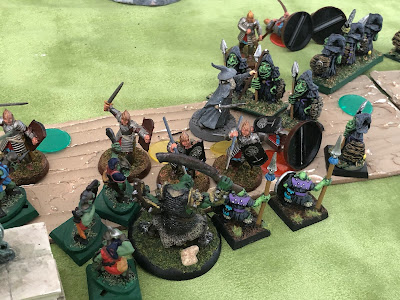
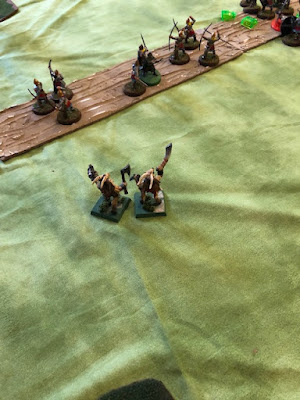
Friday, July 8, 2022

Human-Elf vs Orc-Human Rebel Showdown!

Image

Following the last battle in the Campaign for the Darkened Wood, where the human faction successfully transported several magical (radioactive?) stones through a beastman-infested swamp. The beastmen attacked from different sides and never achieved local superiority, ultimately getting overwhelmed by superior human numbers.

The human success in that battle gave the human king the resources to attract a wizard to their faction. Who looks more than a bit like Gandalf.

And now the human rebels, who attacked and killed one of the king's taxpayers out for a stroll in the woods, know that their days are numbered. The human rebels join forces with the Orcs and Goblins and mount an offensive against the humans. The human king allies with the Elves to confront the human rebel-orc & goblin force.

In the photo above, we setup and we have the orcs on the top right and the humans and the elves on the top left and the rebels on the bottom right. The rest of the captions have been provided by my boys, who played the game with me.

Image
Here is our line of orcs protecting the rebel archers.

Image
This is a group of orcs with a champion.

Image
This is a rebel squad with some archers and their leader Robin.

Image
The Orc line.

Image
This is just anther picture of the champion with three spear men and three orcs.

Image
Here is the squad of rebels in front of orcs.
Image
Here is a closer look at them.
Image
This is a picture of a squad elves ready to provide cover fire for the humans.
Image
Here is the picture of the humans with their wizard in the front of the elves.
Image
Here is our other squad of elves.

Image
Here is our squad of elves with the elven leader.

Image
This is a birds eye view of the humans front line.

Image
Here is another birds eye view but for our wizard.

Image
And here are our human spear men.

Image
Here is a closer look at our spearmen.

Image
Here is a closer look at the humans hired wizard.

Image
Here is another look at our spearmen.

Image
This is one unit of archers, kings guard and spearmen.

Image
This is another look at the humans and elves together.

Image
UMPH! A man falls to the ground almost immediately. 

Image
The elves fire a volley of arrows.

Image
Two rebels die by the volley of arrows.

Image
Then the elves make quick thinking and move towards the kings guard and spearmen.

Image
The other elf squad has fired a volley at the other squad of rebels.

Image
And another rebel falls dead to the ground by another volley of elven arrow.

Image
The champion and his men move toward the kings guard, the spearmen and elven archers.

Image
The rebel archers fire a volley and hit two men of the kings guard and one spearman.

Image
The orcs draw a jack that helps them in close combat.

Image
Now one orc dies and two of the kings guard are shocked.

Image
Now the other orcs attack the front line.

Image
Now the big line of orcs moves 6'' toward the human archers.

Image
Oh no! The big line of orcs finally gets to the human archers and another one is killed.

Image
Now the swords men are in close combat and losing.

Image
It is a blood bath for the humans but the orcs are doing almost the same.

Image
Two spearmen are dead, and the wizard is unprotected.

Image
Now the wizard has to protect himself.

Image
The elves unleashed a deadly barrage of arrows on the rebels again and the rebels start fleeing.

Image
Now one of our elven archers has been shot dead by rebel fire.

Image
The wizard has been hit by rebel fire and is running.

Image
Now in close combat the elven archers are not very good so two of them died.

Image
Now the rebel squad that is fleeing has moved another 6 '' and are trying to go faster.

Image
And it's almost safe to say that the elves and humans have won.

Image

We counted the loses and the elves lost 3 men the humans lost 9. The human rebels lost 9 men and the orcs lost 10.

This proved a bloody conflict for both sides. Ultimately the elves and humans prevailed, their wizard survived, and the orcs and human rebels had to flee the field.

Monday, September 13, 2021

Beastmen vs. Humans, Savage Worlds Showdown!

Picking up where we left off a few years ago in the Campaign for the Darkened Wood, the human kingdom had just come out on top in a three-way battle versus the Elf-Dwarf coalition and the dastardly Orcs. While the Elf-Dwarf gang and the Orc mob duked it out to the death, the humans rushed in, grabbed several magical (radioactive?) rocks that had fallen from the sky and would be useful in enticing a wizard to work for the human king.

Now the humans have departed with the loot and are making their way back to human lands. But first they must pass through a stretch of swamp. The swampy green ground on either side of the path through the swamp imposed a movement penalty on the humans. 

Any beastmen that may be in the swamp were immune to this penalty, owing to their swift movement and long legs. And the beastmen were hoping to get the meteorites from the men, in order to lure a necromancer to join their faction and add legions of the undead to their cause (any excuse to dust off old Warhammer skeletons).

We played this with the Savage Worlds Showdown! rules, using the excellent cards from Fistful of Lead for activations.

Image
The column of human soldiers filing through the swamp.

Image
Led by the brave and trusty Captain Trent, along with a scout hired to lead the convoy back to the kingdom of men.

Image
Captain Trent close-up.

Image
And a close-up of the local scout, a Norse woodsman who is handy with a bow and knows these woods well.

Image
The convoy has advanced halfway across the board without incident. So far, so good...

Image
...so what! Beastmen emerge from the nearby woods, charging toward the column of men.

Image
Two beastmen charge the rear of the column...

Image
...and one of the human soldiers goes down immediately, the victim of a nasty axe blow.

Image
The humans rally and wrap around the beastmen, hoping to put their superior numbers to use, even though they are inferior to the beastmen in one-on-one combat.

Image
Two more beastmen charge into battle further up the column.

Image
The two beastmen at the trail of the column both have yellow Shaken counters.

Image
One of the beastmen at the end of the column goes down, overwhelmend by the numbers of the human soldiers.

Image
Things are looking better for the beastmen in the middle of the column, where they have temporary numerical superiority, and the human scout is wounded and has a yellow Shaken marker. But then a fortuitous initiative card removes the Shaken status.

Image
Things go south for the beastmen at the back of the column, with both beastmen brought down by superior human numbers.

Image
One of the beastmen in the middle of the column goes down from a lucky blow.

Image
The beastman will breaks, and one of them runs off.

Image
Human archers try to shoot the fleeing beastman, but miss.

Image
The beastman runs off to live another day!

Image
Things have gone very poorly for the beastman chieftain, who is one wound short of death.

Image
The beastman chieftain flees sucessfully, expending all remaining Bennies (free saves) to get off of the field alive.

The beastman faction has been reduced to two beastmen. So much for getting a necromancer to build up their numbers. We decided to retire the beastmen as a going concern in the campaign. Any time they might appear from here on out would just be the two surviving members of their faction.

As a review note, the Savage Worlds Showdown system does account well for the weight of individually inferior combatants swarming superior ones. Had I appropriately accounted for this prior to moving in the beastmen, I might have changed how I deployed them.