Welcome to the Burrawon Branch Model Railway. Burrawon is the terminus of a fictitious NSWR branchline connecting with the main southern line. The model draws on NSWR design and practice but is not a scale replica of any one station. It is set in the early 1980’s before rationalisation tore the heart out of NSW branchlines. I began this blog as a personal record of progress and ‘notes’ on construction methods as well as my thinking with respect to the layout’s development. In 2021, I was encouraged to make it more widely accessible. I hope you find it interesting. If you like what you see, please become a follower to be notified of new posts. If you have a query about any aspect of the model or would like additional information on a particular item leave a comment. Happy modelling.

BRIEF OVERVIEW
Construction began in late 2018.
The layout is a double-deck design in a 3.6m x 3m room. A five-turn helix links the decks which are 500mm apart. L-girders on free-standing legs support the helix and both decks. Track sub-base is 9mm external grade ply. Peco track and points are laid on 1.5mm closed cell foam. The backscenes are 3mm ply.
The upper deck track arrangement is similar to that of several NSWR branchline termini. The lower deck track arrangement is inspired by Tarana (junction for the Oberon branch). Locomotives and rolling stock are held on hidden tracks under the helix and in an open marshalling area.
The focus is on operation of branchline trains. Mainline trains are not operated as the mainline truncates at the junction – ie it hits the wall. The ‘one engine in steam’ principle is the basis of operation.
DC control – two hand-held controllers – is used with six blocks: storage, lower deck up mainline, down main, junction yard, helix, upper deck. The layout is wired for easy conversion to DCC should I so decide.
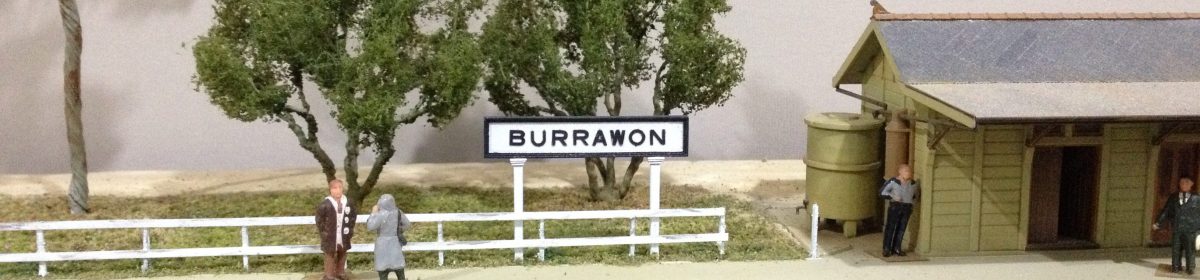
Scenic work is on-going. Nearly all of the structures are scratchbuilt, as are the trees and many other detail items.


See the individual posts for construction details and further photos of the above scenes and other aspects of the layout.
OFF LAYOUT MODELLING


