Search the Community
Showing results for tags 'building'.
-
Version 1.2.1
118 downloads
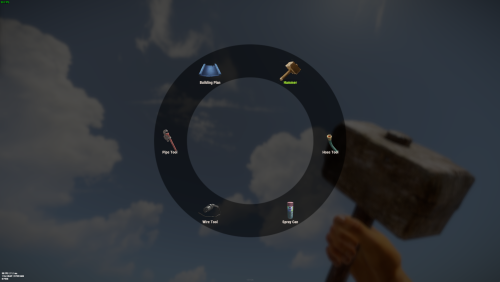
Allows you to quickly switch between available tools (configured in the config) by pressing the E key a menu will open in which the player can select the tool he needs. Commands: /give_mt - will give you the Multi Tool works only if you an admin. give_mt steamid in the server console will give the Multi Tool to a target player. You can change the Multi Tool skin in the config file. If you want to hide some tools or make them available only if play have permission you also can do this in the config file. Also you can enable unlimited resources for Building Blan used via Multi Tool. DEFAULT CONFIG$7.99- 17 comments
- 3 reviews
-
- 3
-

-
- #multi-tool
- #tool
- (and 2 more)
-

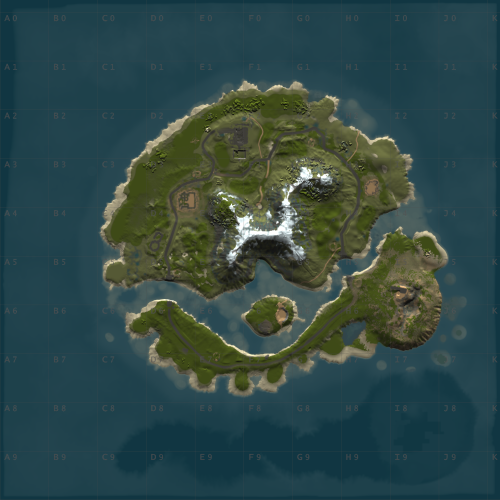
Version 6.0.0
168 downloads
Perfect sized 3500K Rust map offers a unique gaming experience for creative builders, featuring all monuments except the Sewer Branch. It includes train tracks that connect to underground rails making transportation smooth all around. Full types of Topology terrain includes lush forests, arid deserts, rugged coastlines, gentle hills, deep valleys, and elevated plateaus. Key monuments such as the Military Base, Military Tunnel, Launch Site, and more are strategically placed, providing prime locations for looting, trading, and player interactions. The train tracks, linked to underground rails, create additional routes and strategic points for players to explore and control. This unique feature introduces a tactical element, where mastering the train tracks can significantly impact resource and territory competition. Additionally, the map is enriched with numerous custom buildable monuments, including caves, underwater bases, and various structures for building. These custom elements enhance the gameplay, offering diverse options for base construction and defense. Summary this 3500K Size Rust map delivers a complete and dynamic experience, featuring key monuments, custom buildable locations, and the strategic addition of train tracks connected to underground rails. General Information Map size: 3500K Prefab Count: 6091 Custom Buildable Monuments Several total low prefab count monuments to build in such as Caves, Underwater Bases and buildings! Facepunch Monuments Small Harbor Large Harbor Airfield Junkyard Launch Site Military Tunnels Nuclear Missile Silo Powerplant Trainyard Ferry Terminal Water Treatment Sphere Tank Sewer Branch Satellite Dish Outpost Excavator Large Oilrig Small Oilrig Arctic Research Base A Military Base To Enable the Travelling Vendor on Custom Maps its optional to use this Oxide Plugin: https://codefling.com/plugins/anymapvendor Help Discord: DarkoRust$24.99 -
Version 3.0.0
139 downloads
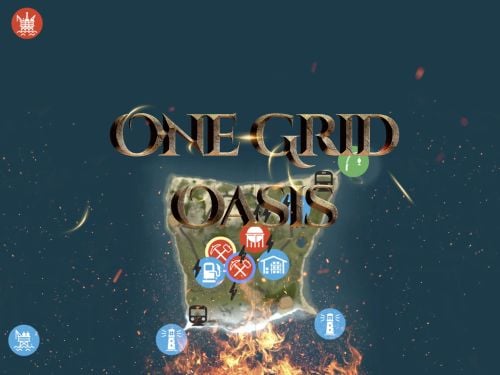
Discover the ULTIMATE RUST ONE GRID MAP, featuring a breathtaking landscape perfect for high-FPS and fast-paced PVP. The dynamic terrain utilizes many hills and valleys to minimizes sight lines making the Map feel much larger. While having custom underwater caves offers strategic building and hiding spots. At the center, the iconic Dome dominates, surrounded by HQM and Sulfur Quarries to entice players to the middle of the map to fight over loot and ore. NEW FLOATING ISLANDS expands buildable terrain, offering unparalleled fun and creativity for players who LOVE TO BUILD. Explore 12 unique buildable monuments marked with "X" on the map, each providing more unique base-building opportunities. This map promises thrilling PVP action and immersive gameplay, making it the BEST One Grid Rust Server Map ever created! FEATURES: • Size: 1000 • Prefab Count: 2285 • Map Optimized for Performance! • Map Password Included. • Vast array of 12 EPIC Custom Buildable Monuments! Caves, Underwater Bunkers, Floating Sky Platforms, Bus Stops, Warehouses and more! • Designated Building Zones (marked X on the minimap) • 3 Floating Islands in the sky to build on to add more buildable terrain for a small map. • 3 Majestic Underwater Buildable Cave Bunkers! • Monuments crafted for peak performance with minimal entities! • The terrain features varied elevations to reduce sight lines, making the smaller map feel much larger! • Everything crafted with One Grid players in mind to have lots of loot and many places to build! • Underground railway. • Custom Combined Outpost/Bandit Camp/Fishing Village Safe Zone! Gambling, Vending Machines, Vehicle Vendors and more! CUSTOM BUILDABLE MONUMENTS: • Amount: 12 Total! • 3 Buildable Underwater Bunkers • 3 Buildable Floating Islands • Custom Large Size Bus Stop Base • 2 EPIC Scale Rock Formation Caves • Medium Sized Glass Roof Cave • + MANY MORE! Facepunch Monuments: Dome 2x Lighthouse Supermarket Jungle Ziggurat Oxum's Gas Station Mining Outpost HQM Quarry Sulfur Quarry Bandit Town/Outpost/Fishing Village Combined Underwater Labs 5x Large Power Substations 4x Small Power Substations 4x Bus Stops To Enable the Travelling Vendor on Custom Maps its optional to use this Oxide Plugin: https://codefling.com/plugins/anymapvendor Help Discord: @DarkoRust$14.99- 8 comments
- 4 reviews
-
- 4
-
-

-
- #one grid
- #custom map
- (and 43 more)
-

Version 2.0.0
21 downloads
Discover the ULTIMATE RUST ONE GRID MAP, featuring a breathtaking mountainous landscape perfect for high-FPS and fast-paced PVP. The dynamic terrain utilizes a large mountain for players to summit and winding roads to minimizes sight lines making the Map feel much larger. While having custom underwater caves offers strategic building and hiding spots. At the center, the iconic Dome dominates, surrounded by HQM and Sulfur Quarries to entice players to the middle of the map to fight over loot and ore. Map offering unparalleled fun and creativity for players who LOVE TO BUILD. Explore unique buildable monuments marked with "X" on the map, each providing more unique base-building opportunities. This map promises thrilling PVP action and immersive gameplay, making it the BEST One Grid Rust Server Map ever created! FEATURES: • Size: 1500 • Prefab Count: 1199 • Map Optimized for Performance! • Map Password Included. • EPIC Custom Buildable Monuments! • Designated Building Zones (marked X on the minimap) • Majestic Underwater Buildable Cave Bunkers! • Monuments crafted for peak performance with minimal entities! • The terrain features a massive mountain with a road leading to the top to reduce sight lines, making the smaller map feel much larger! • Everything crafted with One Grid players in mind to have lots of loot and many places to build! • Underground and Above Ground Railway. Not connected but accessible by Tunnel Entrances. • Full Outpost and Bandit Camp • Fishing Village CUSTOM BUILDABLE MONUMENTS: • 9 Total • 4 Buildable Underwater Bunkers • Large Custom Buildable Cave • Custom Large Size Bus Stop Base • Epic Buildable Sphere Tank players will love! • Buildable Bunker Building • Buildable Warehouse Facepunch Monuments: Dome Satellite Dish 1x Lighthouse Supermarket Oxum's Gas Station 2x Mining Outpost HQM Quarry Sulfur Quarry Bandit Town Outpost Fishing Village Ranch Stables Underwater Labs 5x Large Power Substations 4x Small Power Substations Help Discord: @DarkoRust$14.99- 3 comments
- 2 reviews
-
- 1
-
-
- #one grid
- #custom map
- (and 47 more)
-
Version 2.0.10
20,095 downloads
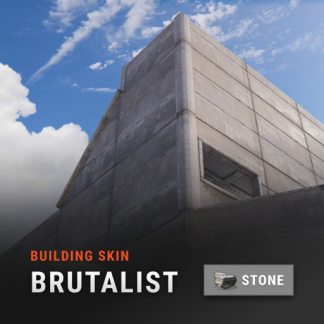
Automatic application of DLC skins for building blocks. This is a simple plugin that allows players to use DLC skins without having to buy them. After obtaining permission and activating the skin, the player will be able to build building blocks with the skin from the DLC. Use the /bskin command to switch modes. To update the skin for existing building blocks, you need to activate the skin and hit the block with a hammer. The block will be updated with the selected skin. To change the skin for all buildings using the /bskin build or /bskin all command, you need to select a skin mode. Depending on the mode you choose, the skin will be updated. Permissions: buildingskins.use - Allows the player to use a command to apply a skin. buildingskins.build - Allows the player to use the bskin build command. buildingskins.all - Allows the player to use the bskin all command. buildingskins.admin — Allows the player to use the bskin all <steam id> command and bypass the build owner check. buildingskins.tc - Allows the player to change the skin of a building from the tool cupboard. To assign a permission, use oxide.grant <user or group> <Steam name or ID> buildingskins.use. To remove a permission, use oxide.revoke <user or group> <Steam name or ID> buildingskins.use. Commands: /bskin - opens a GUI to set the default building skin (can be changed in the config file). /bskin build — updating the skin of the block you are looking at and everything that touches it. /bskin all - updating the skin of all buildings owned by the player. /bskin all <steam id> - updating the skin of all buildings for the selected player. (ex: /bskin all 76561100000000000) /bskin toggle - Disable/enable building skins. Configuration: Building skin change commands - list of commands to switch the skin. You can change, add or remove if the command conflicts with other plugins. Commands will work both in chat and in the console. Block building skin in building blocked - prevents changing the building skin if the player is in building blocked mode and does not have buildingskins.admin permission. Number of blocks updated per tick - description is not required. Don't make changes if you're not sure what you're doing. Automatically activate skin when player connects - when the player connects for the first time, the skins from the dlc will be installed by default. Apply selected paint color to all building blocks - Sets the selected spray paint color for all building blocks when updated. Image and description settings - Image settings and descriptions in the GUI menu.Free -
Version V1.1
1,463 downloads
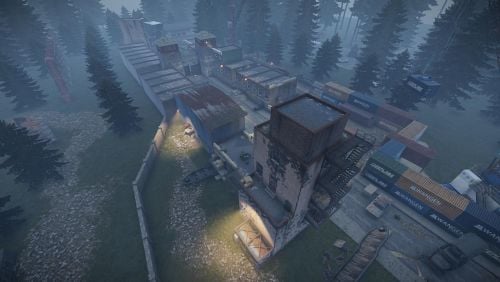
My very first PvP arena. Still very good, working fine. -DisguiseFree -
![More information about "Build Tools [grade/remove/skins]"](https://codefling.com/uploads/monthly_2025_12/v4final.thumb.gif.45df50b470fa522f43059acab6ad0e1e.gif)
Version 1.5.45
4,521 downloads
Introducing a feature-rich plugin that will take your in-game building experience to new heights - Build Tools! This plugin is not just a tool, it is the key to creating incredible builds and will make the processes of upgrading, removing and even downgrading buildings easy and fun! !ATTENTION! After the last update of the game, the additional slot does not work Features of Build Tools Beautiful user interface: Our plugin has a lovely and easy-to-use interface that makes building tasks smooth and functional; Bar progress display: Keep track of your building progress with a clear progress bar, so you can see your upgrades easily; Upgrade of the entire building at once: You can make them stronger and more secure quickly; Interface customization: Personalize the user interface to match your preferences and workflow. Returning an item to remove: Don't worry about losing items when removing structures; our plugin ensures you get them back; Returning items with condition as in the game: Items are returned to the same condition as in the game, with the option to set their condition as a percentage; Blocked list items for remove: You can specify which items should not be removed for precise construction control. Ability to use icons both from the game and your own Work with Clans/Friends/NoEscape Building Skins (+ automatic parsing command) Downgrade: Make structure downgrades simple and adapt your base to changing needs with just a few clicks Edit config via in-game interface (no JSON editing required) Commands /up [1-4] - enable upgrading mode /up all - allows you to upgrade the entire building at once /remove - enable removing mode /remove all - allows you to remove the building at once /down - enable downgrading mode /down all - allows you to downgrade building at once buildtools.parse.skins – allows parsing new building skins from the game + images to them /bskin – open settings menu Permissions buildtools.all – allows you to upgrade/remove the entire building at once buildtools.free – allows you to upgrade buildings for free buildtools.edit – allows you to enable edit mode buildtools.vision – allows you to toggle the remove mode on in the vision mode Video Hooks object canDowngrade(BasePlayer player, BaseEntity entity) object canRemove(BasePlayer player, BaseEntity entity) object CanBuildToolsGiveRefund(BasePlayer player, BaseEntity entity) FAQ Q: Where can I see an example of a config? A: Config$21.95- 328 comments
- 16 reviews
-
- 8
-
-

-
- #building
- #foundation
- (and 27 more)
-
Version 1.0.0
4 downloads
NoEscape – Custom RAIDBLOCK Configuration by SLAYERS.GG A fully-optimized NoEscape config designed to deliver fair, fast, and abuse-proof raiding. Built and perfected on the SLAYERS.GG network for high-pop, high-intensity Rust servers. What This Config Delivers Balanced RaidBlock & Combat Timers Tuned for smooth PvP flow without letting players cheat the system. Anti-Escape Protections Blocks TP, /home, vehicles, logging out, and all common raid-dodging exploits. Clean, Professional Messages Polished alerts that fit Rust’s style and make RaidBlock states easy to understand. Compatible with NoEscape Plugin from Umod: https://umod.org/plugins/no-escape Perfect For Servers That Want: Fair, competitive raiding Zero escape abuse Clear, simple raid rules A polished system trusted by thousands Includes: Full NoEscape JSON config Upgraded notifications Easy-to-edit formatting$4.99 -
Version 1.4.0
440 downloads
Introduction Automatically manages PVP zones for player bases, legacy shelters and tugboats. Background/Compatibility Player Base PVP Zones is meant for hybrid PVP servers that want to allow online raiding. It is meant to complement Dynamic PVP which only provides zones for monuments and events. Zone Manager is a hard requirement in order to implement moving zones for tugboats, as it doesn't officially support this feature. A PVE mod is required to make this useful. I only tested with True PVE for various reasons. Others have reported success with SimplePVE. Features Manages its own Zone Manager zones and maps them as True PVE exclusion zones (Re)creates zones on plugin load and cleans them up on unload Provides tool cupboard based zones: Configurable creation & deletion delays Automatic resizing to always encompass the base as building blocks are added/destroyed, with configurable delay Configurable minimum total base and per-building-block buffer sizes Provides legacy shelter based zones: Configurable zone size Provides tugboat based zones: Configurable zone size Zone moves with the tugboat Optional support for visible zone spheres: Configurable sphere darkness Option to globally network tugboats to prevent spheres from disappearing Optional support for language file based zone creation/deletion and entry/exit notifications Configurable PVP expiration delay on player exit from zones Optional support for toggling zones on and off via a permission-controlled command Zone Toggling Notes In order for players to toggle zones, they must have the `PlayerBasePvpZones.toggleZones` Oxide permission, or be in an Oxide group that has that permission. The `/pbpz toggle` command will attempt to toggle a zone if the player is doing one of the following: Looking at and authorized to a Tool Cupboard within interaction range Within building privilege of a Legacy Shelter Mounted to the steering wheel of a Tugboat If a zone creation/deletion timer is in effect, toggling will cancel it; otherwise, PBPZ will act as if the associated entity (TC/shelter/tugboat) just (de)spawned, applying any appropriate delays. Besides standard zone creation/deletion delays, exploitation of the toggle feature can be discouraged by configuring timed toggle lockouts that are triggered by toggling and/or by damage being done to building blocks, Tool Cupboards, Shelters, or Tugboats. Admins can bypass the standard creation/deletion delays by reloading the plugin after running the toggle command. Admins can also toggle Tool Cupboard zones for other players by temporarily authorizing on the TC, and of course anyone with permission can toggle any Tugboat zone. Admin toggling of other players' shelter zones is currently not supported (if someone really needs it, I can implement it). Permissions `PlayerBasePvpZones.toggleZones` controls whether a player/group can use the `/pbpz toggle` command Commands `/pbpz` in chat supports the following sub-commands: `/pbpz help` shows info on currently available sub-commands (if any) `/pbpz toggle` attempts to toggle a zone on or off Configuration Default configuration: { "Zone creation delay in seconds (excludes tugboat)": 60.0, "Zone creation delay notifications (owner only, excludes tugboat)": true, "Zone deletion delay in seconds": 300.0, "Zone deletion delay notifications (all players in zone)": true, "Zone creation/deletion notification prefix": "[PBPZ] ", "Zone exit PvP delay in seconds (0 for none)": 5.0, "Zone sphere darkness (0 to disable, maximum 10)": 0, "Zone entry/exit ZoneManager messages": true, "Zone TruePVE mappings ruleset name": "exclude", "Building settings": { "Building update check delay in seconds": 5.0, "Building zone overall minimum radius": 16.0, "Building zone per-block minimum radius": 16.0 }, "Shelter settings": { "Shelter zone radius": 8.0 }, "Tugboat settings": { "Tugboat force global rendering on/off when spheres enabled (null=skip)": null, "Tugboat force enable buoyancy when forcing global rendering": false, "Tugboat zone radius": 32.0 }, "Zone toggle settings": { "Zone toggle lockout seconds after damage": 60.0, "Zone toggle lockout seconds after toggle": 60.0 } } NOTE: The tugboat rendering options should be left at defaults. The options are provided for the case that you are running other plugins that force global networking/rendering for tugboats, which can cause spheres to disappear when a tugboat comes back into client render range.This plugin will automatically attempt to synchronize tugboat sphere networking with each tugboat's networking type when (re)creating the spheres. Developer API Supported API calls: bool IsUsingExcludePlayer() Returns whether True PVE 2.2.3+ ExcludePlayer() PVP delay API is being used. string OnPlayerBasePvpDelayQuery(ulong playerID) Provides the ability to query whether a player has an active PVP delay Returns the triggering zone ID if the referenced player has an active PVP delay Returns an empty string If no PVP delay is active Hooks: void OnPlayerBasePvpDelayStart(ulong playerID, string zoneID) Called when PVP exit delay is applied to a player as a result of their exiting a base zone playerID is the ID of the triggering player zoneID is the Zone Manager zone ID whose exit triggered the delay void OnPlayerBasePvpDelayStop(ulong playerID, string zoneID) Called when PVP exit delay expires from a player playerID is the ID of the triggering player zoneID is the Zone Manager zone ID whose exit triggered the delay Zone Manager / PVE Plugin Integration Direct Zone Manager API calls are used to maintain zones for all bases, and indirect True PVE API calls are used to map those zones to the configured True PVE ruleset (`exclude` by default). This will cause True PVE (or other PVE plugins that implement a compatible API) to treat them as PVP areas. Zone names are broken into categories in case you want other plugins to recognize them separately: `PlayerBasePVP:building` for building block bases `PlayerBasePVP:shelter` for legacy wood shelters `PlayerBasePVP:tugboat` for tugboats Developer note: Zone IDs are `PlayerBasePVP:` followed by a unique identifier. Credits Thanks to the following folks for making this plugin possible: bmgjet (help with / code for tugboat sphere issues) CatMeat & Arainrr (moving Zone Manager zones code examples in Dynamic PVP) Karuza (help with unique entity identifiers & tugboat sphere issues) Kulltero (help with TC/building relationship) WhiteThunder (help with tugboat sphere issues) AFKBank and Mooselips whose bases I took screenshots of on my server during testingFree -

Version 0.1.8
736 downloads
This plugin is designed for the forced decay of Building Blocks with Twigs grade. This plugin will be especially useful for PvE servers. The ability to enable and disable forced decay of Building Blocks with Twigs grade; The ability to specify the type of building block that will decay; The ability to adjust the interval of decay damage; The ability to specify the amount of decay damage; The ability to prevent players and the tool cupboard from repairing Building Blocks with a grade of Twigs; The ability to show warnings when placing/repairing Building Blocks with Twigs grade; The ability to specify the style type for GameTips; The ability to personally enable or disable warnings; The ability to automatically grade Building Blocks from Twig grade to Wood grade upon plugin initialization, if the owner player is offline. This helps to avoid the complete decay of buildings for those players who are offline and unable to upgrade right now; The ability to upgrade only undamaged building blocks during forced upgrades. { "Chat command": "twigs", "Is it worth enabling GameTips for messages?": true, "GameTips message style type - Blue_Normal(0), Red_Normal(1), Blue_Long(2), Blue_Short(3), Server_Event(4), Error(5).": 5, "Is it worth using Notify plugins for messages instead of the vanilla UI?": false, "Specify the message type for Notify": 1, "List of language keys for creating language files": [ "en" ], "Is it worth upgrading Building Blocks from Twigs grade to Wood grade during plugin initialization if the players are offline?": false, "Is it worth forcing the upgrade to apply only to undamaged blocks? This is an addition to the setting above.": true, "Is it worth disallowing the repair of Building Blocks with Twigs grade?": true, "The interval, in seconds, at which damage is inflicted on the building.": 60.0, "The periodic damage inflicted. Ranges from 0 to 10. Set to 0 to disable.": 1.0, "Is it worth enabling the tracking list? If it's disabled, it will track all types of building blocks without needing to check the list each time.": false, "List of tracked building block types. Leave empty or null to return the default list.": [ "foundation", "foundation.triangle", "foundation.steps", "ramp", "floor", "floor.triangle", "floor.frame", "floor.triangle.frame", "wall", "wall.doorway", "wall.window", "wall.frame", "wall.half", "wall.low", "block.stair.ushape", "block.stair.lshape", "block.stair.spiral", "block.stair.spiral.triangle", "roof", "roof.triangle" ], "Version": { "Major": 0, "Minor": 1, "Patch": 8 } } EN: { "MsgWarningEnabled": "Forced decay warnings are enabled!", "MsgWarningDisabled": "Forced decay warnings are disabled!", "MsgOnTwigsPlace": "On this server, forced decay of Building Blocks with Twigs grade is enabled!\n<size=12><color=#9A9A9A>To toggle notifications, use </color><color=#BBBBBB>/{0} warn</color></size>", "MsgOnTwigsRepair": "Repairing of Building Blocks with Twigs grade is prohibited!\n<size=12><color=#9A9A9A>To toggle notifications, use </color><color=#BBBBBB>/{0} warn</color></size>" } RU: { "MsgWarningEnabled": "Предупреждения принудительного гниения включены!", "MsgWarningDisabled": "Предупреждения принудительного гниения выключены!", "MsgOnTwigsPlace": "На данном сервере включено принудительное гниение построек из соломы!\n<size=12><color=#9A9A9A>Чтобы включить или выключить уведомления, введите </color><color=#BBBBBB>/{0} warn</color></size>", "MsgOnTwigsRepair": "Ремонт построек из соломы запрещен!\n<size=12><color=#9A9A9A>Чтобы включить или выключить уведомления, введите </color><color=#BBBBBB>/{0} warn</color></size>" } warn - Enabling and disabling personal warning. Example: /twigs warn$6.99 -

Version 2.0.1
235 downloads
This is a custom package designed by us, featuring 210 unique bases and a specialized loot setup for five different difficulty levels, ranging from Easy to Nightmare. Note: The building skins in the package showcase images may differ from the spawned bases or use the default building skin. This MEGA PACK is an upgraded version of the FullWiped-110 Bases + Loot Pack we previously offered. If you've already purchased the FullWiped-110 Bases + Loot Pack, you only need to buy the expansion pack, which includes 100 new bases ranging from Easy to Hard. Get it here: https://codefling.com/bases/raidable-bases-pack-100-bases-expanded-package-from-easy-to-hard Warning: The Raidable Bases plugin requires the Copy Paste plugin to function. You must install both for this bases pack to work. Raidable Bases (Paid): https://codefling.com/plugins/raidable-bases Copy Paste (Free): https://umod.org/plugins/copy-paste This Raidable Bases Pack & Loot Tables package includes: 70 Easy Bases +Base_Loot Tables (Easy "Vanilla" and "Enhanced" tables included) 60 Medium Bases +Base_Loot Tables (Medium "Vanilla" and "Enhanced" tables included) 60 Hard Bases +Base_Loot Tables (Hard "Vanilla" and "Enhanced" tables included) 10 Expert Bases +Base_Loot Tables (Expert "Vanilla" and "Enhanced" tables included) 10 Nightmare Bases +Base_Loot Tables (Nightmare "Vanilla" and "Enhanced" tables included) Beware: Our loot table package includes only the 5-tier loot tables within the Base_loot folder, ranging from easy to nightmare. It does not include the loot tables from the Difficulty_Loot or Weekday_Loot folders. VANILLA AND ENHANCED LOOT TABLES FOR RAIDABLE BASES This package includes 10 different base loot table files, ensuring a well-structured and advanced configuration for every difficulty level, from Easy to Nightmare. - 5 loot files for the Vanilla setup (Easy, Medium, Hard, Expert, Nightmare), offering a balanced loot experience with some junk items, staying close to a 1x rate. - 5 loot files for the Enhanced setup (Easy, Medium, Hard, Expert, Nightmare), designed for modded servers with 2x, 3x, or higher gather rates, featuring cleaner loot tables with minimal junk and more valuable rewards. Installation Path: All loot table files are intended for the /oxide/data/RaidableBases/Base_Loot directory. Setup Requirement: You must choose and install only one loot table setup at a time—either Vanilla or Enhanced. If you want to switch, you can replace the current files with the other set, but both cannot be active simultaneously. For those exclusively seeking the loot table, we offer it as a standalone product: https://codefling.com/customizations/raidable-bases-loot-tables-pack (Note: If you've purchased our Raidable Bases Mega Pack & Loot Tables (210 Bases) package, there is no need to buy this separately.) WARNING: TWO DIFFERENT INSTALLATION METHODS (PLEASE READ BOTH AND APPLY ONLY THE ONE THAT FITS YOUR NEEDS) INSTALLATION GUIDE 1: (If you do not have a custom configuration and are not a professional in server configurations, choose this option. However, if you already have your own configuration and profile settings and do not wish to use the optional configs we provide—in other words, if you only need the bases and loot tables—use the second installation guide instead.) ▶ Step 1: Place the Config File From the extracted ZIP files, locate the config folder and find the RaidableBases.json file. Move it to the following directory: /serverfiles/oxide/config ▶ Step 2: Place the Bases From the extracted ZIP files, locate the copypaste folder and move it to the following directory: /serverfiles/oxide/data ▶ Step 3: Place the Base_Loot Tables From the extracted ZIP files, locate the Base_Loot folder and move it to the following directory: /serverfiles/oxide/data/RaidableBases Important: If there are any existing JSON files inside this folder that are not part of our loot tables, delete them to ensure proper functionality. Choose between Vanilla or Enhanced loot tables based on your preference. If the folder is named "Base_Loot (Enhanced loot)", remove the text in parentheses so that the correct folder name is simply: "Base_Loot" (Otherwise, the loot tables will not work properly.) ▶ Step 4: Place the Profiles Folder From the extracted ZIP files, locate the profiles folder and move it to the following directory: /serverfiles/oxide/data/RaidableBases Why Are Profiles Important? The profiles folder contains crucial settings that allow you to: Enable/disable the dome Enable/disable NPCs Adjust the number of lootable items These are just a few examples—there are dozens of important settings that directly affect how raid bases function. The config file alone is not enough—these files play a major role in customizing your raid bases. I strongly recommend reviewing each difficulty setting (Easy to Nightmare) inside the profiles folder and adjusting them based on your needs. ▶ Step 5: Restart the plugin via RCON: o.reload RaidableBases INSTALLATION GUIDE 2: (Use this installation method if you do not want to use our configurations and instead prefer to use your own config files and your own /oxide/data/RaidableBases/Profiles configurations.) In this case, you only need to add the bases. To do this, use the following commands in RCON: ▶ Step 1: You can add bases one by one or in bulk. After executing the commands in RCON, the bases will be registered inside the Profiles configuration. If you do not want to deal with these adjustments, it is recommended to use Installation Guide 1 instead. A- Example RCON commands: rb.config add "Easy Bases" fullwipedeasy1 rb.config add "Hard Bases" fullwipedhard1 B- Commands to Integrate Raid Bases in Bulk via RCON: rb.config add "Easy Bases" fullwipedeasy1 fullwipedeasy2 fullwipedeasy3 fullwipedeasy4 fullwipedeasy5 fullwipedeasy6 fullwipedeasy7 fullwipedeasy8 fullwipedeasy9 fullwipedeasy10 fullwipedeasy11 fullwipedeasy12 fullwipedeasy13 fullwipedeasy14 fullwipedeasy15 fullwipedeasy16 fullwipedeasy17 fullwipedeasy18 fullwipedeasy19 fullwipedeasy20 fullwipedeasy21 fullwipedeasy22 fullwipedeasy23 fullwipedeasy24 fullwipedeasy25 fullwipedeasy26 fullwipedeasy27 fullwipedeasy28 fullwipedeasy29 fullwipedeasy30 fullwipedeasy31 fullwipedeasy32 fullwipedeasy33 fullwipedeasy34 fullwipedeasy35 fullwipedeasy36 fullwipedeasy37 fullwipedeasy38 fullwipedeasy39 fullwipedeasy40 fullwipedeasy41 fullwipedeasy42 fullwipedeasy43 fullwipedeasy44 fullwipedeasy45 fullwipedeasy46 fullwipedeasy47 fullwipedeasy48 fullwipedeasy49 fullwipedeasy50 fullwipedeasy51 fullwipedeasy52 fullwipedeasy53 fullwipedeasy54 fullwipedeasy55 fullwipedeasy56 fullwipedeasy57 fullwipedeasy58 fullwipedeasy59 fullwipedeasy60 fullwipedeasy61 fullwipedeasy62 fullwipedeasy63 fullwipedeasy64 fullwipedeasy65 fullwipedeasy66 fullwipedeasy67 fullwipedeasy68 fullwipedeasy69 fullwipedeasy70 rb.config add "Medium Bases" fullwipedmed1 fullwipedmed2 fullwipedmed3 fullwipedmed4 fullwipedmed5 fullwipedmed6 fullwipedmed7 fullwipedmed8 fullwipedmed9 fullwipedmed10 fullwipedmed11 fullwipedmed12 fullwipedmed13 fullwipedmed14 fullwipedmed15 fullwipedmed16 fullwipedmed17 fullwipedmed18 fullwipedmed19 fullwipedmed20 fullwipedmed21 fullwipedmed22 fullwipedmed23 fullwipedmed24 fullwipedmed25 fullwipedmed26 fullwipedmed27 fullwipedmed28 fullwipedmed29 fullwipedmed30 fullwipedmed31 fullwipedmed32 fullwipedmed33 fullwipedmed34 fullwipedmed35 fullwipedmed36 fullwipedmed37 fullwipedmed38 fullwipedmed39 fullwipedmed40 fullwipedmed41 fullwipedmed42 fullwipedmed43 fullwipedmed44 fullwipedmed45 fullwipedmed46 fullwipedmed47 fullwipedmed48 fullwipedmed49 fullwipedmed50 fullwipedmed51 fullwipedmed52 fullwipedmed53 fullwipedmed54 fullwipedmed55 fullwipedmed56 fullwipedmed57 fullwipedmed58 fullwipedmed59 fullwipedmed60 rb.config add "Hard Bases" fullwipedhard1 fullwipedhard2 fullwipedhard3 fullwipedhard4 fullwipedhard5 fullwipedhard6 fullwipedhard7 fullwipedhard8 fullwipedhard9 fullwipedhard10 fullwipedhard11 fullwipedhard12 fullwipedhard13 fullwipedhard14 fullwipedhard15 fullwipedhard16 fullwipedhard17 fullwipedhard18 fullwipedhard19 fullwipedhard20 fullwipedhard21 fullwipedhard22 fullwipedhard23 fullwipedhard24 fullwipedhard25 fullwipedhard26 fullwipedhard27 fullwipedhard28 fullwipedhard29 fullwipedhard30 fullwipedhard31 fullwipedhard32 fullwipedhard33 fullwipedhard34 fullwipedhard35 fullwipedhard36 fullwipedhard37 fullwipedhard38 fullwipedhard39 fullwipedhard40 fullwipedhard41 fullwipedhard42 fullwipedhard43 fullwipedhard44 fullwipedhard45 fullwipedhard46 fullwipedhard47 fullwipedhard48 fullwipedhard49 fullwipedhard50 fullwipedhard51 fullwipedhard52 fullwipedhard53 fullwipedhard54 fullwipedhard55 fullwipedhard56 fullwipedhard57 fullwipedhard58 fullwipedhard59 fullwipedhard60 rb.config add "Expert Bases" fullwipedexp1 fullwipedexp2 fullwipedexp3 fullwipedexp4 fullwipedexp5 fullwipedexp6 fullwipedexp7 fullwipedexp8 fullwipedexp9 fullwipedexp10 rb.config add "Nightmare Bases" fullwipednight1 fullwipednight2 fullwipednight3 fullwipednight4 fullwipednight5 fullwipednight6 fullwipednight7 fullwipednight8 fullwipednight9 fullwipednight10 ▶ Step 2: Place the Base_Loot Tables From the extracted ZIP files, locate the Base_Loot folder and move it to the following directory: /serverfiles/oxide/data/RaidableBases Important: If there are any existing JSON files inside this folder that are not part of our loot tables, delete them to ensure proper functionality. Choose between Vanilla or Enhanced loot tables based on your preference. If the folder is named "Base_Loot (Enhanced loot)", remove the text in parentheses so that the correct folder name is simply: "Base_Loot" (Otherwise, the loot tables will not work properly.) ▶ Step 3: Restart the plugin via RCON: o.reload RaidableBases EXTRA IMPORTANT INFORMATIONS: We do not use a dome, NPCs, or arena walls around raid bases on our servers, and in the ZIP file we provided, these features are also disabled by default. If you want to enable them, you will need to adjust the settings accordingly. For example, to enable the dome, follow the steps below: Navigate to: /oxide/data/RaidableBases/Profiles Open the files inside the Profiles folder with a text editor. Locate the following settings: (This is already set to false because it is required for markers to appear on the map.) "Spawn Silently (No Notification, No Dome, No Map Marker)": false, "Create Dome Around Event Using Spheres (0 = disabled, recommended = 5)": 0, Change the value from 0 to 5 as shown below: "Create Dome Around Event Using Spheres (0 = disabled, recommended = 5)": 5, Additionally, the loot amount for bases varies depending on the difficulty level (easy, medium, hard, expert, and nightmare). You can adjust this setting in the same Profiles location according to your needs: "Amount Of Items To Spawn": 210, For example, in medium bases, this value is set to 210, which determines the total number of items that will appear in crates, furnaces, and the cupboard. Our current configuration is specifically adjusted to prevent players from feeling overwhelmed by massive buildings right after a wipe. We have configured Maintained Events accordingly to ensure a balanced experience. In our setup: - Timed events and purchasable events are disabled. - After a wipe, easy bases will start spawning 30 minutes later. - Nightmare bases will begin spawning 48 hours (2 days) later. Imagine starting the game with just a torch in hand and immediately encountering a nightmare base on the shore. You’d likely quit the game right away—this setting is crucial for us to avoid such scenarios. Configuration Example: /serverfiles/oxide/config "Maintained Events": { "Always Maintain Max Events": true, "Max Maintained Events": 30, "Enable X Hours After Wipe (0 = immediately)": { "Easy": 0.5, "Medium": 1.0, "Hard": 3.0, "Expert": 24.0, "Nightmare": 48.0 All of our bases from Easy to Nightmare are equipped with turret protection. If you do not want turrets to spawn in your raidable bases on your server, you can use the following method. Go to the file path /data/RaidableBases/Profiles, open the JSON files inside with a text editor, and apply the following: "Kill These Prefabs After Paste": [ "assets/prefabs/npc/autoturret/autoturret_deployed.prefab", "autoturret_deployed" ], If you are satisfied with this package, you can support us by leaving a 5-star review on the site where you purchased it. Your feedback motivates us to continue improving and providing even better configurations for dedicated server owners like you. Thank you!$89.99 -
Version 2.0.1
45 downloads
This custom package, created by us, includes 100 handcrafted bases across three difficulty levels, ranging from Easy to Hard. Note: The building skins in the package showcase images may differ from the spawned bases or use the default building skin. If you're looking for a more advanced pack, you can get the upgraded version here, which includes 210 bases ranging from Easy to Nightmare along with the Loot Tables package: https://codefling.com/bases/raidable-bases-mega-pack-loot-tables-210-bases Warning: The Raidable Bases plugin requires the Copy Paste plugin to function. You must install both for this bases pack to work. Raidable Bases (Paid): https://codefling.com/plugins/raidable-bases Copy Paste (Free): https://umod.org/plugins/copy-paste This Raidable Bases package includes: (In addition to the bases, it includes a well-configured config file that can be uploaded to /serverfiles/oxide/config, but its usage is optional. It also contains 5 different profile configs that can be uploaded to /oxide/data/RaidableBases/Profiles. These are also well-configured and optional to use. The usage of both is entirely up to you.) 40 Easy Bases 30 Medium Bases 30 Hard Bases WARNING: TWO DIFFERENT INSTALLATION METHODS (PLEASE READ BOTH AND APPLY ONLY THE ONE THAT FITS YOUR NEEDS) INSTALLATION GUIDE 1 (If you do not have a custom configuration and are not a professional in server configurations, choose this option. However, if you already have your own configuration and profile settings and do not wish to use the optional configs we provide—in other words, if you only need the bases—use the second installation guide instead.) Step 1: Place the Config File From the extracted ZIP files, locate the config folder and find the RaidableBases.json file. Move it to the following directory: /serverfiles/oxide/config Step 2: Place the Bases From the extracted ZIP files, locate the copypaste folder and move it to the following directory: /serverfiles/oxide/data Step 3: Place the Profiles Folder From the extracted ZIP files, locate the profiles folder and move it to the following directory: /serverfiles/oxide/data/RaidableBases Why Are Profiles Important? The profiles folder contains crucial settings that allow you to: Enable/disable the dome Enable/disable NPCs Adjust the number of lootable items These are just a few examples—there are dozens of important settings that directly affect how raid bases function. The config file alone is not enough—these files play a major role in customizing your raid bases. I strongly recommend reviewing each difficulty setting (Easy to Hard) inside the profiles folder and adjusting them based on your needs. Step 4: Restart the plugin via RCON: o.reload RaidableBases INSTALLATION GUIDE 2 (Use this installation method if you do not want to use our configurations and instead prefer to use your own config files and your own /oxide/data/RaidableBases/Profiles configurations.) In this case, you only need to add the bases. To do this, use the following commands in RCON: Step 1: You can add bases one by one or in bulk. After executing the commands in RCON, the bases will be registered inside the Profiles configuration. If you do not want to deal with these adjustments, it is recommended to use Installation Guide 1 instead. A- Example RCON commands: rb.config add "Easy Bases" fullwipedeasy31 rb.config add "Hard Bases" fullwipedhard31 B- Commands to Integrate Raid Bases in Bulk via RCON: rb.config add "Easy Bases" fullwipedeasy31 fullwipedeasy32 fullwipedeasy33 fullwipedeasy34 fullwipedeasy35 fullwipedeasy36 fullwipedeasy37 fullwipedeasy38 fullwipedeasy39 fullwipedeasy40 fullwipedeasy41 fullwipedeasy42 fullwipedeasy43 fullwipedeasy44 fullwipedeasy45 fullwipedeasy46 fullwipedeasy47 fullwipedeasy48 fullwipedeasy49 fullwipedeasy50 fullwipedeasy51 fullwipedeasy52 fullwipedeasy53 fullwipedeasy54 fullwipedeasy55 fullwipedeasy56 fullwipedeasy57 fullwipedeasy58 fullwipedeasy59 fullwipedeasy60 fullwipedeasy61 fullwipedeasy62 fullwipedeasy63 fullwipedeasy64 fullwipedeasy65 fullwipedeasy66 fullwipedeasy67 fullwipedeasy68 fullwipedeasy69 fullwipedeasy70 rb.config add "Medium Bases" fullwipedmed31 fullwipedmed32 fullwipedmed33 fullwipedmed34 fullwipedmed35 fullwipedmed36 fullwipedmed37 fullwipedmed38 fullwipedmed39 fullwipedmed40 fullwipedmed41 fullwipedmed42 fullwipedmed43 fullwipedmed44 fullwipedmed45 fullwipedmed46 fullwipedmed47 fullwipedmed48 fullwipedmed49 fullwipedmed50 fullwipedmed51 fullwipedmed52 fullwipedmed53 fullwipedmed54 fullwipedmed55 fullwipedmed56 fullwipedmed57 fullwipedmed58 fullwipedmed59 fullwipedmed60 rb.config add "Hard Bases" fullwipedhard31 fullwipedhard32 fullwipedhard33 fullwipedhard34 fullwipedhard35 fullwipedhard36 fullwipedhard37 fullwipedhard38 fullwipedhard39 fullwipedhard40 fullwipedhard41 fullwipedhard42 fullwipedhard43 fullwipedhard44 fullwipedhard45 fullwipedhard46 fullwipedhard47 fullwipedhard48 fullwipedhard49 fullwipedhard50 fullwipedhard51 fullwipedhard52 fullwipedhard53 fullwipedhard54 fullwipedhard55 fullwipedhard56 fullwipedhard57 fullwipedhard58 fullwipedhard59 fullwipedhard60 Step 3: Restart the plugin via RCON: o.reload RaidableBases EXTRA IMPORTANT INFORMATIONS: We do not use a dome, NPCs, or arena walls around raid bases on our servers, and in the ZIP file we provided, these features are also disabled by default. If you want to enable them, you will need to adjust the settings accordingly. For example, to enable the dome, follow the steps below: Navigate to: /oxide/data/RaidableBases/Profiles Open the files inside the Profiles folder with a text editor. Locate the following settings: (This is already set to false because it is required for markers to appear on the map.) "Spawn Silently (No Notification, No Dome, No Map Marker)": false, "Create Dome Around Event Using Spheres (0 = disabled, recommended = 5)": 0, Change the value from 0 to 5 as shown below: "Create Dome Around Event Using Spheres (0 = disabled, recommended = 5)": 5, In our setup: - Timed events and purchasable events are disabled. - After a wipe, easy bases will start spawning 30 minutes later. - Nightmare bases will begin spawning 48 hours (2 days) later. Imagine starting the game with just a torch in hand and immediately encountering a nightmare base on the shore. You’d likely quit the game right away—this setting is crucial for us to avoid such scenarios. Configuration Example: serverfiles/oxide/config "Maintained Events": { "Always Maintain Max Events": true, "Max Maintained Events": 30, "Enable X Hours After Wipe (0 = immediately)": { "Easy": 0.5, "Medium": 1.0, "Hard": 3.0, "Expert": 24.0, "Nightmare": 48.0 All of our bases from Easy to Nightmare are equipped with turret protection. If you do not want turrets to spawn in your raidable bases on your server, you can use the following method. Go to the file path /data/RaidableBases/Profiles, open the JSON files inside with a text editor, and apply the following: "Kill These Prefabs After Paste": [ "assets/prefabs/npc/autoturret/autoturret_deployed.prefab", "autoturret_deployed" ], If you need not only these bases but also the loot tables for the items that will spawn inside them, check out our one-of-a-kind, exceptional Raidable Base Loot Tables at the link below: https://codefling.com/customizations/raidable-bases-loot-tables-pack (Our loot tables are designed to cater to different server types, including Vanilla (1x) servers as well as 2x, 3x, 5x, 10x, and higher multipliers to match various loot requirements.) If you are satisfied with this package, you can support us by leaving a 5-star review on the site where you purchased it. Your feedback motivates us to continue improving and providing even better configurations for dedicated server owners like you. Thank you! Support: FULLWIPED DISCORD$39.99-
- 2
-
-
-
- #raid
- #raidable bases
- (and 27 more)
-
Version 1.0.4
28 downloads
WindyCleft (OneGrid) A small map in the (OneGrid) style with unique monuments featuring intriguing puzzles and a fully customized underwater monument. Specially designed for OneGrid servers and servers with up to 150 players online. Custom Monuments: Fuel processing plant – a semi-ruined factory with two floors. Two Tower – Two towers connected high in the mountains with military crates. Mysterious house – at first glance, it’s just an ordinary wooden house in the forest under the mountain, but it’s only at first glance. The house hides a secret military bunker with a puzzle and security. You’ll find many interesting things there. Angar – it used to be used to unload military trains, but after the war in 2050, the island’s new residents started using the hangar to repair their cars. However, from the past, there is one room that no one has been able to open yet; they say there is something very valuable inside. Zavod – an old factory that once supplied the island with fuel; now only one external fuel processor remains. Post – a small roadside monument. Puzzle – a monument from the Hapis map slightly modernized. ??? – During a rescue operation with a sunken ship, Captain Morrison discovered an unusual underwater signal. He reported this information to the Cobalt Corporation, and since then, no one has seen them. Old residents say there was once an island there, but it sank after a volcano eruption. FacePunch Monuments: Fishing village Oil Rig SuperMarket Gas Station HQM Quarry Sewer Branch The map will be constantly supported and updated. If you have any questions, feel free to message me on Discord.$19.00-
- 1
-
-
- #maps
- #custom maps
- (and 28 more)
-
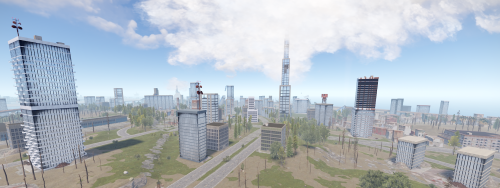
Version 1.1.0
10 downloads
Modular Skyscrapers is a package created to help you create a wide variety of buildings quickly and without error. Each modular skyscraper has been carefully reduced to a low entity count to efficiently allow a large amount of buildings across any map without performance issues. Modular building materials can be quickly swapped out to further create variences in your maps without destructive workflows. Buildings: Skyscraper Modular A Skyscraper Modular B Skyscraper Modular C Skyscraper Modular D Skyscraper Modular E Skyscraper Modular F Skyscraper Modular G - Thin concrete skyscraper with single row of windows Skyscraper Modular H - Peaked topper with gold plating and pike Skyscraper Modular Midsection A - Concrete arch with thick windows Skyscraper Modular Midsection B - Concrete arch with thin windows Skyscraper Modular Midsection C - Double Concrete Arch Skyscraper Glass Modular F - Octagon Glass Building Skyscraper Glass Modular G - Large Circular Skyscraper Skyscraper Glass Modular H - Medium Circular Skyscraper Skyscraper Glass Modular I - Small Circular Skyscraper Skyscraper Glass Modular A Skyscraper Glass Modular B Skyscraper Glass Modular C Skyscraper Glass Modular D Skyscraper Glass Modular E Skyscraper Glass Modular Slanted A - Wide Slanted roof Skyscraper Glass Modular Slanted B - Slanted roof Skyscraper Glass Modular Triangle A - Sliced 'Skyscraper Glass Modular E' Skyscraper Glass Modular Triangle B - Half Sized 'Triangle 'A' Skyscraper Glass Modular Triangle C - Half Sized 'Triangle 'B' Skyscraper Glass Modular Triangle D - Half Sized 'Triangle 'C' Skyscraper Glass Modular Midsection A - Double Stacked Arched building midsection, more concrete Skyscraper Glass Modular Midsection B - Arched building midsection, more concrete Skyscraper Glass Modular Midsection C - Double Stacked Arched building midsection, more glass Skyscraper Glass Modular Midsection D - Double Stacked Arched building midsection, more glass Addons: Skyscraper Modular Addon A - Thick overhang with thick windows, 6 tall Skyscraper Modular Addon B - Medium Overhang with medium windows, 6 tall Skyscraper Modular Addon C - Medium Overhang with thin windows, 6 tall Skyscraper Modular Addon D - Thin overhang with thin windows, 6 tall Skyscraper Modular Addon E - Thin overhang with medium windows, 6 tall Skyscraper Modular Addon F - Thick overhang with thick windows, 2 tall Skyscraper Modular Addon G - Medium overhang with medium windows, 2 tall Skyscraper Modular Addon H - Small overhang with windows, 2 tall Skyscraper Modular Addon I - Thin overhang with thin windows, 2 tall Skyscraper Glass Modular Addon A - Stacked Two Level Sidepiece Skyscraper Glass Modular Addon B - Generic 'T' Styled emblem for buildings Balconies: Balcony A Balcony Concrete A$5.00 -

Version 1.2.6
2,812 downloads
DynamicMonuments is a groundbreaking plugin for Rust servers that breathes new life into your maps! Say goodbye to tedious manual map editing or relying on RustEdit. With just a few clicks, your server will be transformed, featuring 18 unique monuments that blend seamlessly into any environment. Key Features: Dynamic Spawning: - Monuments can spawn randomly during wipes or with each server restart (optional) - Customize spawn frequency and zones through the plugin's configuration - A variety of monument complexities, ranging from cozy hideouts to sprawling fortresses 18 Unique Monuments: - Water Monuments - Coastal Monuments - River Monuments - Roadside Monuments - Modifications for Standard Monuments: (Metro entrances, power line towers, substations, quarries, and more). Personalization: - Give players personal monuments Versatility: - Compatible with both custom and procedural maps. - Automatically adapts to terrain, water, and roads. - No RustEdit required! Everything is managed through the plugin's configuration. Giving a monument to a player 9 out of 18 monuments can be given to players for personal placement. The dynamic monument is represented as a flare with a unique skin, which can be given to players in any way, such as through an in-game store. To spawn the monument, the player must hold the flare and find a suitable location, receiving instructions in the chat and notifications. Once placed, the monument is locked to the player, and only they can loot it. Chat commands (admin only) /killmonument - destroys the DynamicMonument you're looking at /replacecrate NewCratePresetName - replaces the crate you're looking at on the location with NewCratePresetName /spawnmonument PresetName - spawns a monument in a random position /spawnmonumentmypos PresetName - spawns the monument in your position /killallmonuments - destroys all DynamicMonuments on the server /respawnmonuments - forcibly launches automatic respawn of DynamicMonuments /givemonument PresetName - give the monument to yourself /addprefabspawnpoint PresetName — adds a crate or static NPC spawn point to a monument at your current position (only for Static Npc and crates) /removemonumententity command — removes entity spawn point you're looking at. (only for StaticNpc/crates/Entities for respawn) Console commands (RCON only) spawnmonument PresetName - spawns a monument in a random position killallmonuments - destroys all DynamicMonuments on the server respawnmonuments - forcibly launches automatic respawn of DynamicMonuments givemonument PresetName userID - give the DynamicMonument to the player Plugin Config en – example of plugin configuration in English ru – example of plugin configuration in Russian Check out the rest of my work: Adem's Codefling Library You can reach out to me in Discord: Adem's Discord Profile Join the Mad Mappers Discord!$49.99 -
Version 2.1.2
1,316 downloads
The Creative Plugin is designed to enhance the creative and sandbox aspects of the game and offers a wide range of features that empower players to create, build, and experiment with different bases. You can imagine, create and save your structures. From version 2.0 onwards, the following is a mandatory requirement: - REMOVED SQL AS A REQUERIMENT! FAQ: PERMISSIONS CHAT COMMANDS CONFIG FILE (DEFAULT .JSON - EXAMPLE) KEYBIND LIST _ _____ ____ _ ______ __ _ _ ____ ____ | | | ____/ ___| / \ / ___\ \ / / | | / \ | __ ) ___| | | | _|| | _ / _ \| | \ V / | | / _ \ | _ \___ \ | |___| |__| |_| |/ ___ \ |___ | | | |___ / ___ \| |_) |__) | |_____|_____\____/_/ \_\____| |_| |_____/_/ \_\____/____/ Loaded: Creative 2.0 Plugin Rust Plugins | AI Based AntiCheat | Rust Servers | Software Development Visit us as https://legacylabs.icu/ Discord: https://dsc.gg/legacy-labs Support at: https://codefling.com/ryuk_$79.99- 120 comments
- 6 reviews
-
- 12
-
-
-
-

-
- #creative rust
- #building
- (and 1 more)
-
Version 1.0.0
5 downloads
Description The UpgradeRestrictor plugin prevents players in Rust from skipping upgrade levels for building structures. Inspired by the new game Duckside, which showcases this upgrade progression and is loved by players, this plugin enforces Rust's upgrade sequence: Twig → Wood → Stone → Metal → HQ. It ensures that players follow this order and blocks attempts to skip material tiers. If players try to bypass a step, the upgrade is blocked, and a color-coded message appears in the chat, indicating the next required tier. Features - Blocks players from skipping upgrade tiers for building structures. - Displays a color-coded chat message with the plugin name and the next required upgrade level. - Requires specific permission to apply restrictions. - Supports the following upgrade path: Twig → Wood → Stone → Metal → HQ. Commands No specific commands available. Permissions upgraderestrictor.use For these players, the upgrade restrictions must be used. Players without this permission can upgrade structures without restrictions. Configuration No specific configuration settings required. load, run, enjoy$3.99 -
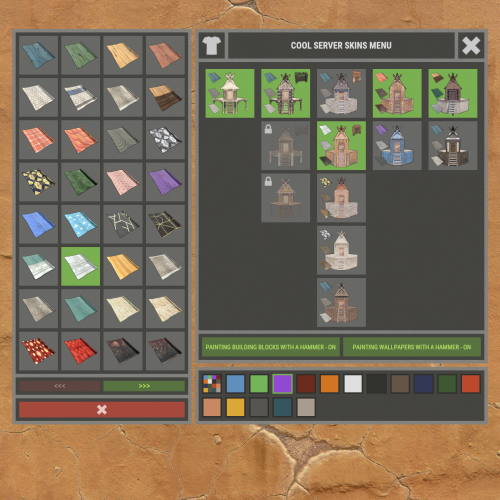
Version 1.5.2
1,795 downloads
XBuildingSkinMenu - building block skins menu for your server. - Optimization of the interface for different monitor resolutions. - Storing player data in - oxide/data/XDataSystem/XBuildingSkinMenu - There is a lang ru/en/uk/es. - Sound effects when interacting with the menu. - Possibility to allow only the owner of the cupboard to paint the building blocks of the house. - Possibility to paint building blocks only when authorized in the cupboard. - Possibility to paint building blocks with a hit of a hammer. [ Each player can turn on/off in the main menu for convenience. ] - Possibility to paint building blocks when upgraded. - Possibility to use effects when painting. - Possibility to paint each house separately. [ You can paint an unlimited number of houses at the same time. ] - Plugin support - BGrade and IQGradeRemove. - Chat messages about the started/completed of painting the house. [ The number of painted building blocks. ] - Chat messages about the started/completed of painting items/constructions inside the house. [ The number of painted items/constructions. ] - Chat messages: the house is already being painted - items/constructions in the house are already being painted. - To paint the containers, the color chosen by the player through the Spray can is used. - UI button for easy transition from the XBuildingSkinMenu menu to the XSkinMenu menu. [ And vice versa. ] - Possibility to choose color in UI. - Automatic replenishment of the configuration with new skins of building blocks. - Permissions for each skin. - Automatically reset selected skins from a player, if revoke away their permission. Permissions xbuildingskinmenu.use - access to plugin functionality. [ Skins menu, hammer, building. ] xbuildingskinmenu.painting - access to paint the entire house through the cupboard. xbuildingskinmenu.simpleblock - access to paint high Walls/Gates. [ Hammer hit only. ] xbuildingskinmenu.entity - access to painting items/constructions inside the house. [ Requires XSkinMenu plugin version 1.1.14 and above. ] xbuildingskinmenu.default - default permission for skins. Commands /bskin - open the building block skins menu. API ulong GetBuildingSkin(BasePlayer player, string grade) - returns the skin of the building block selected by the player. ulong GetBuildingSkin(BasePlayer player, BuildingGrade.Enum grade) - returns the skin of the building block selected by the player. ulong GetBuildingSkin(BasePlayer player, BuildingBlock block) - returns the skin of the building block selected by the player. Config { "General setting": { "Automatically add actual skins of building blocks to the configuration": true, "Only the owner of the cupboard can start painting the house": false, "Use effects when painting home": true, "Use effects when painting items/constructions in the house": true, "Use effects when painting building blocks by hitting a hammer": false, "Enable painting of items/constructions in the house using player skins from the XSkinMenu plugin": false, "Skins for buildings": { "Wood": { "0": { "ImageURL": "", "Permission": "" } }, "Stone": { "0": { "ImageURL": "", "Permission": "" }, "10220": { "ImageURL": "", "Permission": "xbuildingskinmenu.default" }, "10223": { "ImageURL": "", "Permission": "xbuildingskinmenu.default" }, "10225": { "ImageURL": "", "Permission": "xbuildingskinmenu.default" } }, "Metal": { "0": { "ImageURL": "", "Permission": "" }, "10221": { "ImageURL": "", "Permission": "xbuildingskinmenu.default" } }, "TopTier": { "0": { "ImageURL": "", "Permission": "" } } }, "Default skins for new players": { "Wood": 0, "Stone": 0, "Metal": 0, "TopTier": 0 } }, "GUI setting": { "Close the menu by tapping on an empty area of the screen": false, "Material_background_0": "assets/icons/greyout.mat", "Color_background_0": "0 0 0 0", "Color_background_1": "0.517 0.521 0.509 0.95", "Color_background_2": "0.217 0.221 0.209 0.95", "Skin background color": "0.517 0.521 0.509 0.5", "Background color of the selected skin": "0.53 0.77 0.35 0.8", "Close button (icon) color": "1 1 1 0.75", "Color of buttons in cupboard": "0.35 0.45 0.25 1", "Button text color in cupboard": "0.75 0.95 0.41 1", "Hammer button color - On": "0.35 0.45 0.25 1", "Hammer button text color - On": "0.75 0.95 0.41 1", "Hammer button color - Off": "0.65 0.29 0.24 1", "Hammer button text color - Off": "0.92 0.79 0.76 1", "AnchorMin - button 1": "0.5 0", "AnchorMax - button 1": "0.5 0", "OffsetMin - button 1": "395 621.5", "OffsetMax - button 1": "572.5 641.5", "AnchorMin - button 2": "0.5 0", "AnchorMax - button 2": "0.5 0", "OffsetMin - button 2": "395 646.5", "OffsetMax - button 2": "572.5 666.5" } }$18.99 -
![More information about "Building Sites [Super Sized Bundle]"](https://codefling.com/uploads/monthly_2025_09/adem_prev_sites_prev_1.thumb.jpg.e63b8b7d1ba98b9e3733caa76fff8f17.jpg)
Version 1.0.0
293 downloads
Note: This is an add-on, not a standalone plugin. It requires the BuildingSites plugin to be installed (sold separately). SuperSized is an add-on for BuildingSites that introduces 10 new locations — one coastal and nine land-based. Its defining feature is massive buildable areas, perfectly suited for ambitious structures, large bases, or clan settlements. Installation Instructions: Make sure you have the latest version of the BuildingSites plugin installed Move the contents of the data/BuildingSites folder from the archive you downloaded into the oxide/data/BuildingSites folder on your server Reload the plugin Check out the rest of my work: Adem's Codefling Library You can reach out to me in Discord: Adem's Discord Profile Join the Mad Mappers Discord!$19.99- 5 comments
- 3 reviews
-
- 7
-
-
- #building
- #building site
- (and 5 more)
-
Version 1.0.1
83 downloads
Combined Storage lets players connect multiple storage containers so they function as one large inventory. Includes automatic item sorting, search functionality, and filtering to keep storage clean and efficient. Readme Link - Click Here for Instruction and Documentation Highly recommend reading the FAQ section! All Your Items - In One Place Link multiple containers so they all share a single organized inventory. Automatic Sorting Items are automatically sorted as they are inserted, no manual effort required. Search Functionality Quickly find any item across all linked containers using a fast, built-in search bar. Simple Setup Simply press Link in a container to hook it up with the rest of them in your base. Unique View for Each Player Each player sees their own automatically sorted and filtered view of the shared inventory based on their preferences, without affecting anyone else.$24.99- 9 comments
- 2 reviews
-
- 3
-
-
- #inventory
- #storage
- (and 20 more)
-
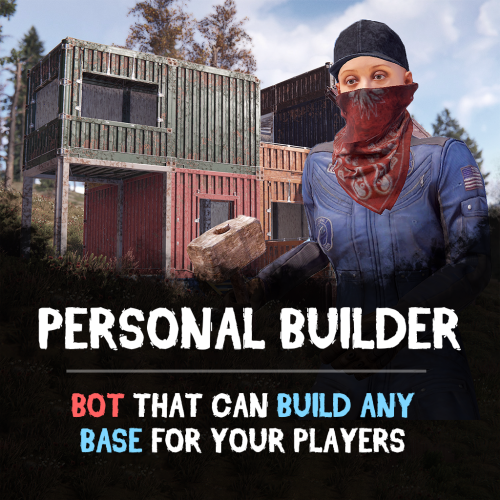
Version 1.1.1
283 downloads
Looking for a fast and efficient way to build bases on your Rust server? The Personal Builder plugin introduces AI-powered builder bots that can construct any CopyPaste saved base design. Just assign a build location, and watch as your bot brings your base to life! Features: Automated Base Construction • Spawn a Personal Builder bot using /pbuilder. • Select a build location, and the bot will begin construction. • Works seamlessly with any CopyPaste base blueprint! Smart AI Building System • Performs terrain checks to prevent building in restricted areas. • Prevents construction near roads, monuments, or other tool cupboards. • Adjustable build speed for optimal server performance. Total Customization & Control • Configure bot name, spawn delay, and immortality settings. • Choose whether resources are required for construction, or make the bot purchasable via economics plugins. How It Works: Use /pbuilder to spawn a builder bot. Select a build point with the middle mouse button (or customize the keybind). The bot scans the area and begins constructing the base. Sit back and watch as the bot automates the entire building process! Requirements: • CopyPaste Plugin (must be installed and configured). • Build files must be stored in /oxide/data/copypaste/ See it in Action! Watch the Video Configuration: To make the default config work, you need to download the build file (link below) and place it in this directory "/oxide/data/copypaste". Link: https://drive.google.com/file/d/11nMTecwn2pZyiaECeRSPqDXacYq2a6iv/view?usp=sharing How to add your buildings: - Open the config, duplicate the standard bot setup - Change the permission to spawn - Change the short name of bot - Change the name of the build file - find the one you need in "/oxide/data/copypaste" directory and enter it without the file EXTENSION { "Controls": { "Button to assign build position (MIDDLE_MOUSE, SECOND_MOUSE, E, RELOAD, SPRINT)": "MIDDLE_MOUSE", "Range of the task assignment button": 25.0, "Display 3D arrows over a build position?": true, "Arrow display duration": 2 }, "Permissions": { "personalbuilder.bot1": { "The name of the bot to be selected through the command when spawning": "bot1", "Bot spawn delay": 300.0, "CopyPaste file name": "pbuilder_test", "Player (bot)": { "Bot display name": "Personal Builder", "Bot health": 1000.0, "Make bot immortal?": false }, "Resources": { "Require resources?": true, "Drop bot's resources on death?": true }, "Speed": { "Bot speed multiplier": 1.0, "Build speed multiplier": 1.0, "Time to check 1 foundation": 0.15, "Time to check 1 building block": 0.15 }, "Build": { "Checks": { "Check is close to road?": true, "Check is building blocked?": true, "Check for Prevent Building triggers": true, "Prevent Building check radius": 10.0 } }, "Effects": { "Enable effects on appear & disappear?": true, "Enable building block upgrade effects?": true }, "Clothes": [ { "Item name": "", "Item shortname": "shoes.boots", "Item skin": 0, "Item amount": 1 }, { "Item name": "", "Item shortname": "pants", "Item skin": 0, "Item amount": 1 }, { "Item name": "", "Item shortname": "hoodie", "Item skin": 0, "Item amount": 1 }, { "Item name": "", "Item shortname": "mask.bandana", "Item skin": 0, "Item amount": 1 }, { "Item name": "", "Item shortname": "hat.boonie", "Item skin": 0, "Item amount": 1 }, { "Item name": "", "Item shortname": "sunglasses", "Item skin": 0, "Item amount": 1 } ] } } }$29.90 -

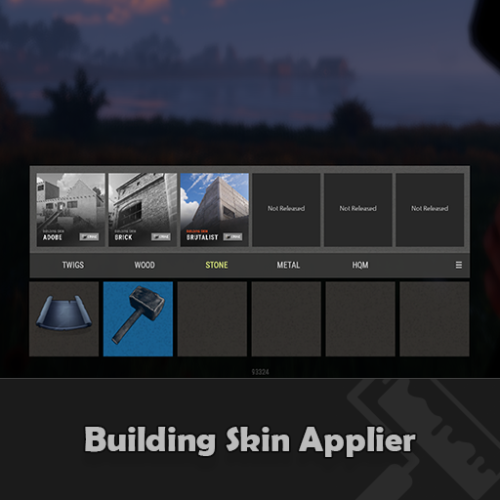
Version 1.6.0
6,266 downloads
Fed up with the need to use multiple addons on my server for functions that players could execute from within the game, and considering the constant increase of new Skins for builds, I found myself dissatisfied with the limited supply of automatic upgrades on the market. For this reason, I have reworked the most used TC-related features on my server into a single plugin, which has been enriched with ideas contributed by players and other Rust administrators. All this under an attractive graphical interface, inspired by the item store of the game itself. Video Update 1.5.0 Video Update 1.4.9 Video Update 1.4.0 Old Video Features AUTOMATIC CONSTRUCTION SKINS With BetterTC your players will be able to improve their builds to any level of improvement, but they will also be able to choose their favorite Skin (if you enable it) completely free of charge or offering it to the VIPS on your server. Update system: I have added a small system that checks for new skins to automatically add them to the configuration. When you install the plugin for the first time and once you obtain permission from bettertc.admin, you must click on "Check Update" so that it performs an internal check and adds all the skins and options that exist to date. LIST OF AUTHORIZED PLAYERS It allows players or simply the rest of the Staff to easily see which players are authorized in the locker. Except for the administrators themselves, if you activate it in the config. (I don't think any player needs to know that the admin was authorized in their locker to check something) You can also allow authorizations to be deleted individually. AUTOMATIC IMPROVEMENT SYSTEM Allows your players to upgrade the grade of their bases automatically by obtaining resources directly from the TC. As long as they don't have RaidBlock (if you use NoEscape/RaidBlock plugin of course). You can configure different speed levels and costs depending on the player's permission from the plugin's own settings. That is, you can have players improve a building every 5 seconds for free and VIPs can improve every 2 or 1... Use your imagination! In addition, you can also calculate the cost of materials that will be required to carry out said improvement by clicking on the info button. A new setting has been added to disable the Container skin's multi-color option. Disabling this option, which is enabled by default, will slightly improve frame rates in builds using this skin: Fewer colors = Better performance (FPS Client). AUTOMATIC RESKIN OF EXTERNAL WALLS The plugin also includes an automatic reskin system for external walls. Previously, it was only compatible with standard stone external walls and their adobe variant. Now, it also includes the ability to switch wooden walls to Frontier and vice versa. Ice walls have also been added as a variant for stone. If you place regular stone external walls (the usual ones), you can change their appearance to adobe or ice by clicking on the corresponding wall icon. When changing the skin, the original wall's health will be preserved, so if it’s damaged, it won’t be fully restored. This prevents players from abusing the system. Important: I recommend using the system for external walls as an appearance modification system, not as an upgrade system. In other words, with the following configuration: "Only reskin on wall of the same grade": true If you disable this parameter, you will be able to change from wood to stone, or vice versa, completely free of charge. Since the wall system doesn’t have a cost mechanism for players, I recommend keeping this option enabled. AUTOMATIC REPAIR SYSTEM Allows your players to repair their bases automatically by obtaining resources directly from the TC. As long as they don't have RaidBlock (if you use NoEscape of course). Now since version 1.4.0 it will also repair damaged objects such as doors, trapdoors, windows, boxes! With configurable cooling system to prevent repair abuse during raids. ("Repair Cooldown After Recent Damage (seconds)": 30.0) AUTOMATIC CONSTRUCTION DEGRADATION It allows players to regret upgrading their huge base to metal and not being able to afford it anymore. Of course, it will charge them resources as if they improved it from 0. However, if you do not want to allow downgrade you can disable it from the config. AUTOMATIC WALLPAPER PLACEMENT Allows your players to place any available wallpaper in the game automatically based on the building type. Support for wallpapers on walls, ceilings, and floors. Wallpapers are always kept up-to-date automatically. So if FacePunch adds new wallpapers, they will be instantly added to the list. You'll also enjoy my exclusive wallpapers. Since update 1.5.0, you can also add and remove custom wallpapers with the following commands. Chat Command: Usage: /addwp <skinid> <Wall|Floor|Ceiling>, Example: /addwp 3356517390 Wall, Console Command: Usage: addwp <skinid> <Wall|Floor|Ceiling>, Example: addwp 3356517390 Wall I've added a new parameter to the config: "Wallpaper Damage": true Setting this parameter to false prevents wallpapers from being broken in melee or with ammunition. However, you can still break them with C4 or missiles. Blocking damage completely is more complex and, in my opinion, unnecessary. In addition, with BetterTC you can place wallpapers on both sides of the walls, even if they are on the outside of the building, as it includes an option in the configuration to force this placement. TC SKINS Give your players the ability to change the appearance of their TC. ALLOWS TO SAVE OLD ITEMS A new configuration option has been added to allow saving items back to the TC. "Allow items in TC inventory": { "gunpowder": false, "sulfur": false, "sulfur.ore": false, "explosives": false, "diesel_barrel": false, "cctv.camera": false, "targeting.computer": false } CONSTRUCTION EFFECTS Allows players to disable auto-build buff effects and reduces headaches.However, if you do not want to allow them to disable this, you can disable it from the config. BETTER GUI The plugin's interface has been programmed so that it maintains its size regardless of the interface scaling settings of each player. It has also been taken into account that perhaps not everyone wants to enable all options for their players. Therefore, the buttons that appear at the top of the TC have been programmed so that if a player does not have permission for a specific function, instead of leaving the space empty, the buttons adapt their position automatically. The player list GUI and construction SKINS have also been prepared with a pagination system if necessary. 95% of the images used in the plugin are loaded directly from the client side, thus optimizing the loading and rendering of the interface and reducing the use of Image Library. Carbon Image Module support. If your server is running Carbon instead of Oxide, it will now use the built-in module instead of the Image Library. Permissions bettertc.admin Exclusive for Admin. It allows you to check if there are new skins to add. You will not appear in the list of authorized players if the option in the settings is activated. bettertc.authlist Shows a button at the top of the TC to check which players are authorized. bettertc.deleteauth Allows you to individually revoke an authorized player. You can give this permission to players if you want them to be able to delete individually. bettertc.use It is the basic degree of use found in the configuration. bettertc.vip It is the level of use for advanced that is found in the configuration. Depending on how you configure it, it makes players with this permission improve/repair/change skin faster. Or it simply costs them less resources. bettertc.repair Displays a button on top of the TC to repair the build automatically. bettertc.repair.nocost No explanation needed I think. (USE WITH CAUTION) bettertc.reskin Allows players to change the skin of their build automatically. Imagine one day you upgrade your entire foundation to container and the next day you regret losing FPS and would like to leave it on normal metal. bettertc.reskin.nocost No explanation needed I think. bettertc.updefault Shows players the default upgrade options. Without SKINS. bettertc.upskin Show players upgrade options with SKINS. bettertc.upwall Allows players to change the skin of external walls. bettertc.upgrade Permission to evade blocking of all items. bettertc.upgrade.nocost No explanation needed I think. (USE WITH CAUTION) bettertc.wallpaper Allows players to place Wallpaper. bettertc.wallpaper.nocost No explanation needed I think. (USE WITH CAUTION) bettertc.wallpaper.custom Display custom wallpapers to players with this permission. bettertc.tcskinchange Allows players to change the TC skin. bettertc.tcskindeployed Allows players to place TC with Skin. Commands Chat Command: Usage: /addwp <skinid> <Wall|Floor|Ceiling>, Example: /addwp 3356517390 Wall, Console Command: Usage: addwp <skinid> <Wall|Floor|Ceiling>, Example: addwp 3356517390 Wall Configuration DEFAULT CONFIGURATION { "Check for updates when loading": true, "Bypass DLC ownership check (⚠ only allowed on creative/test servers per Facepunch rules)": false, "Use NoEscape Plugin": false, "Use RaidBlock Plugin": true, "GUI Buttons TC - Color Default": "0.3 0.40 0.3 0.60", "GUI Buttons TC - Color Active": "0.90 0.20 0.20 0.50", "GUI Buttons TC - OffsetMin": "280 621", "GUI Buttons TC - OffsetMax": "573 643", "GUI Buttons TC - AnchorMin": "0.5 0", "GUI Buttons TC - AnchorMax": "0.5 0", "Alert Gametip": true, "Alert Chat": true, "Alert Notify Plugin": false, "Notify: select what notification type to be used": { "error": 0, "info": 0 }, "Color Prefix Chat": "#f74d31", "Show Admin Auth List": false, "Show SteamID Auth List": true, "Upgrade Effect": true, "Colour Selection MultiColor Option": false, "Reskin Enable": true, "Reskin Wall Enable": true, "Only reskin on wall of the same grade": true, "Reskin Wall TC Distance (Default: 100)": 100.0, "Deployables Repair": true, "Repair Cooldown After Recent Damage (seconds)": 30.0, "Downgrade Enable": true, "Downgrade only Owner Entity Build": false, "Upgrade only Owner Entity Build": false, "Upgrade / Downgrade only Owner and Team": true, "Wallpaper Enable": true, "Wallpaper placement Cost (Cloth)": 5, "Wallpaper Damage": true, "Wallpaper both sides": true, "Force both sides including external sides": true, "Cooldown Frequency Upgrade (larger number is slower)": { "bettertc.use": 2.0, "bettertc.vip": 1.0 }, "Cooldown Frequency Reskin (larger number is slower)": { "bettertc.use": 2.0, "bettertc.vip": 1.0 }, "Cooldown Frequency Repair (larger number is slower)": { "bettertc.use": 2.0, "bettertc.vip": 1.0 }, "Cooldown Frequency Wallpaper (larger number is slower)": { "bettertc.use": 2.0, "bettertc.vip": 1.0 }, "Cost Modifier for repairs": { "bettertc.use": 1.5, "bettertc.vip": 1.0 }, "Allow Items in TC Inventory": { "gunpowder": false, "sulfur": false, "sulfur.ore": false, "explosives": false, "diesel_barrel": true, "cctv.camera": true, "targeting.computer": true }, ... ] } Bonus KNOWN ISSUES Random spawn of default (blue) wallpapers in constructions. If this happens on your server, it's likely because you have the TruePVE plugin or a similar one installed. Make sure to disable the configuration option that protects wallpaper damage in that plugin. Instead, enable wallpaper damage protection in BetterTC. While it won't prevent 100% of the damage to wallpapers, it will significantly reduce it—especially from melee weapons. For any problem, doubt, suggestion or assistance do not hesitate to contact me by Discord ninco90#6219 If you need me to configure everything from scratch, according to your tastes, for your server I can also do it for an additional fee. Although you should be able to configure everything yourself$30.00- 399 comments
- 29 reviews
-
- 14
-
-
-
- #builder
- #automation
- (and 9 more)
-
Version 1.0.12
217 downloads
Allow visitors of your server to make use of the premium building skins without having to own them. Compact and minimalistic UI. Fully UI Controlled. ( no commands required ) Only visible when the player has a hammer in their hands. When the UI is open, Hit a toolbelt hotkey so you can instantly swap to a weapon when being attacked. Create custom themes and let players choose the one they prefer. Apply the building skin to a single block or to all blocks of the same grade in the building. Optional keypress check to apply skins, so that by default the hammer retains its normal functionality. Optional background blur. Previews Toolbar will only be visible once the hammer has been selected, So its not cluttering the screen when its not required to be. Selected skin will be colored to make it stand out while the unselected skins are greyed out. Automatic adding of tabs when a skin is colorable to keep things clean and minimalistc. Create your own custom themes or modify existing ones and let players select themselves which one they prefer. User Settings On Upgrade Automatically apply the selected skin when upgrading a building block. Hammer Hit Enabled Updates the skin when a building block is being hit with the hammer. Hammer Hit Contagious Updates all the building blocks of the same grade with one hit of hammer. Requires Keypress Updating the skin with a hammer hit requires you to either hold the "SPRINT" or "RELOAD" button. This way it retains the repair function of the hammer without accidently change skins. Skin Change Animation Whenever a skin is being changed it will trigger the upgrade animation. Screen Blur When the hud is in use it will blur the baground to improve visibility of the hud. Permissions buildingskinapplier.use | Allow players to make use of the plugin. buildingskinapplier.on_upgrade | Update the skin when a part of the structure gets upgraded. buildingskinapplier.hammer_apply | Update skin on hammer hit. buildingskinapplier.hammer_contagious | Update skin on hammer hit for all objects of the same grade. Questions / Answers Q: How to choose a building skin? A: Press "Enter" to open chat this allows you to make use of the cursor, Click with the cursor on one of the grade catégories to show the skins available for the selected tier. Select one of the availible skin packs, when the image is colored it means that this is the selected skin pack, when all the skin pack images are greyed out the default skin will be selected. Q: How to apply a skin? A: Hit an building block with the hammer while holding the "SPRINT" button, the block will change to the selected skin. Q: How to apply a skin to all objects of the same grade at once? A: Hit an building block with the hammer while holding the "RELOAD" button, all blocks that are part of the building will change to the selected skin. Q: How to change huds theme? A: Click on the menu button located on the right side of the toolbar, Select the theme tab located at the top of the hud. Click on one of the prefered themes listed below and the hud will directly update its appearance. Q: How to change a skin color? A: When a skin pack is colorable you can change the color by going into the grade category of which you would like change the color, if the selected skin is recolorable then a color tab button at the rop of the hud will appear. Click on this button and select your prefered color below. For a quick response to questions, problems or bugs contact me at discord https://discord.gg/UHpZtN4jgz$9.99 -
Version 1.1.8
2,227 downloads
This plugin allows you to quickly and easily add unique locations for building houses to any map. There are 17 different locations of three types: ground sites, islands, and flying platforms — choose what suits you best! Key benefits of the plugin: Suitable for any map; No need to use RustEdit; Random automatic spawn after wipe; Ability to give a Building Site to a certain player. With this plugin, you can build the perfect house for yourself and your friends! Spawn locations The plugin has a function for automatically generating spawn points for BuildingSites on any map. You can independently enable and disable the spawning of water, land, and air BuildingSites. For each type, you can set the number of BuildingSites that will appear after the wipe. You can also give players flare to summon a BuildingSite. With their help, players will be able to call the desired BuildingSite anywhere. When the player holds the flyer in their hands, they are shown information about whether their position is suitable for spawning the BuildingSite or not. Players can be given flyers in any way, for example, by kits or in the in-game store. Chat commands (admin only) /respawnsites - forcibly launches automatic respawn of BuildingSites /spawnsite PresetName - spawn the BuildingSite in your position /killsite- destroys the BuildingSite you're looking at /killallsites - destroys all BuildingSites on the server /givesite PresetName - give the BuildingSite to yourself /killsiteentity — look at the object you want to remove and enter the command; this object will no longer spawn at new locations of this type Console commands (RCON only) respawnsites - forcibly launches automatic respawn of BuildingSites killallsites - destroys all BuildingSites on the server givesite PresetName userID - give the BuildingSites to the player Plugin Config en – example of plugin configuration in English ru – example of plugin configuration in Russian Check out the rest of my work: Adem's Codefling Library You can reach out to me in Discord: Adem's Discord Profile Join the Mad Mappers Discord!$29.99- 51 comments
- 9 reviews
-
- 15
-
-
-
-
- #adem
- #madmappers
- (and 6 more)
-

Version 1.0.0
23 downloads
Wall Rotator Wall Rotator is a quality-of-life plugin that allows players to rotate walls at any time, bypassing Rust's default 10-minute rotation window. Perfect for servers that want to give players more building flexibility while maintaining control through TC authorization and optional material costs. Key Features Bypass the 10-minute timer - Players can rotate walls long after placement TC Authorization - Require cupboard access before allowing rotation (configurable) Material costs - Optional resource requirements based on wall tier (wood/stone/metal/armored) VIP/MVP support - Configurable cost multipliers for donor tiers Admin bypass - Admins can rotate any wall without restrictions Safety checks - Prevent rotation of walls with mounted items, explosives, or recent damage Developer hooks - API for other plugins to integrate with rotation events Players often realize they need to rotate a wall after the vanilla timer expires. Rather than tearing down and rebuilding (wasting resources), this plugin gives them the flexibility to fix their mistakes. Server owners maintain control through TC requirements and configurable costs making it feel like players are paying for it. Configuration { "Require TC Authorization": true, "Enable Rotation Costs": false, "VIP Cost Multiplier (1.0 = 100%, 0.5 = 50%, 0 = free)": 0.5, "MVP Cost Multiplier (1.0 = 100%, 0.5 = 50%, 0 = free)": 0.25, "Block Rotation With Mounted Items": true, "Block Rotation With Explosives": true, "Block Rotation After Damage (seconds)": 30.0, "Material Costs": { "wood": { "Item Shortname": "wood", "Amount": 50 }, "stone": { "Item Shortname": "stones", "Amount": 50 }, "metal": { "Item Shortname": "metal.fragments", "Amount": 50 }, "toptier": { "Item Shortname": "metal.refined", "Amount": 5 } } } Configuration Options Require TC Authorization - If true, players must have cupboard access to rotate walls (recommended) Enable Rotation Costs - Toggle material costs for rotation VIP/MVP Cost Multipliers - Reduce costs for donor tiers (0 = free, 0.5 = 50%, 1.0 = full price) Block Rotation With Mounted Items - Prevent rotation if picture frames, shelves, signs, etc. are attached Block Rotation With Explosives - Prevent rotation if C4 or satchels are attached Block Rotation After Damage - Set cooldown period after wall takes damage (prevents rotation during raids) Material Costs - Define resource requirements per wall tier when costs are enabled Chat Commands /rotate - Rotate the wall you're looking at (requires wallrotator.use permission) Simply look at a wall and type /rotate. The plugin handles the rest. Permissions wallrotator.use - Allows player to use the /rotate command wallrotator.admin - Bypasses all restrictions (TC auth, costs, mounted items, explosives, damage cooldown) wallrotator.nocost - Rotate walls for free (when costs are enabled) wallrotator.vip - Apply VIP cost multiplier wallrotator.mvp - Apply MVP cost multiplier (usually lower than VIP) Note: MVP permission takes priority over VIP if a player has both. Developer API Other plugins can integrate with Wall Rotator using these hooks: OnWallRotate - Called before rotation occurs. Return non-null to cancel. object OnWallRotate(BasePlayer player, BuildingBlock wall) { // Return string message to cancel and notify player // Return any non-null value to silently cancel // Return null to allow rotation } OnWallRotated - Called after successful rotation. void OnWallRotated(BasePlayer player, BuildingBlock wall) { // Perform actions after wall is rotated }$3.99