
Build and Publish a Template
This tutorial will guide you through the process of creating, testing, and publishing your first Automation Template:
Build a template using the Appmixer no-code Studio.
Parametrize your template by adding fields to gather information from your end-users through an easy-to-use web form (Wizard).
Test the Automation Template
Publish your Template to your end-users for immediate use.
See a preview of how your template will be shown to your end-users
Explore our demo content or build from scratch
The Get Started section on the Dashboard of Appmixer Studio provides examples of automation templates. Each one has built-in notes describing how to use it
This tutorial explains how to build one of the demo templates from scratch, specifically the one called Get Slack Notifications for Hot Leads.
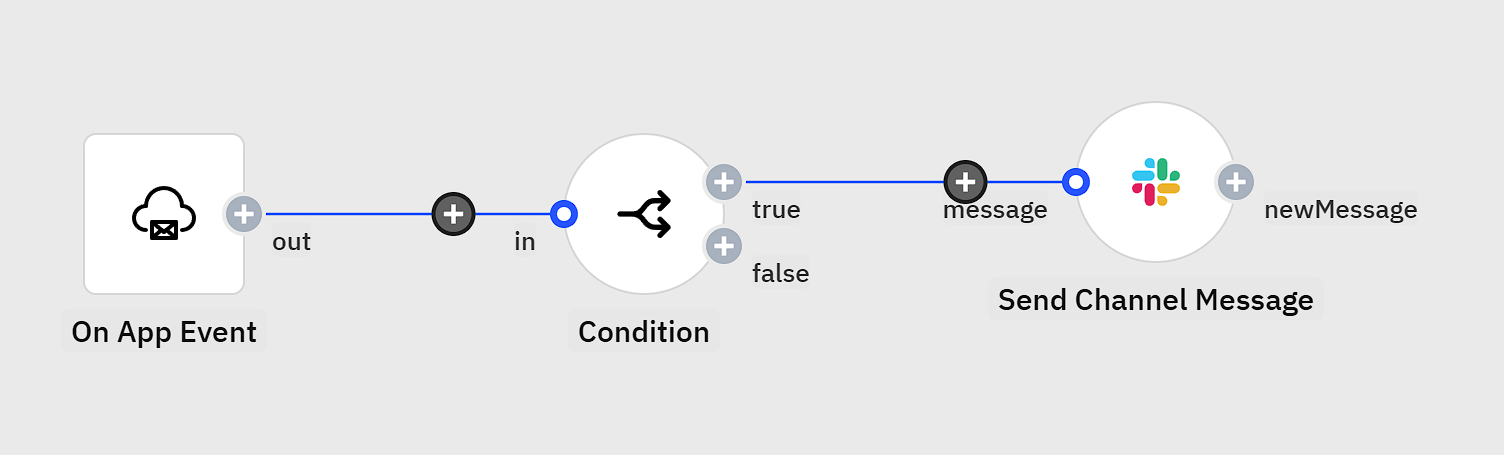
Template Overview - Slack Notifications for Hot Leads
This template processes newly created contacts as external events. This simulates a real-world scenario where you would send these events via HTTP requests from your application code. The automation template examines each contact for the presence of a hotLead parameter. If this parameter is set to true, the contact is then forwarded to Slack.
Create an Automation Template
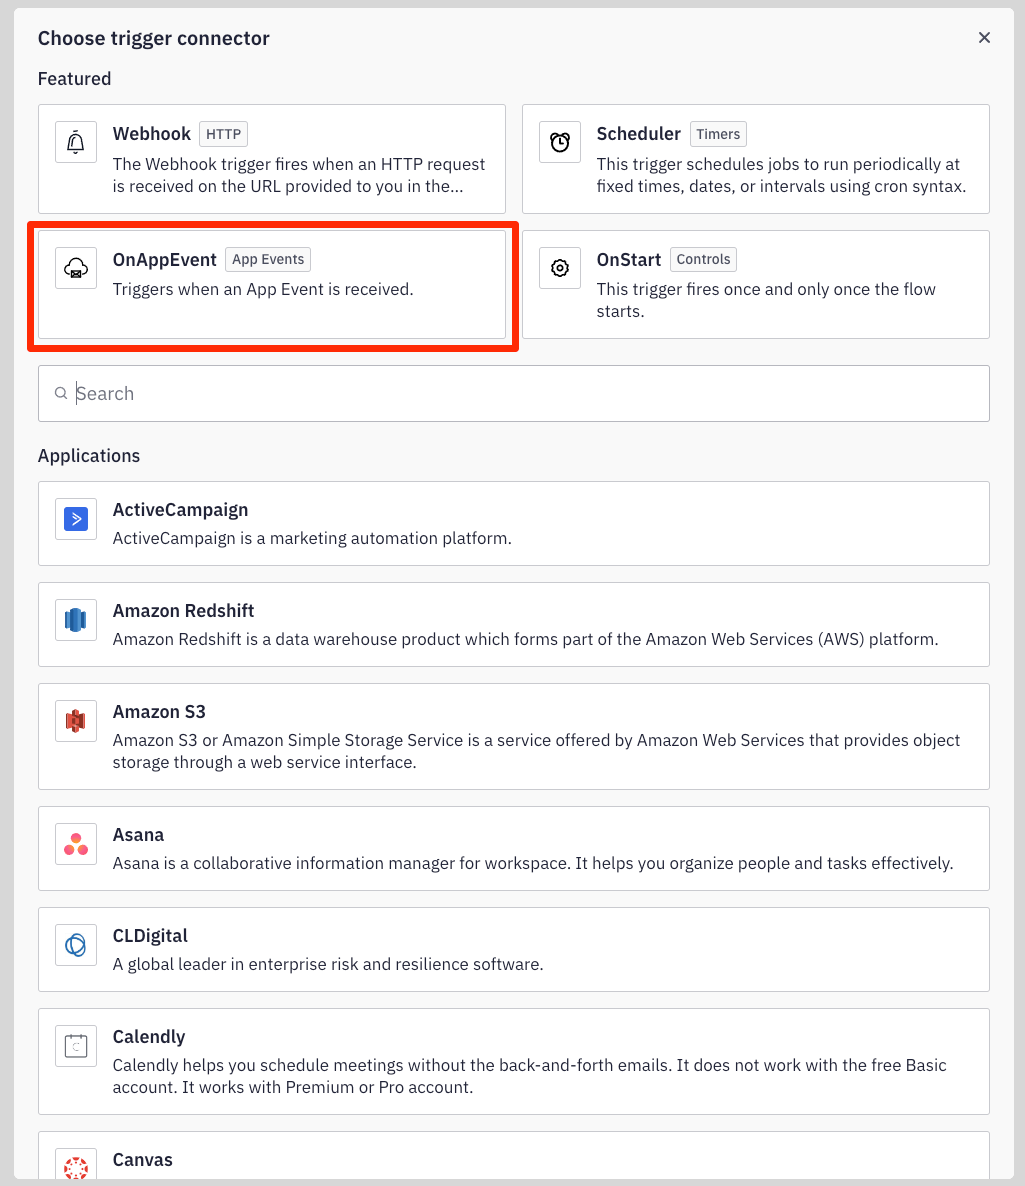
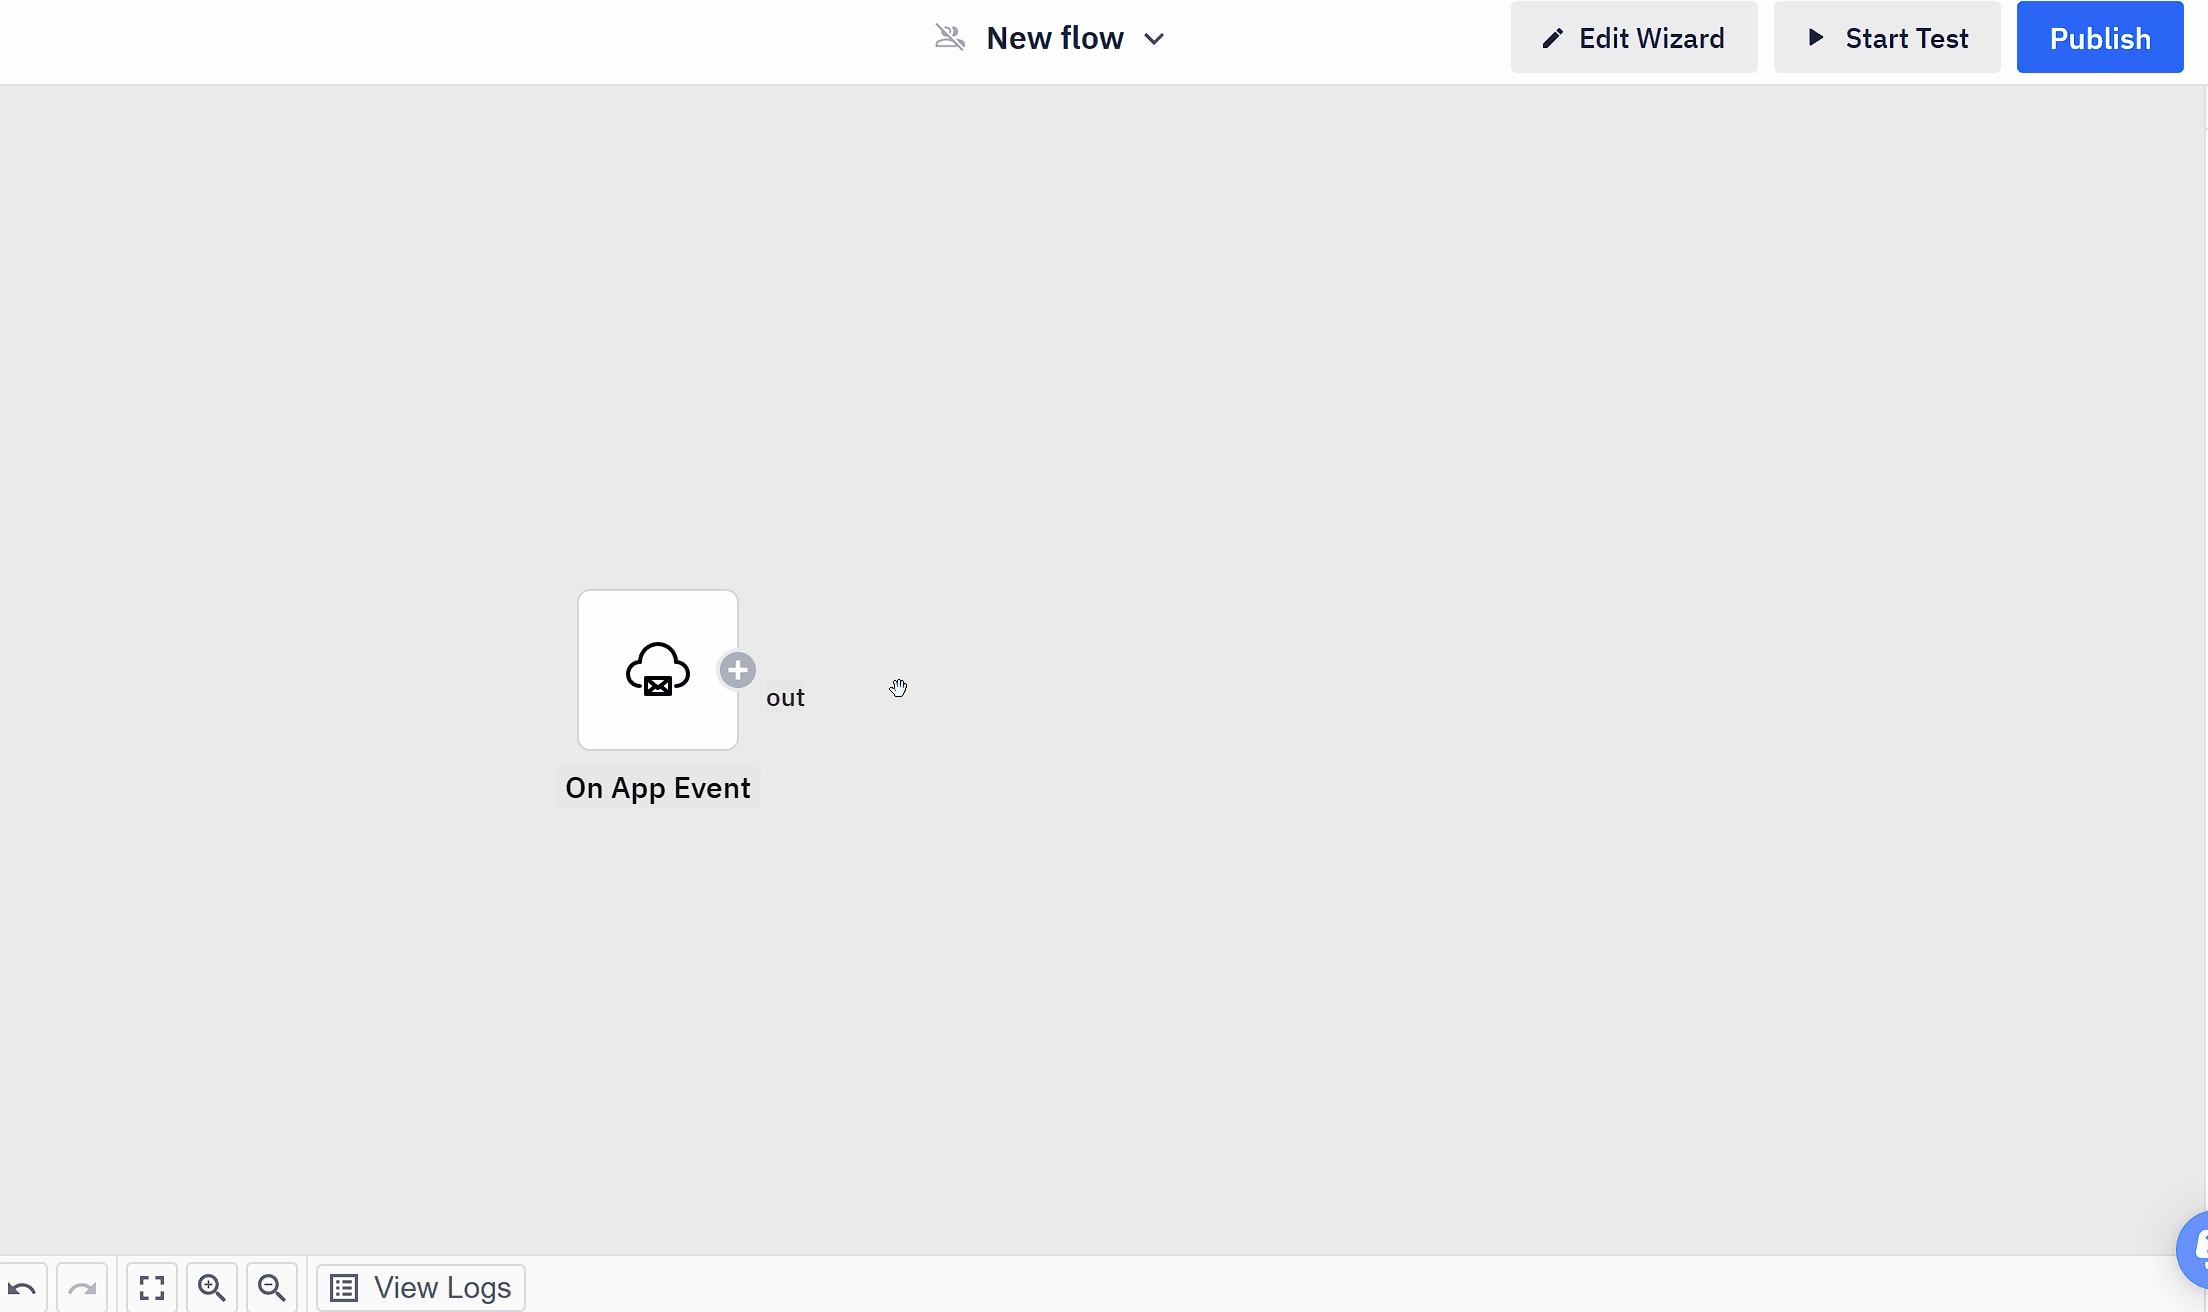
From the Templates page in the Build section, click the "New Template" button located in the top right corner. Then, select the OnAppEvent trigger from the Trigger selector. Utilizing App Events represents the simplest method for sending data to Appmixer.
You can also pick ready-to-use templates from our Get Started section on the Dashboard
Configure the OnAppEvent trigger by setting the Event name to contact-created.Use { "first": "John", "last": "Doe", "hotLead": true } as the Event Data Example. This data sample will enable us to reference the specific data fields later in the template workflow.

Next, add the Condition component to your flow. Do this by clicking Add Step on the right side of the On App Event component. Then type in "condition" and select it.
Configure the Condition component to check whether the hotLead property from the OnAppEvent trigger is set to true. Use the "+" button next to any configuration field. This feature allows you to reference data from any component earlier in the template flow (data variables), regardless of its depth in the workflow.

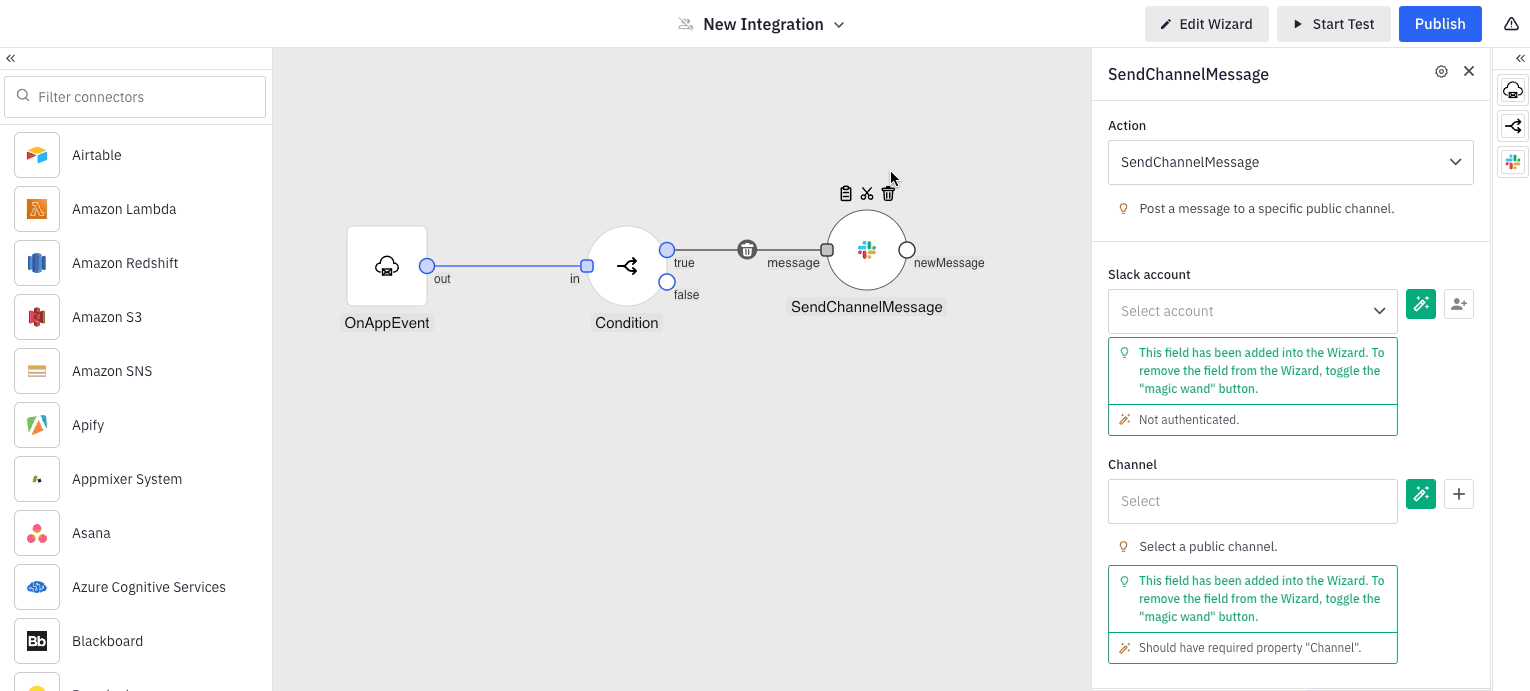
Next, click Add Step on the true output port of the Condition step. Then, find the Slack - Send Channel Message component:

Select Configuration Fields to Collect from your End-Users
The next step is to setup the Slack - Send Channel Message component. This component includes three configuration fields:
Slack account
Slack channel
Message
These fields should not be hardcoded by the template creator. Instead, they are intended to be customizable by the end-user. This means the end-user will authenticate with their own Slack account, choose their desired Slack channel, and tailor the message to be sent.
To allow end-users to configure fields, click on the Add to template checkbox next to each field. This will add the fields to the Configuration Wizard (the final product of this setup) for end-user customization:

Predefine values for your users
You can make it easier for your users by choosing default values for any field. To do this, simply enter a value into the field. For example, we'll set a default value for the "Slack message" field as seen on the screenshot above.
Apply data transformations
Additionally, you have the option to apply data transformations to any data variable. To do this, click on the desired variable, which will open the Modifiers panel. Here, you can define a sequence of modifiers that will be applied in the specified order once the automation template is activated and the data becomes available. For our scenario, we aim to transform the last name of the incoming contact to uppercase.

Finally, edit the name of the automation template:
Refine the template wizard
At this point, our automation template is ready - let's check the appearance of the final configuration web form (Wizard) as it will be presented to our end-users.
Click Edit Wizard to open the Wizard Builder dialog to:
Add and reorder fields
Setup custom labels, tooltips and placeholders
Set advanced options (more details below)
See a live preview of the wizard
Advanced wizard options
For each field, you can set advanced options. For account/authentication fields, you can also choose to share an account with the end-users of the template.
Share account with all template users
Use this option to share your account with the end-users of this integration template. This means that end-users will not connect their own accounts, but use the shared account used by the author of the template.
Hide tooltip
Use this option to completely hide the tooltip for a field in the wizard UI.
Disable variables
Use this option to prevent end users from adding data variables in a field.
Restrict variables
Use this option to define which components within the template will be available as a source of variables within that field, i.e. only allow users to map variables from a specific component(s).
Disable modifiers
Use this option to prevent users from applying data transformations to variables within that field.

For our template, you can for example rename the default "Channel" and "Message" fields within the wizard to "Slack Channel" and "Slack Message," respectively.
Test your Template
Next, proceed with a live test of the automation template. Click the "Start Test" button at the top of the page to initiate the template within your user context (as the template creator). This action will launch the Wizard in its defined state, allowing you to configure the necessary fields. Once the test of the automation template is activated, you can put yourself in the shoes of your users and test it.

With our test currently running, you have the ability to manually initiate the OnAppEvent trigger. This is achieved by sending a custom App event to the active test automation. To do this, click the "Test" button located at the top of the interface, which will open the Test menu. From here, choose "Send App Event." For the Event name, enter "contact-created," and for the Event Data, use an example such as { "first": "John", "last": "Smith", "hotLead": true }. After submitting the event, monitor your Slack channel to verify that the contact information has been successfully posted.

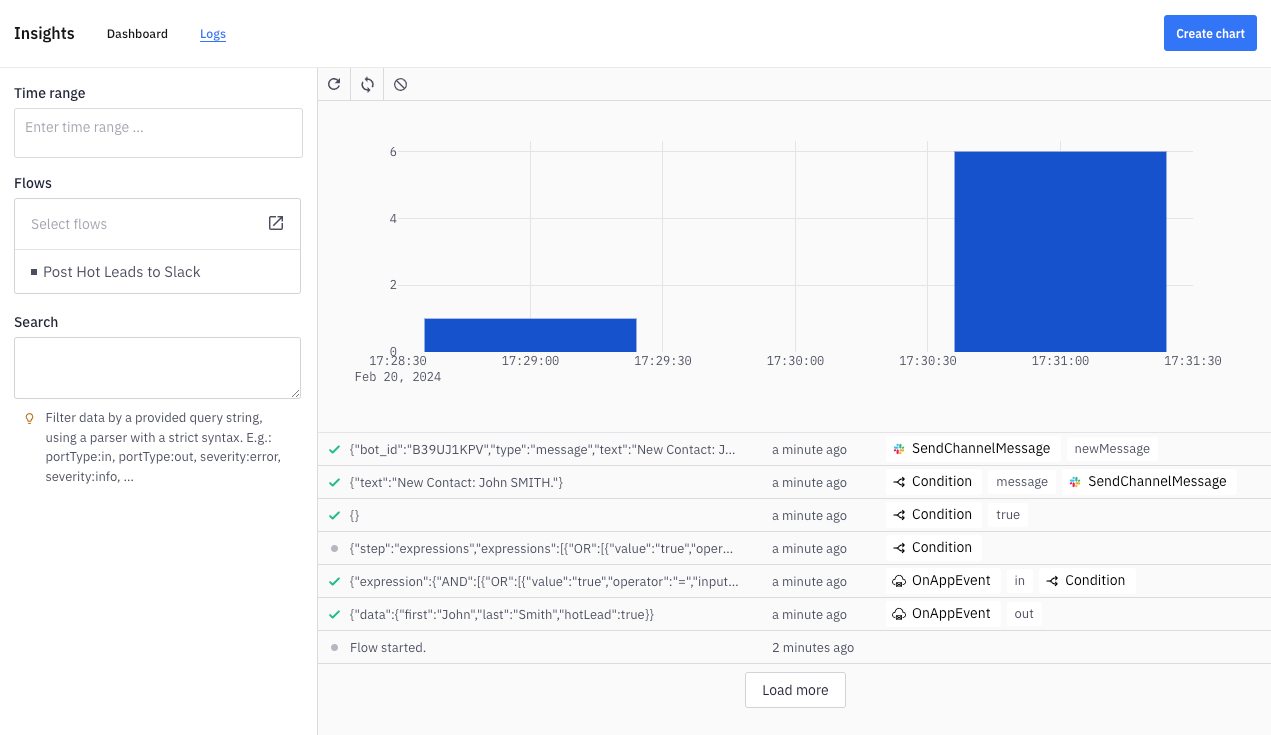
Additionally, you can view the activity of your running test template by navigating to "Test" and then selecting "Insights" from the menu:
Publish your Template to your End-Users
Now that your template is ready and has been thoroughly tested, you are all set to publish it for your end-users. Click Publish on the right side of the upper toolbar.
Set target users
You can publish a template to all your users, or uncheck the All users option and choose from these options:
User
Scope
Domain
Update existing instances
Check this option to push your update to existing instances, i.e. end-user automations created from your template. For this option, you can also set if in-progress data should be kept or deleted for running instances.
Please note that it is not possible to force updates that would touch end-user configuration, i.e. values and variables in configuration fields.

Preview the Template
Please note, if Appmixer has not yet been embedded into your product, you can easily open a preview of the Automation Hub by clicking the Preview button in the Templates section or on the Dashboard.

Last updated
Was this helpful?