I’m not sure if I’ve mentioned it, but Oliver and I leave on December 12 to visit my family and friends in Wisconsin. We’ll be joined a week later by My Husband, which means I’ll be traveling alone on the way there. And we’re going to Wisconsin where it’ll be colder than a witch’s tit in a brass bra, as my Great Gramma Plummer used to say (she’s also the one who used to sing, “Frankie and Johhnie were lovers…” which I don’t think was a gay-themed song, but if she only knew!).
Since I’ve never traveled alone with a toddler, I’ve been doing a bit of research online to see what I may need to make going through the airport and flying on a plane a little bit easier (other than Children’s Benadryl. Don’t judge me.).
The first thing I found was this incredible contraption which I first found on another website. As you can see, after it’s attached your child’s car seat becomes a mobile throne. The reviews claimed it calms all but the most unruly child by being in a seat they know (unlike the car seat/stroller combo which, aside from requiring a second mortgage in order to be able to afford to purchase it, is foreign to the little tike and therefore not comforting, blah blah blah).
Unfortunately, other reviews claimed the Gogo Kidz Travelmate (the first contraption) was difficult to attach to some car seats and needed to be removed at the security checkpoints. Others mentioned that it was difficult to cart the car seat around as well in addition to a carry-on suitcase.
So one night as I was continuing my research, I typed “gogo kidz” into the Amazon search engine and came up with this page. I was shocked to see the second listing (nestled between two of the aforementioned contraptions, I might add!) was something that looked like the other gizmo but was only $14.99!
Upon further inspection of the $14.99 alternative I realized that the child’s car seat was attached to a carry-on suitcase (one problem solved!). After reading the reviews, most people claimed it was a very easy and effective way of toting your tot through an airport (although some people said it was difficult to reattach, but to save $55, I can tolerate a little bit of heartache!).
Then I clicked on the smaller photos to see what this contraption looked like (I just tried linking it into my blog, but the photo is SO TEENY TINY it looked like a fly speck, so click here to see what it looks like).
DUDE! It’s a piece of webbing with three D-rings. I can’t pay $14.99 for that! (And that was mentioned in some of the reviews!)
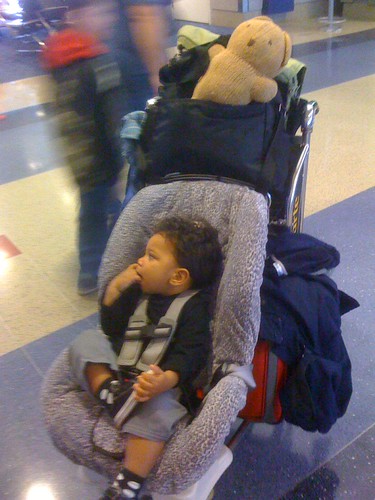
So (I’m finally tying back into the title of this post!), I made my own!

(No S&M jokes, I run a family blog here…)


Just like the photos on Amazon! Only I saved about $12.99! And Oliver seemed to enjoy it!
Now that I have found some assistance for the “traveling alone” dilemma, I needed to figure out the “traveling to The Tundra” dilemma.
Even with the moderate temperatures we’ve been having in Southern California (anywhere from low 60s to the 80s!), I’m usually freezing, so I needed to get a scarf and a hat. Unfortunately, there wasn’t anything out there that I liked that I was willing to pay for.
So a couple of weeks ago I knit myself a hat from alpaca.
It ended up too large. So I felted it.
It ended up too small. So I’m still working on solving this problem.
However, after not finding a scarf I liked (that I was willing to pay for!) and clearly not having the time nor inclination to knit myself one!, I decided to make my own. Two layers of fuzzy, warm flannel in a shade of blue sure to compliment my eyes! ;o)


(I toldja, slow hair growth. Although if you look closely at the large photo, you can see the halo that my new sprouts are making around my Chrome Dome! Of course, on a photo that size, you can also see that my nose hairs are also growing in…)
Finally, I needed to find winter wear for Oliver. I bought him a used winter coat from Ebay that came with mittens, which left a hat and a scarf. Someone coughJoansycough scared me by telling me that it was dangerous for a toddler to wear a scarf! So after looking through a couple stores and not finding anything 1) I liked, 2) that matched, and 3) that I wanted to pay for! I decided to make him a hat.
Thankfully Joansy (after scaring the bejesus out of me) came to my aid and scanned a pattern for me for a hat that was meant to be used with fleece. Unfortunately, the dimensions were messed up in transmission (clearly it wasn’t my sewing inability!), so the hat ended up being too short and too wide. (It actually reminded me of the leather football helmets they used to wear back in The Day!)
And although the hat pattern had a strap that attached with velcro below the chin, I kept wondering how to keep his neck warm.
So today when I was attempting to redraft the hat pattern, I made the flaps super long so they could be wrapped under Oliver’s chin and behind his neck. A bit of velcro held it in place.

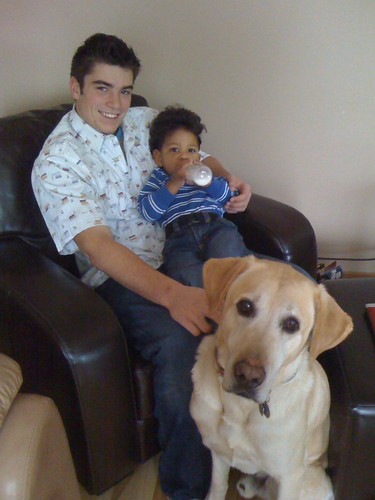
Unfortunately it was still a little odd-looking. After realizing it looked like he had ears, I decided to go with it and embroidered ear shapes onto the corners and some monster eyes and a mouth on the front part. And voila, a Monster Hat for My Monster!


No he’s not still trying to blow out candles in this photo; he’s trying to look scary.
So there ya have it, in encyclopedic length, the story of my crafting the last week or so. And actually, I haven’t even gotten into the holiday gifts I’m making! That will have to be Volume II.
(If there is interest, I can do tutes for any/all of these projects, but clearly there isn’t space in this post! So leave a comment if you’re interested and which project you’re interested in.)