
A Square Layout Gallery shows images in equal square shapes with clean alignment. It crops images evenly without distortion. This layout makes galleries look neat, modern, and balanced. Let’s explore how to create a Square Layout Gallery on the WordPress editor in the following write-up.
Adding the Square Layout Gallery #
Go to your WordPress. Click the plus (+) icon. Type Galleryberg in the search box. Once it appears, click and add it to the editor.

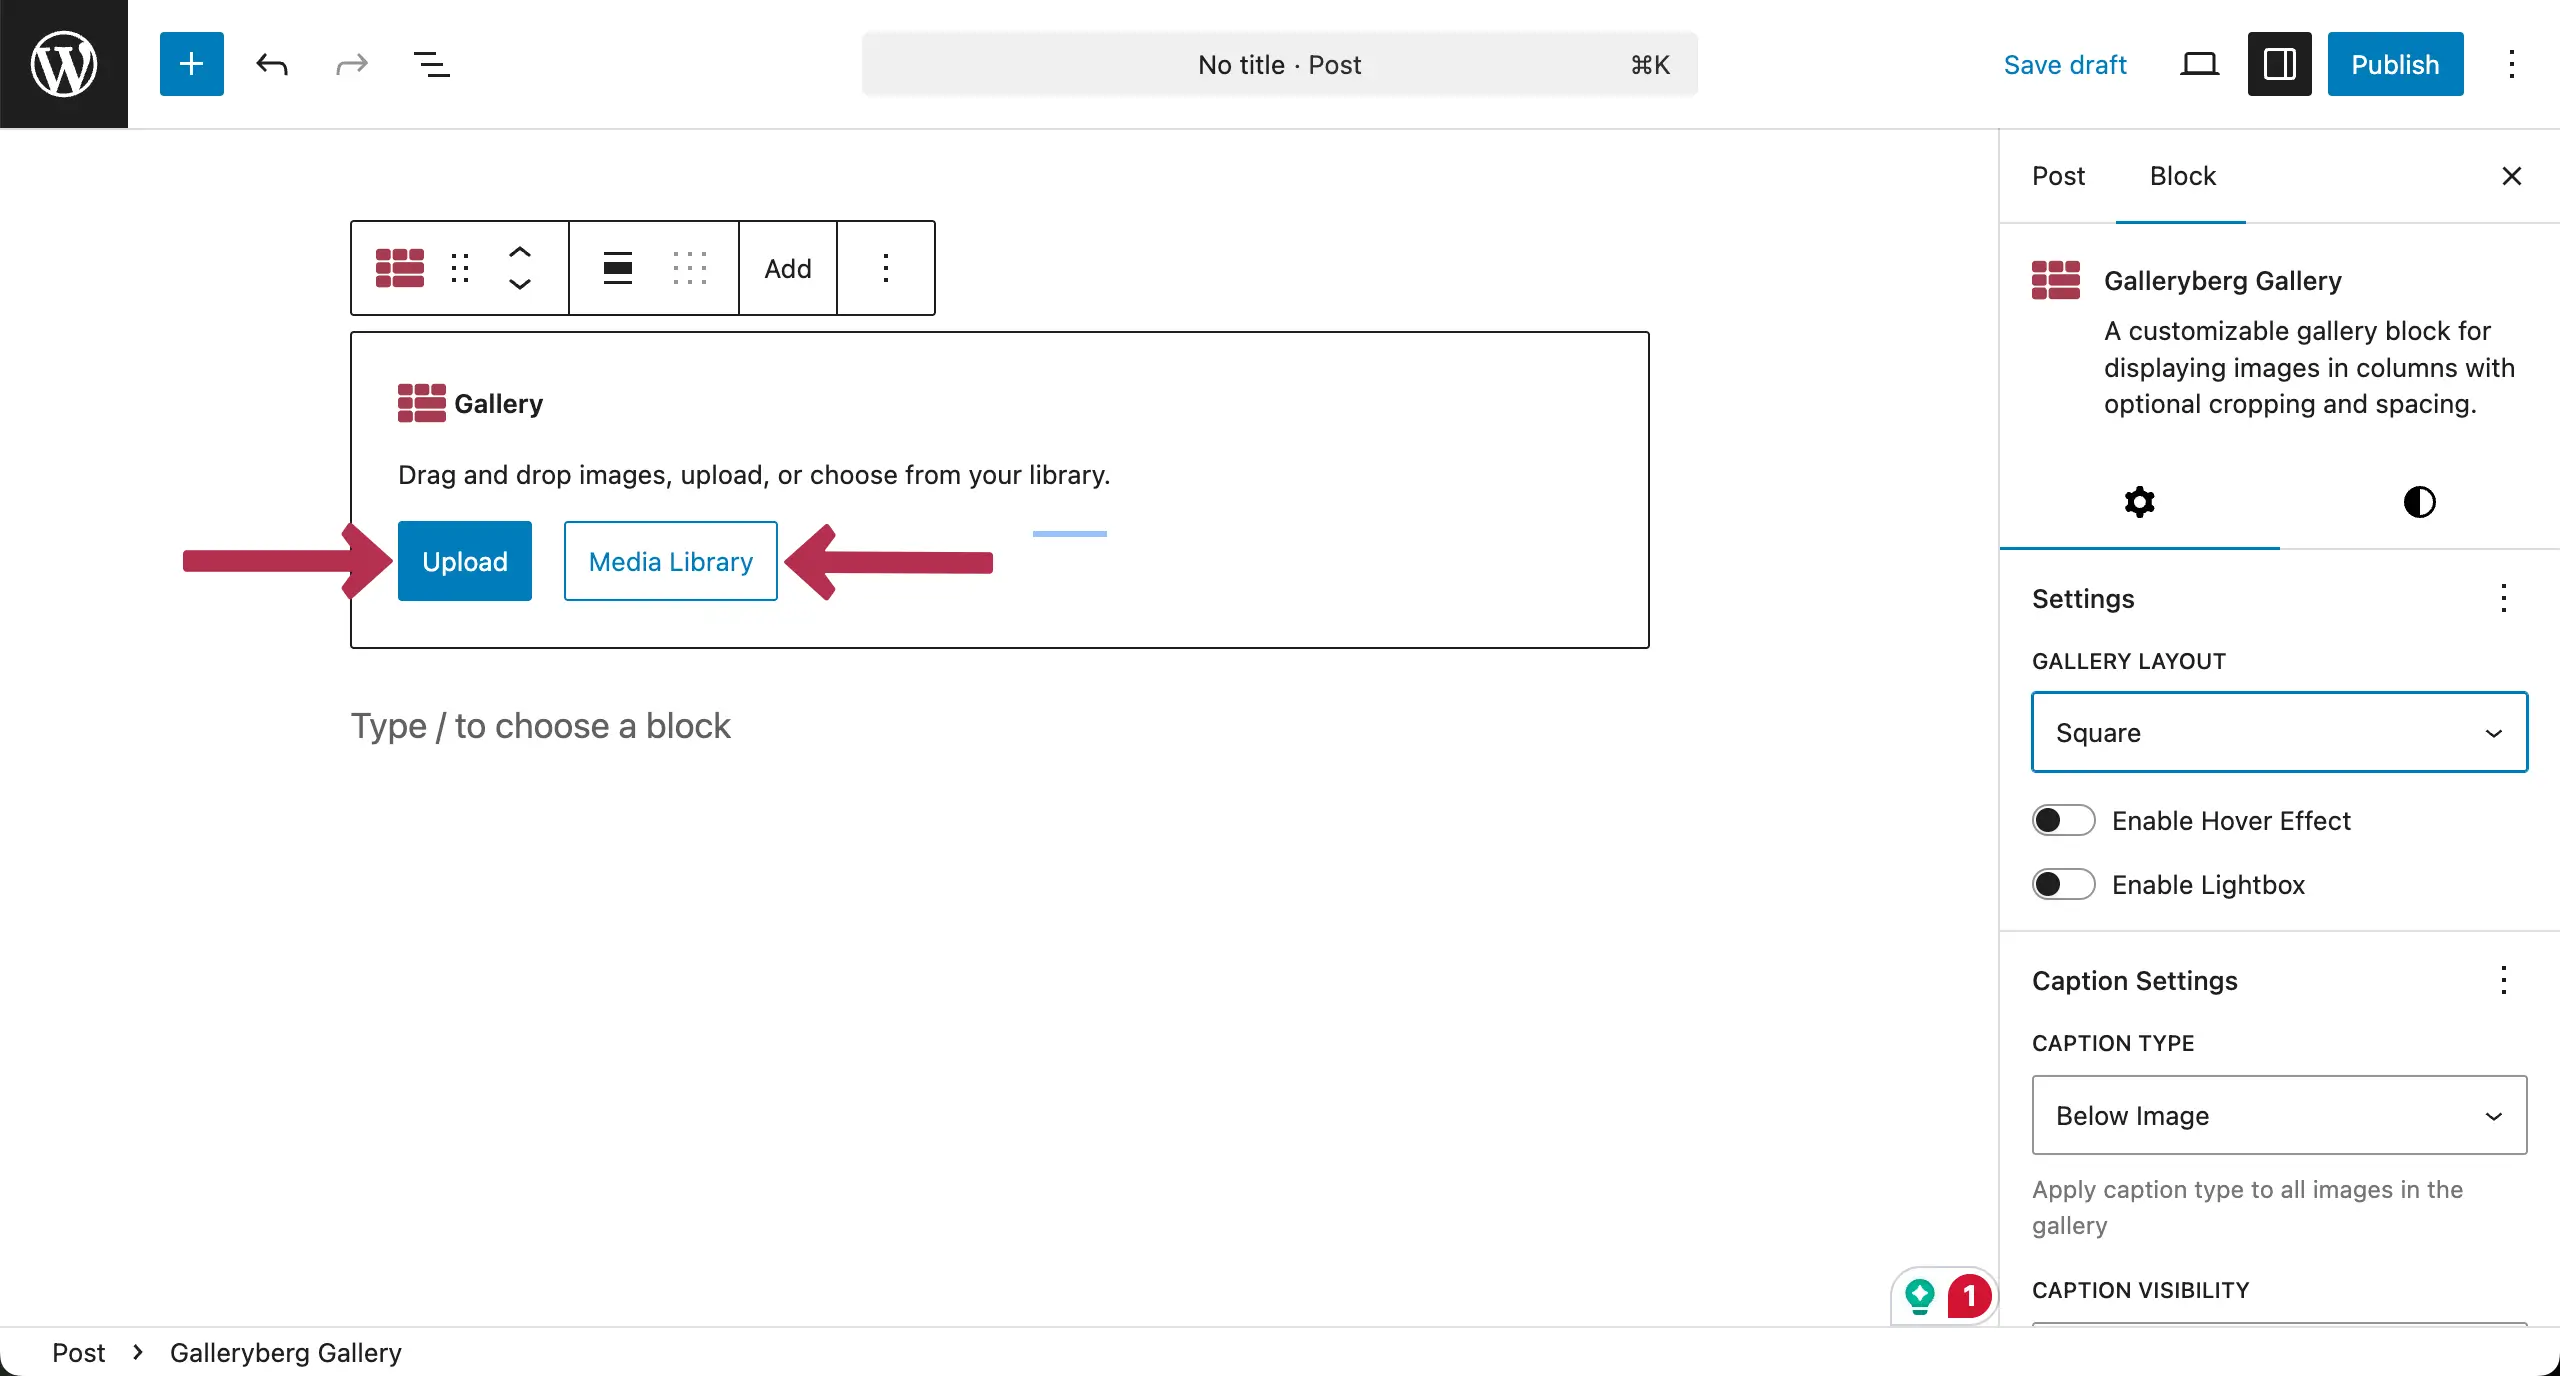
Next, go to the settings tab on the right sidebar. Open the dropdown list under Gallery Layout and choose Square.

Now, select a suitable option whether to upload images from your local drive or from your media library.
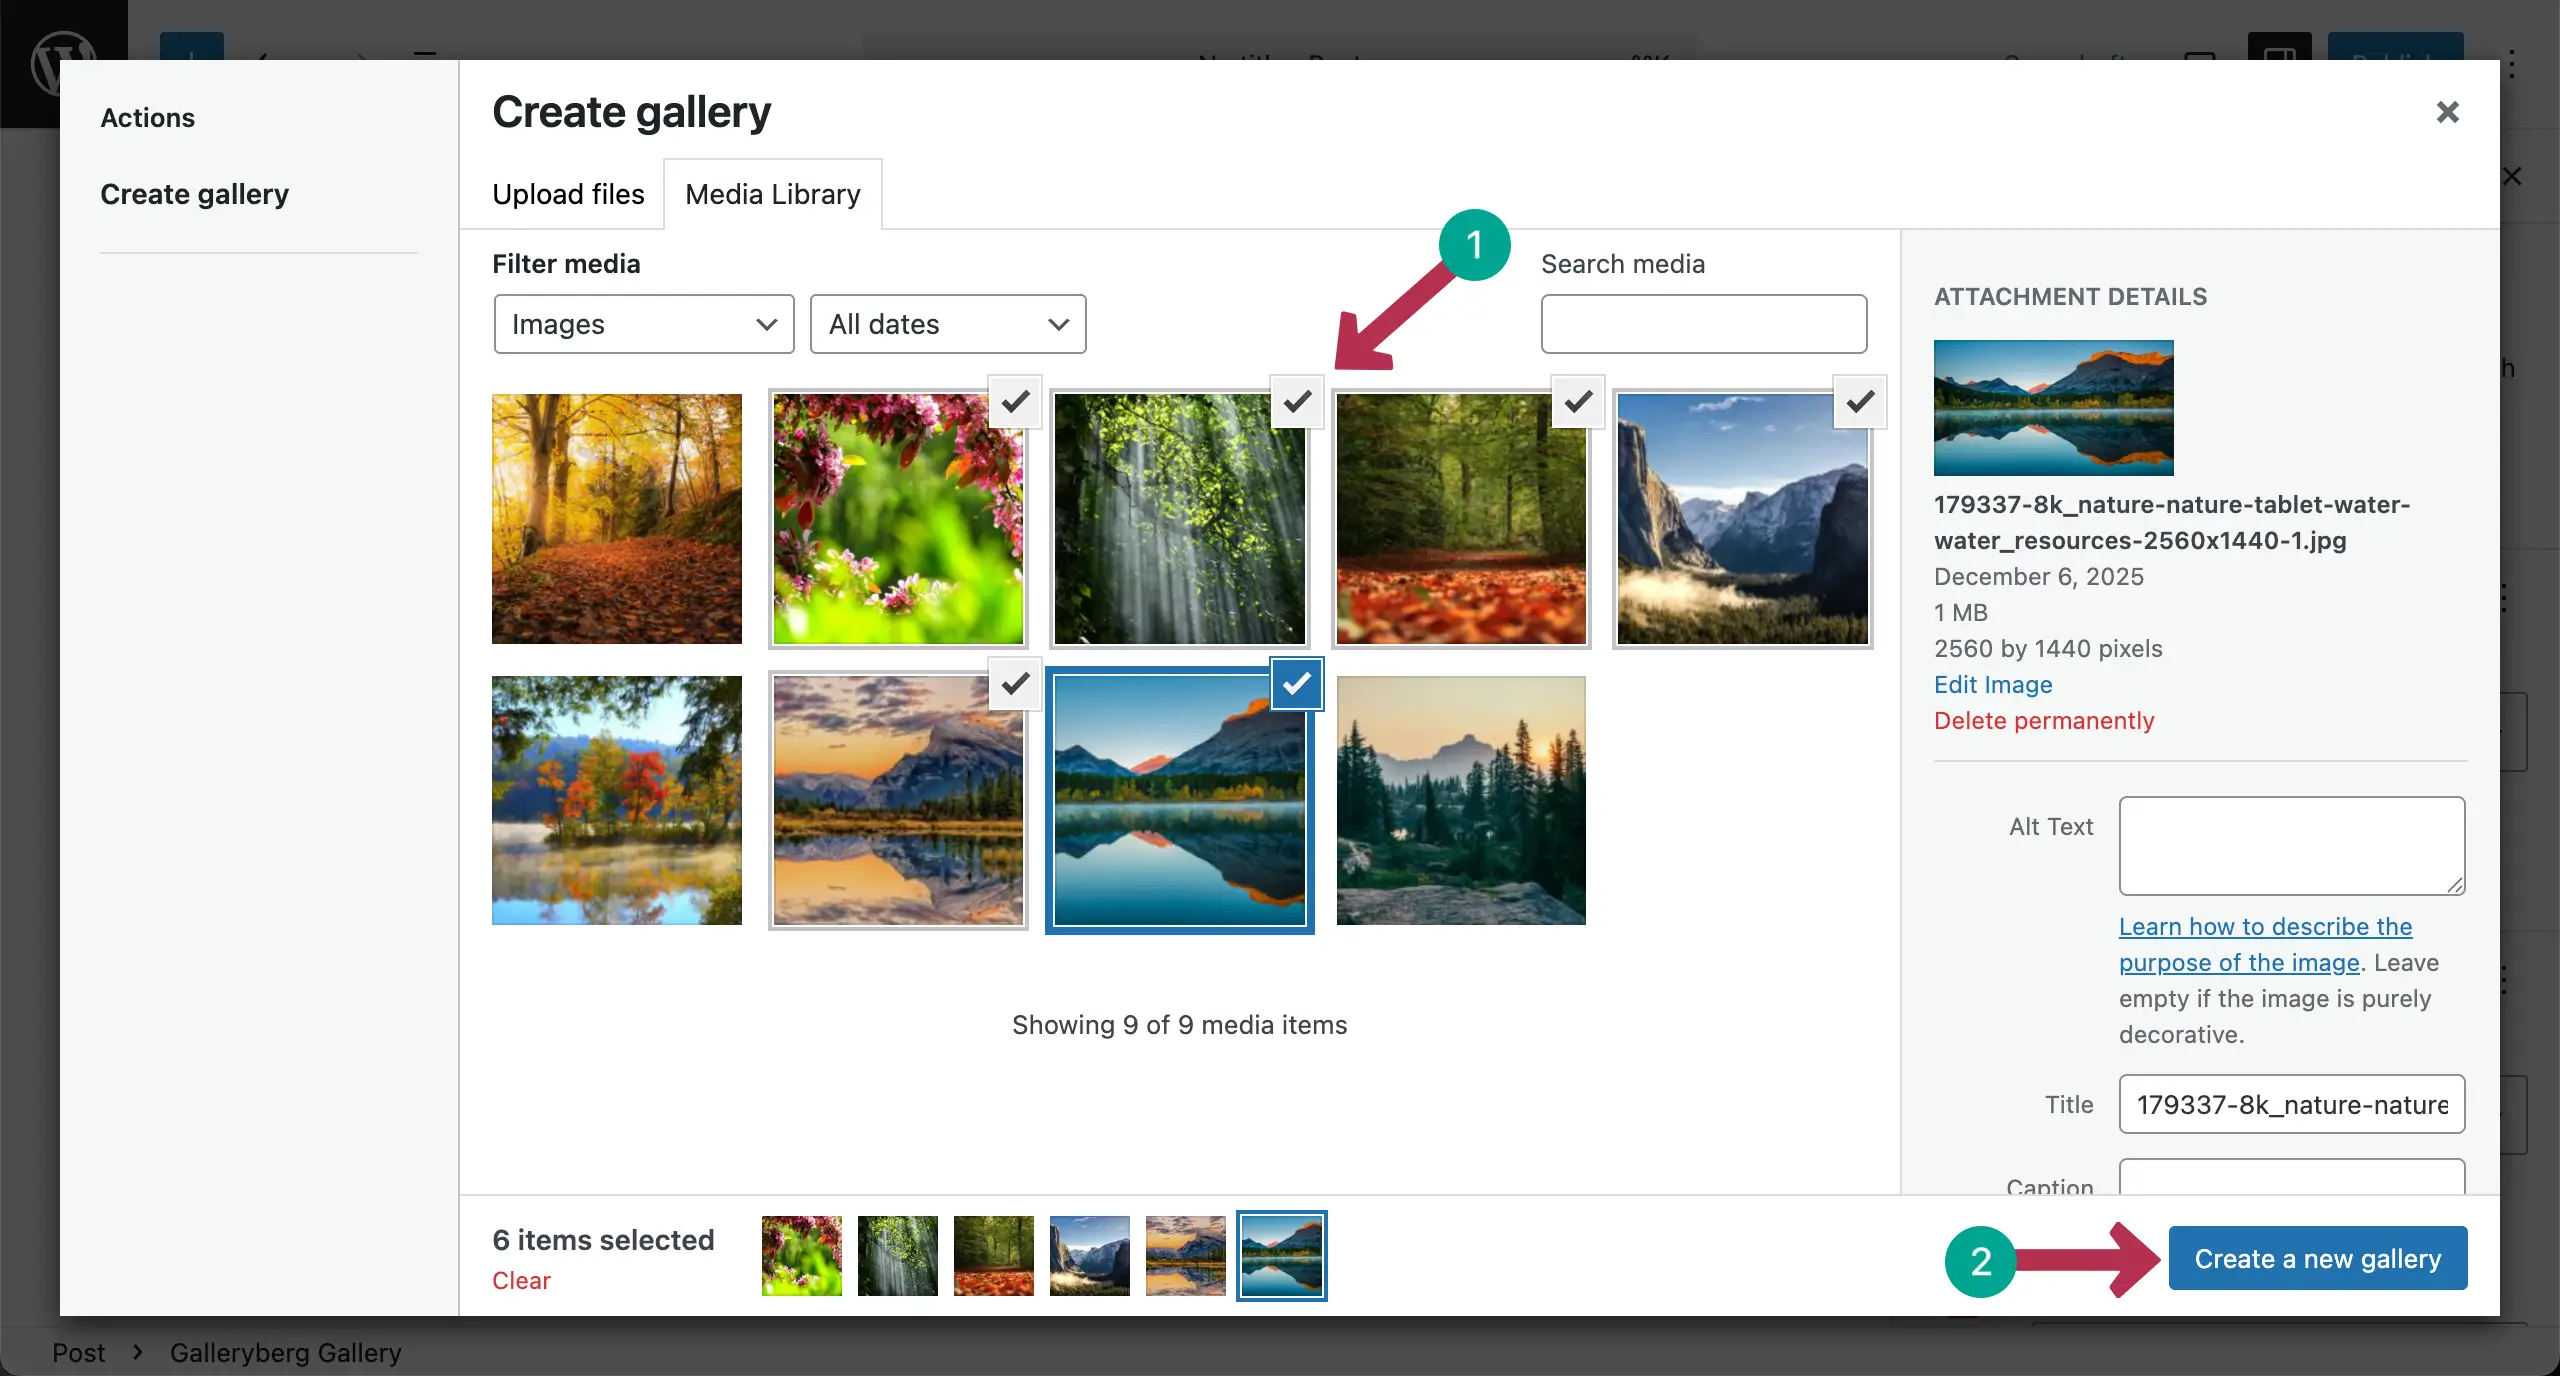
After uploading, choose the images you like. Then, hit the Create a new gallery button.
Add captions to the images one by one if needed. Click the Insert gallery button.

The Square Layout Gallery has been created and added to the editor right away. You can see that all images are appearing in the square layout.

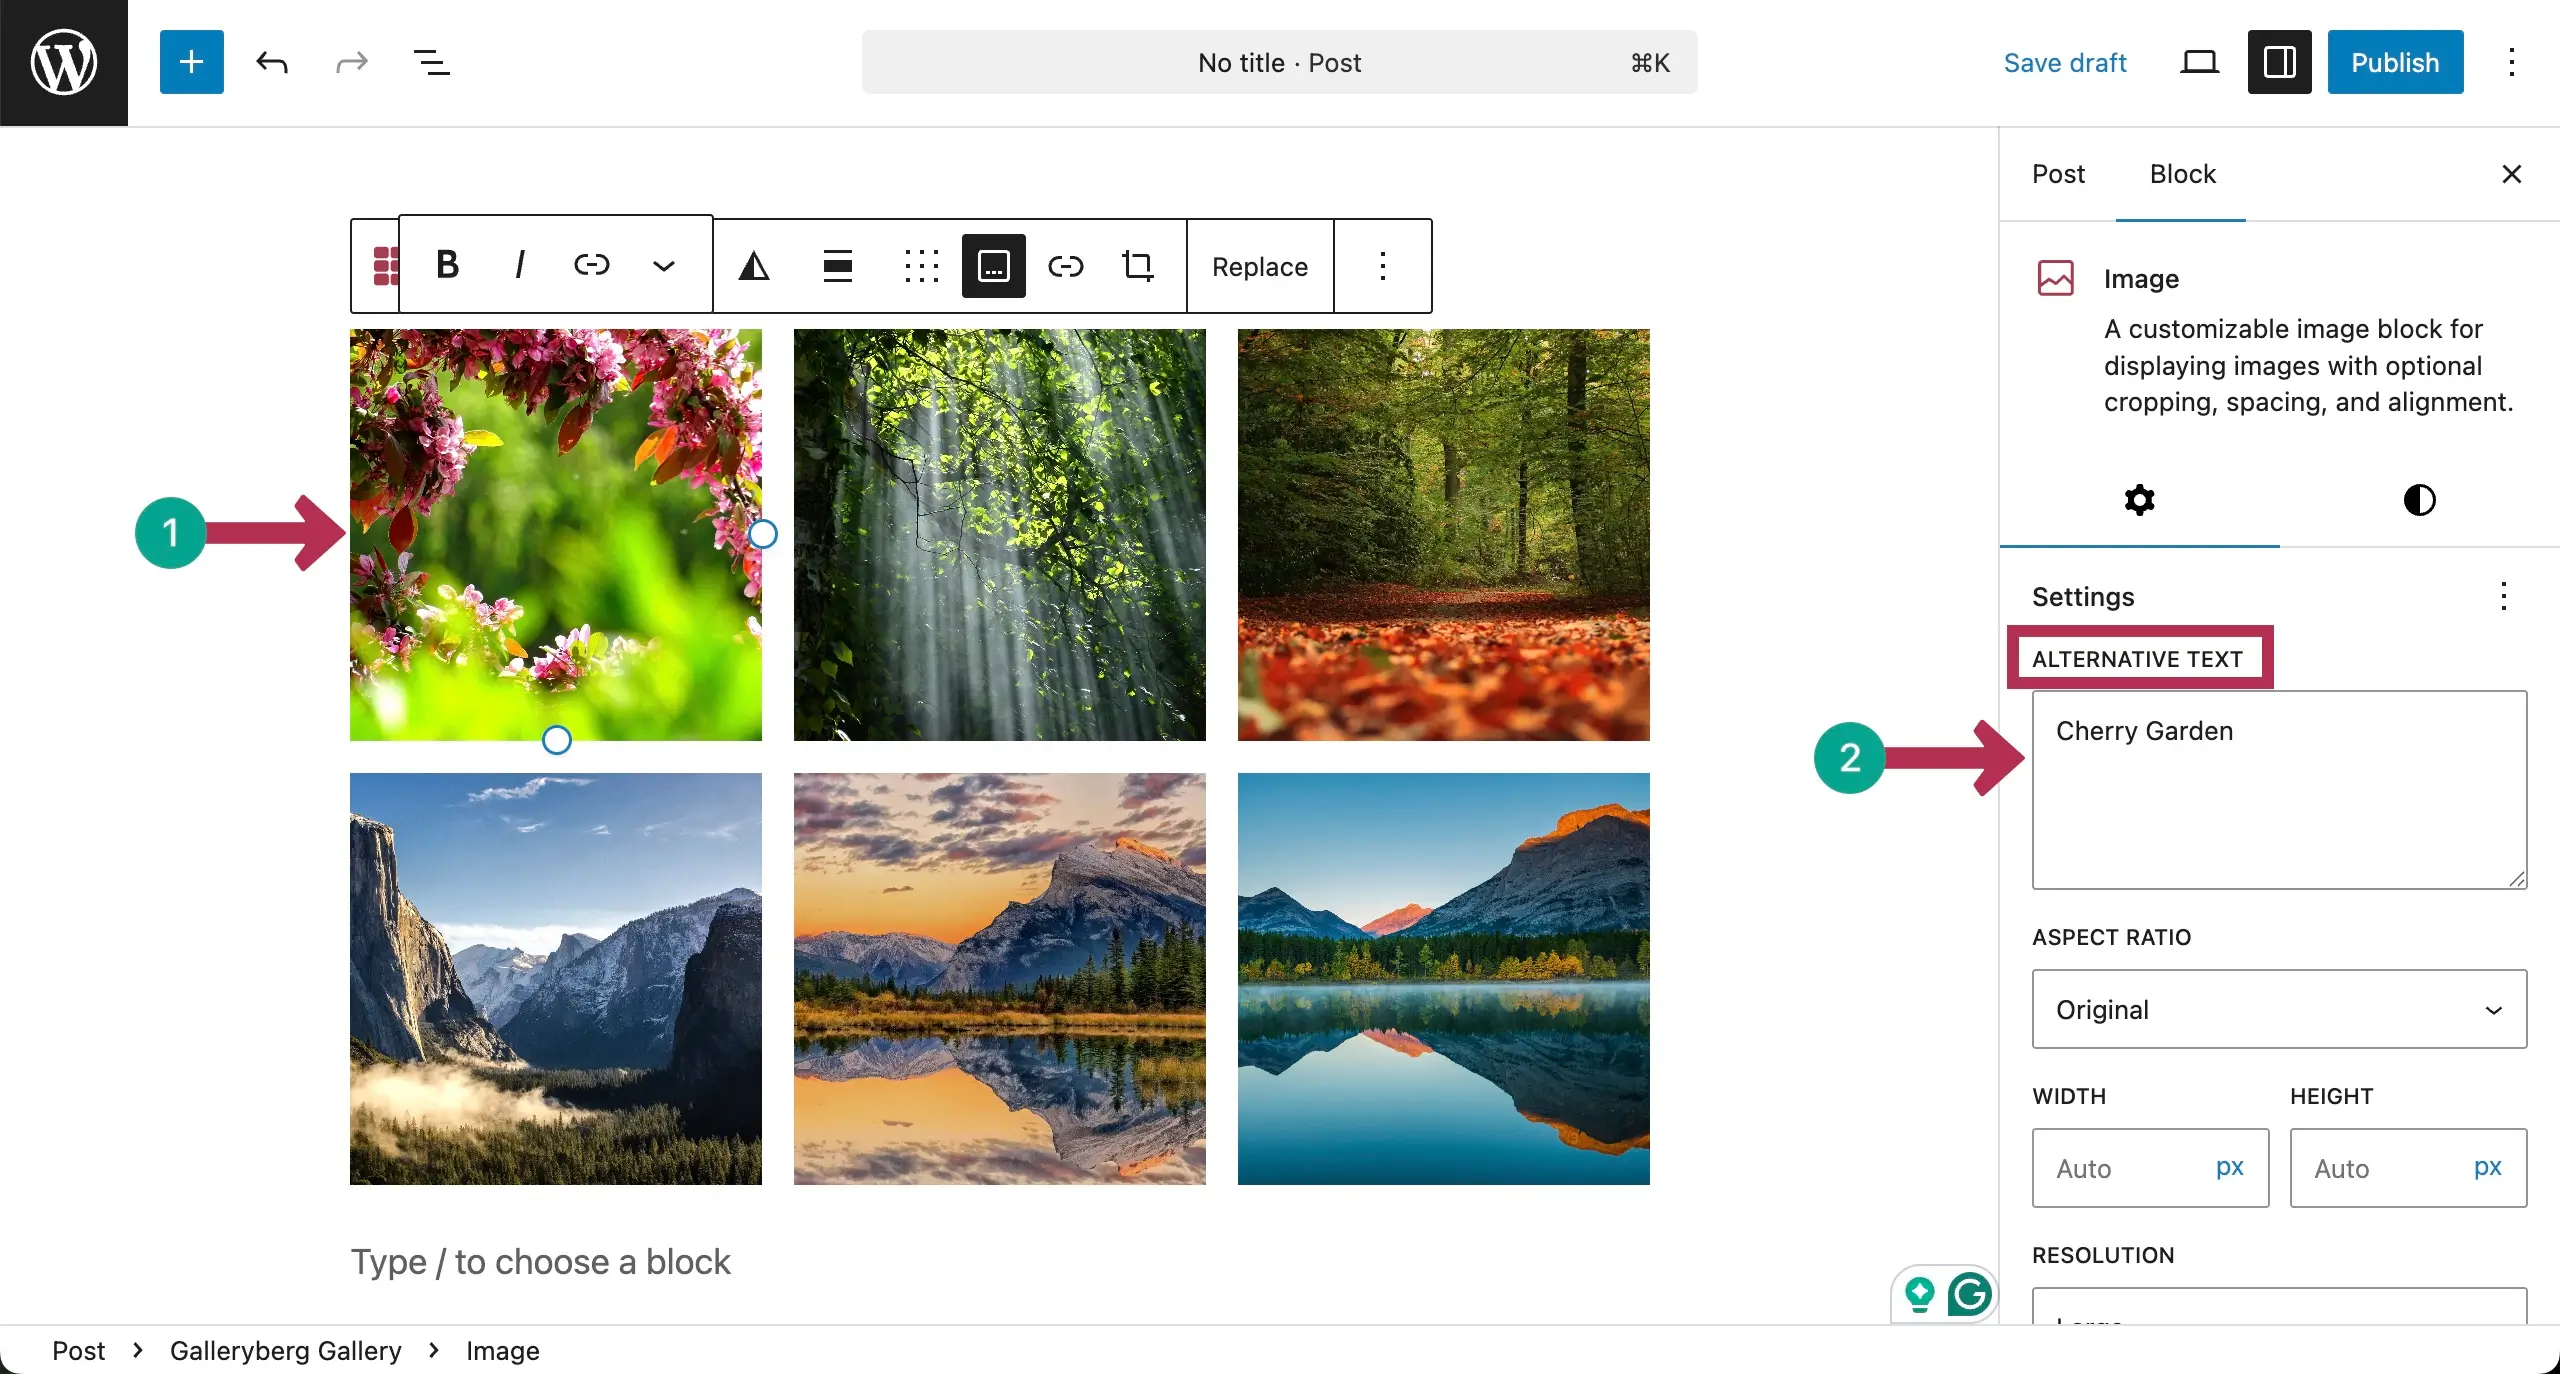
Now, you can add alternative texts to the images one by one by selecting them individually.
Configuring General Settings #
To configure settings, let’s first select the entire gallery by clicking the Galleryberg icon on the toolbar.
After that, come to the settings tab. You’ll find lots of options there. Using the column, you can change the number of columns.
You can also enable/disable the Hover Effect and Lightbox.
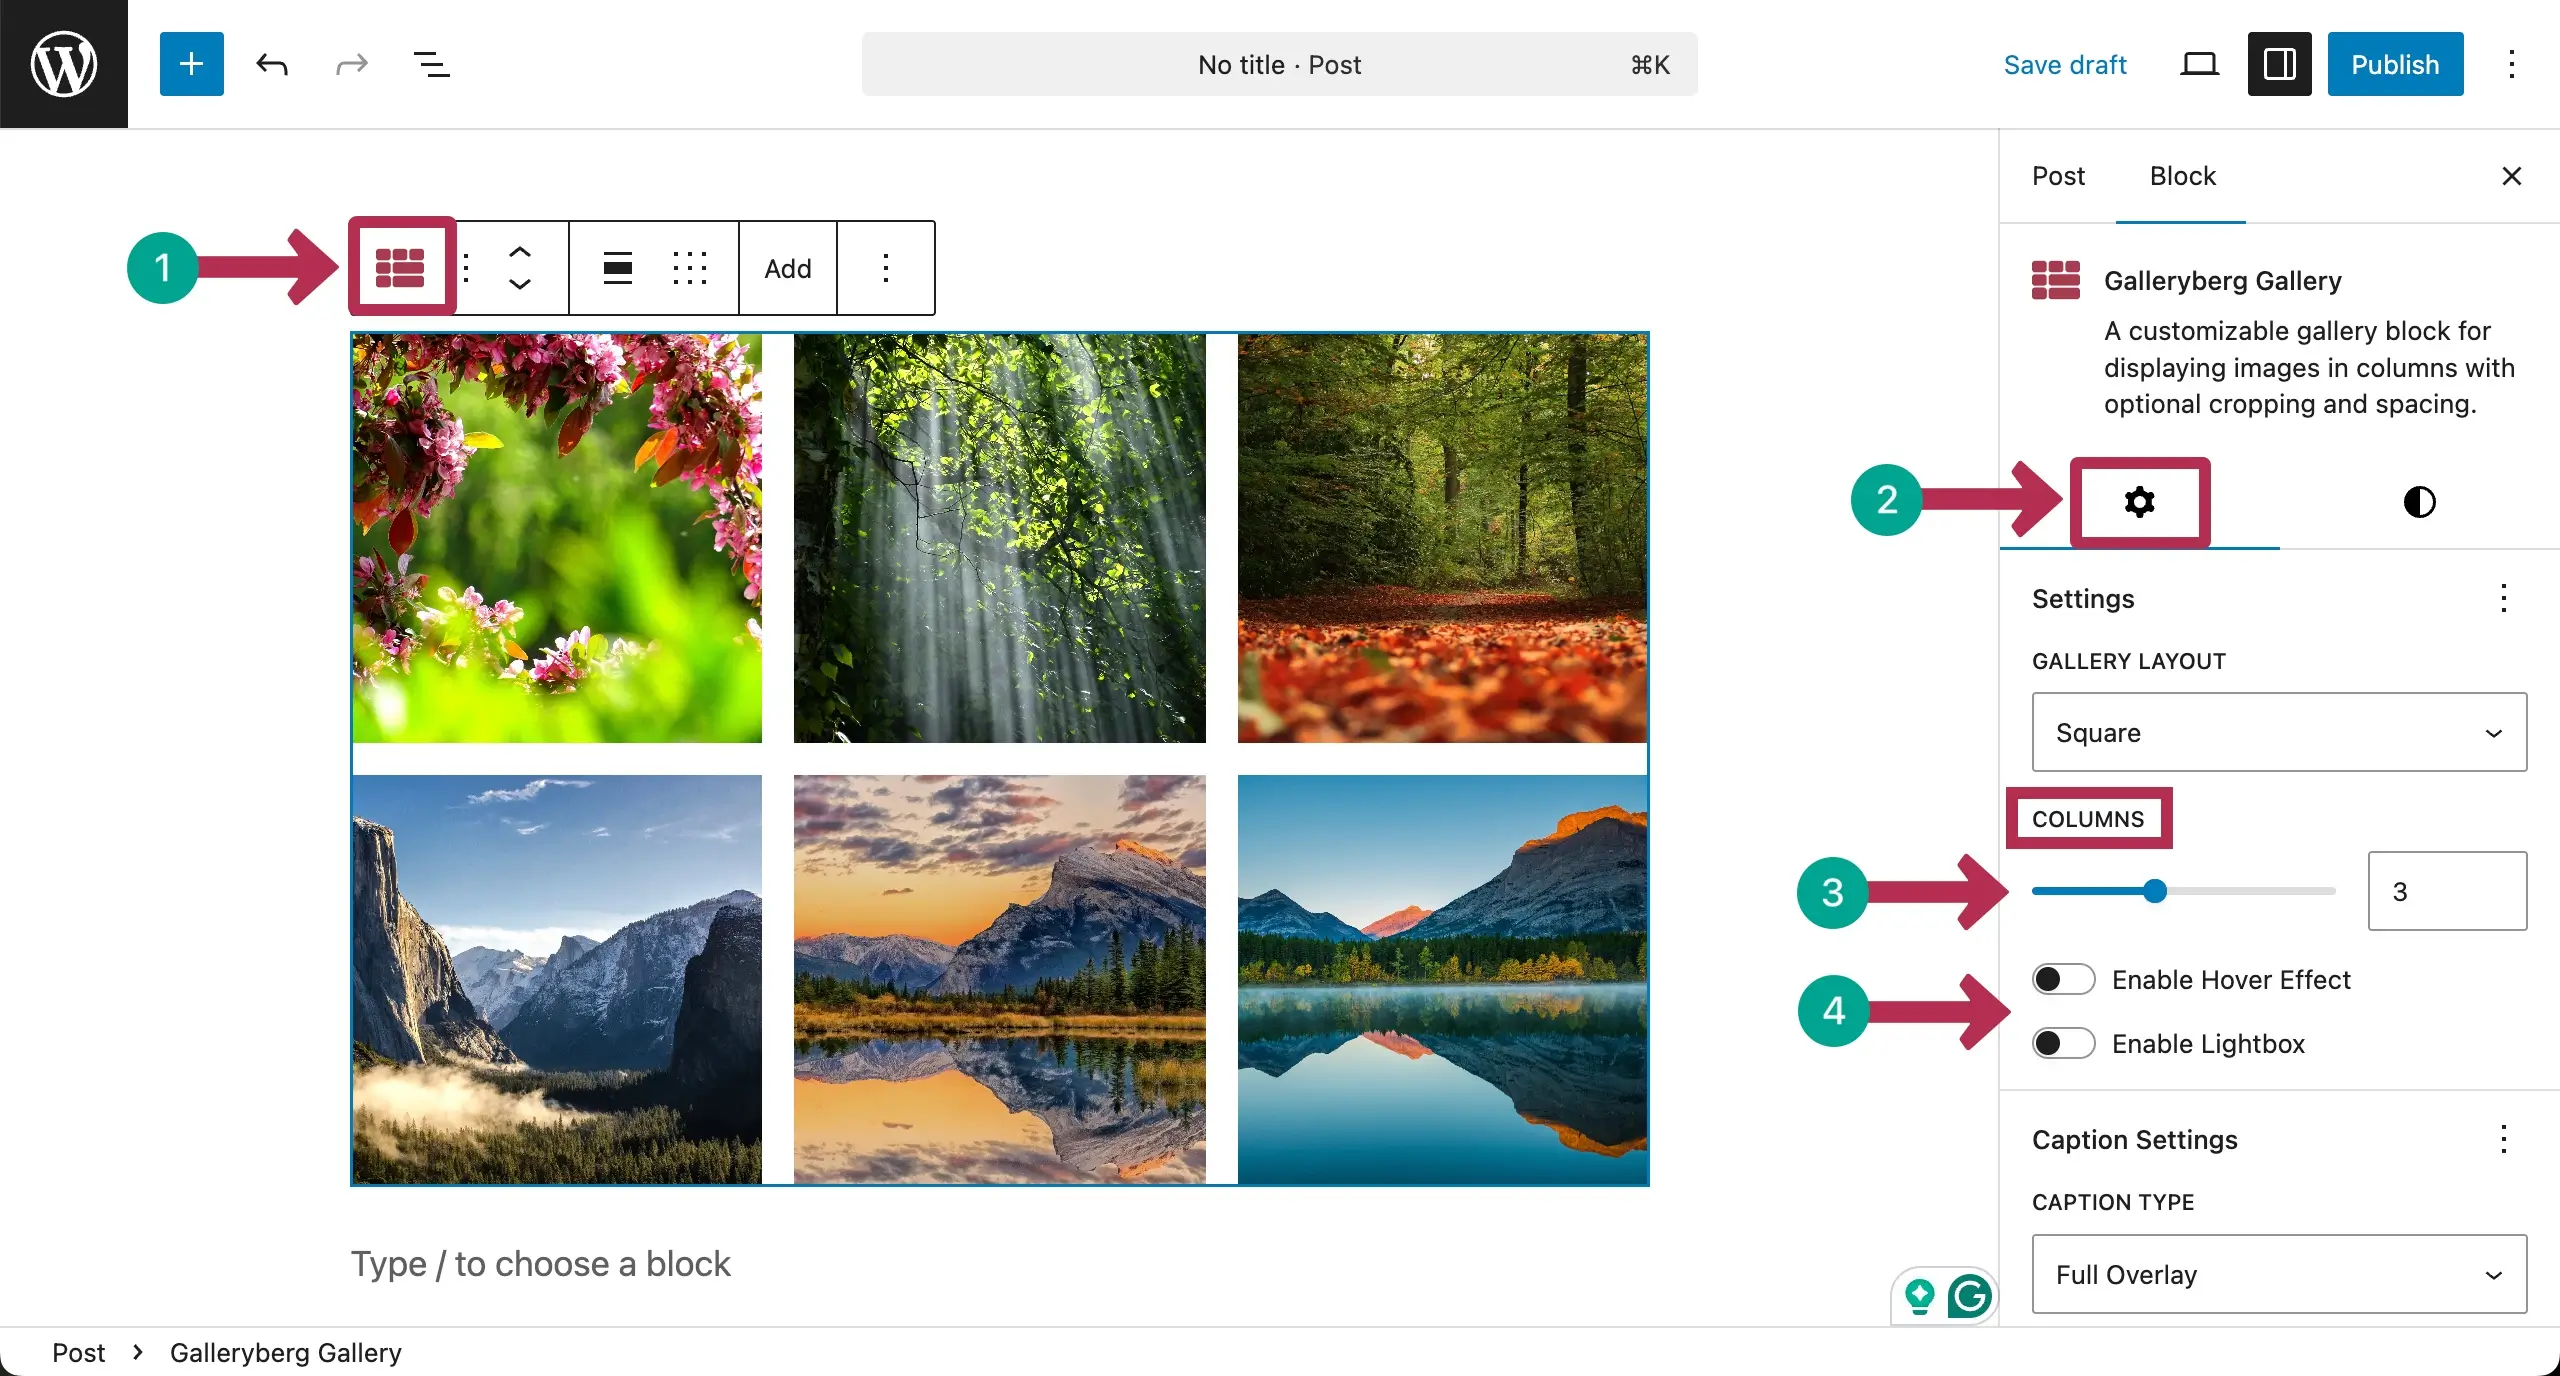
See that we have changed the number of columns of the gallery. Also, when Hover Effect and Lightbox options are enabled, some more options appear. Hope you can explore and configure them yourself.
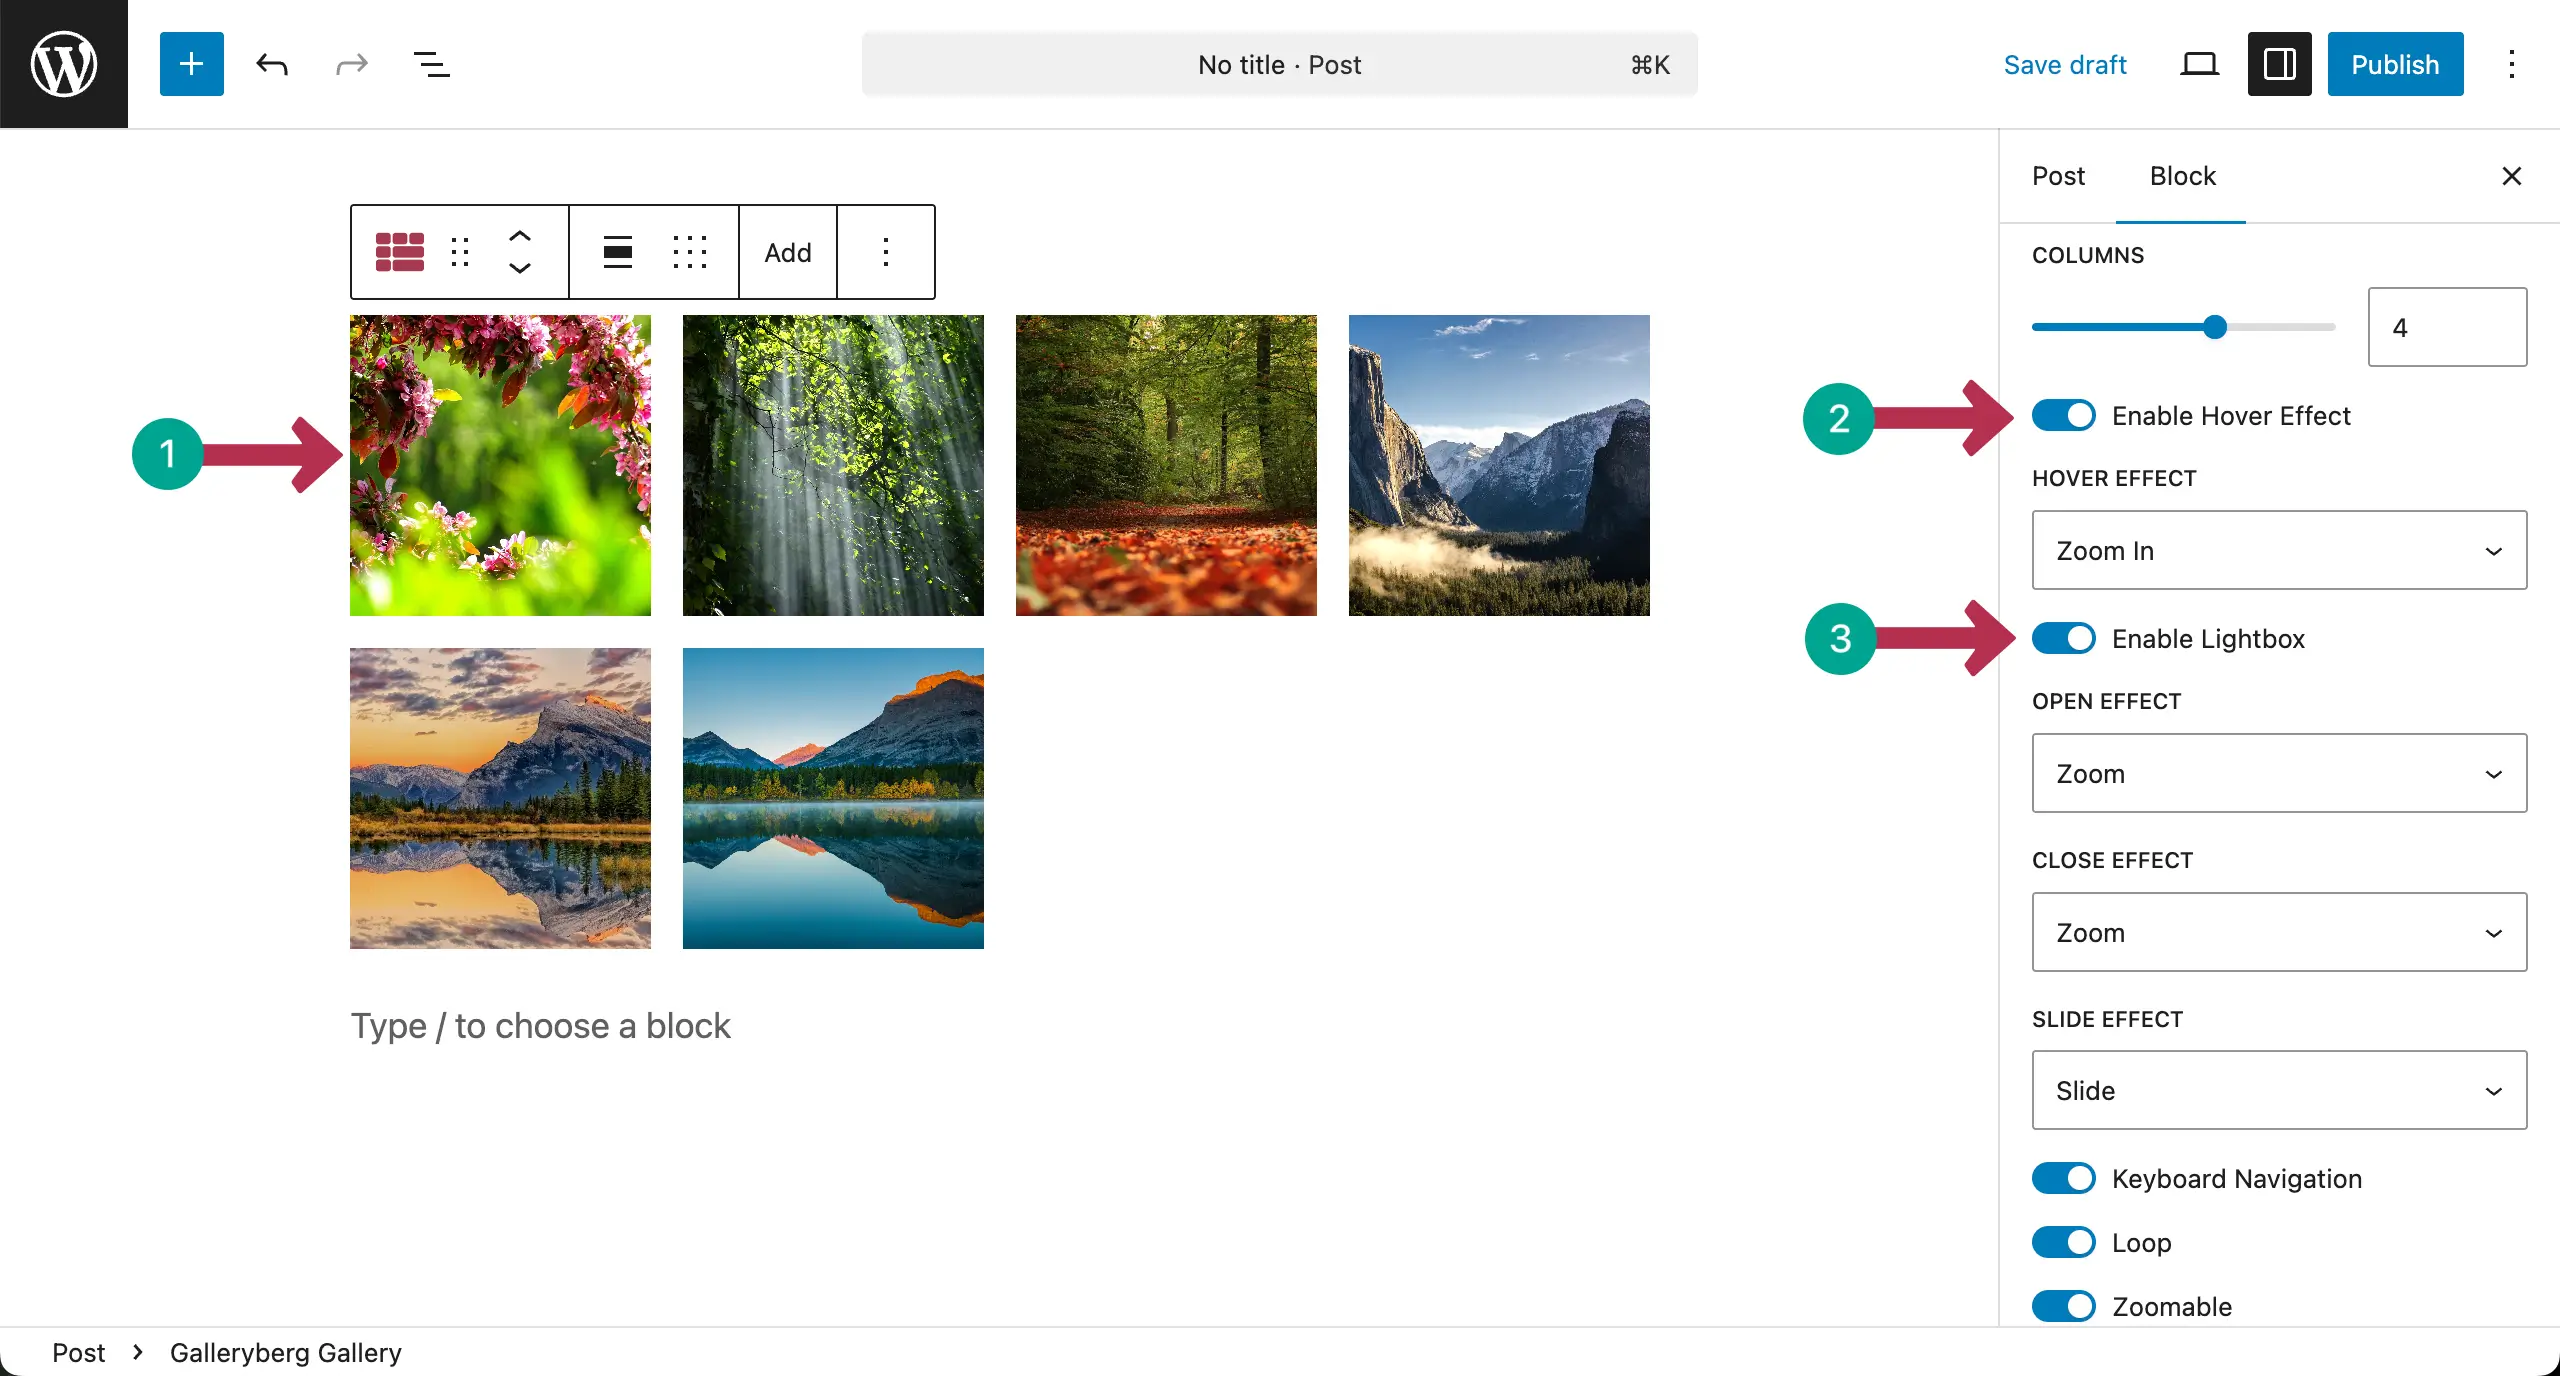
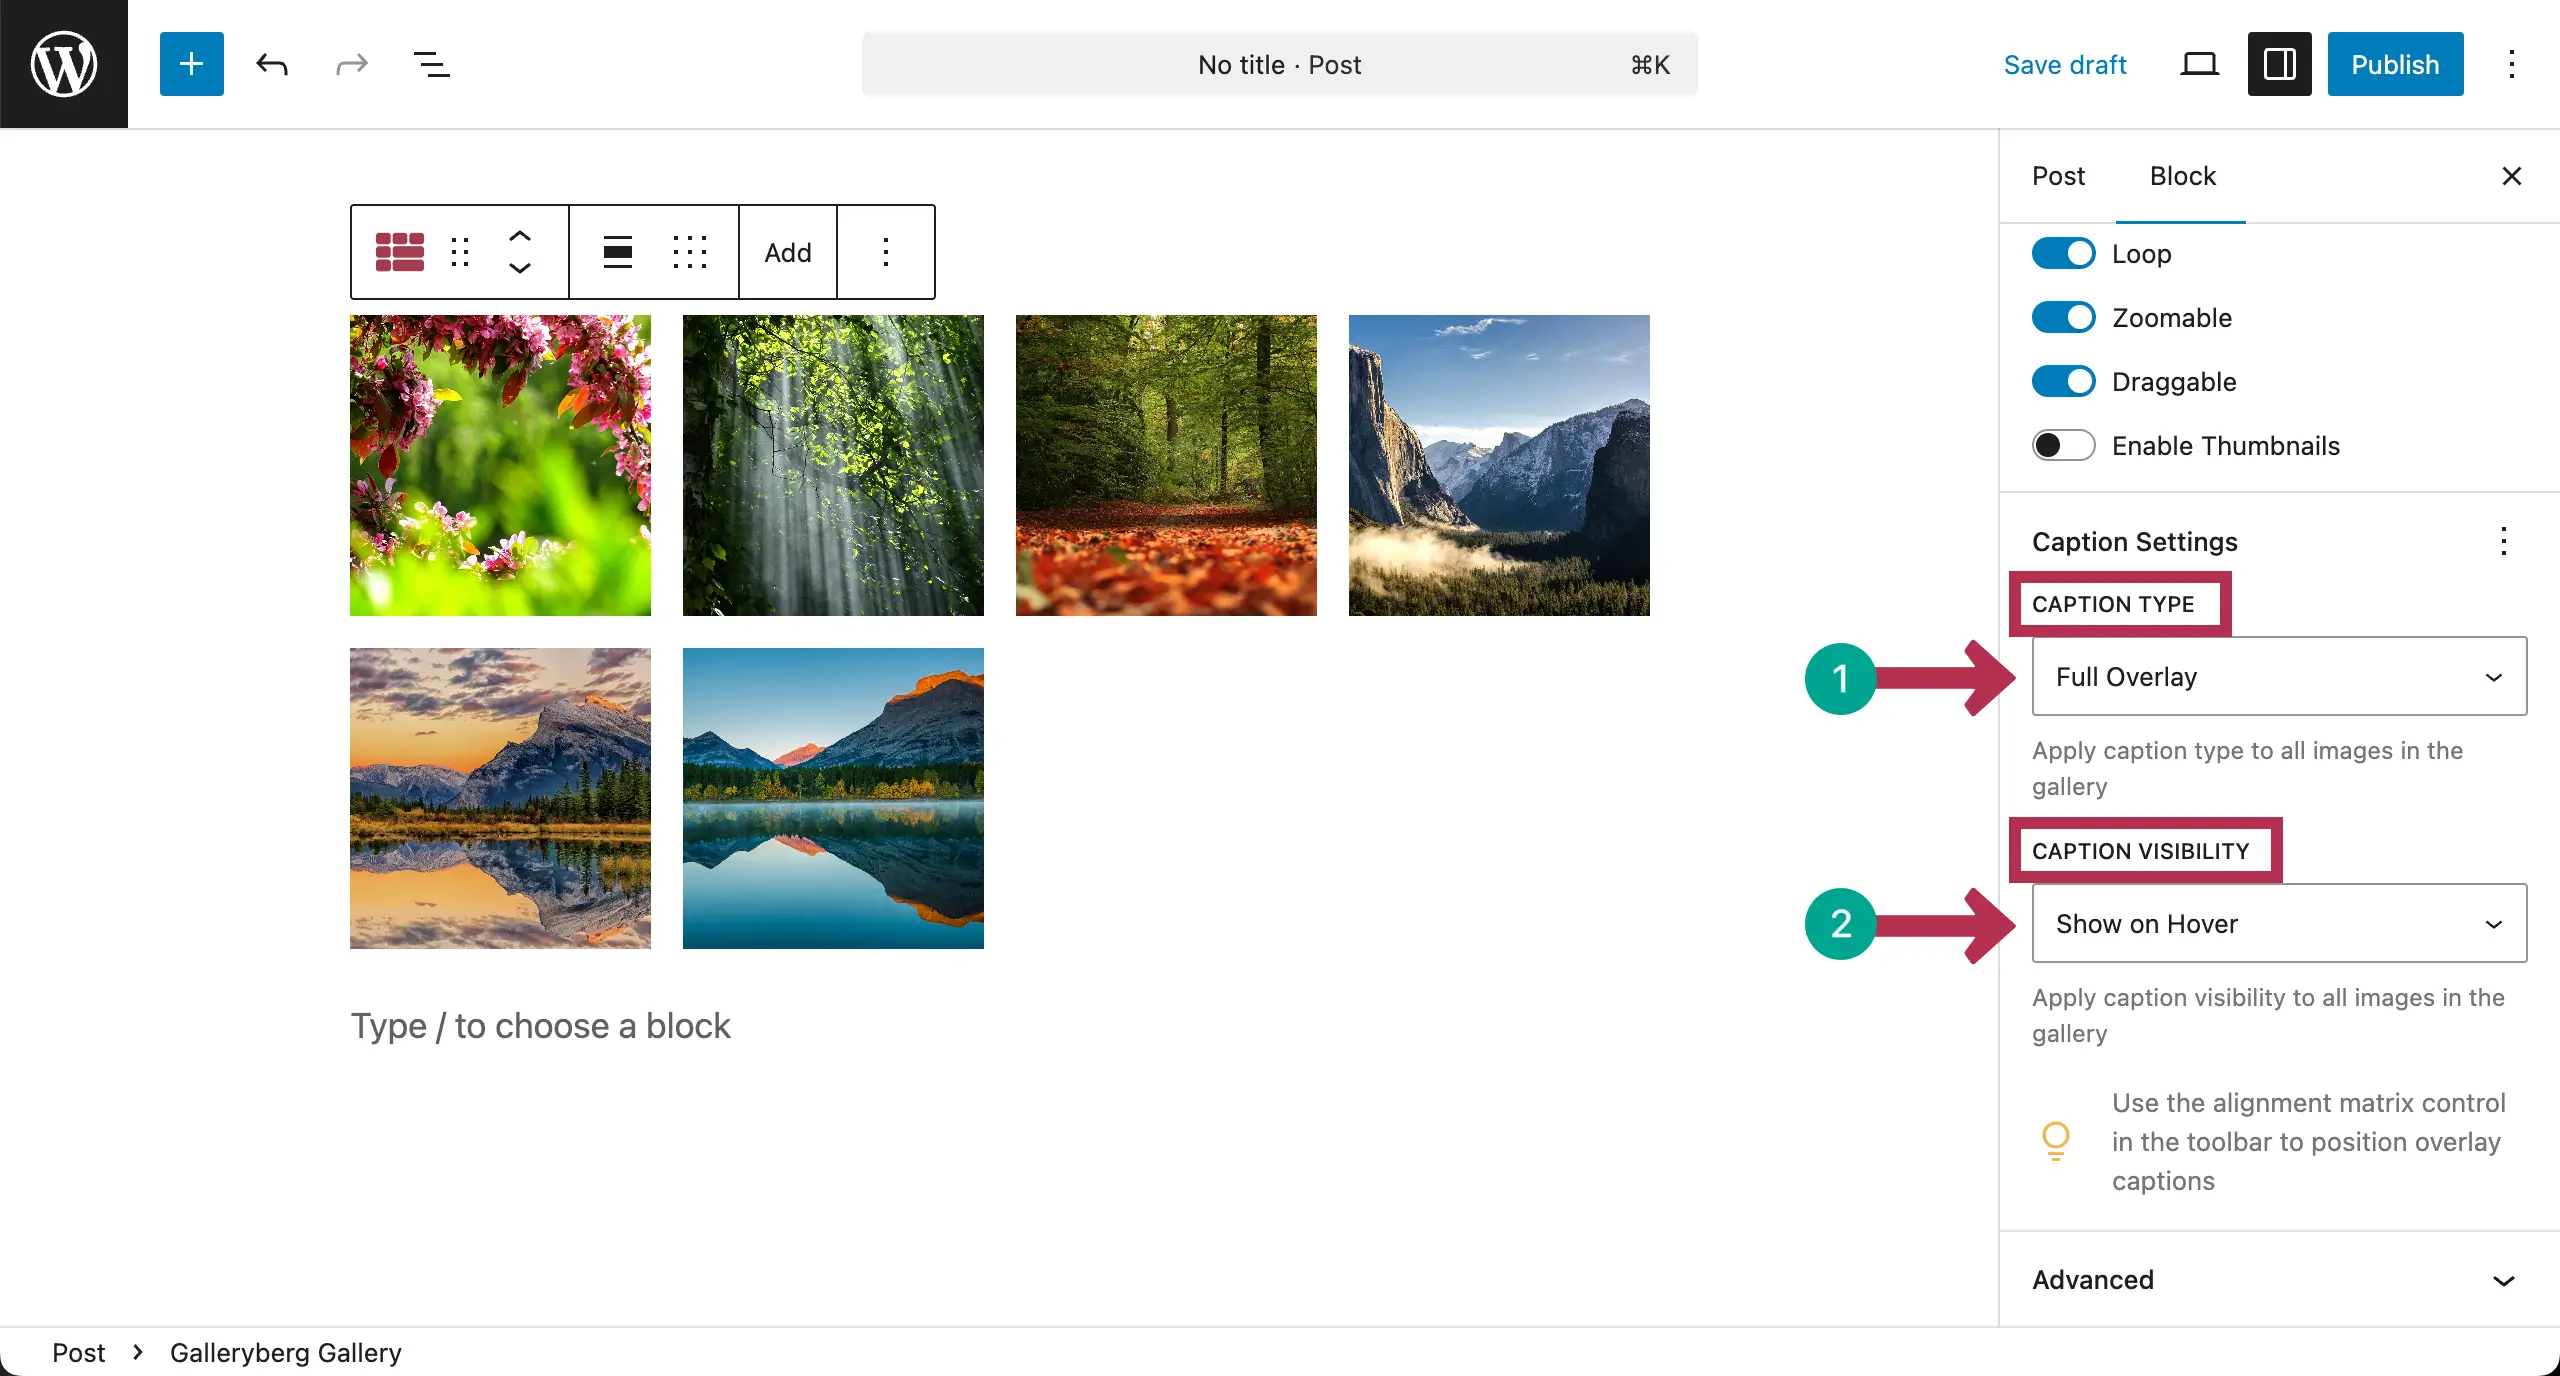
Scrolling the bar, come to Caption Type and Caption Visibility. Each one has three options.
Caption Type lets you decide to display any of three places: Below Image, Full Overlay, and Bar Overlay.
Caption Visibility allows you to set what will make the caption visible. They are Always Visible, Show on Hover, and Hide on Hover.
Customization #
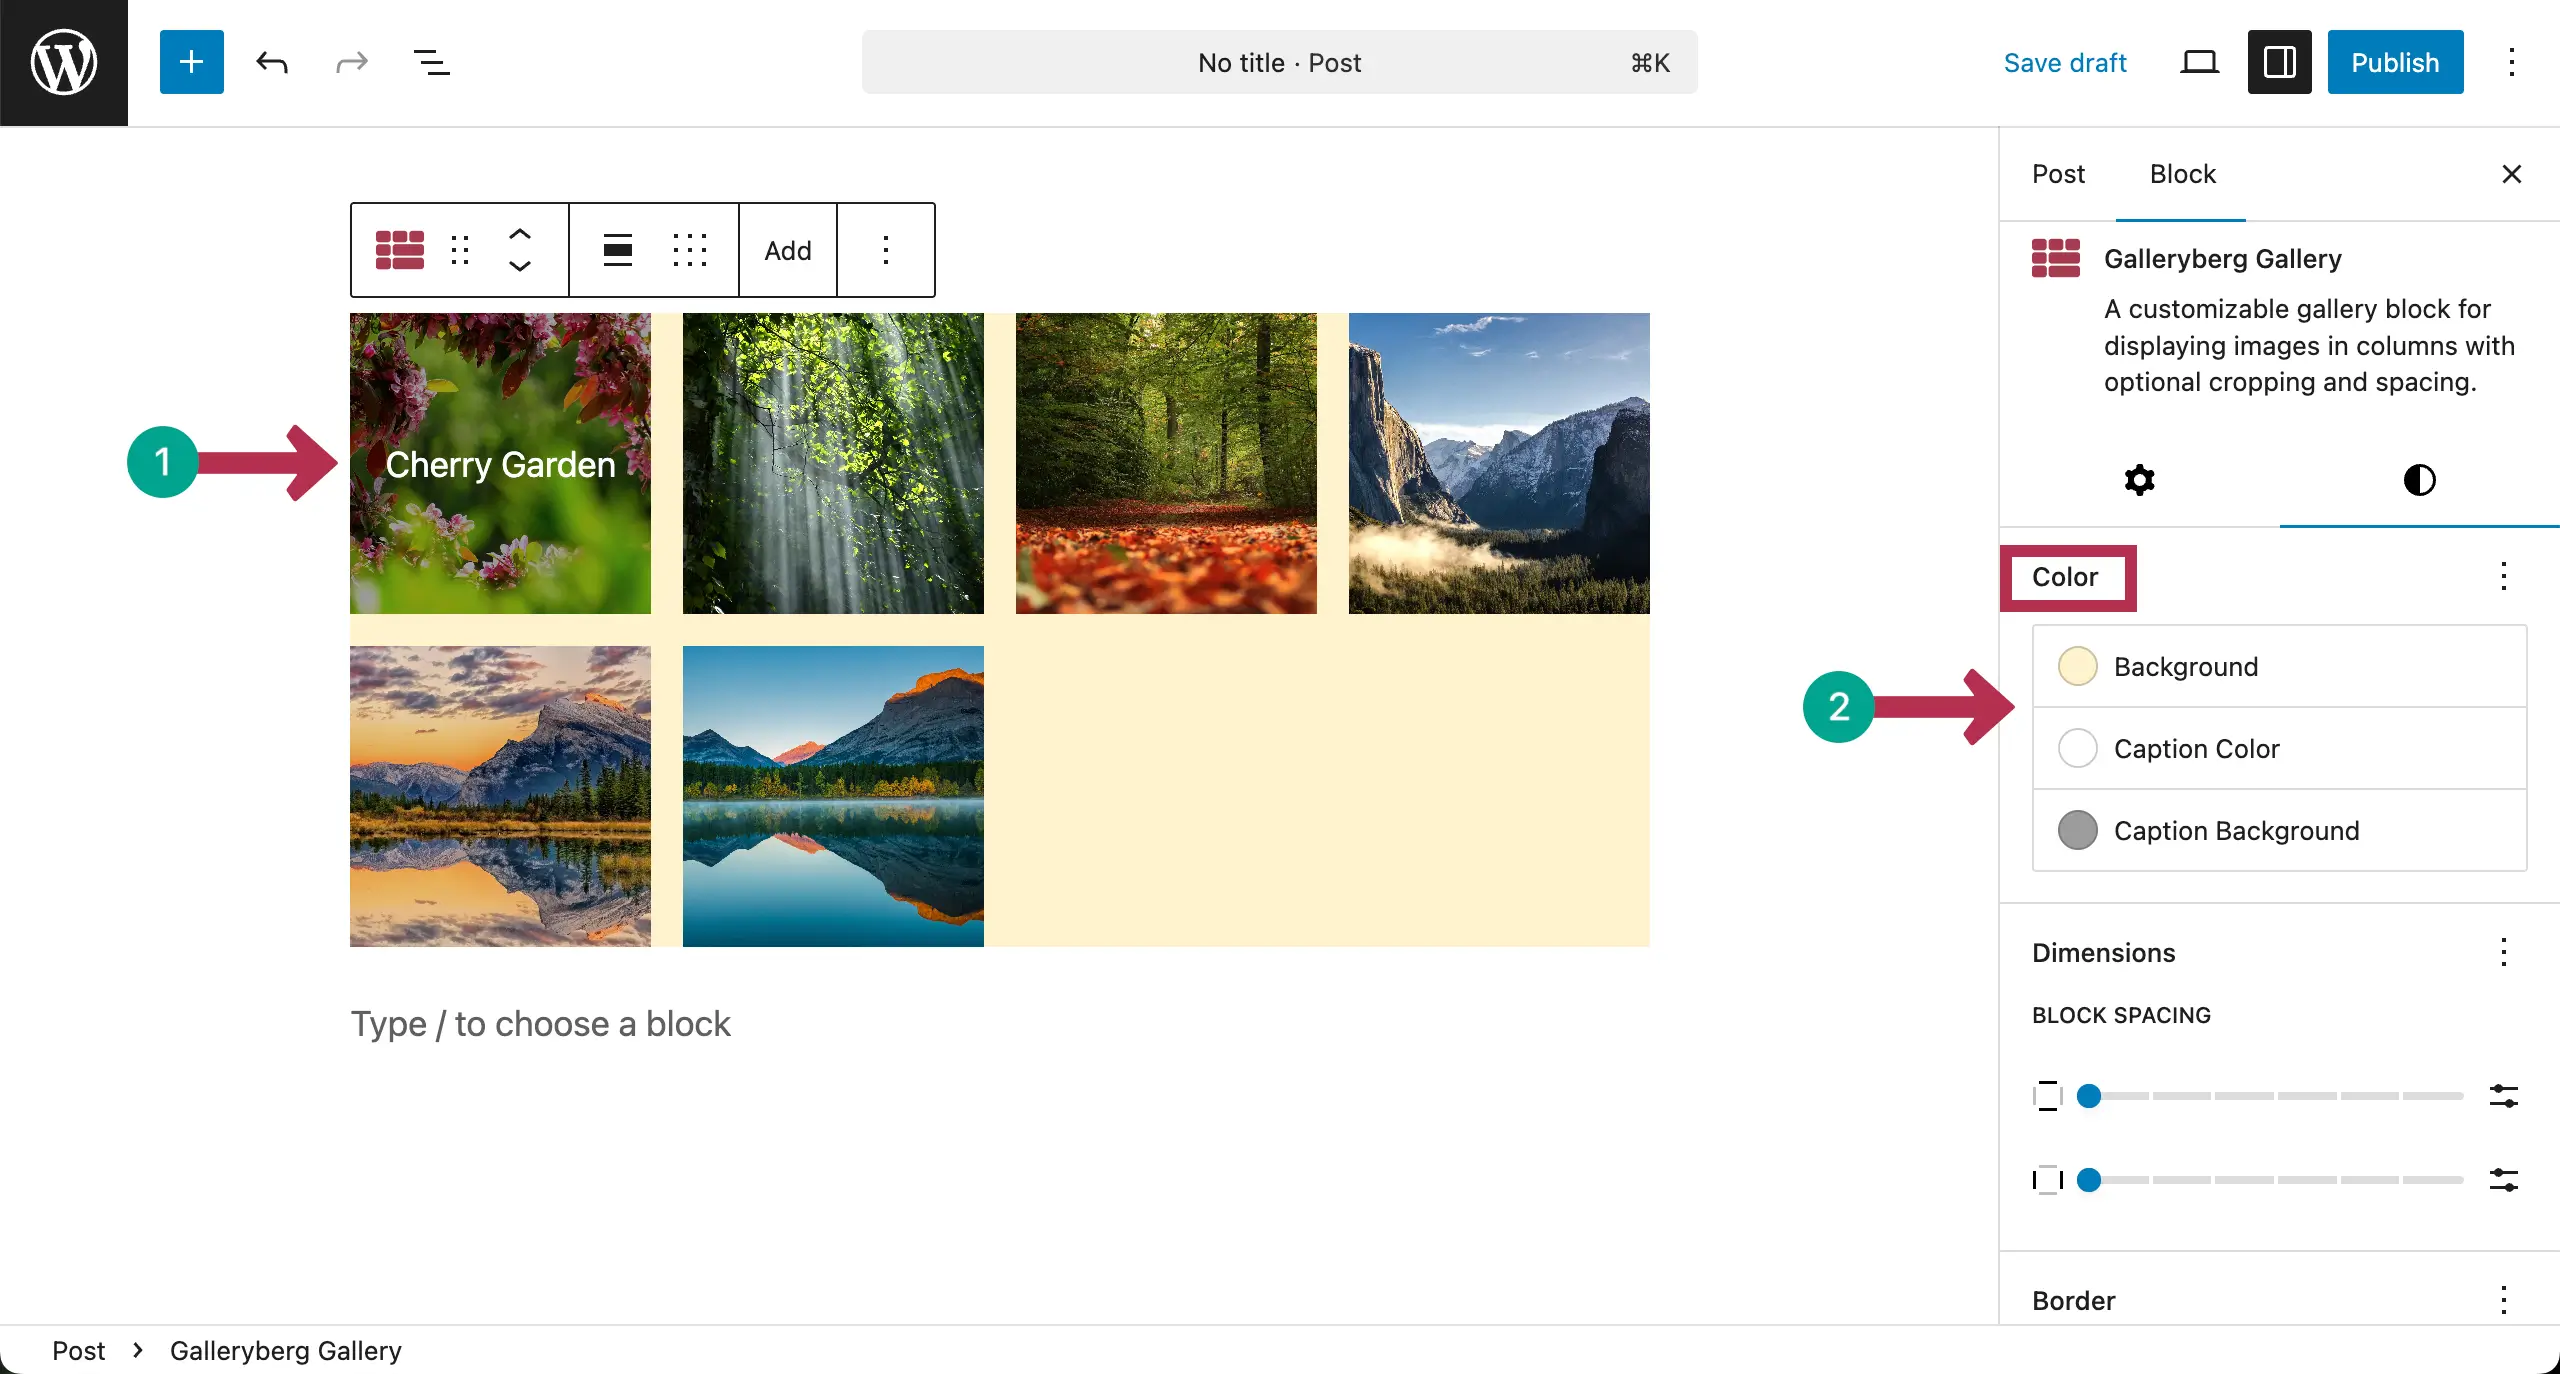
Go to the Styles tab on the right sidebar. Let’s first come to the Color section. You can set three types of color: Background, Caption Color, and Caption Background.
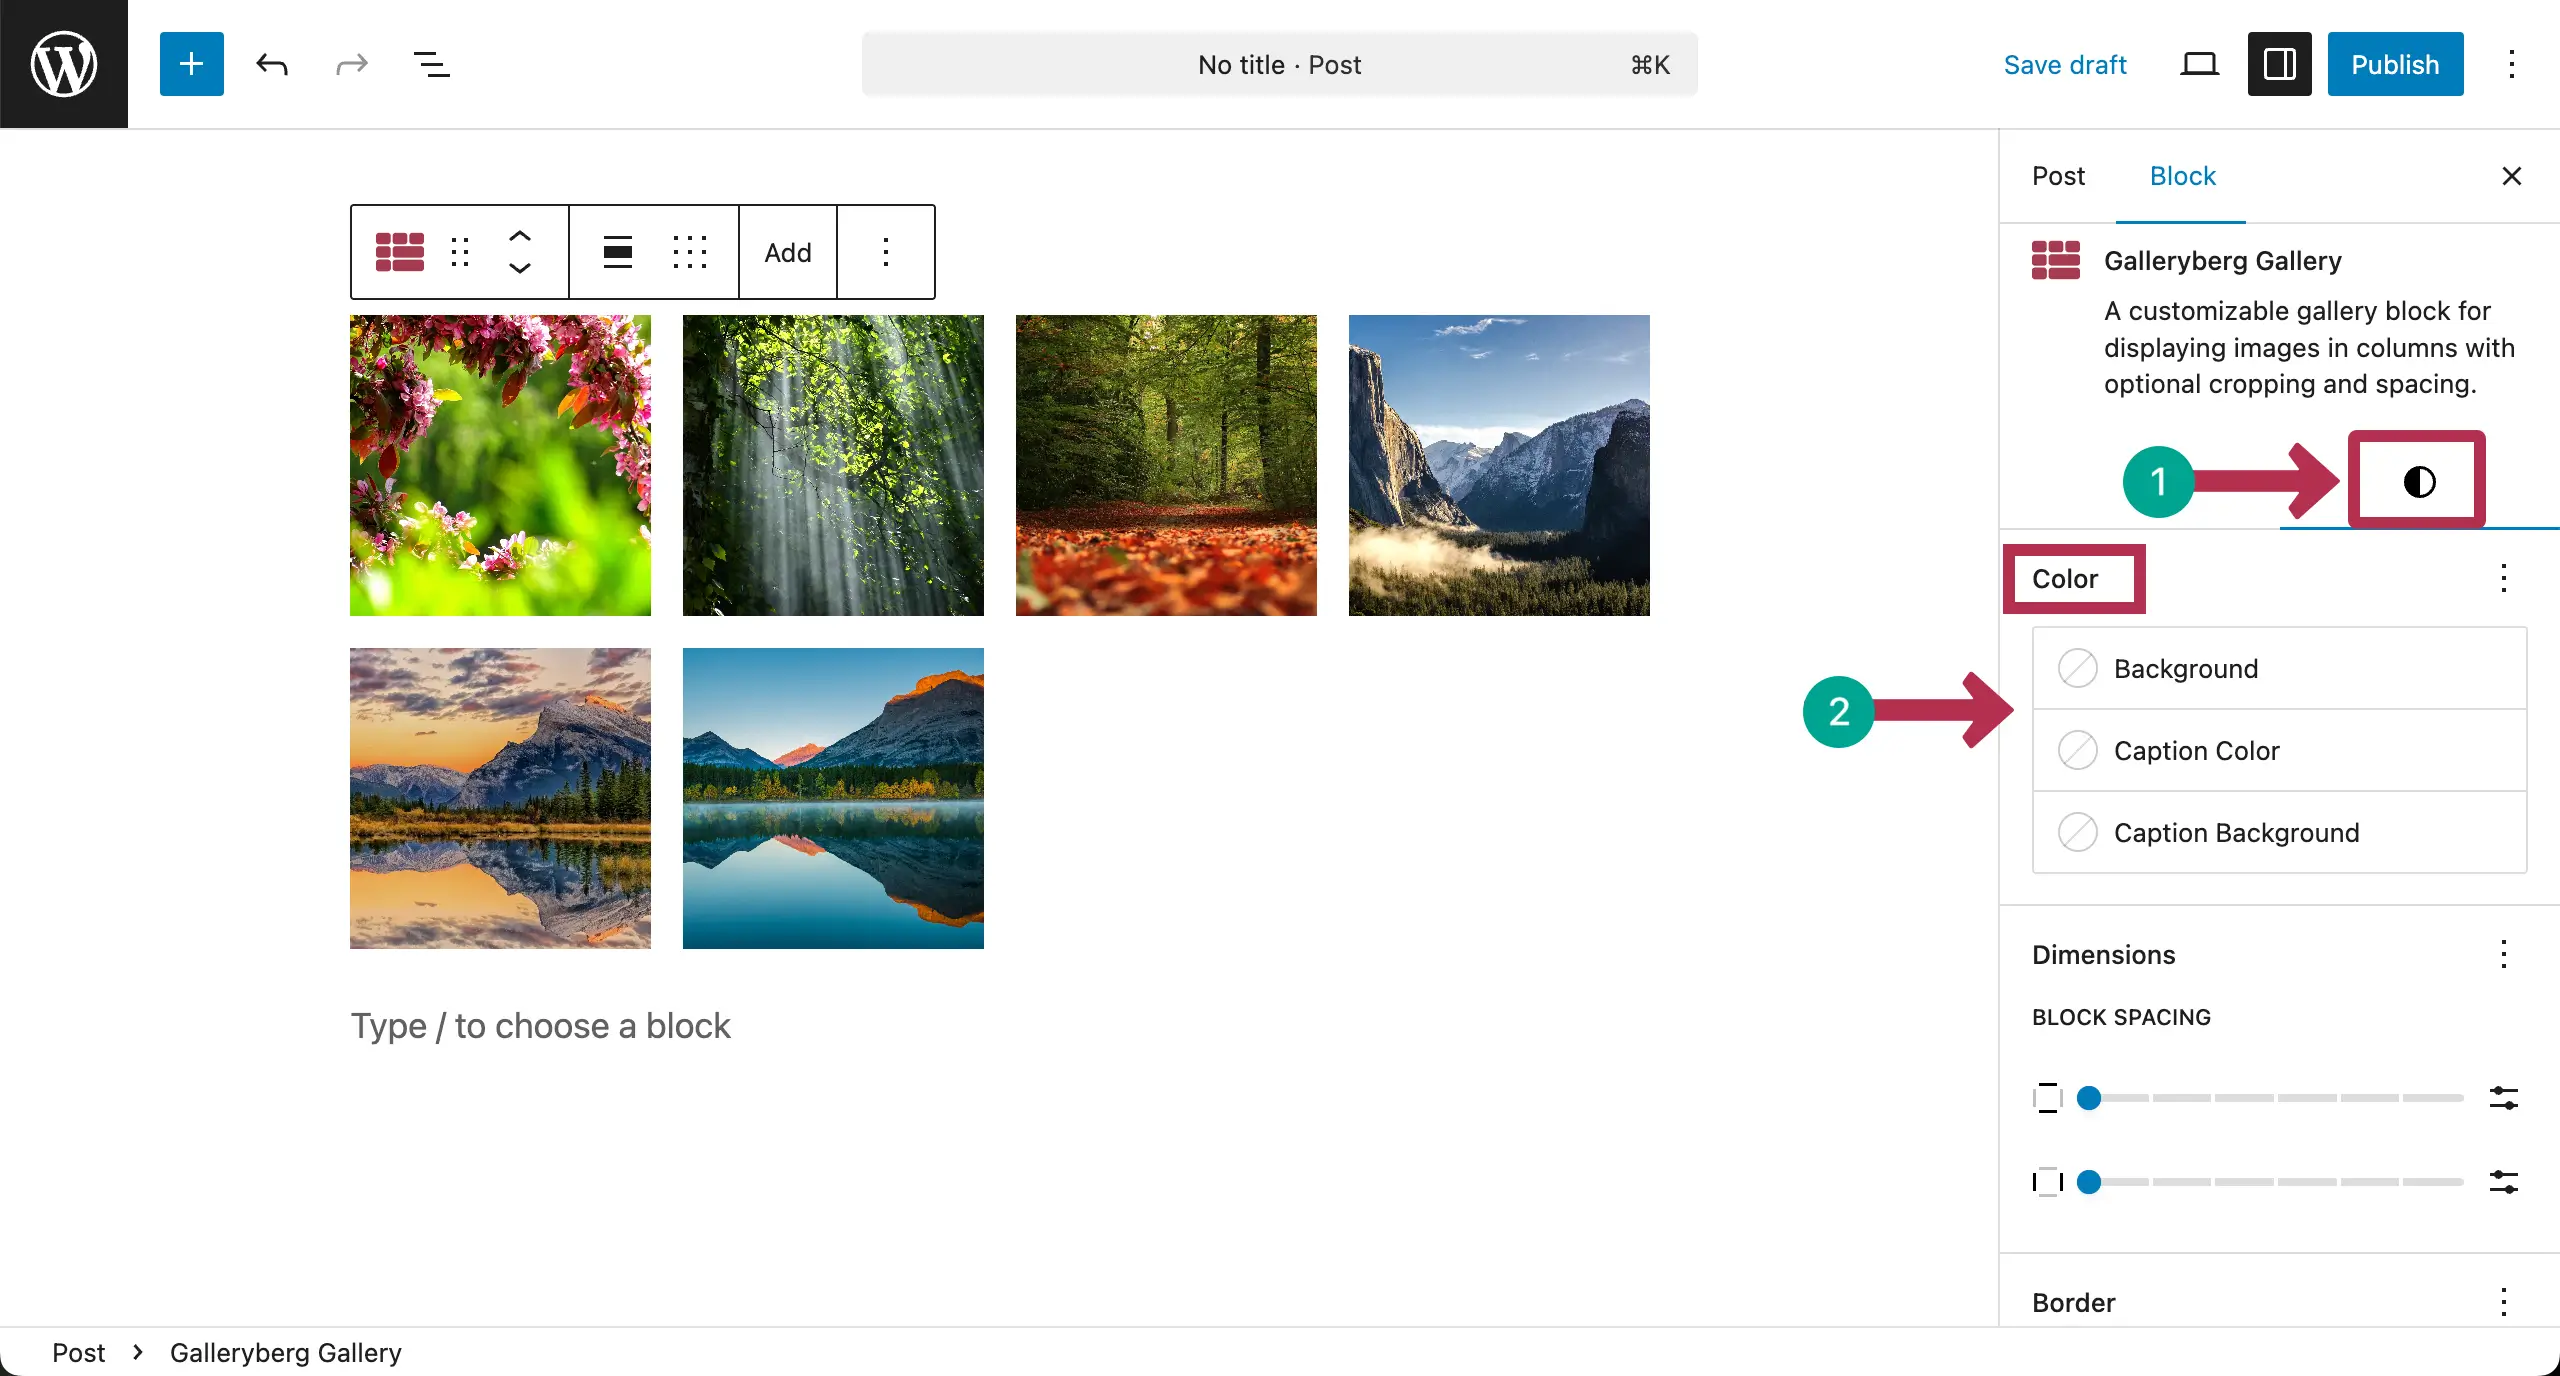
You can see that we have already selected respective colors for these three options.
Click the three-dot icon next to Dimensions. A popup will appear. If you want to add Padding and Margin, click on them. They will be added to the bar under the Dimensions section.
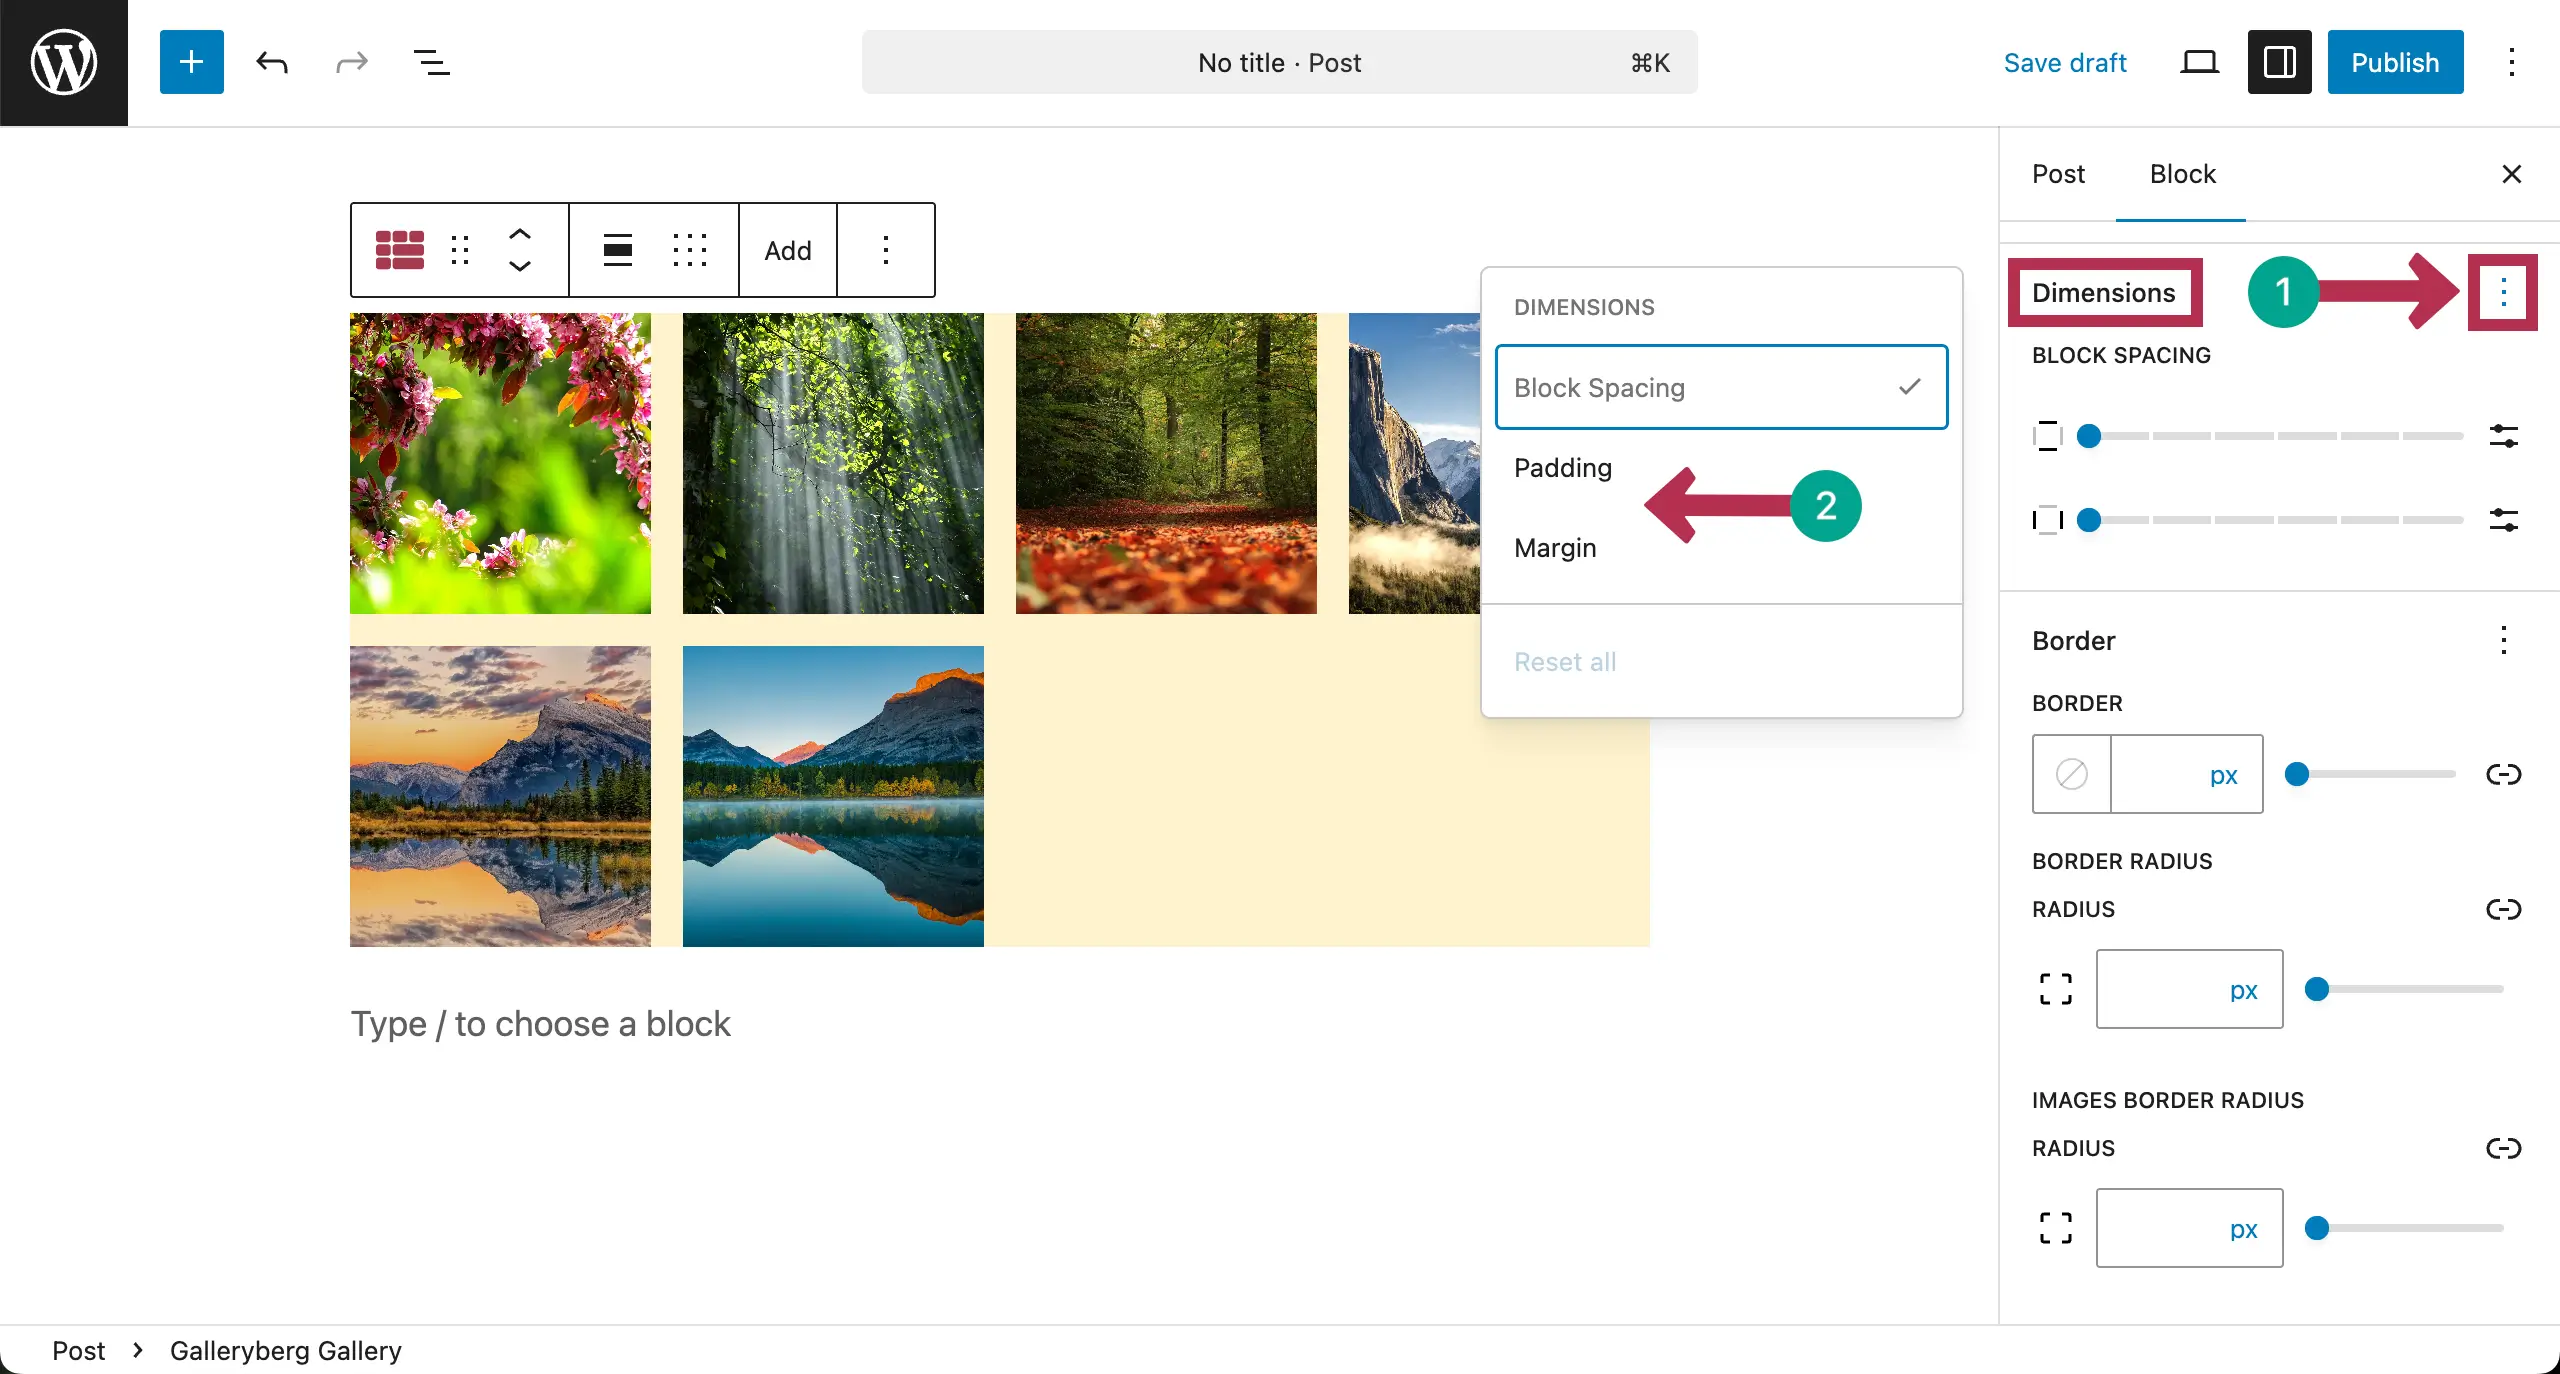
You can see that the Padding option has been added under the section. Now, add values to Block Spacing and Padding as required.

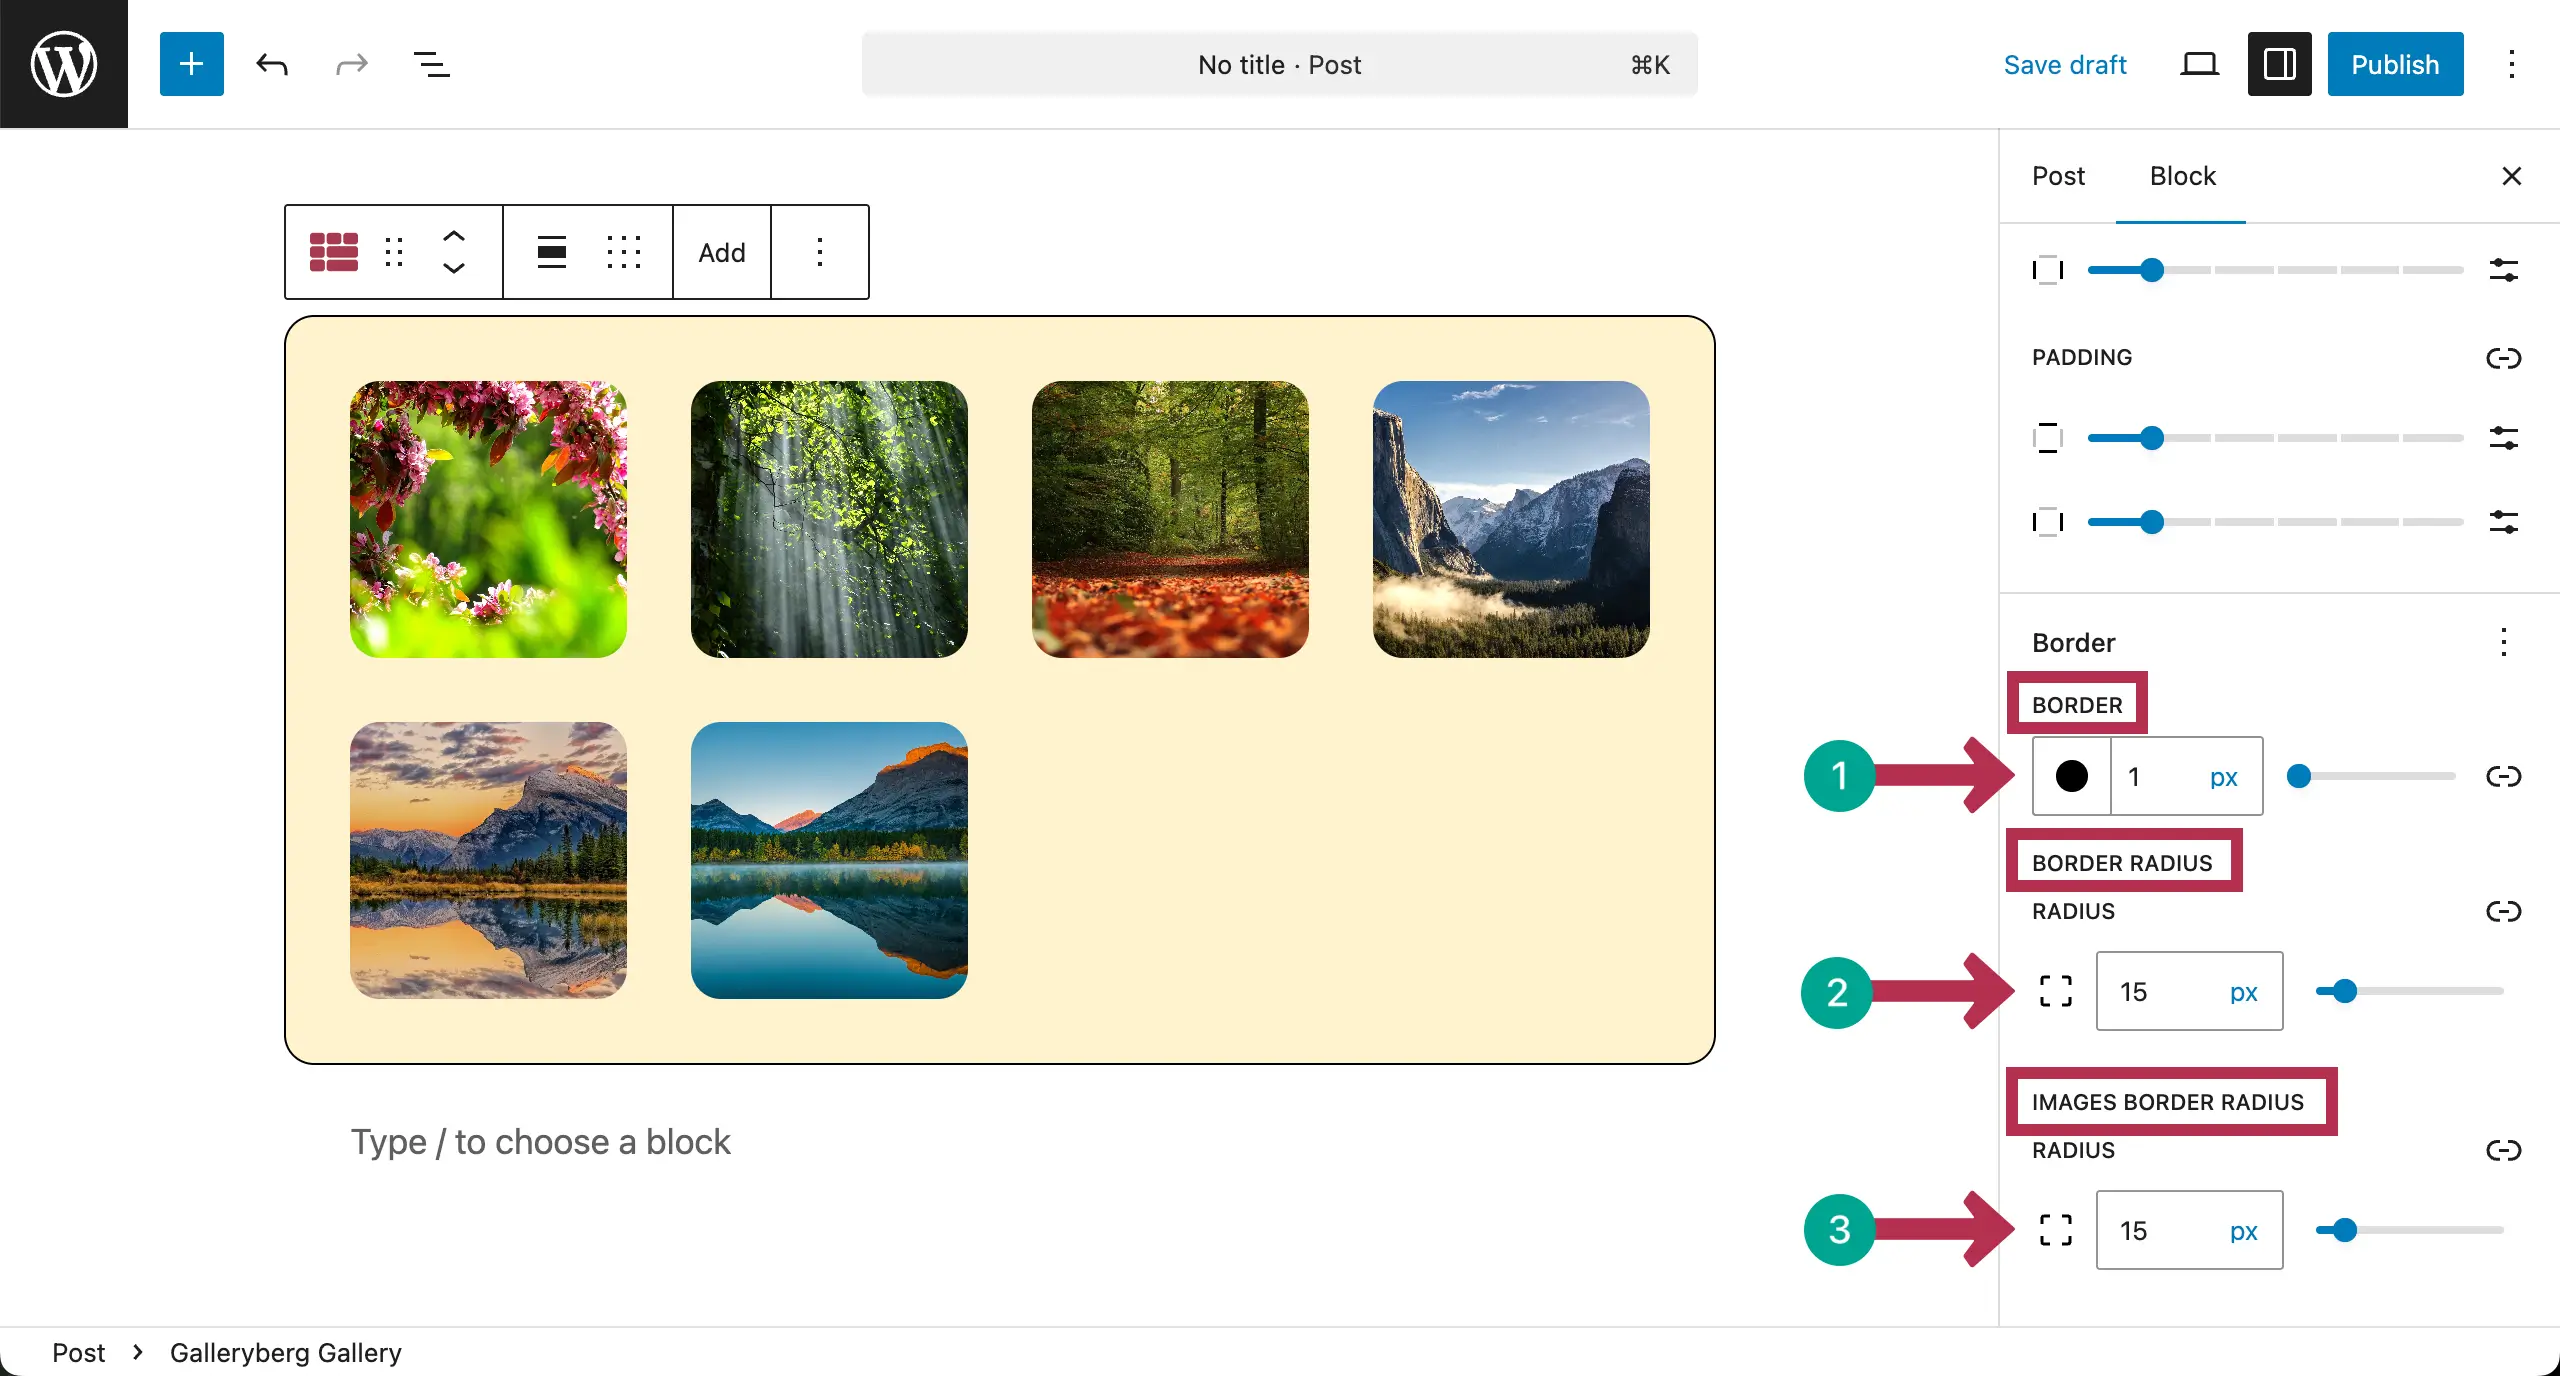
Finally, add a border and radius to the square layout gallery.
Conclusion #
Thus, you can create square layout galleries on WordPress. Keep spacing and alignment consistent. Avoid mixing very dark and very bright photos. Test the gallery on mobile and desktop. A simple square layout works best when the design stays clean and uncluttered.


