How to Configure Integrate Settings
First log in as an Administrator (see instructions).
- Number Format Preference
- Date and Time Format Preference
- Ignore Hidden Rows and Columns
- Insert Hard Line Breaks from Excel
- Restore Data Sources
Number Format Preference
Number Format preference allows you to choose from a set of presets, each representing common formatting styles and the possibility to customise them. It gives you control over the number formatting within your reporting project. Your chosen settings are applied throughout the project. To ensure that you preference is applied correctly when using Integrate, it's important to use the default thousand separator in your Excel number formats.
Please note: You need to set the number format preference before you upload your data source file. If you need to modify your preference after you have already added your data source file in CtrlPrint, an update will be available for all linked elements. Then, you need to refresh your documents with the updates (see this support article on how to refresh data source).
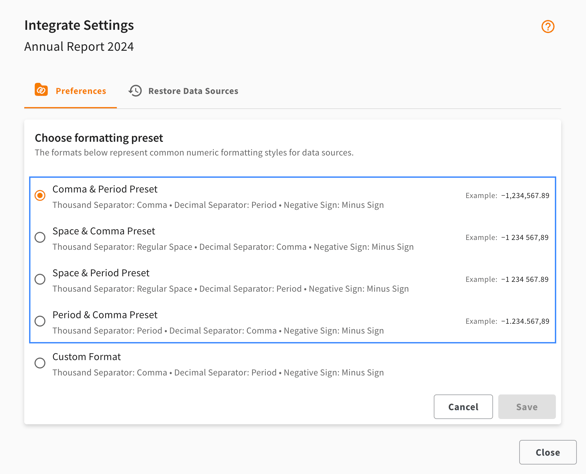
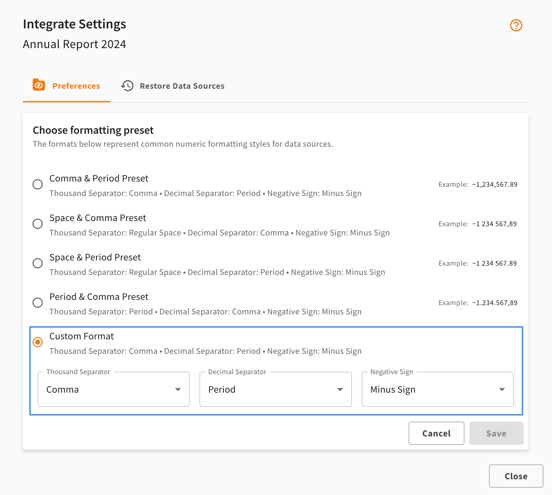
Administrators can modify the number format preference as shown in the images below.


There are four formatting presets present. Comma & Period Preset is the default preset as shown in the image below.
You can also set up a custom format if needed for the thousand separator, decimal separator and negative sign as shown in the image below.
Please Note: Integrate settings only apply to actual negative numbers (a minus sign followed by a digit). They do not affect cells that contain only dashes or standalone minus signs without any numeric values. For these cells, you must ensure the correct cell format is applied in Excel to guarantee the data imports accurately into InDesign/InCopy.
Date and Time Format Preference
The Date and Time Format preference in Integrate directly controls how date and time values from your Excel source appear in your project chapters. It specifically targets default Excel date formats, including short/long dates, short/long times, and month/day translations.
Administrators can modify the time and date format preference as shown in the images below.


If you find that a specific date and time format locale you require in your project is not currently available within Integrate, please let us know.
Please Note: Custom date formats from the Excel data source are not affected by the date and time format settings, except for translations of months and days in both short and long written forms (e.g., January, Jan, Monday, Mon).
Ignore Hidden Rows and Columns
Enable Ignore Hidden Rows and Columns to ignore hidden rows and columns when inserting tables. This ensures that tables you insert/link in InDesign/InCopy reflects only the visible data in Excel that you intend to report, and does not insert any hidden rows or columns you have in Excel.

Insert Hard Line Breaks from Excel
By default (when this feature is not enabled), all of your line breaks in Excel are imported as soft returns (forced line break) in InDesign/InCopy. Enable Insert Hard Line Breaks from Excel to import your line breaks in Excel as hard line breaks (paragraph break) in InDesign/InCopy.

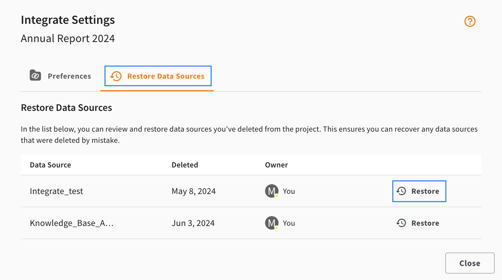
Restore Data Sources
Restore Data Sources allow you to restore and recover data sources that have been deleted from your project. To restore a data source, navigate to Integrate Settings and access the Restore Data Sources tab. You will see a list of deleted data sources. Click Restore next to the data source as shown in the image below.
The data source owner and administrators can restore the deleted data sources. To see who has permission to perform all the actions related to Integrate settings, please go to Manage Permissions.