Signs You Need a New HVAC System or Repair from an HVAC Contractor in Woodbridge VA

hvac repair company

Properly maintaining your HVAC system is essential for ensuring comfort and energy efficiency. However, there comes a time when repairs may no longer suffice, and replacing the system becomes the better option. Recognizing these signs early can save you both time and money. Below are some indicators that can help you determine whether to repair or replace your HVAC system.

Key Signs Your HVAC System May Need Replacement

  1. Most HVAC systems have a lifespan of 10-15 years. If your unit is older than this, it may be running inefficiently and costing more in utility bills.
  2. Advances in technology mean newer systems are often more energy-efficient, which could result in long-term savings.
  3. Are you constantly calling for repairs? Multiple service calls within a short timeframe can indicate that your system is nearing the end of its lifespan.
  4. Evaluate your repair costs: If repairs exceed 50% of the cost of a new unit, it is usually more economical to replace it.
  5. A noticeable increase in your energy bill without an increase in usage could mean your HVAC system is no longer operating efficiently.
  6. Older units often struggle to maintain their performance while consuming excessive power.
  7. If some rooms are consistently warmer or cooler than others, this points to an aging or failing system that cannot properly circulate air.
  8. Loud banging, rattling, or squealing noises often signal mechanical issues.
  9. Persistent unpleasant odors could be due to mold growth within ducts or other internal problems that may necessitate replacement.
  10. An effective HVAC system should manage indoor humidity levels effectively. High humidity indoors during summer months could indicate that the system isn’t functioning optimally.

When Repairs May Be Enough

  • System Age Under 10 Years:
    If your HVAC unit is relatively new but experiencing issues, repairing specific components such as filters, capacitors, or thermostats might extend its life.
  • Minor Issues:
    Problems like clogged air filters or dirty coils can often be resolved through regular maintenance rather than replacing an entire unit.
  • Short-Term Needs:
    If you’re planning to move soon and don’t want to invest in significant upgrades for long-term use, repairing minor issues might make sense temporarily.

Repair vs Replacement Cost Comparison

Factor Repair Costs (Average) Replacement Costs (Average)
Minor Repairs (e.g., filter change) $100-$200 Not Applicable
Major Repairs (e.g., compressor replacement) $1,500-$3,000 $5,000-$12,000
Long-Term Savings Minimal savings Significant energy savings with modern units

Final Considerations

It’s important to weigh both immediate and long-term factors when deciding whether to repair or replace your HVAC system. Consulting with an experienced professional can provide clarity on the condition of your current unit and what options best suit your home’s needs and budget goals. Regular maintenance can also help maximize the lifespan of any decision you make moving forward. Keep detailed records of service visits to help assess performance over time for both existing systems and new installations alike.

Finding the Best AC Repair Woodbridge VA: Tips for Choosing or Replacing Your HVAC System

Airecom Services LLC
www.airecomservices.com

When it comes to maintaining comfort in your home or office, choosing the right HVAC system is crucial. Whether you’re considering repairing your current system or replacing it entirely, several factors should guide your decision-making process. Below, we break down key considerations to help you make an informed choice.

Assessing Your Current HVAC System

  • System Age: Most HVAC systems have a lifespan of 10-15 years. If your unit is nearing or beyond this range, replacement may be more cost-effective than frequent repairs.
  • Efficiency: Older systems often lack energy efficiency compared to newer models, potentially leading to higher utility bills.
  • Frequent Repairs: If breakdowns and costly repairs are common, replacing the unit can save money over time.
  • Performance Issues: Uneven temperatures, strange noises, or poor airflow might indicate the need for an upgrade.

Types of HVAC Systems and Their Benefits

System Type Best For Features & Benefits
Central Air Conditioning Larger homes with ductwork Provides consistent cooling across all rooms; efficient when paired with proper insulation.
Heat Pumps Moderate climates Offers both heating and cooling; energy-efficient alternative to traditional furnaces and air conditioners.
Ductless Mini-Splits Homes without existing ductwork Flexible installation options; allows zoning for individual rooms.
Geothermal Systems Eco-conscious homeowners Uses renewable energy from the ground; highly cost-effective over time despite higher upfront costs.
Packaged Systems Smaller homes or limited space Combines heating and cooling in a single unit; space-saving solution for compact areas.

Factors to Consider When Choosing

  1. Energy Efficiency Ratings (SEER/AFUE)
    Higher Seasonal Energy Efficiency Ratio (SEER) ratings for cooling systems and Annual Fuel Utilization Efficiency (AFUE) ratings for heating units translate into greater savings on monthly utility bills.
  2. Climate and Location
    Your geographic location plays a key role in determining whether you need a system that prioritizes cooling, heating, or both equally.
  3. Budget Constraints
    While upfront costs can vary significantly between systems, long-term operating costs also impact affordability.
  4. Home Size and Layout
    The square footage of your home will influence the size (measured in BTUs) and type of HVAC system required for optimal performance.
  5. Environmental Impact
    Opting for environmentally friendly systems such as geothermal units can reduce carbon emissions while lowering energy consumption.

Consult a Professional Technician

Once you’ve identified potential options based on your needs, it’s wise to consult an experienced HVAC contractor before making a final decision. A professional technician can perform load calculations specific to your home’s size and energy demands while assessing compatibility with existing ductwork.

Choosing between repairing and replacing an HVAC system is never a one-size-fits-all decision—it depends on individual circumstances like age, efficiency, repair history, budget constraints, and personal preferences regarding sustainability. By weighing these considerations carefully and seeking expert advice when needed, you’ll ensure that you invest in an option that supports long-term comfort and value in your property.

How to Choose the Right HVAC System for Furnace Repair Woodbridge VA

Selecting the right HVAC system is a critical decision when considering repairs or replacements. Whether you’re upgrading an outdated unit, dealing with frequent breakdowns, or installing a more energy-efficient system, choosing the best option will impact your comfort, utility costs, and long-term savings. Here are some key considerations to guide your decision-making process.

1. Assess Your Current HVAC System

Begin by evaluating the performance and efficiency of your current system. Some signs that indicate it might be time for repair or replacement include: – Frequent Repairs: If repair costs are adding up annually, replacing your unit may be a better long-term investment.
High Energy Bills: Older systems are often less efficient and cost more to operate. – Uneven Heating or Cooling: This could signal underlying issues such as failing components or improper sizing. – Age of the Unit: HVAC systems typically last 10–15 years; if yours is older, consider replacement for improved efficiency.

2. Understand Different Types of HVAC Systems

System Type Description Best For
Central Air Conditioning A centralized system that cools air through ductwork in large spaces Large homes with existing ducts
Heat Pumps Provides both heating and cooling by transferring heat efficiently Moderate climates
Ductless Mini-Split Offers targeted heating and cooling without ductwork Small spaces or retrofits
Furnaces Uses fuel (gas/electric/oil) to generate heat Colder climates
Geothermal Systems Leverages ground heat for energy-efficient heating and cooling Eco-conscious homeowners

Each type has its own advantages depending on your specific requirements.

3. Consider Efficiency Ratings

Efficiency plays a major role in choosing an HVAC system. Look for units with: – SEER Ratings (Seasonal Energy Efficiency Ratio): Higher SEER numbers mean better cooling efficiency. – AFUE Ratings (Annual Fuel Utilization Efficiency): Measures furnace efficiency—higher percentages indicate better performance. – ENERGY STAR Certification: This ensures the unit meets government standards for energy savings.

While high-efficiency models may cost more upfront, they can significantly reduce utility bills over time.

4. Evaluate Sizing Requirements

An improperly sized system can lead to numerous issues like increased wear-and-tear, poor temperature regulation, and higher energy usage: – A unit too small will struggle to maintain comfort. – A unit too large may short cycle frequently, wasting energy.

To avoid these problems, consult an HVAC professional who can perform load calculations based on factors such as square footage, insulation quality, window placement, and local climate conditions.

5. Budgeting for Repair vs Replacement

Your decision will also depend on financial considerations. Use these guiding principles: 1. If repair costs exceed 50% of the price of a new unit and your current system is nearing the end of its lifespan (10–15 years), replacement is usually recommended. 2. Research warranties offered by manufacturers; some provide extended coverage on major components like compressors and heat exchangers. 3. Explore financing options if upfront costs are daunting—many vendors offer payment plans tailored to different budgets.

By carefully assessing these factors—efficiency ratings, appropriate sizing requirements, available budgets—you can confidently choose an HVAC solution tailored specifically to meet your needs while maximizing comfort throughout every season.

Step-by-Step Guide to HVAC Installation Woodbridge VA: Replacing Your Old System

Replacing an outdated or malfunctioning HVAC system can seem daunting. However, understanding the process in clear, actionable steps helps simplify the task. Below is a breakdown of the process involved in removing and replacing an old HVAC system.

1. Evaluating the Existing System

Before starting replacement, a licensed HVAC technician will perform a thorough assessment of your current system to determine:
Age of the unit: Systems older than 15-20 years are less efficient and more prone to breakdowns.
Energy efficiency: Older units often have lower SEER (Seasonal Energy Efficiency Ratio) ratings compared to modern systems.
Extent of wear and tear: Frequent repairs or declining performance indicate it’s time for a replacement.

The evaluation also involves inspecting ductwork, thermostat compatibility, and airflow concerns.

2. Choosing the Right Replacement Unit

After evaluating your needs, you will need to select an appropriate HVAC system that aligns with your home’s requirements. Key considerations include:
System type: Central air conditioning, heat pumps, ductless mini-splits, or hybrid systems may be viable options depending on climate and home design.
Energy efficiency rating: Look for ENERGY STAR-certified systems or those with high SEER ratings for better energy savings.
Size and capacity: Undersized or oversized systems can lead to inefficiency; technicians will calculate proper sizing using Manual J load calculations.

A professional contractor can guide you in selecting a unit tailored for optimal comfort and cost-efficiency.

3. Disconnecting and Removing the Old Unit

  1. Shut off power to ensure safety during removal.
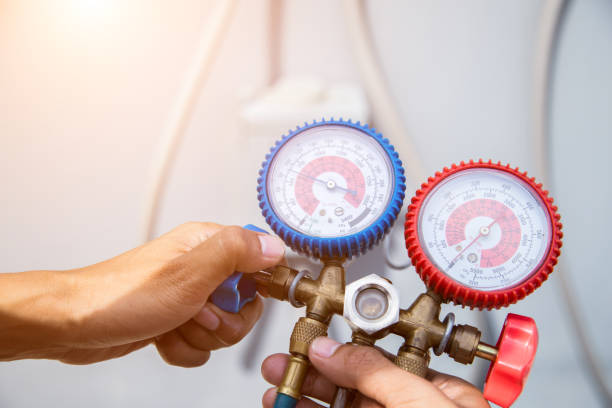
  2. Recover refrigerants per EPA regulations using specialized equipment.
  3. Disconnect electrical wiring connected to the old unit.
  4. Remove existing duct connections if necessary.
  5. Dismantle and remove larger components like furnaces or outdoor condensers.

Technicians often assess reusable parts like thermostats or ducts during this phase.

4. Preparing for Installation

Proper preparation ensures smooth installation of your new unit: – Duct cleaning or repair: Before installation begins, existing ducts may need sealing or cleaning for optimal airflow. – Upgrading electrical systems: Modern units may require updated wiring or circuit panels to meet safety standards. – Installing new pads or mounts (if applicable): Outdoor condensing units are placed on leveled concrete pads, providing stability.

This preparation sets the stage for placing your new equipment efficiently while avoiding potential issues down the line.

5. Installing New Equipment

The actual installation involves connecting all components systematically: 1. Positioning major parts such as indoor air handlers/furnaces and outdoor condensers securely. 2. Connecting refrigerant lines between indoor coils and outdoor units. 3. Wiring electric connections while adhering to safety codes. 4. Testing airflow through ducts to ensure balanced distribution across rooms. 5. Inspecting drain pans/drain lines critical for preventing water damage caused by condensation buildup.

Each step must align with manufacturer specifications for warranties to remain valid over time.

6. Testing System Performance

After installation concludes — but before finalizing — technicians conduct detailed testing: – Confirm thermostats work accurately when cooling/heating cycles initiate. – Measure airflow levels across supply/return vents ensuring uniform temperature regulation indoors. – Check refrigerant pressures matching recommended thresholds listed within equipment manuals.

These measures verify operational efficiency meets expectations outlined pre-installation stages discussed earlier above!

Checklist During Testing Status Notes/Comments
Thermostat Calibration ✔️ All set
Airflow Test ✔️ Balanced
Refrigerant Levels Check ✔️ Within range

Replacing an HVAC system involves many intricate steps requiring professional expertise at each stage—from evaluation through testing post-installation—ensuring peak performance satisfaction long-term reliability benefits homeowners significantly over time!

Exploring Emergency HVAC Service Woodbridge VA: Rebates, Tax Credits, and Financing Options for Repairs

When considering HVAC repairs, one critical aspect that should not be overlooked is the financial impact. Fortunately, there are many ways to reduce the burden of these costs through rebates, tax credits, and financing options. Understanding these opportunities can help homeowners make smarter decisions about their HVAC systems while saving money in the process.

Rebates for HVAC Repairs

  • Manufacturer Rebates
    Many HVAC manufacturers offer seasonal promotions that include rebates for certain products or system repairs. For instance:

    • Energy-efficient air conditioners
    • Smart thermostats bundled with system repairs
    • Heat pumps meeting specific efficiency standards
  • Utility Company Incentives
    Local utility providers may offer rebates to incentivize energy savings in your home. These often include:

    • Discounts on upgrading old units to ENERGY STAR® certified systems
    • Perks for adding insulation or sealing ducts during HVAC repair projects
  • State and Local Programs
    Some states and municipalities provide additional incentives for upgrading aging systems or performing significant energy-saving repairs.
Type of Rebate Who Offers It Potential Savings
Manufacturer Rebate HVAC manufacturers $100–$1,500+
Utility Company Rebate Local energy providers $50–$800
State/Local Programs Government agencies Varies by region

Tax Credits for Energy-Efficient Repairs

  1. Energy Efficiency Tax Credits
    As of 2025, federal tax credits allow homeowners to deduct a percentage of their system repair expenses if they meet efficiency standards set by the Department of Energy (DOE). Eligible upgrades may include:
  2. High-efficiency furnaces or boilers
  3. Geothermal heat pump repairs or enhancements
  4. Solar-powered heating systems
  5. Systems must meet minimum Seasonal Energy Efficiency Ratio (SEER) ratings.
  6. A certification statement from the manufacturer is typically required at tax filing time.
  7. Savings Potential: Up to 30% credit on qualifying expenses up to certain limits. Always consult a tax professional for updated regulations.

Financing Options for HVAC Repairs

  • HVAC Dealer Financing Plans
    Many repair companies partner with lenders offering promotional interest rates or no-interest payment plans over several months.
  • Home Equity Loans/Lines of Credit (HELOC)
    If you own your home outright or have significant equity built up, borrowing against it could help cover large repair costs at relatively low interest rates.
  • Personal Loans
    Personal loans from banks or credit unions can be an alternative if you don’t qualify for other financing options.
Financing Option Interest Rates Loan Terms
Dealer Financing Often <10%, promotional rates Short-term (6–24 months)
HELOC ~3%-7% Long-term (up to 20 years)
Personal Loans ~5%-15% Flexible terms

By taking advantage of available rebates, tax credits, and financing solutions, homeowners can reduce their out-of-pocket expenses significantly while ensuring their homes remain comfortable year-round with an efficiently running HVAC system. Always review eligibility criteria thoroughly and consult professionals when planning major repairs or replacements.


Common Issues and Solutions for AC Repair Woodbridge VA Residents Should Know

Repairman fix air conditioning systems, Technicians man using screwdrivers service for repair and maintenance of air conditioners Repairman fix air conditioning systems, Technicians man using screwdrivers service for repair and maintenance of air conditioners Aircon stock pictures, royalty-free photos & images

When your air conditioner stops working, it can be both frustrating and uncomfortable, especially during warmer months. Understanding the most common issues that lead to AC malfunctions can help you identify problems early and take steps to resolve them efficiently. Below, we’ll explore four common AC issues and provide practical solutions for each.

Common Causes of Furnace Repair Woodbridge VA: Dirty or Clogged Air Filters

One of the most frequent causes of air conditioning problems is a dirty or clogged air filter. Over time, dust, dirt, and debris accumulate on the filter, restricting airflow and causing the system to work less efficiently.

Signs of a Dirty Filter:
– Reduced airflow from vents
– Inconsistent cooling throughout your home
– A noticeable increase in energy bills

Solution:
– Regularly inspect your air filters (once a month during peak usage).
– Replace or clean reusable filters every 30–90 days, depending on the manufacturer’s recommendations.

2. Refrigerant Leaks

Low refrigerant levels often point to a leak within your AC system, which can impair its ability to cool effectively or even cause complete failure if left unaddressed.

Signs of Refrigerant Issues:
– Warm air blowing from vents despite setting a low temperature
– Hissing or bubbling noises coming from your unit
– Ice buildup on refrigerant lines or evaporator coils

Solution:
– Contact an HVAC professional to locate and repair leaks. Proper handling of refrigerants requires specialized tools and training due to environmental regulations.

3. Faulty Thermostat Settings or Malfunctions

Your thermostat acts as the control center for your AC system, so improper settings or malfunctioning components can prevent it from operating correctly. This is particularly common with older manual thermostats or improperly calibrated units.

Signs of Thermostat Problems:
– The system does not turn on when expected
– Incorrect indoor temperature readings displayed on the thermostat screen
– Short cycling (frequent turning on/off)

Solution:
– Double-check that the thermostat is set to “cool” mode with an appropriate target temperature selected. – Replace batteries if applicable. – Upgrade to a programmable or smart thermostat for greater control and efficiency if recurring issues persist.

4. Electrical Component Failures

Air conditioners rely on an array of electrical components like capacitors, contactors, wires, and relays to function properly. Over time, wear and tear may cause these parts to deteriorate.

Signs of Electrical Problems: – The unit won’t start despite receiving power – Burning smells coming from near electrical panels – A tripped breaker when attempting operation

Solution: – Check breakers at your electrical panel before assuming major damage. – If you suspect component failure (e.g., capacitor), consult licensed repair professionals rather than attempting DIY fixes which could lead risks injuries/errors

Recognizing these commonalities empowers users toward practical resolutions while minimizing expenses

Finding an HVAC Contractor in Woodbridge VA to Fix Your Air Conditioner When It’s Not Cooling

When your air conditioner stops cooling effectively, it can lead to discomfort, especially during the warmer months. Various issues can cause this problem, ranging from minor maintenance oversights to more complex mechanical failures. Below are some common reasons why your AC might not be cooling and how to address them.

1. Dirty or Clogged Air Filters

Air filters play a crucial role in maintaining proper airflow in your AC unit. Over time, these filters can become dirty or clogged with dust and debris.

Signs of a dirty air filter:
– Weak airflow from vents
– Reduced cooling efficiency
– Increased energy consumption

Solution:
– Turn off the AC before performing any maintenance.
– Locate the air filter (commonly in the return vent or inside the unit).
– Clean reusable filters with water and allow them to dry completely before reinserting. For disposable filters, replace them with a new one.

It is recommended to clean or replace filters every 1–3 months depending on usage.

Low Refrigerant Levels During HVAC Installation Woodbridge VA

Refrigerant is responsible for absorbing heat from your home and releasing it outside. If refrigerant levels are low due to leaks or improper charging during installation, your AC won’t cool properly.

Signs of low refrigerant:
– Warm air blowing from vents even when set to cool mode
– Ice buildup on refrigerant lines or evaporator coils
– Hissing or bubbling sounds near the unit

Solution:
Handling refrigerant requires professional expertise due to environmental regulations and safety concerns:
– Contact a licensed HVAC technician for inspection and repair. They will locate leaks, seal them if possible, and recharge the system with the correct amount of refrigerant.

3. Dirty Evaporator Coils: When to Call for Emergency HVAC Service Woodbridge VA

The evaporator coils absorb heat from indoor air, but they cannot function efficiently if covered in dirt and grime.

Signs of dirty evaporator coils:
– Faulty cooling performance despite clean air filters
– Unusual odors when using the AC

Solution:
While routine cleaning of external components like filters is manageable for homeowners, cleaning evaporator coils may require professional tools:
– Schedule an annual HVAC tune-up where technicians will safely inspect and clean internal components like coils.

4. Faulty Thermostat Settings

Checklist for thermostat troubleshooting:
| Problem | Solution | |—————————|—————————————————————————————–| | Incorrect temperature | Ensure that it’s set lower than current room temperature (cooling mode). | | Calibration issues | Check calibration accuracy; recalibrate if needed by consulting user manuals or experts.|

In more serious cases requiring thermostat replacement upgrading programmable systems might offer savings long-term .

Keep Your System Maintained Regularly

Routine care prevents future costly malfunctions so schedule annual servicing: Cleaning ducts Checking electrical terminals etc

How to Address Common Air Conditioner Leaking Water Problems

Water leakage from an air conditioner can be a frustrating issue for homeowners. Understanding the root causes and addressing them promptly can prevent further damage to your HVAC system and surrounding areas. Below, we will explore common reasons why air conditioners may leak water and provide practical solutions to resolve these problems.

Common Causes of Air Conditioner Water Leaks

  1. The condensate drain line is responsible for carrying excess water away from your AC unit. Over time, dirt, mold, and debris can block the line, leading to water backing up and leaking out.
    • Use a wet/dry vacuum or a plumber’s snake to clear any obstructions in the drain line.
    • Regularly clean the drain line with a mixture of vinegar and warm water to prevent future clogs.
  2. A dirty or clogged air filter restricts airflow over the evaporator coil, causing it to freeze. As the coil defrosts, excess moisture may overwhelm the drainage system, leading to leaks.
    • Check and replace your air filter every 1-3 months, depending on usage and conditions such as pets or allergies.
  3. When refrigerant levels are too low, pressure within the system drops, potentially causing the evaporator coil to freeze and thaw irregularly. This can result in water leakage around your AC unit.
    • Contact an HVAC technician to inspect refrigerant levels and fix any leaks in your system if necessary.
  4. An improperly installed air conditioner may not be level, causing water from condensation to pool in unintended areas instead of draining properly.
  5. Solution:
    • Verify that your AC unit is level using a carpenter’s level tool.
    • If necessary, adjust its position or consult an installation professional for assistance.

Steps to Prevent Future Water Leaks

  • Schedule professional maintenance at least once a year.
  • Inspect and clean the condensate pan periodically for cracks or dirt buildup.
  • Ensure proper insulation around refrigerant lines.
  • Monitor humidity levels in your home using a dehumidifier if needed.

Table: Quick Overview of Causes & Fixes

Problem Cause Recommended Fix Maintenance Tip
Clogged condensate drain line Dirt/debris buildup Clear with vacuum/vinegar solution Clean lines every 3-6 months
Dirty air filter Restricted airflow Replace filter regularly Change every 1-3 months
Low refrigerant levels Leak/pressure drop Professional inspection/refill required Have refrigerant checked annually
Improper installation Uneven AC placement Reposition unit Verify level during initial installation

By addressing these common issues proactively through regular maintenance practices and timely repairs, you can ensure that your air conditioner operates efficiently without experiencing recurring water leaks.

Troubleshooting Air Conditioner Fan Issues Inside and Outside

Air conditioner fan problems, whether inside the unit (blower fan) or outside (condenser fan), can disrupt the cooling process and reduce efficiency. Understanding the potential causes of these issues and how to address them is essential for maintaining your HVAC system. Below, we’ll explore common fan-related problems, their causes, and practical solutions.

Common Air Conditioner Fan Issues

  1. The blower fan’s role is to circulate cool air throughout your home. If it stops functioning, you may experience reduced airflow or no cooling at all.
  2. The condenser fan removes heat from your AC unit by expelling hot air outside. If this fan malfunctions, it can lead to overheating of the system.
  3. Unusual noises such as rattling, grinding, or squeaking can indicate mechanical issues with the fans or surrounding components.
  4. A constantly running fan could signal a thermostat problem or an issue with the control board.

Causes of Fan Problems

Issue Possible Causes Potential Solutions
Blower Fan Not Working Faulty motor, dirty filter, tripped breaker Replace motor, clean/replace filter
Condenser Fan Not Running Damaged capacitor, bad motor Inspect/replace capacitor or motor
Noisy Operation Loose parts, worn bearings Tighten screws/bolts; replace bearings
Constantly Running Fan Malfunctioning thermostat Check/replace thermostat

Steps to Troubleshoot Indoor Blower Fans

  1. A clogged air filter can restrict airflow and overwork the blower motor. Check your filter every 1-3 months and replace it if it’s dirty.
  2. A tripped breaker might cut power to your indoor unit’s blower fan. Reset any tripped switches in your electrical panel.
  3. If none of the above resolves the issue, test whether the blower motor is receiving power using a multimeter.
  4. Some older models require lubrication for smooth operation of moving components like bearings.

Tips for Diagnosing Outdoor Condenser Fans

  • Look for visible damage: Assess whether debris has bent or blocked any condenser blades.
  • Test capacitors: Use a multimeter to determine if capacitors are functioning properly.
  • Clean around vents: Dirt buildup near vents can hinder performance.

If these steps don’t resolve outdoor condenser issues, consider calling a professional HVAC technician as more complex repairs may be needed.

Efficiently identifying and resolving air conditioner fan problems ensures that your system remains operational when you need it most while prolonging its lifespan through regular maintenance practices.

Technician with screwdriver repairing air conditioner at home Air conditioner maintenance or repair Aircon stock pictures, royalty-free photos & images

Central Air Conditioner Not Working? Causes and Repair Solutions

A central air conditioner that stops working can be a frustrating issue, especially during the hotter months. Identifying the root cause is essential to restoring comfort in your home. Below, we will explore common causes for central AC malfunctions and provide actionable repair solutions.

Common Causes for a Non-Functional Central AC

  1. A lack of power is one of the simplest yet most overlooked problems.
    • Tripped circuit breaker.
    • Blown fuses.
    • Faulty wiring.
    • Incorrect settings (e.g., thermostat set to “fan” instead of “cool”).
    • Dead batteries in manual thermostats.
    • Malfunctioning or outdated programmable units.
    • Restrict airflow.
    • Cause uneven cooling or no cooling at all.
    • Lead to overheating of components.
    • Insufficient cooling performance or no cool air at all.
    • Frozen evaporator coils over time.
  2. The compressor is the heart of the AC system; when it fails, symptoms may include:
    • Unusual noises such as humming or clanking sounds.
    • Lack of cold air coming from vents.

Inspect Power Connections

  • Check your home’s main electrical panel for tripped breakers and reset them if needed.
  • Replace blown fuses or consult an electrician to address faulty wiring issues.

Test and Adjust Thermostat Settings

  • Ensure your thermostat is set to “cool” mode with an appropriate temperature setting lower than room temperature.
  • Replace dead batteries, if applicable, and verify that programmable thermostats are functioning correctly.

Clean or Replace Air Filters

  • Turn off power to your HVAC system before removing filters for inspection.
  • Clean reusable filters with water and let them dry completely before reinserting them.
  • Dispose of disposable filters according to manufacturer recommendations, replacing them every 1–3 months depending on usage.

Address Refrigerant Leaks

  • Identify leak locations using specialized tools like UV dye detectors.
  • Seal small leaks where possible or replace affected lines if necessary.
  • Refill refrigerant levels according to manufacturer specifications.

Examine Outdoor Unit Components

  • Remove dirt and leaves from around the condenser unit using a soft brush or vacuum attachment.
  • Straighten bent fins carefully with a fin comb tool for optimal airflow circulation.

Seek Professional Support for Advanced Repairs

If addressing basic troubleshooting steps doesn’t restore functionality, contact an experienced HVAC technician who can inspect critical components like compressors, motors, capacitors, and control boards for wear and tear.

Preventative Maintenance Tips

Task Frequency
Clean/Replace Air Filters Monthly/Quarterly
Inspect Thermostat Annually
Schedule Professional Tune-Up Annually
Clean Outdoor Unit Every Season

Regular maintenance ensures that small issues are detected early before they evolve into larger repairs while also prolonging the lifespan of your system.

By systematically addressing both common problems and preventative care solutions, you’ll be better equipped to maintain a comfortable indoor environment year-round without unnecessary disruptions from AC malfunctions.

Simple Steps to Repair an AC That Won’t Stop Running

An air conditioner that runs continuously can lead to increased energy bills, unnecessary wear and tear on the system, and reduced efficiency. This issue often stems from underlying problems that need attention. Below, we’ll explore the causes and outline actionable steps to help you address this common HVAC issue effectively.

Common Causes of an AC That Won’t Turn Off

  • Dirty Air Filters
    A clogged filter restricts airflow, making it harder for your system to reach the desired temperature. This causes the unit to work overtime.
  • Thermostat Issues
    Incorrect thermostat settings or a faulty thermostat can signal the AC unit to keep running unnecessarily.
  • Refrigerant Levels
    Low refrigerant levels can prevent your AC from reaching its set temperature, leading it to run continuously in an attempt to cool your space.
  • Oversized or Undersized Unit
    An improperly sized air conditioning system may result in inefficient cooling cycles, causing it either never to turn off or short-cycle repeatedly.
  • Mechanical Malfunctions
    Faulty components like fan motors, relays, or capacitors can also contribute to this problem by preventing normal operation.

Step-by-Step Guide for Troubleshooting

Step 1: Check and Replace Air Filters

  1. Turn off your AC at the thermostat.
  2. Locate your air filters (common places include near the return air duct or inside the blower compartment).
  3. If the filters appear dirty or clogged, replace them immediately with new ones rated for your system.

Step 2: Inspect Thermostat Settings

  1. Ensure that your thermostat is set properly (e.g., “Cool” mode with an appropriate temperature setting).
  2. If it’s a programmable thermostat, double-check that there are no conflicting schedules programmed.
  3. Test whether adjusting the set temperature by a few degrees resolves the issue.

Step 3: Examine Refrigerant Levels (Professional Task)

If you suspect low refrigerant levels: – Look for signs of refrigerant leaks (e.g., ice buildup on coils or hissing sounds). – Contact a licensed HVAC technician for proper diagnosis and recharging of refrigerant.

Step 4: Inspect Unit Size

If you’ve noticed persistent issues since installation: – Review whether your system is appropriately sized for your home. – Consider consulting with an HVAC professional about resizing options if necessary.

Step 5: Test Mechanical Components

For mechanical issues: 1. Turn off power at both the thermostat and circuit breaker before opening any panels. 2. Inspect visible wires and connections for signs of damage. 3. If components like relays or motors appear damaged or suspect, consult with a professional technician as repairs may require specialized tools.

Tips for Preventing Future Problems

  • Schedule regular maintenance checks with a trusted HVAC technician.
  • Replace air filters every one to three months based on usage and household conditions.
  • Invest in a smart thermostat that allows better control over settings and displays potential issues early on.
  • Ensure proper insulation around windows and doors so your AC doesn’t overwork itself cooling unnecessary heat gain.

Table: Troubleshooting Summary

Problem Potential Cause Action Needed Professional Help Required?
Dirty Air Filter Restricted airflow Replace filter No
Thermostat Issues Incorrect settings Adjust settings/check battery No
Low Refrigerant Leak/insufficient charge Call HVAC technician Yes
Oversized/Undersized Unit Improper installation Consult HVAC professional Yes
Mechanical Malfunction Damaged parts Inspect components; replace if needed Likely

Addressing these steps promptly will ensure better efficiency, reduce energy costs, and extend the lifespan of your AC system while keeping your home comfortable year-round.


Expert Tips from an HVAC Contractor Woodbridge VA on Furnace Repair and Troubleshooting

Technician repairing combi Gas Boiler Technician repairing combi Gas Boiler Furnace stock pictures, royalty-free photos & images

Furnaces are an essential part of maintaining a comfortable indoor environment during colder months. However, like any mechanical system, they can experience issues over time. Understanding how to properly repair and troubleshoot a furnace can save you time, money, and frustration. This guide provides practical steps to address common furnace problems and maintain optimal performance.

Steps for Diagnosing Furnace Issues

When your furnace is not functioning as expected, it’s important to systematically troubleshoot the problem.

  1. Ensure the thermostat is set to “Heat” mode.
  2. Check if the temperature setting is higher than the current room temperature.
  3. Replace batteries if applicable, as low power can cause malfunctions.
  4. Confirm that the furnace is receiving power by inspecting its circuit breaker or fuse box.
  5. Look for a tripped breaker or a blown fuse and reset or replace it if necessary.
  6. Dirty or clogged air filters restrict airflow, causing overheating or reduced efficiency.
  7. Replace disposable filters every 1-3 months based on usage.
  8. For furnaces with pilot lights: Verify that the flame is steady and blue; relight it if it’s out.
  9. For electric ignition systems: Test and clean the igniter sensor with fine-grit sandpaper if needed.
  10. Ensure all vents are open and unobstructed by furniture, curtains, or debris.
  11. Check for blockages in ductwork that might hinder effective airflow.

Tools You May Need

Tool Purpose
Screwdriver Set To open panels on your furnace
Multimeter To test electrical connections
Flashlight For visibility in dark areas
Replacement Filters For swapping out clogged air filters
Fine-Grit Sandpaper To clean ignition sensors

Preventative Maintenance Tips

  • Schedule annual professional inspections before winter begins.
  • Regularly clean vents and inspect ductwork for leaks or gaps.
  • Maintain a consistent thermostat setting to reduce wear on components.
  • Lubricate moving parts such as blower motors (if applicable) according to manufacturer instructions.

Signs of Persistent Problems

If your troubleshooting efforts do not resolve an issue—or if you notice recurring problems—it may indicate more serious underlying issues such as:
– Frequent cycling on and off (short cycling).
– Uneven heating across different rooms in your home.
– Persistent strange noises such as banging or screeching sounds coming from the unit.

In these cases, calling a skilled HVAC technician may prevent further damage while ensuring safe operation of your heating system.

When to Call a Professional Technician for AC Repair Woodbridge VA Services

Knowing when to call a professional technician for furnace repair services is critical to maintaining the efficiency, longevity, and safety of your heating system. While some minor issues can be addressed with basic troubleshooting steps, there are times when professional expertise is essential. Below, we’ve outlined key scenarios to help you determine when it’s time to contact an HVAC expert.

Key Signs You Need Furnace Repair Woodbridge VA

  1. Frequent Cycling
    If your furnace constantly turns on and off (short cycling), it could indicate serious issues such as:
  2. A malfunctioning thermostat
  3. Overheating due to restricted airflow
  4. An improperly sized furnace for your home

A technician can accurately diagnose these problems and recommend long-term solutions.

  1. Insufficient Heat or Cold Air
    When your furnace blows cold air or fails to provide enough heat:
  2. The burner might be dirty or damaged
  3. The pilot light may have gone out
  4. There could be ductwork leaks reducing heat distribution

These issues typically require advanced tools and expertise that only professionals possess.

  1. Unusual Noises
    Rattling, banging, or screeching noises often signal mechanical problems like:
  2. Loose or broken components in the blower motor assembly
  3. Ignitor malfunctions leading to delayed ignition

Attempting DIY repairs could worsen these issues without proper training.

  1. Carbon Monoxide Alerts
    If your carbon monoxide detector activates or you suspect a gas leak:
  2. Leave the house immediately and call emergency services if necessary.
  3. Contact an HVAC technician without delay for inspection and repair of potential gas leaks or venting problems.
  4. Rising Energy Bills
    A sudden spike in energy costs often points to inefficiency caused by:

    • Dirty air filters restricting airflow
    • Worn-out components requiring replacement
  5. Only a professional can identify hidden inefficiencies and restore optimal performance.

The Benefits of Professional HVAC Installation Woodbridge VA Over DIY Repairs

  • Safety Concerns:Furnaces involve electrical systems, gas lines, and combustion processes that require specialized knowledge.
  • Warranty Void:Many manufacturers void warranties if repairs are done by unlicensed individuals.
  • Incomplete Fixes:Attempted DIY solutions may address symptoms but fail to resolve underlying issues fully.

Hiring a certified HVAC professional ensures safe and effective repairs that comply with industry standards.

Expert Emergency HVAC Service in Woodbridge VA

Service Benefit
Comprehensive Diagnostics Identify root causes efficiently
Specialized Equipment Use advanced tools for precision repairs
Preventative Maintenance Extend system lifespan through ongoing care
Energy Efficiency Improvements Optimize performance to reduce utility costs

By relying on trained experts, homeowners gain both peace of mind and long-term savings.

Timely intervention by an experienced technician not only prevents larger problems but also helps maintain comfort during colder months. Recognizing when professional assistance is required ensures that your furnace operates safely and efficiently year-round.

When to Call a Professional Technician for Furnace Repair Services

Furnaces are essential for keeping your home warm and comfortable, especially during colder months. While homeowners can address some minor furnace issues on their own, there are situations where calling a professional technician is not only advisable but necessary to ensure the safety, efficiency, and longevity of your heating system. Below is a guide to help you determine when it’s time to involve an expert.

Signs You Need a Professional Technician

  • Unusual Noises:If you hear loud banging, screeching, or rattling sounds coming from your furnace, this could indicate problems with internal components like the blower motor or ignition system.
  • Frequent Cycling:A furnace that constantly turns on and off may be experiencing issues with its thermostat, airflow blockage, or heat exchanger.
  • Inconsistent Heating:Uneven temperatures throughout your home suggest potential ductwork leaks or malfunctioning parts within the unit.
  • Rising Energy Bills:A sudden increase in heating costs without any changes in usage could be due to an inefficient furnace that requires professional attention.
  • Gas Smell or Carbon Monoxide Detectors Triggered:The smell of gas or activation of carbon monoxide alarms is an urgent safety concern. Shut the furnace off immediately and call a professional.

DIY vs. Professional

Issue Can You DIY? Requires Professional Assistance
Thermostat calibration Likely manageable Not needed unless advanced reprogramming required
Dirty air filter replacement Yes No
Pilot light issues Possibly If persistent or connected to gas supply systems
Electrical component failure No Yes
Heat exchanger cracks No Yes (Safety Risk)

If you’re unsure whether an issue is within your expertise range, err on the side of caution and consult with an HVAC specialist.

Benefits of Hiring a Professional Technician

  • Accurate Diagnosis:Professionals use specialized tools and expertise to identify underlying problems quickly and efficiently.
  • Long-Term Cost Savings:Proper repairs prevent further breakdowns and enhance energy efficiency, reducing monthly utility bills over time.
  • Warranty Protection:Many furnaces come with warranties that require certified technicians for repair work; attempting DIY fixes could void this coverage.
  • Safety Assurance:From handling electrical components to addressing potential gas leaks, trained professionals ensure all repairs meet safety standards.

Emergency Situations That Demand Immediate Attention

  1. Gas leaks from the furnace or nearby lines.
  2. Loss of heat during extreme cold weather conditions.
  3. Furnace short-circuiting or failure after power fluctuations.
  4. Detection of soot buildup around vents or burners.

Do not delay repairs in these scenarios as they can pose serious risks to both property and personal safety.

By understanding when it’s appropriate to call a technician for assistance, you can maintain the performance of your furnace while protecting yourself from costly complications down the line.

Close up technician repairing Gas Furnace using digital tablet Close up technician repairing Gas Furnace using digital tablet Furnace stock pictures, royalty-free photos & images

Benefits of Hiring Skilled Professionals for Quality Furnace Repairs

When it comes to ensuring your home’s heating system operates efficiently, hiring skilled professionals for furnace repairs offers distinct advantages. Attempting DIY fixes or relying on unqualified technicians may lead to prolonged issues, increased energy bills, or even safety concerns. Below, we outline the key benefits of entrusting your furnace repair needs to experienced HVAC professionals.

Expert Diagnosis and Precise Repairs

Skilled technicians have the training and tools necessary to quickly diagnose furnace problems. They are familiar with a wide range of models and brands, allowing them to identify underlying issues that may not be immediately apparent.
– Accurate identification of root causes
– Targeted solutions that address specific issues
– Prevention of recurring breakdowns

With expert diagnostics, you not only save time but also reduce the risk of further damage to your heating system.

Enhanced Energy Efficiency

A well-maintained furnace operates more efficiently, consuming less energy while providing optimal heating performance.
– Fixing worn-out components such as heat exchangers and blower motors
– Cleaning clogged filters and ducts that restrict airflow
– Calibrating thermostats for more accurate temperature control

These improvements lead to noticeable savings on energy bills over time.

Improved Safety

Furnaces that are malfunctioning can pose serious risks, such as carbon monoxide leaks or fire hazards.
– Inspecting for gas leaks or faulty wiring
– Repairing cracked heat exchangers to prevent carbon monoxide exposure
– Addressing improper venting that could cause dangerous build-ups

Hiring a professional minimizes these risks and helps you maintain peace of mind.

Cost Savings in the Long Run

While DIY repairs might seem more affordable initially, they can often result in additional expenses due to improper fixes or overlooked issues.
– Preventing expensive emergency repairs down the line
– Extending the lifespan of your furnace through proper maintenance
– Avoiding unnecessary replacements caused by misdiagnosed problems

Investing in quality repair services today can help you avoid costly surprises later.

Warranties and Service Guarantees

Reputable HVAC companies often provide warranties and service guarantees on their work. This ensures customers receive high-quality repairs without added financial risk.
– Peace of mind knowing repairs are backed by a guarantee
– Free follow-up services if the problem persists within a specified timeframe
Such warranties reflect a commitment to customer satisfaction and reliable workmanship.

DIY Repairs Professional Furnace Repairs
Limited expertise In-depth knowledge
Higher chances of recurring issues Long-lasting fixes
Safety concerns Adherence to safety standards
No guarantees Warranties provided

Access to Advanced Tools and Technology

HVAC professionals have access to specialized tools designed for efficient diagnostics and repairs—tools that may not be readily available for home use.
– Identify hidden problems using diagnostic devices like infrared cameras or combustion analyzers
By leveraging these technologies, professionals deliver superior results compared to manual efforts.

Hiring skilled professionals is an investment in both comfort and reliability during cold seasons. Their expertise ensures your heating system is running smoothly while enhancing efficiency, safety, and cost savings over time.

Understanding the Importance of Timely and Reliable Furnace Repair Services

Timely and reliable furnace repair services play a crucial role in ensuring your home remains comfortable, energy-efficient, and safe. Ignoring furnace issues or delaying repairs can lead to more significant problems, costly replacements, or even safety hazards. Below, we explore why timely furnace repair is essential and how it benefits you in the long run.

Why Timely Furnace Repair Matters

Addressing furnace problems promptly ensures:
Improved Efficiency: A malfunctioning furnace consumes more energy to maintain desired temperatures. Timely repairs restore efficiency, reducing energy bills.
Extended Lifespan: Regular maintenance prevents further wear and tear, helping your furnace last longer. Neglect often leads to premature breakdowns.
Safety Assurance: Faulty furnaces can pose risks such as carbon monoxide leaks or electrical fires. Prompt professional attention minimizes these dangers.

Key Signs Your Furnace Requires Immediate Attention

Recognizing early warning signs can prevent small issues from escalating into major problems.

  1. Inconsistent Heating– Uneven temperatures across rooms could signal thermostat issues or airflow blockages.
  2. Strange Noises– Banging, rattling, or squealing sounds may indicate loose components or mechanical malfunctions.
  3. High Energy Bills– A sudden spike in energy usage might mean your system is no longer operating efficiently.
  4. Pilot Light Issues– A yellow or flickering pilot light could reflect ventilation or fuel supply concerns.
  5. Unpleasant Odors– Smelling gas or burnt material requires immediate professional evaluation.

Benefits of Reliable Furnace Repair Services

Partnering with a trusted technician ensures peace of mind and optimal system performance.

Benefit Description
Cost Savings Avoid expensive replacements by addressing minor issues early on.
Enhanced Comfort Repairs ensure consistent heating throughout your home during cold months.
Improved Air Quality Well-maintained systems reduce dust, allergens, and pollutants indoors.
Reduced Downtime Professional services minimize long repair times and system outages.

Tips for Ensuring Timely Repairs

To keep your furnace in top condition year-round:
– Schedule annual inspections before the winter season begins. – Change air filters regularly to prevent clogs that strain the system. – Monitor for unusual sounds or smells and act quickly when detected. – Keep vents unobstructed for proper airflow.

Investing in timely and reliable furnace repair ensures a comfortable home environment while safeguarding your family’s well-being from avoidable risks like inefficient heating systems and potential safety hazards.


Tips for Choosing the Best HVAC Contractor Woodbridge VA for AC Repairs

turn on air conditioner Energy Efficient concept - Close up shot of split type air conditioner on the wall Aircon stock pictures, royalty-free photos & images

Air conditioning systems play a crucial role in maintaining comfort, especially during hot weather. However, over time, even the most reliable air conditioning units can experience issues that require repair or maintenance. Knowing how to examine your AC unit for common repair needs can save you time and prevent more significant problems from developing. Below is a guide to help you identify common AC issues and manage them effectively.

Common Signs Your AC Needs Repair

Regularly inspecting your air conditioner can help catch signs of trouble early.

  • Uneven Cooling:If certain rooms in your home feel warm while others remain cool, there could be an issue with airflow or ductwork.
  • Strange Noises:Unusual sounds like grinding, rattling, or buzzing may signal loose components, motor problems, or failing parts.
  • High Energy Bills:Unexplained increases in energy usage might mean your system is working harder than necessary due to inefficiencies.
  • Weak Airflow:Limited airflow from vents could indicate clogged filters, blocked ducts, or a malfunctioning blower motor.
  • Leaking Water or Refrigerant:Puddles of water near your indoor unit or signs of refrigerant leaks require immediate attention to avoid further damage.

Checklist for Inspecting Your AC Unit

  1. Dirty filters reduce efficiency and restrict airflow.
  2. Replace disposable filters every 1–3 months.
  3. Ensure the thermostat is set to “cool” mode and set at the desired temperature.
  4. Replace batteries if applicable.
  5. Look for debris like leaves or dirt around the outdoor condenser unit.
  6. Inspect condenser fins for bending or damage and gently clean them if necessary.
  7. Confirm all vents are unobstructed by furniture or drapes.
  8. Check for consistent airflow across different vents.
  9. Inspect visible refrigerant lines for ice buildup or leakage.

Troubleshooting Minor Issues

  • If your system fails to turn on, verify that all breakers are functioning properly in your electrical panel.
  • Clean dirty filters and ensure no blockages are restricting air intake near vents.
  • Reset your thermostat if it appears unresponsive.

When to Call a Professional

Issue Why You Need Professional Help
Refrigerant Leaks Only certified technicians can handle refrigerants safely and recharge the system.
Electrical Problems Wiring issues pose serious safety risks if not handled properly.
Compressor Failure The compressor is a critical component requiring specialized repair or replacement knowledge.
Persistent Cooling Problems Prolonged inefficiency may indicate underlying mechanical failures needing diagnosis.

By conducting periodic examinations of your air conditioner and addressing minor issues promptly, you can extend its lifespan while ensuring optimal performance year-round. For more complex problems that go beyond basic troubleshooting steps, contacting a reputable HVAC professional is essential to maintain the long-term reliability of your system.

How to Identify Common AC Repair Needs in Woodbridge VA

Regular maintenance and timely repairs are crucial to ensure the longevity and efficiency of your air conditioning (AC) unit. By learning to identify common repair issues, you can take proactive steps to address problems before they worsen, saving both time and money. Below is a comprehensive guide for homeowners to examine their AC units for common repair needs.

Signs You May Need Furnace Repair Woodbridge VA

When your AC unit isn’t working optimally, it often displays distinct signs.

  • Poor airflow: If certain rooms feel warmer than others or airflow seems weaker than usual, you may have clogged filters, blocked vents, or a failing blower motor.
  • Unusual noises: Rattling, squealing, or grinding sounds could indicate loose parts, motor issues, or debris inside the system.
  • Inconsistent temperatures: An AC unit that fails to maintain consistent cooling may have thermostat problems or low refrigerant levels.
  • Leaking water or refrigerant: Visible leaks around the unit are usually signs of blocked drain pipes or refrigerant line damage that requires immediate attention.
  • Higher energy bills: A sudden spike in electricity costs might suggest inefficiency caused by dirty coils or malfunctioning components.

Essential Steps for HVAC Installation Woodbridge VA

  1. Check the air filter: A clogged filter restricts airflow and forces the system to work harder. Replace it if it appears dirty or hasn’t been changed in 1–3 months.
  2. Inspect the outdoor condenser unit: Clear debris like leaves, dirt, and grass clippings from around the condenser unit to ensure proper air circulation.
  3. Monitor thermostat functionality: Test your thermostat by setting different temperatures and observing whether your AC responds correctly.
  4. Look for leaks: Check drain lines and surrounding areas for signs of moisture accumulation.
  5. Examine electrical connections: Ensure there are no frayed wires or burnt sections near connections.

Quick DIY Fixes Before Calling Emergency HVAC Service Woodbridge VA

  • Replace worn-out air filters regularly.
  • Reset circuit breakers if the system has tripped due to overloads.
  • Carefully clean dust from vents using a vacuum with a brush attachment.

For more intricate problems like damaged coils or compressor failures, contacting an HVAC technician is highly recommended.

When Professional Repairs Are Necessary

Problem Possible Cause Why Professional Help Is Needed
Refrigerant leaks Damaged tubing Requires licensed technicians to handle refrigerants safely
Compressor failure Electrical issues Replacing compressors involves advanced expertise
Frozen evaporator coils Restricted airflow Diagnosing root causes demands technical skill
Faulty wiring Electrical short circuits Ensures safety compliance during repairs

Attempting DIY repairs for complex issues without expertise may void warranties and lead to further damage.

Importance of Timely Repairs

Addressing small issues promptly prevents them from escalating into costly replacements down the road.

  • Fixing refrigerant leaks early avoids compressor burnout.
  • Replacing worn belts averts motor damage.
  • Cleaning condenser coils reduces strain on your system.

Consistent inspection of your AC ensures efficient cooling during peak seasons while reducing energy consumption and extending its lifespan. Scheduling regular HVAC servicing with licensed professionals will keep your unit performing at its best year-round.

Understanding the Key Steps in Your AC Service Call Process

A professional air conditioning (AC) service call is an essential step to ensure your cooling system operates efficiently and effectively. Understanding the process can help homeowners set realistic expectations and make informed decisions during the repair or maintenance visit. Below is a detailed breakdown of what typically happens during an AC service call.

The first step in the process is reaching out to an HVAC company to schedule your appointment.

  • Be clear about your issue:Provide as much detail as possible about symptoms such as strange noises, reduced cooling, or higher energy bills.
  • Prepare your schedule:Choose a time that allows you or another household member to be home during the visit.
  • Confirm credentials:Ensure the company you contact is licensed, insured, and well-reviewed.

Once the technician arrives, they will conduct a thorough examination of your AC system to diagnose potential problems.

  • Visual inspection:Checking for any visible signs of wear, damage, or leaks in components like refrigerant lines or coils.
  • Performance testing:Measuring airflow levels, thermostat accuracy, and refrigerant pressure.
  • Electrical system check:Ensuring all wiring connections are functioning properly and there are no safety hazards.

Technicians use specialized tools such as multimeters and pressure gauges to accurately diagnose issues.

Component Common Issues Diagnostic Tools Used
Air Filter Clogs reducing airflow Visual inspection
Refrigerant Levels Low charge due to leaks Pressure gauges
Compressor Overheating or failure Multimeter
Condenser Coils Dirt buildup affecting efficiency Visual inspection

After diagnosing your unit, a reputable technician will explain their findings clearly.

  • The specific problem(s) identified
  • Recommendations for repair or maintenance
  • A cost estimate for parts and labor

It’s important at this stage to ask questions if anything is unclear. For example: – What caused the issue?
– Are there alternative solutions?
– How soon should repairs be done?

If you agree with their recommendations, technicians usually proceed with repairs or routine maintenance tasks on-site.

  • Replacing air filters
  • Cleaning coils or ducts
  • Sealing refrigerant line leaks
  • Repairing electrical connections

In some cases where specialized parts are required but unavailable during the visit, a follow-up appointment may be scheduled.

Before leaving, technicians will test your system again to ensure proper functionality after completing repairs.

  • The unit cools effectively.
  • There are no unusual noises or vibrations.
  • Thermostat settings align with indoor temperatures.

You’ll also likely receive advice on preventive measures like routine filter replacements or annual tune-ups.

Tips for Homeowners During an AC Service Call

To get the most out of your experience: 1.Keep records:Document details from each service visit for reference during future issues. 2.Clear access areas:Ensure your AC unit is easily accessible before technicians arrive. 3.Follow up on advice:Schedule regular maintenance based on professional recommendations.

By understanding these key steps in an AC service call process, homeowners can feel confident navigating repairs while maintaining their cooling systems’ longevity and performance levels over time.

Understanding the Key Steps in Your AC Service Call Process

When your air conditioning system malfunctions, understanding what to expect during a service call can help you feel more prepared and confident about the process. A professional HVAC service call typically involves several critical steps aimed at diagnosing, addressing, and preventing future issues with your AC unit. Here’s a breakdown of the key steps involved in an HVAC service call.

Before the technician arrives, there are a few things homeowners can do to ensure the process goes smoothly:
Clear the area around your AC unit: Remove any furniture, debris, or objects that might obstruct access to your indoor or outdoor units.
Note down specific issues: Write down any unusual signs you’ve noticed with your AC system. Common symptoms include uneven cooling, strange noises, higher energy bills, or frequent cycling on and off.
Locate important documents: If available, have documentation such as previous repair records or warranties ready for reference.

Upon arrival, the technician will conduct a thorough evaluation of your system to determine what’s causing the problem.

  • Visual inspection: The technician examines both indoor and outdoor components for visible damage or irregularities such as leaks, corrosion, or dirty filters.
  • System performance testing: They may test airflow levels, temperature output, or thermostat functionality to identify specific performance issues.
  • Electrical component check: Critical electrical parts like capacitors and relays are inspected to ensure they are functioning correctly and safely.
  • Refrigerant level check: If cooling performance is reduced, refrigerant levels are assessed for signs of leakage or low supply.

Once the problem is identified, a reputable HVAC technician will explain their findings in detail using clear language so you can fully understand what’s going on with your system.
– They’ll describe the issue(s) that need attention. – Provide information about repair options. – Discuss potential preventive measures to avoid similar problems in the future.

Technicians should also provide a written estimate detailing labor costs and any required parts before proceeding with repairs.

After gaining approval from you as the homeowner, they will begin making repairs based on their diagnostic findings.

Repair Type Description
Replacing air filters Removing clogged filters that restrict airflow
Fixing refrigerant leaks Sealing leaks and recharging refrigerant if necessary
Cleaning coils Removing dirt from evaporator/condenser coils
Repairing/replacing components Fixing broken parts like motors or capacitors

Depending on the complexity of repairs needed, this step could take anywhere from an hour to several hours.

  • Verifying proper airflow throughout all vents.
  • Confirming thermostat settings and accuracy.
  • Double-checking repaired/replaced components for functionality.

This step ensures that not only is your AC running again but also that it performs optimally moving forward.

  • Schedule routine maintenance appointments (typically biannually).
  • Regularly replace air filters (every 1–3 months depending on usage).
  • Keep outdoor units free from obstructions like leaves or debris.

By following these recommendations along with professional servicing when needed, you can maintain a more reliable HVAC system while avoiding costly breakdowns down the road.

Understanding these steps empowers homeowners with knowledge during their next AC service call while fostering trust between clients & repair professionals alike.

manometers measuring equipment for filling air conditioners manometers measuring equipment for filling air conditioners Furnace stock pictures, royalty-free photos & images

Signs Your Furnace May Be Broken and In Need of Immediate Repair

A properly functioning furnace is crucial for maintaining comfort during the colder months. When a furnace begins to fail, it can not only leave you in the cold but may also lead to more serious and costly issues. Below are key warning signs that your furnace might require immediate repair.

While furnaces generally make some noise during operation, loud or unusual sounds such as banging, screeching, rattling, or hissing often indicate mechanical problems or loose components, including:
– A failing blower motor.
– Damaged belts or bearings.
– Airflow obstructions within the system.

If persistent noises occur, it’s best to have a professional HVAC technician inspect the system.

If certain rooms in your house are significantly colder than others despite the furnace running, it could be a sign of:
– A malfunctioning thermostat.
– Blocked ductwork preventing proper airflow distribution.
– An aging unit that is no longer effective at heating evenly.

A sudden spike in energy bills without any corresponding changes in usage habits often signals that your furnace is working harder than necessary due to inefficiencies such as:
– Dirty or clogged filters restricting airflow. – Worn-out components requiring replacement. – Poor burner efficiency causing excessive fuel consumption.

Regular maintenance can often prevent this issue from escalating into costly repairs.

Symptom Possible Cause Recommended Action
High Energy Bills Dirty filters or worn parts Replace filters; repair/clean parts
Uneven Room Temperatures Blocked ducts; thermostat issues Inspect ducts; recalibrate thermostat

Short cycling—a condition where the furnace turns on and off repeatedly—indicates underlying problems such as:
– An oversized system improperly calibrated for your home’s size. – Clogged air filters causing overheating. – Faulty flame sensors requiring cleaning or replacement.

This issue not only reduces efficiency but also places unnecessary strain on the unit, shortening its lifespan if not properly addressed.

Unpleasant odors emanating from a running furnace should not be ignored as they could point to serious concerns like:
– Burning smells caused by dust buildup when starting the unit after months of inactivity. – Rotten egg odors indicating potential gas leaks (immediate attention required).

If you detect unusual smells, turn off your system immediately and contact an HVAC professional for inspection.

A healthy pilot light should burn bright blue due to proper gas-to-air combustion ratios. A yellow flame typically signals carbon monoxide buildup—a dangerous situation that requires immediate professional intervention.

By staying alert to these warning signs, homeowners can prevent minor furnace issues from evolving into more significant problems while protecting their family’s safety and comfort during winter months.

Dirty air ducts are often overlooked during regular HVAC maintenance, but they play a significant role in the performance and efficiency of your heating and cooling system. Over time, dust, dirt, pet dander, mold spores, and other contaminants can accumulate in your ducts, negatively affecting both your system’s function and your indoor air quality.

Reduced HVAC System Efficiency

As a result: – Your energy bills may increase due to higher power consumption. – The strain on the HVAC components can lead to premature wear-and-tear. – It may take longer for your home to heat or cool effectively.

By ensuring that your ducts are clean, you allow for optimal airflow, reducing energy usage and extending the life of your system.

Poor Indoor Air Quality

Contaminants trapped in ductwork are often recirculated throughout the house whenever you run heating or cooling systems. This can lead to: – Increased respiratory issues or allergy symptoms for occupants. – Aggravation of asthma or other chronic health conditions. – Unpleasant odors caused by mold or mildew growth inside the ducts.

For homes with children, elderly family members, or individuals with sensitive immune systems, maintaining clean ductwork is even more crucial.

Risk of Mold Growth

One serious consequence of dirty ducts is the potential for mold growth. Moisture from condensation during cooling cycles can collect within the duct system when combined with accumulated dust and debris. Mold growth in ductwork poses significant risks: – A spread of harmful spores into living spaces. – Damage to walls or ceilings due to moisture infiltration. – Costly repairs if left untreated over time.

Scheduling routine inspections and cleaning services helps mitigate these risks before they become major problems.

Impacts on Temperature Regulation

Blocked or dirty vents can cause uneven temperatures throughout different rooms in your home. This results from restricted airflow that prevents proper distribution of heated or cooled air. Common signs include: – Hot or cold spots around various areas of the house. – Inconsistent performance despite adjusting thermostat settings.

Duct cleaning ensures consistent temperature regulation by allowing unobstructed flow through every part of the ventilation network.

When Should You Consider Duct Cleaning?

Here are some key situations where professional duct cleaning services might be necessary:
1.Visible Dust Around Vents: Excessive dust buildup near vents suggests poor filtration within the ductwork itself. 2.Unexplained Allergy Symptoms: If family members experience sneezing, coughing, or other respiratory issues indoors but not elsewhere. 3.Mold Odors: Persistent musty smells could indicate fungal growth inside hidden parts of the system. 4.Recent Renovations: Construction projects generate fine particles that easily settle in vents unless thoroughly cleaned afterward.

Indicator Potential Cause Action Required
Increased Energy Bills Blockage from dirt/debris Schedule cleaning
Higher Allergy Symptoms Indoors Dust/mold circulation Inspect/clean ducts
Uneven Cooling/Heating Restricted airflow zones Clean & test airflow balance

Regular maintenance coupled with periodic professional duct cleaning will ensure an efficient HVAC operation while keeping energy costs manageable over time without compromising indoor comfort levels.

Recognizing When It’s Time for an HVAC Replacement to Avoid Costly Repairs

Many homeowners struggle with deciding whether to repair or replace their system. Knowing when replacement is the most cost-effective option can save you from ongoing maintenance expenses, inefficiency, and discomfort.

  • Most HVAC systems have a lifespan of 10–15 years for air conditioners and 15–20 years for furnaces.
  • If your unit is nearing or exceeding this age range, consider replacement instead of frequent repairs.
  • Older systems lose efficiency over time, leading to higher energy consumption.
  • A sudden or gradual increase in utility bills could signal that your unit isn’t operating efficiently anymore.
  • If you find yourself calling your HVAC technician multiple times per year, the cumulative cost of repairs might outweigh investing in a new system.
  • Repeated issues may indicate systemic failure that repairs cannot fully resolve.
  • This could also mean your current unit is improperly sized for your home’s needs.

Cost Comparison: Repairing vs Replacing

When deciding whether to repair or replace, it’s helpful to consider costs over time.

Repair Cost as % of Replacement Recommended Action
Less than 30% Consider repair if the unit is under ten years old and efficient.
More than 30% but less than 50% Evaluate both options based on energy savings and efficiency improvements with a new system.
Over 50% Replacement often makes more financial sense in terms of long-term savings and reliability.
  1. Improved Energy Efficiency: Modern systems often boast higher SEER (Seasonal Energy Efficiency Ratio) ratings, reducing energy usage by up to 30%.
  2. Enhanced Indoor Air Quality: Newer units incorporate advanced filtration options to remove allergens, dust, and pollutants more effectively.
  3. Lower Maintenance Costs: A newer system will run reliably without frequent servicing for several years after installation.
  4. Smart Technology Integration: Many modern systems offer smart thermostats and energy-tracking features for optimized performance.
  5. Environmental Benefits: New systems use eco-friendly refrigerants like R-410A that have less environmental impact compared to older refrigerant types such as R-22.

When Professional Guidance Becomes Necessary

  • Ask for a detailed inspection report on your current system.
  • Request an estimate comparing repair costs versus replacement expenses.
  • Discuss available rebates or incentives for upgrading to energy-efficient equipment.

By recognizing when replacement makes more sense than constant repairs, you can reduce stress associated with breakdowns while maximizing comfort and efficiency in your home environment.

Recognizing When It’s Time for an HVAC Replacement to Avoid Costly Repairs

Over time, wear and tear, inefficiency, and outdated technology can lead to higher repair costs or inadequate performance.

Frequent Repairs Are Adding Up

Common issues like failing compressors, refrigerant leaks, or motor breakdowns indicate that the unit is nearing the end of its lifespan.

Ask yourself:
– Are repair costs approaching 50% of the cost of a new system?
– Are the same components breaking repeatedly?

By opting for a new system instead of consistent repairs, you can avoid unpredictable expenses and enjoy peace of mind.

Your Energy Bills Have Increased Significantly

Older units tend to lose efficiency over time due to aging components or outdated technology.

Signs of poor efficiency include:
– The unit takes longer to heat or cool your home.
– Uneven temperatures throughout different rooms. – Rising utility bills even with consistent usage patterns.

Switching to a modern, energy-efficient model with a high SEER (Seasonal Energy Efficiency Ratio) rating can reduce monthly expenses while improving overall performance.

Your System Is Past Its Expected Lifespan

Most HVAC systems have an average lifespan of 10–15 years with proper maintenance. If your unit is older than this range, replacement is worth considering before major issues arise.

System Type Average Lifespan
Central Air Systems 12–15 years
Furnaces 15–20 years
Heat Pumps 10–12 years

Modern systems incorporate advanced features such as programmable thermostats and smart controls that can help extend their usability.

Poor Indoor Air Quality

An aging HVAC system may struggle with effective air filtration and circulation, leading to poor air quality in your home.
– Increased dust accumulation. – Lingering odors. – Aggravated allergies or respiratory issues for household members.

Upgrading your system not only enhances temperature control but also improves air filtration capabilities—especially when paired with clean ducts and modern filtration technologies.

Refrigerant Type Is Obsolete

Systems using outdated refrigerants like R-22 (also known as Freon) should be replaced because these substances are being phased out due to environmental concerns. Repairs involving R-22 are increasingly expensive since production has ceased as of 2020.

Advantages of switching:
– Avoid costly refrigerant replacements. – Reduce environmental impact by using eco-friendly alternatives like R-410A.

Benefits of Replacing an Old HVAC System

  1. Improved Energy Efficiency:Newer models consume less energy while delivering optimal performance.
  2. Lower Maintenance Costs:Modern systems require fewer repairs compared to aging units.
  3. Enhanced Comfort Features:Smart thermostats, zoning options, and quieter operation improve living conditions.
  4. Higher Resale Value:A new energy-efficient HVAC system adds value when selling a home.

Evaluating these factors can help you determine if it’s time for an upgrade instead of continuing costly maintenance on an old unit—ensuring long-term savings and comfort for years ahead.