(This is a guest post from Antoni Sawicki aka Tenox)
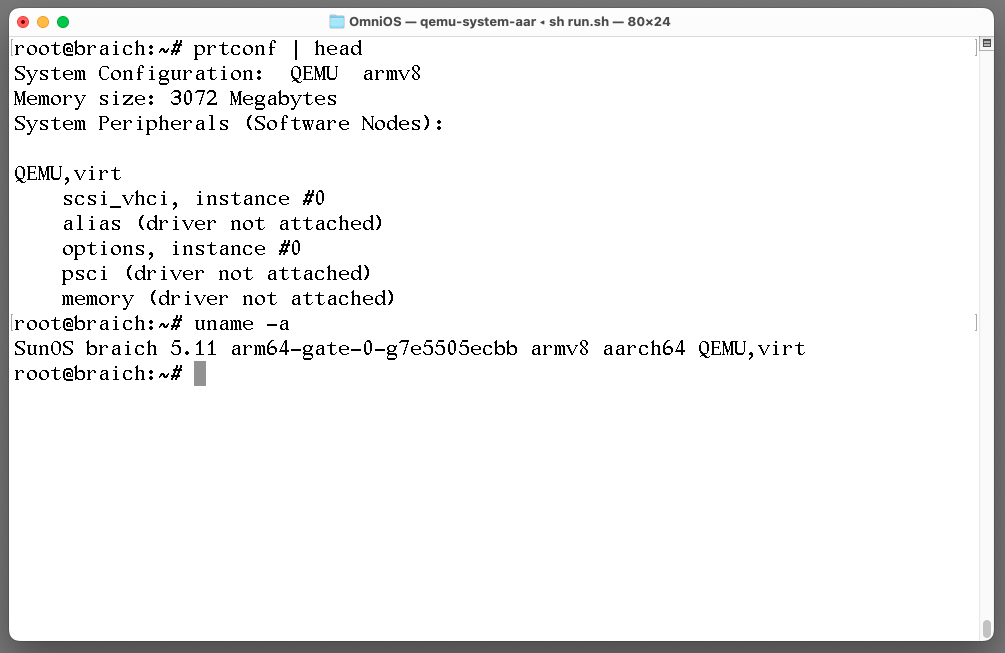
Ever since inception of Illumos I always wanted to get it working on ARM / AARCH64. But being under development it was somewhat difficult task. I previously tried building arm64-gate but there always was something not quite right. Turns out OmniOS has a ready to run image that one can boot under QEMU!
While I have a mountain of old discarded Windows Phones from work, I’d flashed them all to Windows 10, well except for one that was stuck in a ‘happy face boot loop’. In this business we call this foreshadowing.
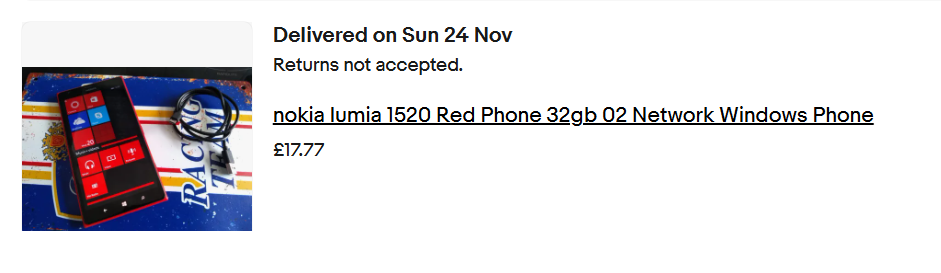
That’s when I saw this gem, a Nokia Lumia 1520, 32Gb, and in Red. I offered 17.77, and the seller took me up on it!
17.77!Windows phone 8.10.14266.359
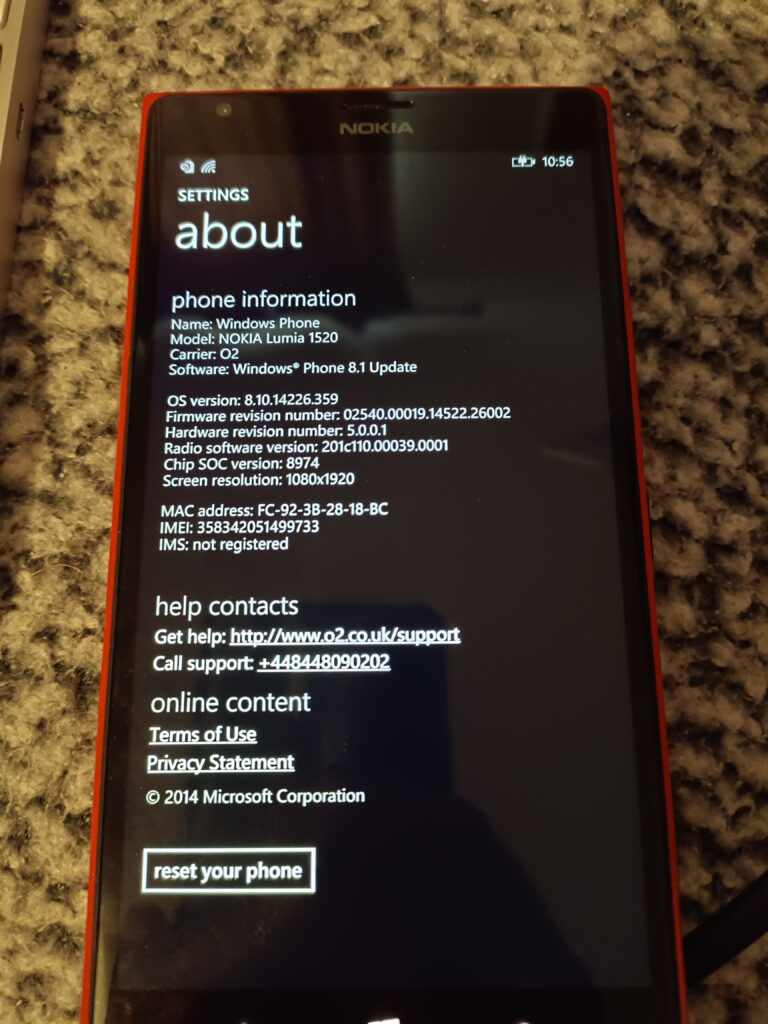
The phone arrived, running Windows 8.1. Needless to say, the store is all shutdown, so loading apps or doing anything fun is basically out of the question. So, the first thing to do is update it. I can’t download the ‘upgrade advisor’ as the 8.1 store has been shut down. Luckily the hand/dandy OTC Updater (otcupdater.zip) to the rescue!
Updating from 8.1
Just connect the phone with USB, run the CLI tool, and it’ll kick off the update.
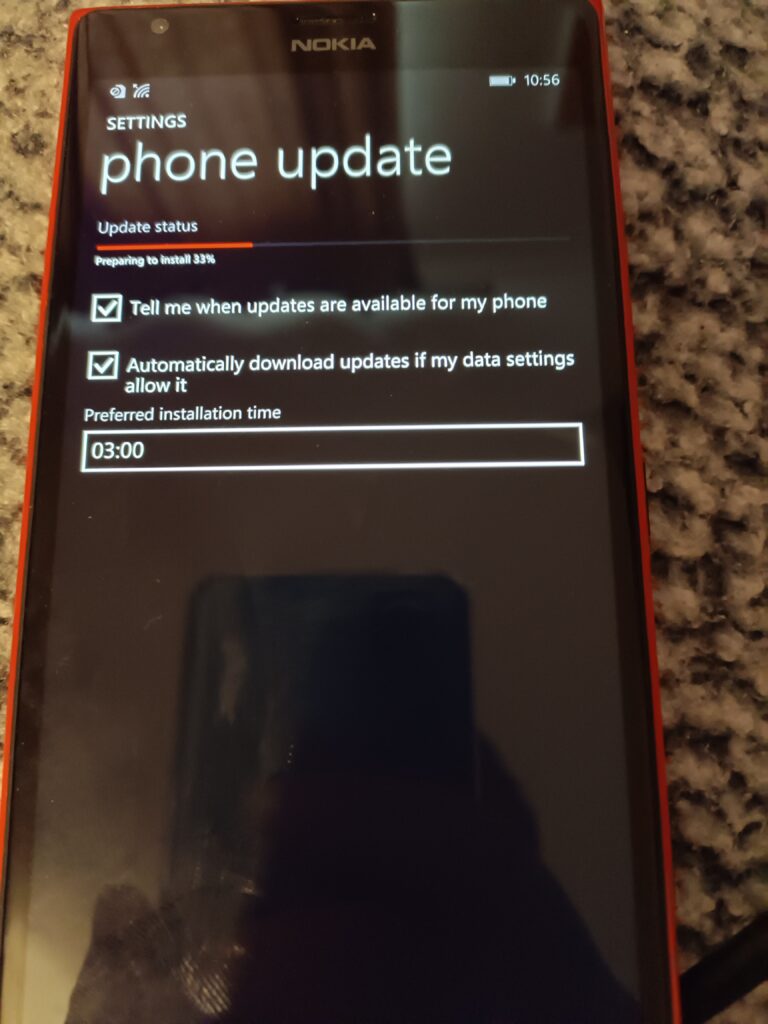
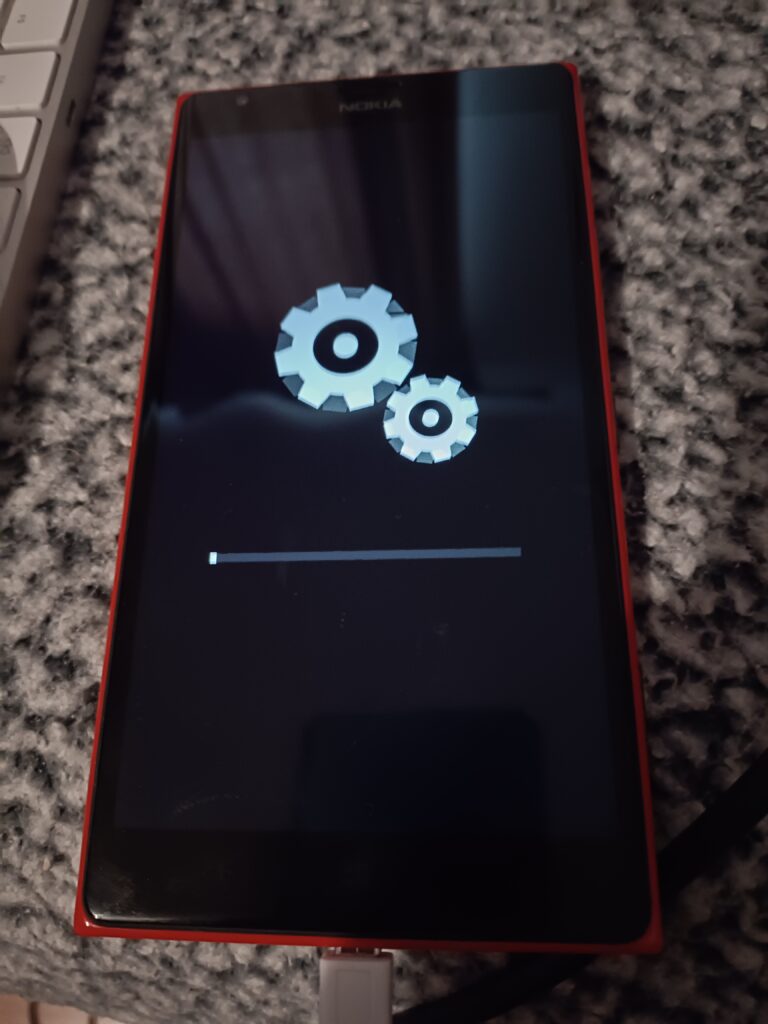
Updating
A few minutes later, and the gears of progress grind away through the update
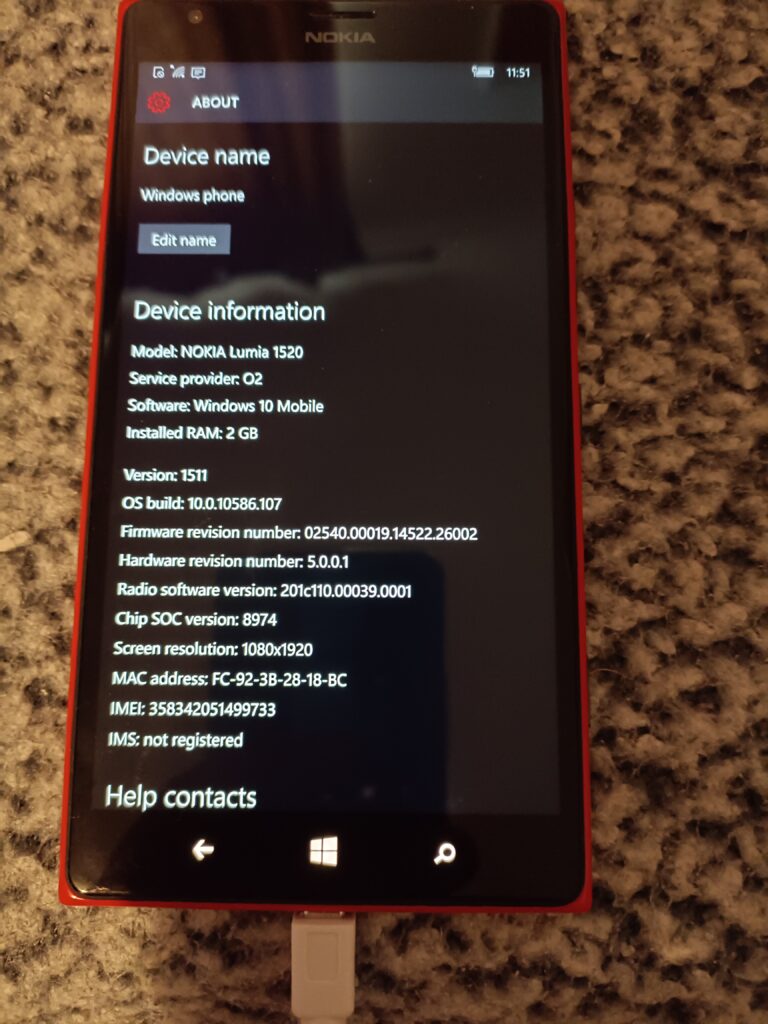
Updated to 10.0.10586.170 version 1511
And in no time, I’m up and running Windows 10, build 1511. I go ahead, connect up to WiFi, and run Windows update, and after downloading, updating and then rebooting…
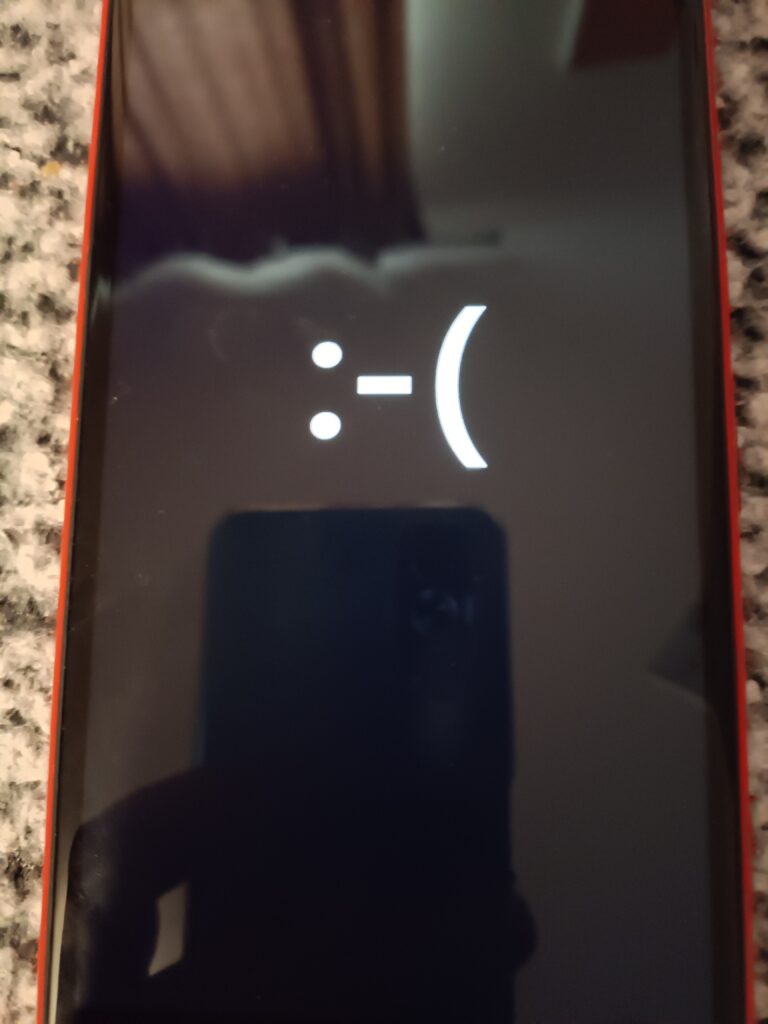
🙁
Oh no, now my 1520 is now doing the unhappy face boot loop. 🙁 indeed.
Searching around, I see the tool to fix this all is the Windows Device Recovery Tool. Although it didn’t work for me. So, I sat there for 3 days watching my ‘new’ 1520 boot looping over and over and over.
I also need the .FFU recovery file, which is thankfully all backed up on lumiafirmware.com
I’m not sure what was going on, but I got a new USB-A cable, and suddenly, running thor manually ….
THOR2 1.8.2.18
Built for Windows @ 13:36:46 Jun 16 2015
Thor2 is running on Windows of version 6.2
thor2.exe -mode uefiflash -ffufile \temp\RM937_02540.00019.15235.40003_RETAIL_prod_signed_942_026BB5_O2O-GB.ffu -do_full_nvi_update -do_factory_reset
Process started Thu Nov 28 17:12:29 2024
Logging to file C:\temp\thor2_win_20241128171229_ThreadId-42432.log
Debugging enabled for  uefiflash

Initiating FFU flash operation
WinUSB in use.
isDeviceInNcsdMode
isDeviceInNcsdMode is false
Device mode 6  Uefi mode
[THOR2_flash_state] Pre-programming operations
Disable timeouts
Get flashing parameters
Lumia Boot Manager detected
Check status of battery
State of charge 61, charging current -338
Protocol version 2.6 Implementation version 2.35
Detecting UEFI responder
HELLO success
Lumia Boot Manager detected
Check status of battery
State of charge 61, charging current -381
Protocol version 2.6 Implementation version 2.35
Booting to FlashApp
Reboot to FlashApp command sent successfully.
Verifying that device is online
Device is online
Detecting UEFI responder
HELLO success
Lumia Flash detected
Protocol version 2.34 Implementation version 2.59
Disable timeouts
Get flashing parameters
Lumia Flash detected
Protocol version 2.34 Implementation version 2.59
Size of one transfer is 2363392
MMOS RAM support: 1
Size of buffer is 2359296
Number of eMMC sectors: 61071360
Platform ID of device: Nokia.MSM8974.P6081.2.2
Async protocol version: 01
Security info:
Platform secure boot enabled
Secure FFU enabled
JTAG eFuse blown
RDC not found
Authentication not done
UEFI secure boot enabled
SHK enabled
Device supports FFU protocols: 0015
Subblock ID 32
[THOR2_flash_state] Device programming started
Using secure flash method
CoreProgrammer version 2015.06.10.001.
Start programming signed ffu file \temp\RM937_02540.00019.15235.40003_RETAIL_prod_signed_942_026BB5_O2O-GB.ffu
FfuReader version is 2015061501
Send FlashApp write parameter: 0x4d544f00
Perform handshake with UEFI...
Flash app: Protocol Version 2.34 Implementation Version 2.59
Unknown sub block detected. Skip...
DevicePlatformInfo: Nokia.MSM8974.P6081.2.2
Unknown sub block detected. Skip...
Unknown sub block detected. Skip...
Supported protocol versions bitmap is 15
Secure FFU sync version 1 supported.
Secure FFU async version 1 supported.
Secure FFU sync version 2 supported.
Secure FFU async version 2 supported.
CRC header v. 1
CRC align bytes. 4
Get CID of the device...
Get EMMC size of the device...
Emmc size in sectors: 61071360
CID: Samsung, Size 29820 MB
ConnSpeedEcho: Elapsed= 0.234000, EchoSpeed= 28.85, Transferred= 7077918 bytes
Get security Status...
Security Status:
Platform secure boot is enabled.
Secure eFUSE is enabled.
JTAG is disabled.
RDC is missing from the device.
Authentication is not done.
UEFI secure boot is enabled.
Secondary HW key exists.
Get RKH of the device...
RKH of the device is 3774964A7E6AC7EF7D428DDC0C0EAD71640B0D8DD3BFC3829110AF2D8ED68D7C
Get ISSW Version...
ISSW Version: 216
Mon Aug 11 15:15:33 EEST 2014;ISSW v0216; main; OS; DNE; KCI 1244; ASIC 8974;
Get system memory size...
Size of system mem: 2097152 KB
Read antitheft status...
Requested read param 0x41545250 is not supported by this flash app version.
Send backup to RAM req...
Clearing the backup GPT...SKIPPED!
Successfully parsed FFU file. Header size: 0x000e0000, Payload size: 0x0000000066a00000, Chunk size: 0x00020000, Header offset: 0x00000000, Payload offset: 0x00000000000e0000
RKH match between device and FFU file!
Option: Skip CRC32 check in use
Start sending header data...
Start sending payload data V2Sbl in async mode...
Percents: 0
........
Percents: 100
lastDescriptorIndex: 13135 lastLocationIndex: 0
Flashing completed successfully! Status: 0x0001
Safe write descriptor index reached: true
Payload data transfer speed (31.94 MB/s) Elapsed time 51.41 sec
Payload data size 1642.022339 MB
Read flashing status..
[IN] programSecureFfuFile. Closing \temp\RM937_02540.00019.15235.40003_RETAIL_prod_signed_942_026BB5_O2O-GB.ffu
Get EMMC write speed...
EMMC write speed: 44244 KB/s
Get data verify speed...
Data verify speed: 42032 KB/s
Send restore backup from RAM req...
programming operation completed!
[THOR2_flash_state] Post programming operations
[THOR2_flash_state] Executing factory reset
[Factory reset result] 0
Factory reset done
[THOR2_flash_state] Executing Full NVI Update
Write flash options ( WriteNvi: Full )

Write parameter to device via UEFI Flash App
Write parameter Ok
Flash options set successfully.

[Full NVI update result] 0
Operation took about 58.00 seconds. Average transfer speed was 29.69 MB/s.

Exited with success
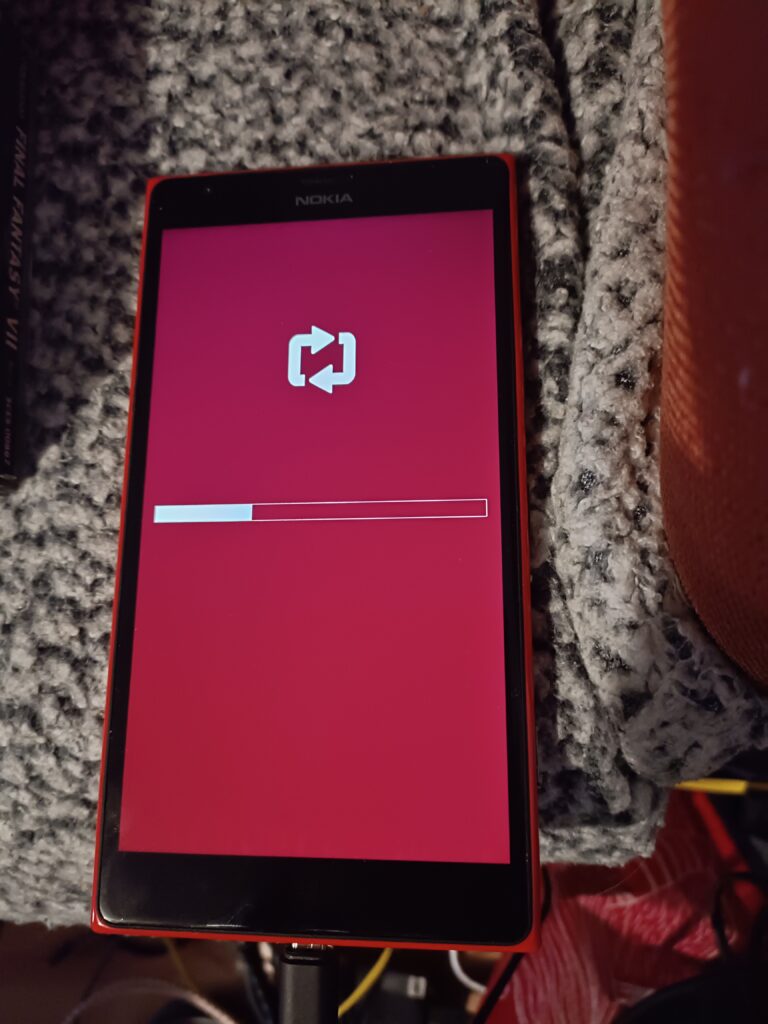
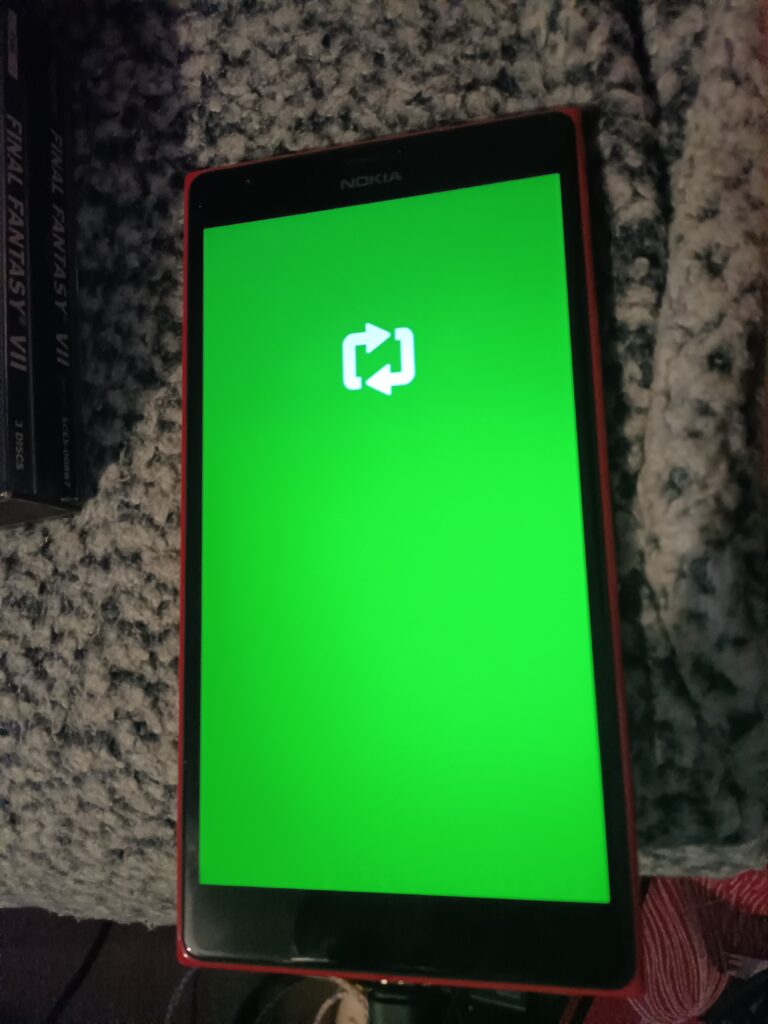
And then with the phone prepped, it then went green:
Green boot state
Now it’s just a matter of having the phone reboot, reset from using Thor yet again
thor2 -mode rnd –bootnormalmode
THOR2 1.8.2.18
Built for Windows @ 13:36:46 Jun 16 2015
Thor2 is running on Windows of version 6.2
thor2 -mode rnd -bootnormalmode
Process started Thu Nov 28 17:15:54 2024
Logging to file C:\Temp\thor2_win_20241128171554_ThreadId-3412.log
Initiating do RnD operations
WinUSB in use.
Debugging enabled for  rnd

Detecting UEFI responder
Send HELLO
HELLO success
Lumia Flash App detected
Disable time-outs
Read FlashApp Build Info
Read parameter from UEFI Flash App
Read parameter Ok
FlashApp Build Info: Date:Dec 23 2014 Time:10:56:58 Info:-
Transfer size: 2363392
Sublock ID 31
Buffer size: 2359296
Number of sectors: 61071360
PlatformInfo is Nokia.MSM8974.P6081.2.2
Async protocol version: 01
Security info sublock detected
Platform secure boot enabled
Secure FFU enabled
JTAG eFuse blown
RnD Certificate not found
Authentication not done
UEFI secure boot enabled
SHK enabled
Device supports FFU protocols: 0015
Sublock ID 32
Read Root Key Hash
Read parameter from UEFI Flash App
Read parameter Ok
Root Key Hash is 3774964A7E6AC7EF7D428DDC0C0EAD71640B0D8DD3BFC3829110AF2D8ED68D7C
Read public ID
Read parameter from UEFI Flash App
Read parameter Ok
Public ID is 2D54A10E278A16A38EE918F17BBB88431406FBF5
Protocol version 2.34 Implementation version 2.59
Resetting the device

THOR2_ERROR_CONNECTION_OPEN_FAILED

THOR2 1.8.2.18 exited with error code 84001 (0x14821)
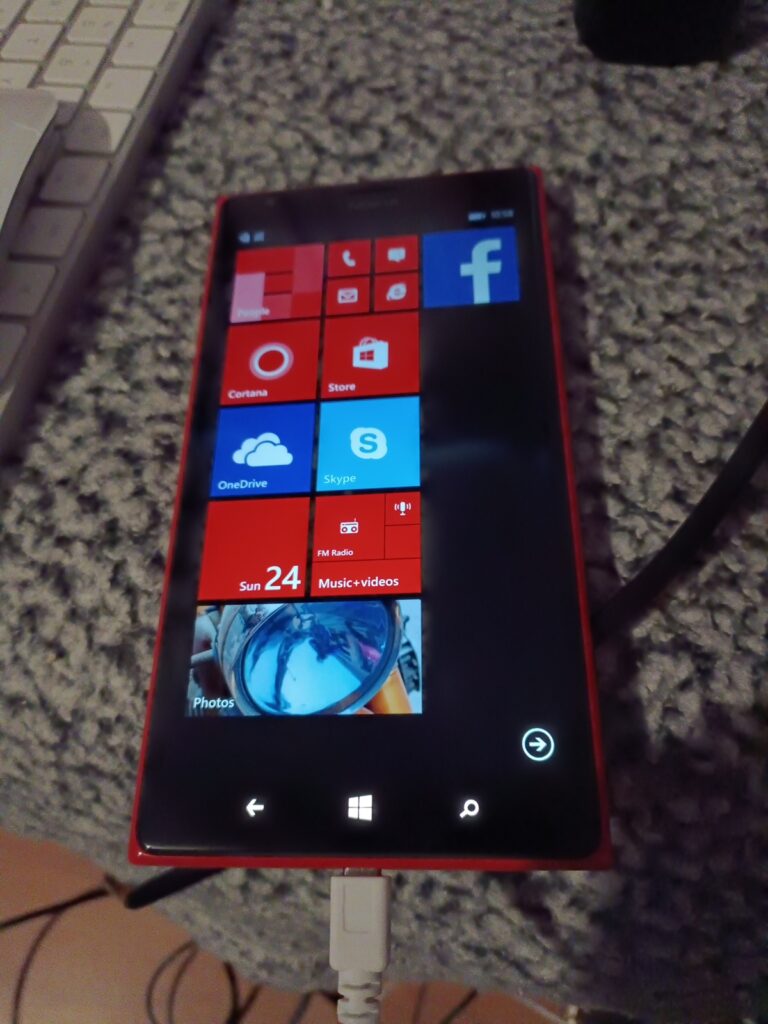
And now I was back in business!
Back from the dead
And we’re so back!
This time I re-ran the OTC Updater to bring me back to Windows 10 10.0.10586.170 version 1511. This time I just decided to keep re-running the OTC Updater.
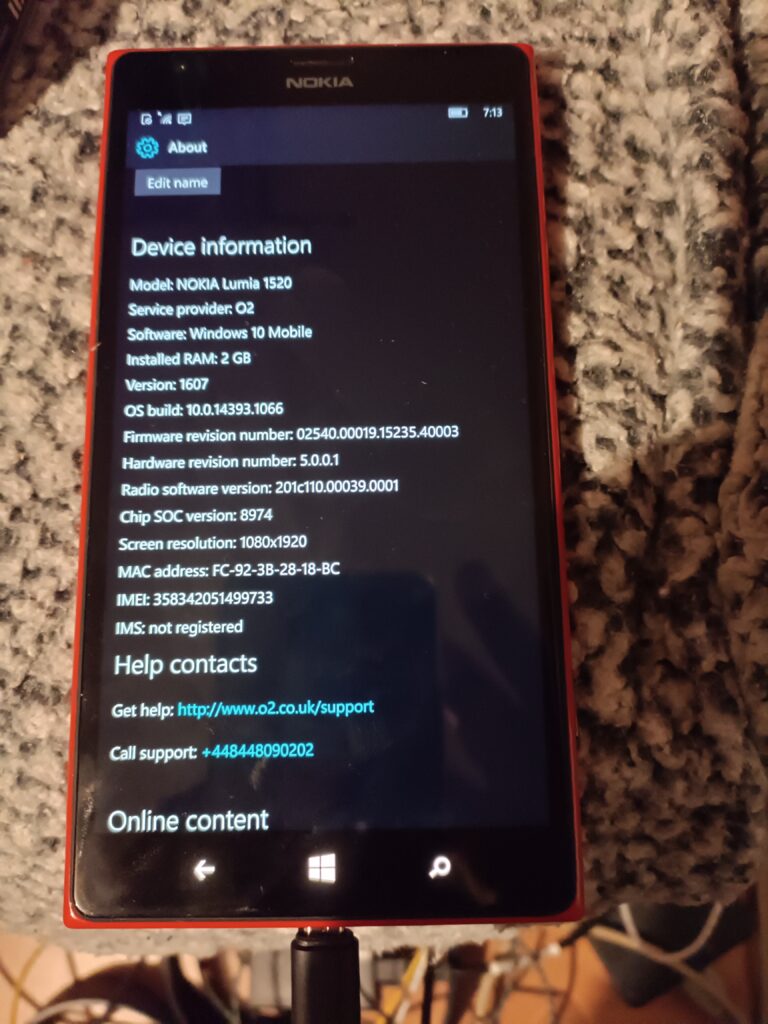
Windows 10 10.0.14393.1066 Version 1607
I was then able to update to 10.0.14393.1066 Build 1607. Nice!
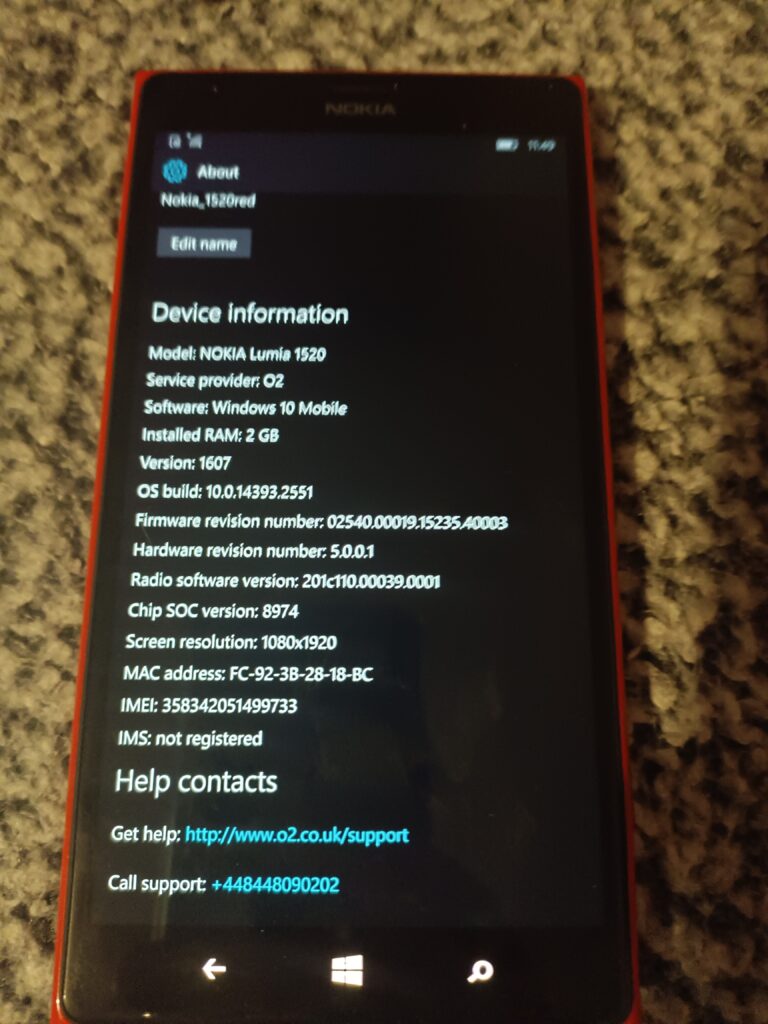
Windows 10 10.0.14393.2551 Version 1607
And one more update, and now I’m running Windows 10 10.0.14393.2551 Version 1607, aka the last version that OTC can pull.
Well that was fun!
Next up, I signed in, and I was able to retrieve my One Drive. I forgot how nice it was to be able to play music directly from OneDrive, without having to download it to flash. And wow is the UI so snappy. Kind of crazy how old and 32bit bound the old Windows Phones are. Shame Microsoft didn’t believe.
I thought Outlook would surely work, but alas, no dice. It’ll load but not sync. MSN weather, stocks, travel are all dead. Just is the map software (Even on 8.1).
MUST GO FASTER!
Of the purchased apps, Minecraft just sits at the loading screen. Sonic CD, and Final Fantasy load up and run. As does the most coveted game of 2017, Candy Crush Saga still runs as well.
So yeah, it’s nice the paid stuff still works, but with no email it’s now just barely above feature phone level of usefulness.
There are a few reasons to get an M2 Mac Pro and although many will say the Studio is a better buy for value: that’s only true if you’re not after these important considerations:
The ability to install your own *bootable* SSD: nearly every major Mac reviewer ignored this insanely important feature.
The ability to install internal storage (and go beyond 8 TB), period: do we really want a cocktail of external HDDs attached? I don’t!
The ability to install an internal USB A licensing dongle: unless you’re sharing your dongle over the network with 3rd party software from an RPi hiding in a closet (you should try VirtualHere if you want cross-platform dongle sharing it’s great), you don’t want to accidentally shear it off costing thousands of dollars of lost licensing.
The Magic Keyboard and (black) Magic Mouse are bundled (this is not the case with the Mac Studio or the MacBook Pro adding a substanstial cost. However, since the AppleCare+ is more expensive for the Mac Pro over the Mac Studio you could argue these costs cancel themselves out… unless you’re Icarus with a wax wallet instead of wax wings and never purchase AppleCare+).
Recently ‘GoFetch’ made the headlines, but it’s irrelevant for a variety of reasons in my opinion: 1) you won’t have WAN-exploitable instances of GoFetch in the real world, 2) it does indeed affect some Intel processors and probably others. The way all processors are designed now with speculative execution, CVE-after-CVE is unavoidable so the sensationalization has worn out its appeal. Even the once-ironclad AMD processors are afflicted with a bunch of nasty CVEs now too. \rant
Mac Pro vs PS/2 Model 95
After an eye-watering $8000: refurbished base model with AppleCare+ 🤮💸💸, we’re greeted with our new friend. The Cheese Grater (2023 Mac Pro) has befriended the Ardent Tool of Capitalism (PS/2 Model 95)! It’s odd how both share silly nicknames and a very similar height sans handles. Both systems symbolize the same sentiment that Louis Ohland shared many years ago: “Think of a business computer being used for purely personal reasons. Fist pump at the man! Isn’t using a corporate tool because you can an expression of free will?”*
*Louis Ohland is the guy who nicknamed the PS/2 Model 95, the Ardent Tool of Capitalism.
Q&A
Q: will I grate cheese on both of them?

A: only if you clean up the cheese residue for me. Are Personal System/2s even food-safe???
Storage
Sonnet M.2 4×4 NVMe PCI-e
The first thing we’ll need to do is install an NVMe PCI-e card. I’m going with the overly-priced “Sonnet M.2 4×4”, because the 2×4 card is nearly the same price making it a horribly valued product and we may as well expand this thing with four NVMes to get our money’s worth. It’s not really clear if the Sonnet M.2 4×4’s controller outperforms the Sonnet M.2 2×4 (they don’t use the same one), but both operate on gen 3 and the NVMes themselves are gen 3 so none of it really matters. There are much cheaper NVMe PCI-e cards but most are not compatible with Macs, you’re paying the tax for the fancy firmware… otherwise buy a much cheaper card if you’re on Windows or Linux. The card only came in a pink ‘static suppressant bag’ instead of a true antistatic bag which is laughable at how much sonnet is charging, and Amazon appears to have taken a bite out of the box.
For the primary boot NVMe we’re going with a 2TB 970 EVO Plus. I know Louis Rossmann decried them as being unreliable after he torched a bunch in some custom gaming rigs with sketchy PSUs, but they’re good drives if you don’t kill them with dirty PSU voltage rails. Always use quality PSUs folks. This is why many Maxtors failed due to the ST SMOOTH chips receiving power from PSUs outputting higher than 12v, and not the drives themselves… same thing applies today when you eclipse 12v on your power rails. I’ve also been running one in a ThinkPad for more than a year and it’s been fine.
For the remaining tertiary storage we’re going with some WD Green SN350s: solely because they’re compatible with macOS — the macOS compatibility with NVMes is very specific unfortunately. Otherwise I would have went with more TeamGroup 4TB drives as they’re one of the best value for money (particularly the TM8FP4004T0C101, it uses better NANDs than the more expensive and inferior 4TB offerings from Crucial and WD). Yeah… the cost of NVMe disks isn’t absolute, sometimes cheaper ones use better NANDs and you can be fleeced by brand recognition and false-positive specs on gen4 which I imagine is what Crucial capitalizes on.
[If you don’t know what I’m talking about: the Crucial and Western Digital NVMe drives always cheap out and use QLC NANDs instead of proper TLC NANDs as TeamGroup and Samsung do; and obviously they’re not going to advertise they’re cheating you and will price their products the same as the competition. Very similar to the whole SMR/CMR debacle, why would Western Digital tell you you’re buying something cheaper at a premium cost??? Caching is an entirely different thing separate to this and usually only the Samsung drives have ‘true’ dedicated cache logic, which is why I’m using the 970 EVO Plus as a boot/OS NVMe]
reinstalling MacOS
Fortunately we don’t need a second mac to perform OS reinstallation so the ‘Apple Configurator’ is not needed. The procedure is as simple as this: Press & hold power button until the recovery menu pops up, choose ‘continue’, choose reinstall OS, choose the new drive (in this case the Samsung drive I just formatted as “OS”). I know a lot of people raise an eyebrow requiring a second mac for when the system does actually need to be completely restored if it can’t boot into the internal recovery mode; just when you haven’t paid Apple enough you also need a second Mac to perform recovery and restoration. Even neozeed himself encountered this problem and with a heavy sigh (a very heavy sigh) and mild disbelief, set up a macOS VM for restoration since he only owns one. 😂
Once this is completed we’ll no longer be using the proprietary SSD that’s present on the Mac Pro. It DOES still need to be present in the system for the computer to POST (Apple marries it against the security IC so it’s intrinsic and serialized to the computer based on configured storage), but presumably as it won’t be written to anymore it’ll never become exhausted from write cycles… and even if it did fail over time, as a result of ordering the bottom-of-the-barrel 1TB model I could just buy another ‘cheap’ 1TB card which would allow the system to resume POSTing once again. If the soldered-in RAM or CPU fails then it’s game over; as much micro-soldering as I do, I refuse to purchase even more tools to swap out underfilled BGA ICs… and then of course you have to hope employees at Foxconn actually managed to sneak out unused genuine ones to be resold on AliExpress or eBay. *sigh*
With us now being able to use our own bootable SSD, the primary failure and annoyance of ARM-based Macs is now mitigated. For the Mac Studio you could buy backup replacement SSDs to constantly replace as they wear out (they would have to match what storage size the system was preconfigured with), but keep in mind I can add 8TB cheaply and have my own bootable SSD. And in the event you need to do data recovery or read the drive on another system, anything — even your grandma’s phonograph — can read NVMes so it’s much less of a hassle. As much as I hate to say it I think the Mac Studio makes less sense over the Mac Pro BECAUSE of the storage… you’re already buying an overpriced computer, may as well go the full distance for proper storage? Everyone’s living in the honeymoon phase right now while all of the NANDs are under warranty and still functioning… but once they start failing it’ll be a nasty money pit at best, or unfixable at worst. And do you know how many people make one computer their whole life and allow it to spontaneously fail with no backups?
ARE YOU NOT ENTERTAINED?
An ARM-based Mac using internal NVMes, is that not a nice thing? ARE YOU NOT ENTERTAINED? And no need to pay ~$2000 for 8TB. I did have to shell out $400 for the stupid SoNNeT card and $400 for the SSDs… buuut if I paid $2000 worth of SSDs I would far eclipse 8TB. In this screenshot you can also see the ‘OS’ Samsung SSD now the primary ‘Startup disk’. Fortunately, Apple’s utility automatically switched it over after I reinstalled the OS to this drive shockingly enough, so nothing more needed even on that.
Internal USB, perfect for Dongles:
Installing the iLok dongle
The iLok licensing dongle installs nicely inside the internal USB A port. Kind of reminds me of those internal VMware USB A ports meant for the ESX installation… and then you know they’d eventually go bad or corrupt themselves and the internal IT of that company never makes a backup so then you need to reconfigure ESX from scratch… good times. What? I’m not salty, not salty at all. The Sonnet NVMe card being installed on the first slot (bottom) does seem to bring more attention to the fact there’s so many unpopulated PCI-e slots.
What should be used as the display option?
1. The Dell UltraSharp U3224KB 6K actually has a few potential compatibility problems with macOS or the hardware (it’s not really well-known as Dell support gave up troubleshooting it), so you’ll get various screen distortions. It’s also possibly one of the most UGLY products I’ve ever seen in my life… the web camera looks like a malignancy, and I absolutely can’t stand silver-painted plastic. Complain about Apple’s prices all you want, at least they use nice materials.
2. The Pro Display XDR is just a little bit too much for my taste and sometimes temperamental as it’s such a complicated display (contrary to popular mythology it does not use OLED technology so it shouldn’t burn out over time). I honestly don’t think I would encounter any problems if I bought a Pro Display XDR but the cost is too much.
It’s Free Real Estate –
3. That basically leaves us with the Studio Display. A lot of the 3rd party Samsung/ASUS/LG 4K or 5K offerings have dramatically inferior colour or a larger pixel size… and there’s still the potential aspect of compatibility since non-Apple hardware sometimes doesn’t play nicely. While the Studio Display is much-maligned with its high cost and strangely attached power plug, its DPI is the same as the Pro Display XDR you just get less screen real-estate and inferior contrast which I don’t care too much about. It will still look much better than your garden variety LG 27” 4K UHD Ultrafine because the colour is calibrated very well and it gets decently bright… again… I wish YouTube reviewers would point some of these things out instead assume that every display is equivalent to Apple’s offerings when they’re not. And in the event, you do find the 5K 27″ displays from other manufacturers they’re still at 60Hz. The refurbished Studio Display I had my eye on from Apple is no longer available, so I’ll be waiting for a bit until they stock another one… or maybe they’ll get a heavily marked down Pro Display XDR…. in the meantime, I’m stuck using one of my gaming monitors which has 240Hz and strobing to reduce ghosting, which does work on macOS!.. and makes macOS look so different since I’m used to how it looks with all of the ghosting all the time.
Another little something that’s rarely discussed: the nano-texture glass option causes a slight ‘frosting’ which is especially noticeable on text… it’s only meant as a compromise if you’re working in a literal sun room, sometimes more expensive does not mean better. This is exemplified with the M2 MacBook Air situation: if you opted for the superior GPU it ended up running more slowly because of the thermal throttling so the lower-end GPU option is more performant, lol. Of course Apple doesn’t always disclose these caveats or finer details, but their divisions responsible for publishing the products may not be privy to them.
Peripherals:
Onto the peripherals: I will indeed be using the Magic Mouse… before your jaw drops and you grab some tomatoes while calling me a heretic, let me explain. The Magic Mouse is one of the few peripherals with velocity sensitive 360º scrolling AND fully integrated in the UI of the operating system. This is extraordinarily similar and analogous to IBM’s ScrollPoint which also offered dynamic 360º scrolling and to a lesser extent the TrackPoint scrolling but which only offers vertical and horizontal. Needless to say 360º scrolling and horizontal scrolling is something I use all the time and cannot fathom why we still even have (notched!) mouse wheels. It’s bizarrely a mouse Apple seemingly designed specifically for me and nobody else, I imagine average or larger hands would be extremely uncomfortable with it and Apple really should offer a larger version to encompass a better demographic.
Men & Mice
The Magic Mouse and ScrollPoint Pro share very similar design philosophies in the way we scroll. I also made another strange discovery when I was looking for some more flat slick mousepads since the Magic Mice don’t work well on cloth ones at all, and that are these 3M ‘Precise’ mouse pads: AMAZON LINK.
Apparently the 3M mouse pads have a reflective material which allows the lasers to use less strength and thus supposedly saves 50% battery life, some Magic Mouse users affirmed this, so we’ll see how this goes down. It’s kind of surprising I’ve never heard of any tech reviewers mention these because saving 50% of battery life on a wireless mouse is huge.
Keyboards..
There’s a lot of good reasons to NOT use Bluetooth keyboards due to wireless keylogging, there’s not going to be anyone with that talent in rural Canada so I’m in the clear. You could buy a Matias keyboard but they’re actually worse in many aspects than the 1st party Apple keyboards: the legend printing is of dramatically worse quality, the surface of the keycaps don’t have that special velvety texture, and the snappiness of the scissor switches is probably worse. While I have many mechanical keyboards, I don’t care so much about it anymore. The Apple Magic Keyboard is just a little bit too flat for my tastes today so I ordered a “ESC Flip PRO Computer Keyboard Stand”, which can stick on the back and give you different height adjustments if needed.
onboard LEDs everywhere.
Both the iLok and Sonnet NVMe card have so many LEDs on them you can see the lightshow through the rear of the ‘grater’ now.
Now my plans are to use this thing for at least a decade to get my money’s worth: will 64GB of RAM be enough? To that I say: 64GB ought to be enough for anybody. The only major hindrance will be the forced software obsolescence when the Apple overlords declare it will not be receiving anymore updates… and then you know things like the Roland Cloud and other major vendor software will cease to get updates and functionally work. It’s appalling at how all software is heavily DRMed and requires a live account to work against. At the very least when WWIII breaks out I’ll have plenty of premium aluminum to donate to the state, forged by Tim Apple himself!
For the record I was never really an ‘Apple person’, but they’ve finally fixed all of the problems (mice have two buttons and the keyboard layout is restored to be more IBM-like) and made a product that fulfills everything I’ve ever wanted… AND forced developers to program for ARM: so now my Stallman-not-approved-absolutely-proprietary audio software runs incredibly well on a non-x86 platform. Astounding. Yeah there were some 3rd party mice that had two buttons for Macs ‘back in the day’ but a good portion of the *software* and games weren’t programmed for a real right click rendering it useless. I remember watching a ‘making-of’ video of the Myst developers pushing down Ctrl with the mouse to right click EVERY SINGLE TIME in their 3D modelling software and nearly fell off my chair… it’s quite jarring when you need to press a button on the keyboard at the same time with clicking the mouse so I’ve no idea how they tolerated that. Maybe they loved doing it? Who knows.
It’s crazy how much changes, and how much is the same
With all that Dec Alpha talk, and how hard it is to get hardware, and how seemingly exclusionary it is, I thought I would try to touch on a more available 64bit ‘risc’ platform, for the masses!
While a couple years ago I had touched on running Windows 10 on the Raspberry Pi 4, in the brave new world of 2023 getting ahold of a pi4 is expensive, hard to find, and kind of depressive, which lead me to this (old) but exciting project, the Renegade Project!
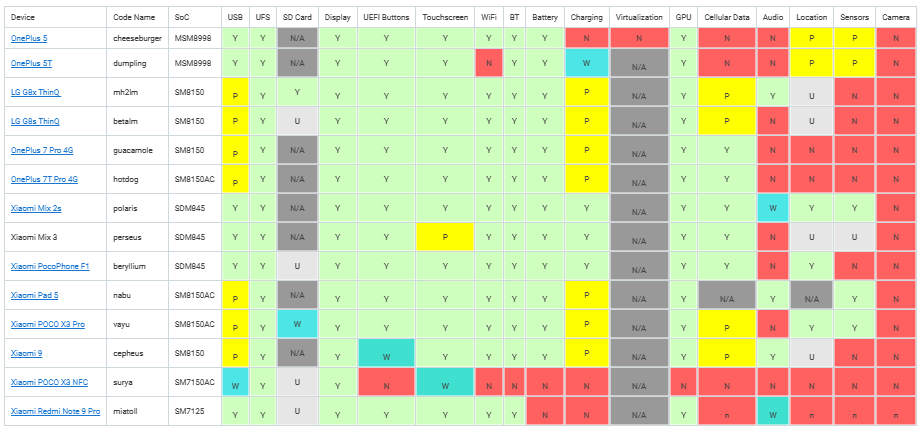
Long story short, there exists enough drivers & information to facilitate a port to the Snapdragon 845, a 64bit System On a Chip( SOAC!), meaning that if you have a device with this chip it *can* be slightly possible to install Windows 10 onto it.
system compatibility matrix, for ants.
Glancing at the system matrix, to me the glaring hole is Charging. 3 systems outright support it, all of them from Xiaomi, the Xiaomi Mix 2s, Xiaomi Mix 3 & the Xiaomi PocoPhone F1. Looking around eBay to start this adventure I found a PocoPhone F1!
Getting the Phone
This seemed like a good start, 29.99, 128GB of flash storage, and I’d later learn 6GB of RAM. The first problem came from Xiaomi. Turns out that the phone was still locked, the seller had neglected to logout from his Xiaomi account. Even worse though he had forgotten his login and password. Calling Xiaomi support was basically worthless. Without unlocking the phone on a reset to root the phone lead me to this:
Locked!
I got lucky however after talking to the seller, he agreed to go above and beyond and we were able to unlock the phone together. So everything went well. If you do buy one of these phones used, MAKE SURE TO CHECK THE XIOAMI login id! It has to be unlocked and blank so you can register it and get the unlock. It will require a valid email & phone number + sim for it to send/receive SMS codes.
I should add that we’ve cleared the first few hurdles of precuring the device and unlocking it. And I’m glossing over stuff. Getting to this point was not easy and took a week. The unlock process is not intuitive, and I’m sure many phones are sold out there that have their google access wiped, but have not been logged out all the way, or the flash erased. I can’t show you mine as I ended up erasing Android but be aware of this!
Getting ready for Windows
Basically on the Android side there is three main modes, the boot, the recovery and the ‘fastboot’ mode. Holding power & down brings you to fastboot, where using the fastboot tool you can load an image from your PC into ram and execute it. EDK2 UEFI firmware, is the first part or the renegade project you’ll encouter. It’s really powerful, allowing you to not only boot into Windows, but it also supports a linux disk target mode, allowing you to partition and access the flash directly from a PC. Naturally this is SUPER dangerous, and backup your modem files!
With the phone unlocked softbooting E2DK you can put it into a target disk mode, connect it to a pc and partition away!
disk mode… for ants!
The guide (section 1.2) advices pushing the disk tools to the phone booted up in twrp-3.7.0_9-0-beryllium.img. Honestly its easier to just partition it on your computer. HOWEVER if you were to use Windows, there is a slight issue:
The device may no longer be able to boot into fastboot mode
I ran into this issue and thought I had bricked my phone. I was actually in the middle of researching how to do a physical hard reset, and place it into EDL mode (taking it apart and finding which pads to short, when I found this section of the troubleshooting guide, where it’s the partition names. So instead, I ended up doing the partitioning on a Virtual Machine using VMware and Ubuntu.
Before I did anything, this is what the phone partition table looked like. It’s an exceptional amount. The new parted v 3.0 that is recommended to use, doesn’t support the resize command so I had to manually do the numbers after destroying partition 21.
Originally, I had made a 32Gb partition to keep some Android functionality but somewhere it just stopped booting. But I didn’t care.
Obviously dont follow this. I’m only providing output as an example.
If I were more patient, I guess I would have dd’d the entire phone to get a full entire backup. But I didn’t get this phone to run Android, so I really don’t care.
There is a LOT of disks being presented to Windows, in case you ever wondered how those 128GB flash devices get sold with only 114GB of user space.
So many partitions!
And even that 112GB is actually usable!
Remember the system partition needs the boot,esp flags, and the windows partition is msftdata. Also make sure the partition names are either single words, or NO words. Spaces will kill the fastboot mode.
I put all the disks that are presented in offline mode, so I don’t get confused. Make sure you are going to mess with the right volumes when formatting after the partitioning. This is NOT for the novice, it would be easy to not only brick the phone but screw up your existing install. If you have physical disks attached you don’t absolutely need, remove them or put them offline to make sure you don’t screw up.
I used diskpart to select the appropriate volumes and format them.
select disk 8
select volume 5
format quick fs=fat32 label="System"
assign letter="S"
select volume 6
format quick fs=ntfs label="Windows"
assign letter="W"
This isn’t a guide, just a reflection of what I went through.
With the disk now formatted, it’s a matter of selecting an OS to install.
I had really bad luck picking random versions of Windows, so I looked until I could find a confirmed working version in this video, Rodando o Windows 10 ARM nativamente em um Dispositivo Android (Pocophone F1 + UEFI). Long story short, it’s Windows build 210521-1658 with version 0.4 of the bootloader. Long story short I messed with LOTS of Windows on ARM driver sets, before I finally had the brave idea to just load it with no drivers:
booted
But that image is far too stale, and expires out very quickly, reducing any useful functionality once it’s connected to the internet. So it’s something that probably could be fixed, but it’s far easier to just grab an image that’s newer.
The x86_64 image I’m using now is 19045.3031, so I guessed to pick something comparable on ARM64. I used something called 19045.3031_arm64_en-us_professional, although it too was out of date, but Windows update brought it up to 22H2 19045.3086 . I had tried the downloader tool and apply all the updates offline, but I had issues. I suspect now in retrospect it was drivers.
Another thing I learned the hard way is that some of these images have multiple OS images installed. I guess it’s de-duplication, along with compression, but be sure to index the image first! I accidentally installed a Home version. Yuck.
dism /Get-ImageInfo /imagefile:install.wim

Index : 1
Name : Windows 10 Home
Description : Windows 10 Home
Size : 17,706,743,995 bytes

Index : 4
Name : Windows 10 Pro
Description : Windows 10 Pro
Size : 17,836,320,420 bytes
So just don’t go wildly apply image #1. I wasted too much time on that one.
But in the release I’m using it’s image #1. I checked. Trust me.
The S volume needs to be populated with the UEFI boot files. I had foolishly thought the boot.wim file would include the boot files, but instead bcdboot can set it up based on the location of a Windows install.
bcdboot W:\Windows /s S: /f UEFI
The next thing to do is install the drivers.
I was lucky enough to get some insight into some driver combination to work, and I came up with this much:
minimal 2210.1-fix
USB beryllium v2.0rc2
FG beryllium v2.0rc2
The key of course is that there is a minimal set in 2210.1-fix that will bring the system up with working USB. The FG package brings in enough of the power management to know the battery status.
The drivers are not signed, so that means we need to change a bunch of boot flags. I also turned on debugging so have Windows dump core files, so you can run analysts on them with Windgb.
S:
cd S:\EFI\Microsoft\Boot
bcdedit /store BCD /set "{default}" testsigning on
bcdedit /store BCD /set "{default}" nointegritychecks on
bcdedit /store BCD /set "{default}" recoveryenabled no
bcdedit /store BCD /set "{default}" debug on
Of course the catch being that with no drivers loaded it’s in a super basic mode, with no USB, no touch screen, no power management, no wifi no nothing. So it’s a brick. But at least we’ve reproduced enough to show that you can boot Windows.
Sadly, loading all the drives from 2210.1-fix or beryllium v2.0rc2 lead to this:
the cracked glass adds to the feeling.
Add in a much needed OTG adapter and a mouse or keyboard, and you can complete the installation.
However, since I left off the majority of the device drivers as I didn’t want to spend forever trying to track it down, I used a random USB to Ethernet adapter and thankfully It just worked!
Accessing the phone over RDP.
I added a fancy USB 3.0 ‘dock’ with USB-C connector that you can plug a charger into, so that not only can the phone stay connected to power, but there is room for the Ethernet. It also has HDMI, perhaps is the drivers were more stable, it could be a viable desktop? And I have what I wanted, which was a non Intel/AMD 64bit platform that is hopefully more reliable than the Alpha64 platform, and maybe something to do some kind of contrast of the past vs future
This was NOT a simple thing to go through. I would be extremely hesitant to advise other people to follow suit. But in the off chance anyone who wants to do it, might have a better idea of what is involved.
With all the controversy over 64bit pinball, and where and how things appeared, then disappeared to the discovery that the x64 version was a thing, but it was left off the install manifest but shipped on CD, along with my simple script to just extract it, the problem was that ARM32/64 users were left in the cold.
Don’t get me wrong, the original 32bit exe runs fine under emulation, but who wants emulation when you can have NATIVE CODE?! You’d have to try to find the source code (lol good luck!) or reverse engineer the program. And that’s what happened, enter:
I’m using Visual Studio 2019 to build this, and it was great it *just worked*. Hurray!
There is also a rebuild going on for SDL to bring Space Cadet Pin Ball to Linux and beyond. The only downside is that it uses a number of ‘new C++ features’ locking out older platforms. I’d done some work to dumb it down although there is a bit of this new fangled C++ I’m unsure of what is going on. So that means, unfortunately Itanium users are left in the dark, as Visual Studio 2010 is too old.
(This is a guest post by Antoni Sawicki aka Tenox)
Just for fun with virtualization I wanted to try out VMWare ESXiforARM64, most specifically Raspberry PI. ESXi for ARM has been around for a couple of years now. Since PI4 packs 8GB of RAM and has a reasonably fast CPU it can be a worthwhile experience. Also more OSes for Raspberry PI are now available in UEFI boot mode.
Not going to go through exact installation steps as these are all around the web and youtube. Just to summary you will need to download an image from VMWare website as well as bunch of UEFI firmware files from github and combine it all together on to a SD card. When you boot it you will go through an install process which is straightforward. You can overwrite install media and use it as the target so no need for multiple SD cards. Once it boots you will see familiar ESXi boot screen:
ESXi booting on Raspberry PI 4
In order to get it going you will obviously need to add some storage. You can use NFS, iSCSI or locally attached USB drive. For the latest you need to disable USB arbitrator.
# /etc/init.d/usbarbitrator stop
# chkconfig usbarbitrator off
What can it run?
ESXi ARM only officially supports only UEFI boot based OSes. Fortunately this is a default option for Ubuntu PI, Free/Net/OpenBSD also work and so does Windows. But what about OSes that use U-Boot? Since ESXi-ARM Fling 1.1 you can boot oses in a “direct” mode with no UEFI! This is a huge step, but unfortunately as of today it doesn’t support UEFI-less VGA, only a serial port. Hopefully this can be fixed in future. I would love to have a RISC OS and/or Plan 9 VM. On the other hand Plan 9 supports EFI boot so an image could be made.
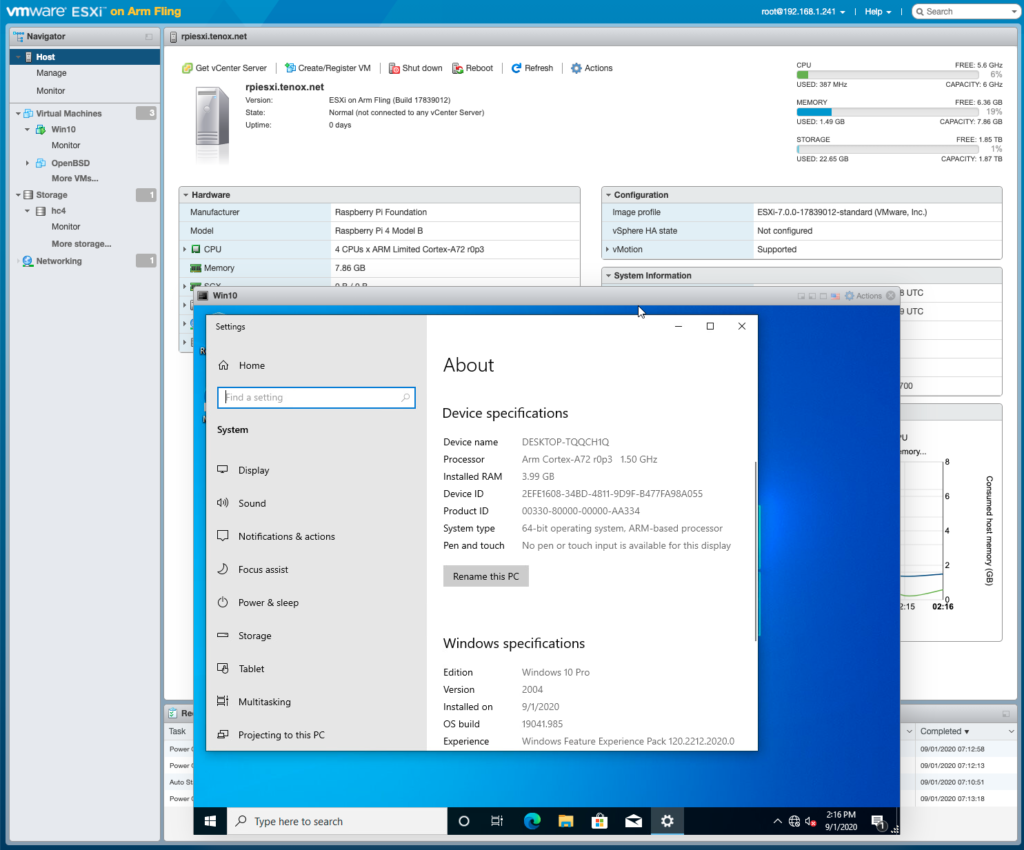
Windows guest install was also much easier than I expected. Thanks to UUP dump you basically roll your own bootable ISO. I think it’s actually easier to get it going on ESXi than natively on RPI hardware or QEMU.
Windows 10 Guest VM on ESXi Fling Raspberry PI
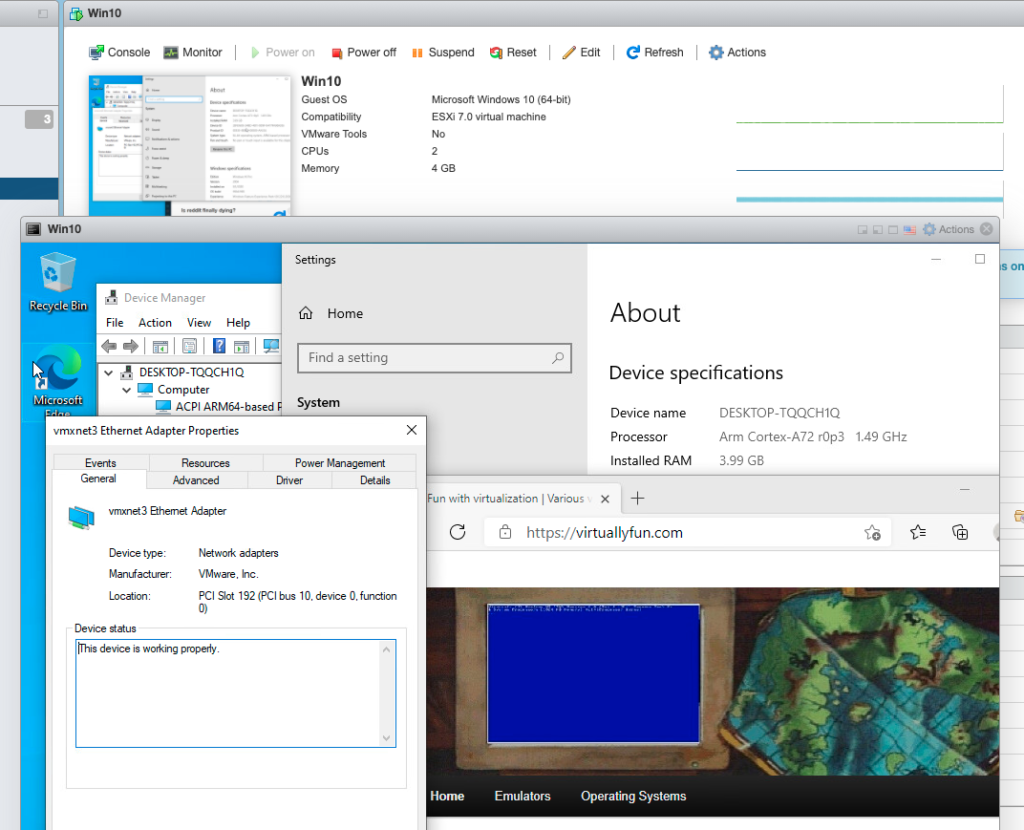
NIC driver obviously did not work by default, but there is a VMXNET3 ARM64 driver in the wild:
VMXNET3 for Windows 10 ARM64 on ESXi Fling on Raspberry PI
What is it good for?
Right now probably just for fun. But I can easily see datacenters filled in with ARM servers running ESXi. Future is bright and free of Intel! Personally I will keep it around for development purposes if I need to make builds for ARM on various OSes.
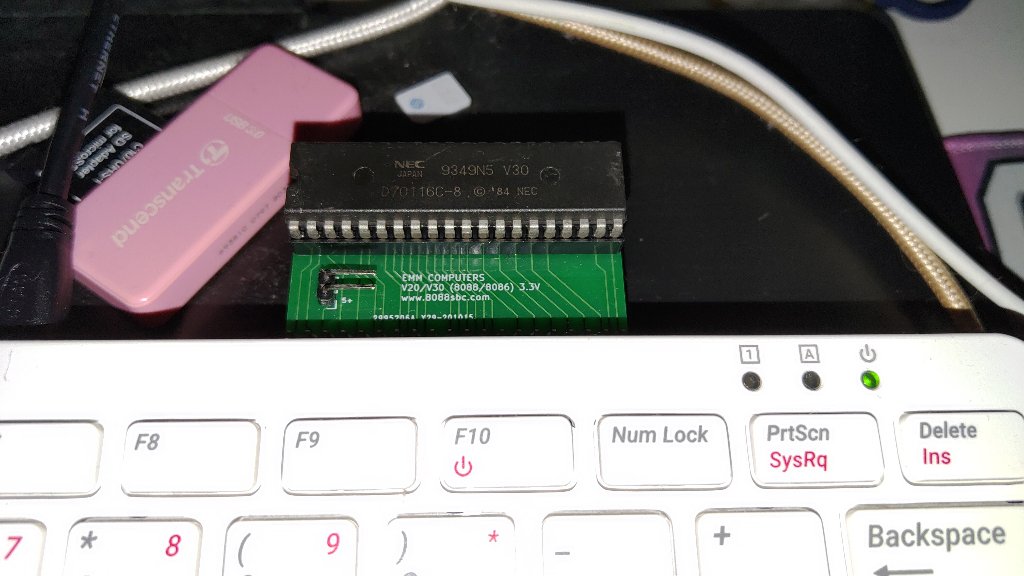
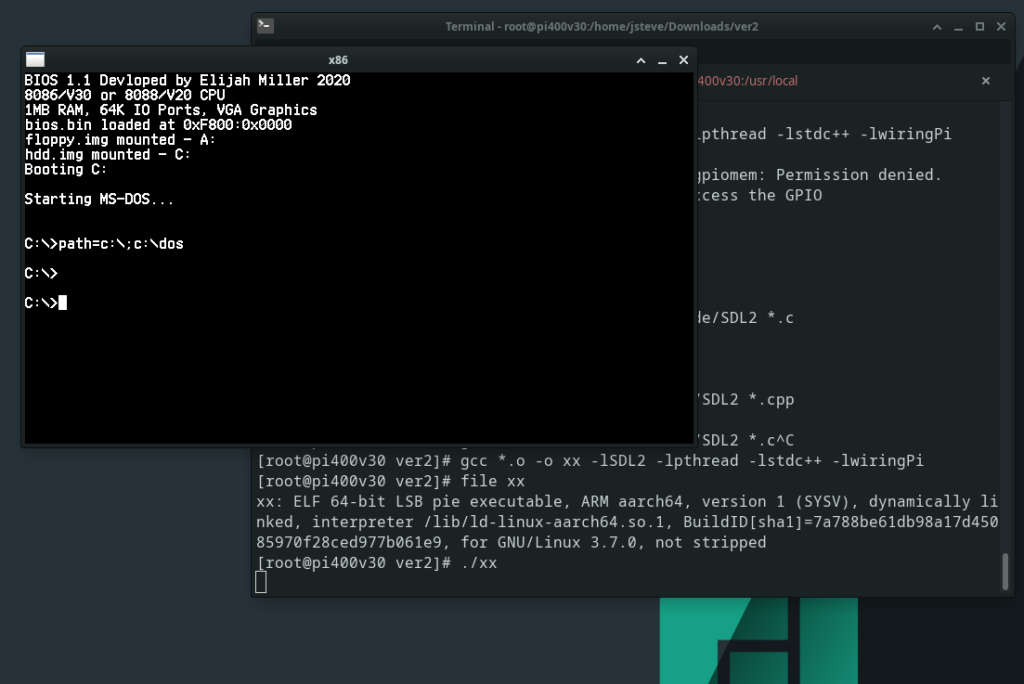
While talking about home brew 8080 and 8086 systems on Discord an ebay search brought me to Elijah’s store page where this small little curiosity was up for sale. It’s literally just a NEC v30 on a Raspberry Pi hat, for a mere $15 USD! Interestingly enough the v30 can operate at 3.3v meaning no special hardware is required to interface to the GPIO bus on a Pi. This reminds me so much of the CP/M cartridge for the Commodore 64, and the price being so right I quickly ordered one and eagerly awaited to 2 weeks shipping to Asia.
While I have Pi 4’s that I run Windows 10 on to drive some displays & power point, I wanted to use the slightly faster Pi400 for this. The Pi400 has a compatible GPIO expansion port so just like a cartridge it’s a simple matter of slotting the card, powering up and building the software. While there is an included binary, it’s a 32bit one, and I’m running Manjaro on the Pi400 for a similar look/feel as the PineBook Pro. Anyways the dependences are SDL2, and an odly named ‘wiringPi’ library that allows C programs to interface to the GPIO.
You can download the emulator over on homebrew8088, specifically the Raspberry Pi Second Project. The last ‘ver 2’ download has the project configured for a v30 which is an 8086 analogue, unlike the v20 which is an 8088. When physically interfacing to the processor things like this really matter!
With the emulator built it was pretty simple to fire it up, and boot into MS-DOS:
first boot!
I have to admit I was a little startled at first as I really had no idea if this was going to work at all. I’d spoken to an engineer friend and he was saying plugging a CPU directly into the GPIO bus, and toggling connections to actually emulate the board was both crazy and that without any electrical buffers it’d most likely either fry the processor and maybe the Pi as well. I suspect this being low voltage may be sparing both, although I have no EE so I’m not going to pretend to know.
Loading up Norton SI confirms what Elijah had posted on Ebay is that it runs very slowly about 1/3rd the speed of an XT. Now I may not know anything about hardware but this seemed at least something a profiler could at least tell me what is going on, and if someone like me helicoptering in on the shoulder of giants could see something.
This will build a profiled version of the emulator that’ll let us know which functions are being called both the number of times, and how much time to do so. Not knowing anything but having profiled other emulators, the usual pattern is that you spend most time fetching and possibly translating memory; Both in feeding instructions and pushing/popping data from stack and pointers. Waiting is usually for initialisation and for IO.
Once you’ve run your profiled executable, it’ll dump a binary file gmon.out which you can then use gprof to format to a text file like this:
gprof pi gmon.out > report.txt
And then looking at the report you can see where the top time, along with top calls are. Some things just take a while to complete and other well they get called far too often.
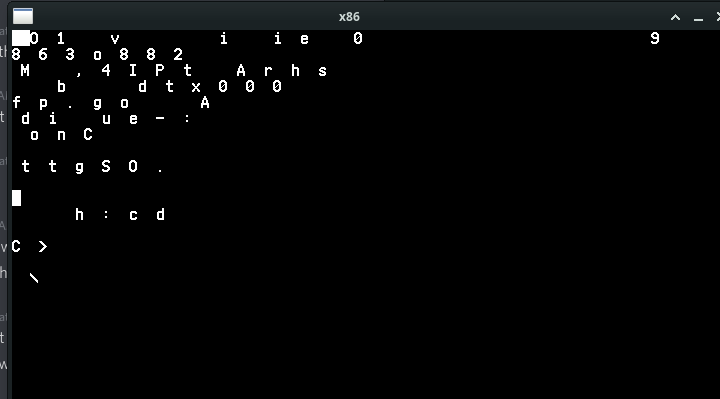
As expected Start_System_Bus takes 1 second, followed by 1,100,374 calls to set the Data_Bus_Direction_8086_OUT (no doubt the Pi needs to alternate between reading and writing to the CPU), followed by 5,954,106 ticks of the CLK function. Of course the real culprit is Print_Char_9x16 which was called 286,883 times, and is responsible for nearly 40% of the tuntime!
Obviously for a simple MS-DOS boot the screen should not be calling any print char anywhere near this many times. Clearly something is amiss. Not knowing anything I added a simple counter to block at the top of the Print_Char_9x16 function to let it only execute 1:1000 times, and I got this:
Obviously it’s not right, which means that the culprit really isn’t Print_Char_9x16 but rather what is calling it. It was a simple change to each of the Mode functions to only render a fraction of the time, and I changed it to a define to let me fire it more often. This is a simple diff, assuming WordPress doesn’t screw it up. It’s not pretty but it gets the job done.
$ diff -ruN ver2/vga.cpp ver2-j/vga.cpp
--- ver2/vga.cpp	2020-07-29 10:36:51.000000000 +0800
+++ ver2-j/vga.cpp	2021-06-04 01:51:33.546124473 +0800
@@ -1,5 +1,9 @@
 #include "vga.h"

+static int do9x16 = 0;
+#define VIDU 5000
+
+
 void Print_Char_18x16(SDL_Renderer *Renderer, int x, int y, unsigned char Ascii_value)
 {
 	for (int i = 0; i < 9; i++)
@@ -23,6 +27,12 @@

 void Mode_0_40x25(SDL_Renderer *Renderer, char* Video_Memory, char* Cursor_Position)
 {
+do9x16++;
+if(do9x16>VIDU)
+        {do9x16=0;}
+else
+        {return;}
+
 	int index = 0;
 	for (int j = 0; j < 25; j++)
 	{
@@ -36,6 +46,7 @@
 	Print_Char_18x16(Renderer, (Cursor_Position[0] * 18), (Cursor_Position[1] * 16), 0xDB);
 	SDL_RenderPresent(Renderer);
 }
+
 void Print_Char_9x16(SDL_Renderer *Renderer, int x, int y, unsigned char Ascii_value)
 {
 	for (int i = 0; i < 9; i++)
@@ -57,6 +68,12 @@
 }
 void Mode_2_80x25(SDL_Renderer *Renderer, char* Video_Memory, char* Cursor_Position)
 {
+do9x16++;
+if(do9x16>VIDU)
+        {do9x16=0;}
+else
+        {return;}
+
 	int index = 0;
 	for (int j = 0; j < 25; j++)
 	{
@@ -102,6 +119,12 @@

 void Graphics_Mode_320_200_Palette_0(SDL_Renderer *Renderer, char* Video_Memory)
 {
+do9x16++;
+if(do9x16>VIDU)
+        {do9x16=0;}
+else
+        {return;}
+
 	SDL_RenderClear(Renderer);
 			int index = 0;
 			for (int j = 0; j < 100; j++)
@@ -156,6 +179,12 @@
 }
 void Graphics_Mode_320_200_Palette_1(SDL_Renderer *Renderer, char* Video_Memory)
 {
+do9x16++;
+if(do9x16>VIDU)
+        {do9x16=0;}
+else
+        {return;}
+
 	SDL_RenderClear(Renderer);
 			int index = 0;
 			for (int j = 0; j < 100; j++)
While it feels more responsive on the console, it’s still incredibly slow. SI was returning the same speed which means that although we aren’t hitting the screen anywhere near as often it’s still doing far too much. Is it really a GPIO bus limitation? Again I have no idea. But the next function of course is the clock.
First I tried dividing the usleep in half thinking that maybe it’s not getting called enough. And running SI revealed that I’d gone from a 0.3 to a 0.1! Obviously this is not the desired effect! So instead of a divide I multiplied it by four:
Now it’s scoring a 1.5! Obviously these are all ‘magic numbers’ and tied to the Pi400 and more importantly I haven’t studied the code at all, I’m not trying to disparage or anything, if anything it’s just a quick example why profiling your code can be so important! At the same time trying to run games is so incredibly slow I don’t even know if my changes had any actual impact to speed as emulation of benchmarks can be such a finickie thing.
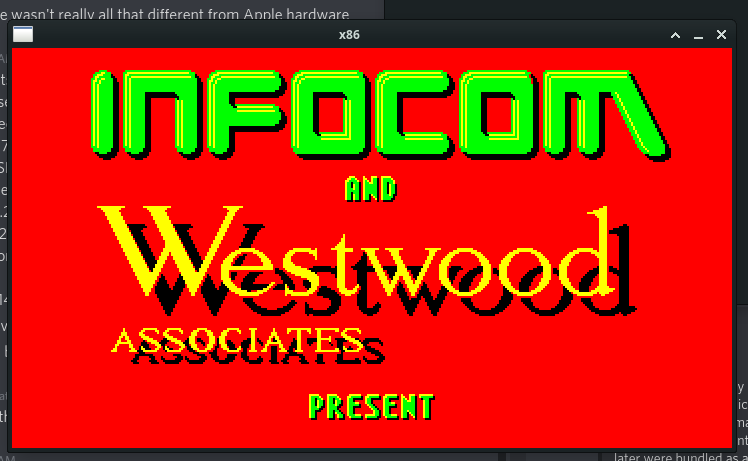
My goto game, Battletech 3025 Crescent Hawks Inception loads to the first splash but then seems to hang. I could be impatient or there could be further issues but I’m just some impatient tourist with a C compiler…
With my changes and re-running the profiler I now see this:
Which is now what I expect with the bulk of the emulation now calling Read_Memory, with the Clock following that and of course our tamed screen renderer (although its still called far too much!) with the Data_Bus_Direction being further down the list. No doubt some double buffering and checking what changed in between calls would go a LONG way to optimise it, just as would actually studying the source code.
The one cool thing about this is that if I wanted to write a PC emulator this way gives me the confidence that the CPU is not only 100% cycle accurate, but it’s 100% bug for bug accurate since we are using a physical processor.
And again for $15 USD + Shipping I cannot recommend this enough!
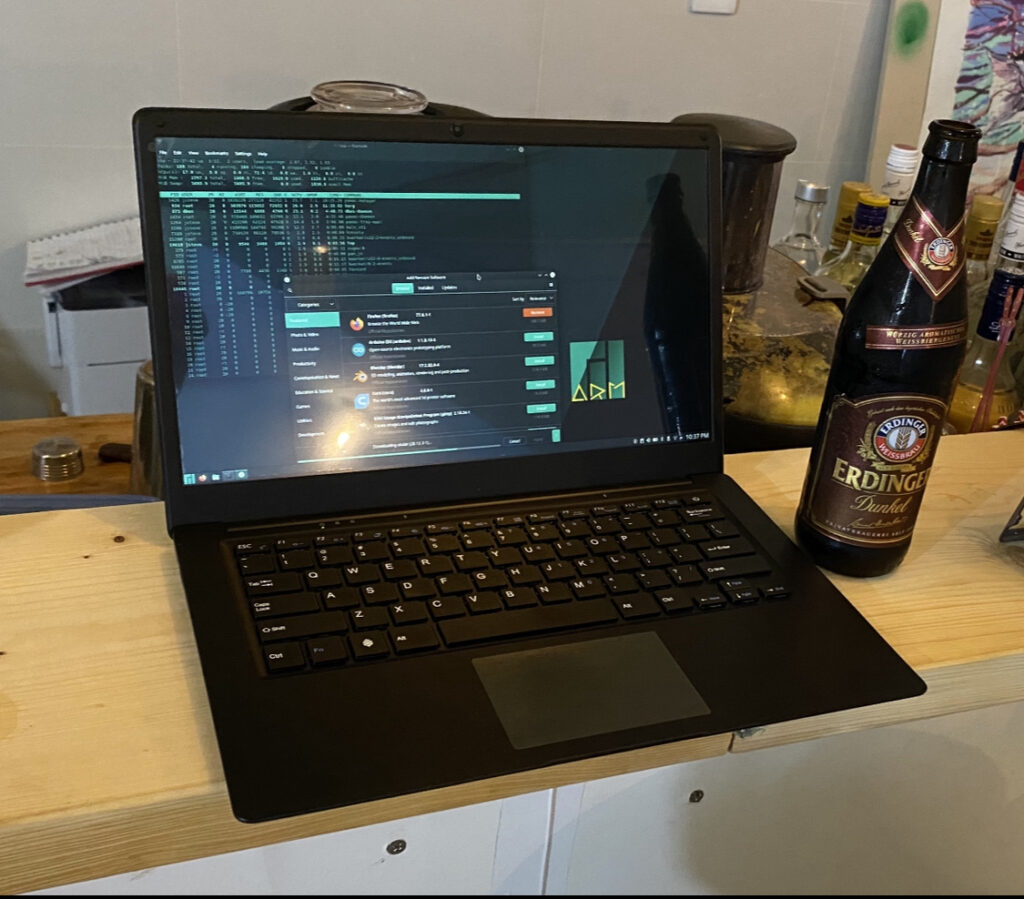
So yes, it’s most certainly built from a MacBook Air looking frame. But it’s not the same build materials, which of course is to be expected as these are far cheaper. Unlike the other ARM book I have, this one doesn’t have a GPRS modem, and as of this moment doesn’t natively run Windows. Which with it’s paltry 4GB of RAM and 64GB of disk space is just as well.
adding a 32bit runtime
Just as the MIPS64 had it’s weirdisims, the ARM64 is in the same seat. I didn’t see anything all that clear on Manjaro, and 32bit, at the same time debootstrap is available in the repo, allowing you to quickly install a 32bit Debian userland to chroot into. It’s pretty much the same steps as before, with the only real change being to use the armhf processor family giving a 32bit tree.
Maybe it’s my overall familiarity with Debian, but I find the environment far easier to deal with. Well that and of course many things just build so much nicer in 32bit mode, than 64bit mode sadly. It’s a shame that many distros don’t seem to include a matching 32bit/64bit libset but here we are.
Another plus is that Debian has far more robust mirrors world wide, and downloading components and updates is FAR faster than Manajro.
Loose clips?!
In the first week however disaster struck as I had it ‘sleeping’ one night and plugged in to charge, and when I opened the lid, I got nothing. The charging led showed RED for some reason like it was still charging, and no matter what I tried on the keyboard it just would not turn on.
Searching online didn’t give me much other than people saying that they were replacing the built in flash and didn’t seat it correctly. Did my kids or cat knock it over when I wasn’t looking? Was it on the edge of not being seated from shipping? I have no idea.
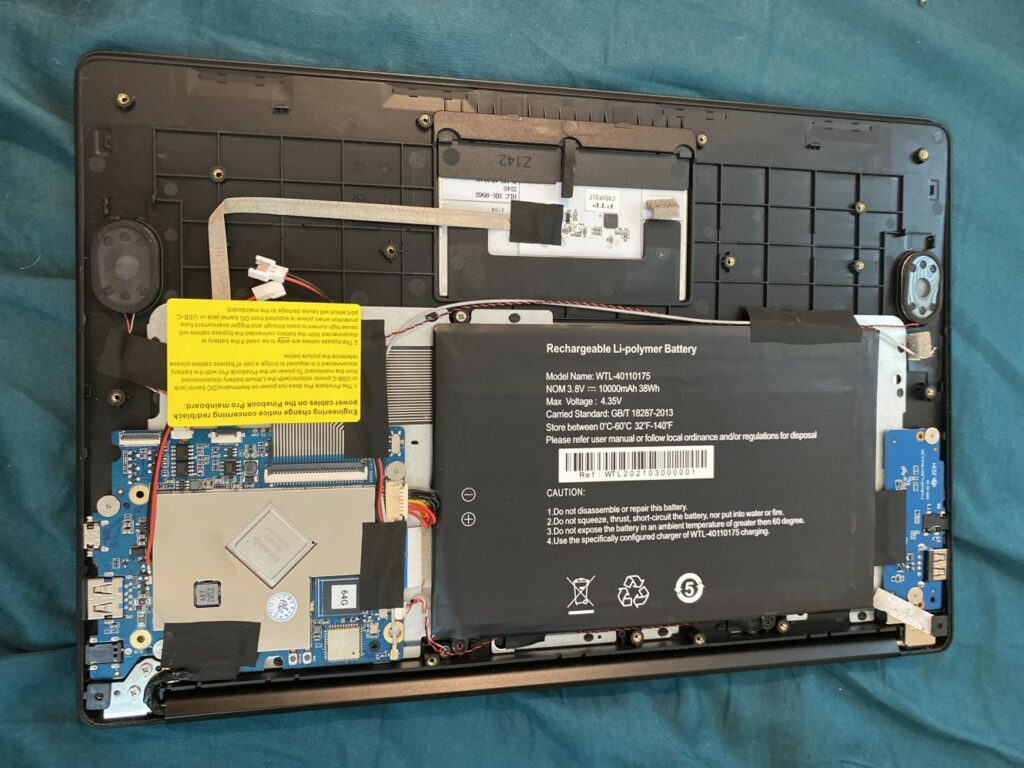
Lid off!
Well as much as I love opening new stuff, it was acting dead so I guess nothing to lose. That said the screws come off pretty easily but there is 2 sizes as the ones up front are super short. With the lid off you can see that the battery is 2x the size of the motherboard. And yeah of course it being ARM, its very raspberry pi – ish. And I guess it’s really no surprise.
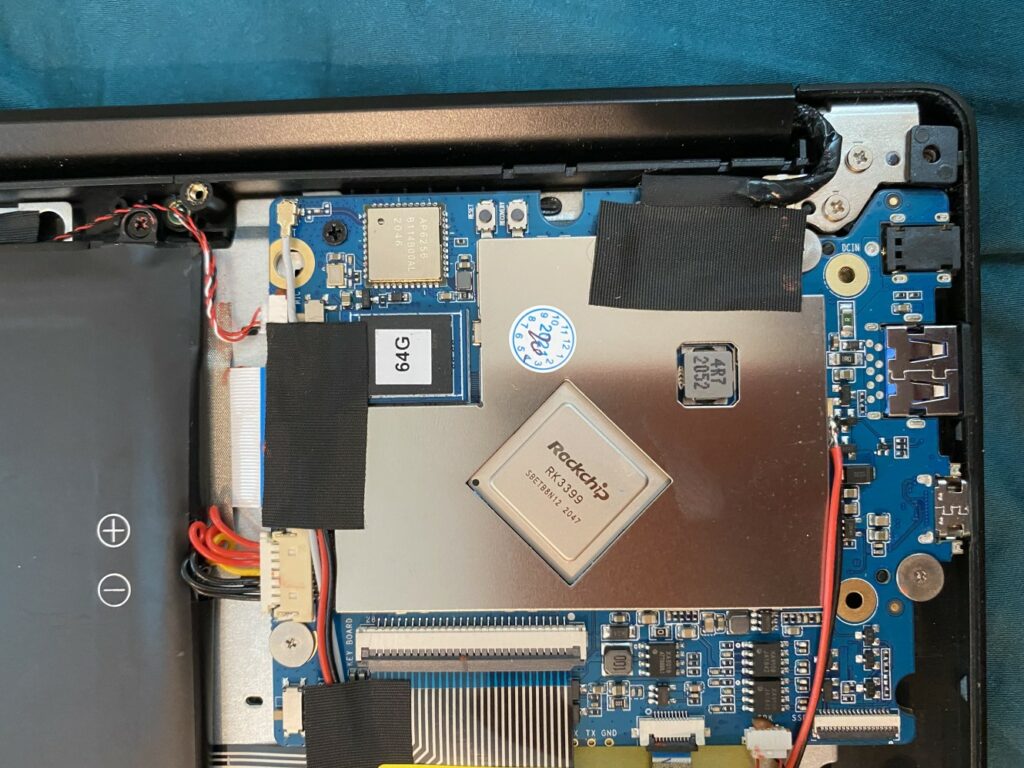
The mainboard
On the mainboard there is 2 push buttons, and 2 sliding jumpers. One is hidden beneath the black tape. I hit the reset button, and slid both sliders up and down and then pressed down on the 64GB chip. I flipped it over to see if that did anything, and surprisingly it’d turn itself on!
I quickly shut it down, and screwed it back together. And I’ve been using it daily over the last week without any further issues with it powering on. Again I have no idea what was wrong but at least it seemed easy enough to open up and hit some buttons. Which brings me to the overall feel:
Build quality
It’s really hard to slam the PineBook Pro. It has incredibly lofty goals, and for the pricepoint it’s absolutely insanely good value. The body has been molded from what at best could be called an ‘inspired by the Mac Book Air’ but it’s the keyboard and trackpoint where it falls short. The keys have too much travel for their own good, and seem to twist a little giving a klunk as they don’t depress quite right. I have had issues with the arrow keys trying to play DooM via DOSBox. And I’ve become so spoilt with backlit keys, that although I know how to touchtype I still look from time to time.
The trackpoint is miserable, it’s constantly jumping the mouse (no palm detection)? and it just doesn’t glide or click ‘right’. But I know I’m being 100% unfair as I’m comparing this to a laptop that is 5x the price. I’ve written this and other stuff on the laptop and it’s just been so jumpy at times for seemingly no reason when I type it’ll jump and click at the worst possible moments.
The flip side is that FPS stuff is impossible as the keyboard and trackpoint won’t deliberately work at the same time. And I have no idea how to go about dealing with that. I guess use an external mouse.
Another stupid low point is the speakers. They are so tinny which I guess is to be expected, but they are so quite. I guess I should play test tones, and get some app to measure dB, but comparing it to anything else again just seems so unfair.
That said the screen is AMAZING. I had worried that the screen was going to be terrible, but no the screen is an absolute high point of the machine.
Battery life has been pretty good, and from opening it up, it’s no surprise as it does have a massive battery. They do include clips to bypass the battery all together if you want to run it from DC mains 100%. The only issue I have had with battery life is that Manjaro doesn’t seem to have hibernation support. And many times I put it to sleep when I go to sleep it’ll wake up with zero percent remaining. I don’t see that as a fault of the physical build, rather the OS.
Software and FSF flailings?
I don’t know much about Manjaro but it’s default setup sure feels a lot like the way Debian felt when they were under pressure to keep all non-free stuff segregated and partitioned away from users. The problem as it’s always been is that popular software has almost always been commercial, especially for normal uses. Turning on Community and Contributions should really be the default setting with people who want to be FSF pure having to click the button giving normal people the best possible experience. As an old person who’s been hearing about the ‘year of the Linux desktop’ is at hand back in 1997 (Va Linux et al), and been an on and off user since SLS, it’s always about the users. All the plugins and bookmarks and shared data stuff I have is on Chromium and having to hunt down how to turn it on sucked, as I was moments away from just doing the usual ‘user’ thing of wiping the install because I can’t find an app.
Distro shopping has been the worst thing to plague Linux since it was apparent that Linus wasn’t going to bless us a userland, unlike BSD. I know some see it as a strength but it’s always been such a critical weakness for the user. Oddly enough the circle has come around to bite enough people that Docker is a thing to deal with dependency and distro hell.
Games!
Well without a doubt visit astr0baby’s blog and enjoy some good hand holding to get a bunch of open stuff built. It’s toally worth it. And incredible to play 64bit Duke Nukem 3D!
Is it worth it?
Well if you want non x86 on the go, the price simply cannot be beat. However the default Linux install is alien to me, but I’m trying to learn to deal with it. And of course the weird power on issue really precludes this from normal people. I’d recommend it to anyone comfortable with Linux and a screwdriver. If you are 100% hardware focused it’s a laptop, no GPIO so it’s going to be a little bit of a bummer. If you are scared of opening it up, you may find like I did that you very well might have to. However for anyone in the middle absolutely.
“Normies” this isn’t the laptop you want. .. I’d say “yet” as I’m sure that build quality will only improve, just as software will hopefully get a bit more friendly for adding stuff like Chrome (what a mission to get it installed!).
Final ramblings
Years ago in college we joked that 30 years in the future you could get a quad processor Dec Alpha as a bundle in with a box of cereal. That a computer would be an impulse purchase at the supermarket. It seemed so laughable but a given as manufacturing and acceptance of that internet thing was a given. But that was the future from 30 years ago.
This is really nothing more than a placeholder for me… Unless someone else knows the answer, then it’s really ‘how not to cross compile GCC’.
First I’m using the EMX’ified version of GCC from my MinGW to EMX cross. It didn’t require that much massaging to get it to build, the usual unzip as ascii to convert text, and in no time I can build cc1.
root@pinepro:/src/emx/src/gcc-2.5.8# file cc1
cc1: ELF 32-bit LSB pie executable, ARM, EABI5 version 1 (SYSV), dynamically linked, interpreter /lib/ld-linux-armhf.so.3, for GNU/Linux 3.2.0, BuildID[sha1]=42c0c8de7175edade7614dc92d5d13e4421e0e6f, with debug_info, not stripped
and it crashes in what has to be a 2020 most unfortunte name
Reading symbols from cc1...done.
(gdb) r
Starting program: /src/emx/src/gcc-2.5.8/cc1

Program received signal SIGSEGV, Segmentation fault.
0x004f6b84 in rtx_cost (x=<error reading variable: Cannot access memory at address 0xff7efff0>,
    outer_code=<error reading variable: Cannot access memory at address 0xff7effec>) at cse.c:667
667     {
(gdb)
Yes, it really crashes in rtx_cost. Good thing there isn’t a super popular card from Nvidia that is currently being short squeezed by crypto miners right now called the RTX where everyone is looking for a good price. 😐
I had then been thinking perhaps it’s because I’m using GCC 8.3.0, maybe it’s introducing some new and exciting bug? So I cross compiled GCC 4.1.2 as follows:
Keeping in mind that my knowledge of ARM is pretty much nill, especially on Linux. The compile went mostly okay, just have to remember the gnu inline macro’s as needed from back in the day (-fgnu89-inline) and while it builds, it is insisting on using collect2 which of course is screwing things up. And of course I don’t want it as my system compiler. As a hack I found system gcc 8 can link things fine as I didn’t want to spend all day messing with GCC/collect2
I copied xgcc, cc1 and cpp from 4.1.2 into a /412 directory, and rebuilt 2.5.8 with the following shell:
As you can see the cross wasn’t picking up the right include paths, so I just cheated, and dumped them from 8, and just copied them into this script. I re-ran the build and had 2 issues,
/412/xgcc -B/412 -g -O0  -I. -I./config -I/usr/lib/gcc/arm-linux-gnueabihf/8/include -I/usr/local/include -I/usr/lib/gcc/arm-linux-gnueabihf/8/include-fixed -I/usr/include/arm-linux-gnueabihf -I/usr/include -c  -DIN_GCC   -g -std=gnu89     -I. -I. -I./config local-al.c

....

/tmp/ccMguyhs.s: Assembler messages:
/tmp/ccMguyhs.s:5001: Error: selected processor does not support `fltd f1,r3' in ARM mode
/tmp/ccMguyhs.s:5025: Error: selected processor does not support `fltd f0,r3' in ARM mode
/tmp/ccMguyhs.s:5026: Error: selected processor does not support `dvfd f1,f1,f0' in ARM mode
/tmp/ccMguyhs.s:5027: Error: selected processor does not support `ldfd f0,.L489' in ARM mode
/tmp/ccMguyhs.s:5028: Error: selected processor does not support `mufd f0,f1,f0' in ARM mode
and so on. Also failing was global.c Again the same weird instruction/asm mix being triggered. Other than those two, cc1 will build, but unsurprisingly:
Reading symbols from cc1...done.
(gdb) r
Starting program: /src/emx/src/gcc-2.5.8/cc1

Program received signal SIGSEGV, Segmentation fault.
0x004f6b84 in rtx_cost (x=<error reading variable: Cannot access memory at address 0xff7efff0>,
    outer_code=<error reading variable: Cannot access memory at address 0xff7effec>) at cse.c:667
667     {
(gdb)
Well, at least it’s consistent?
Or a fun way to kill a couple hours.
**EDIT I went ahead and looked in the 4.1 source for ARM stuff..
root@pinepro:/src/gcc-4.1.2# grep arm config*|grep linux
grep: config: Is a directory
configure:  arm*-*-linux-gnueabi)
configure.in:  arm*-*-linux-gnueabi)
it didn’t like the gnueabihf stuff one bit.
I tried to rebuild as linux-gnueabi
./configure --target=arm-linux-gnueabi --host=arm-linux-gnueabi --build=arm-linux-gnueabi

make LANGUAGES=c HOST_CFLAGS='-fgnu89-inline' CFLAGS='-fgnu89-inline'
And then re-built GCC 2.5.8 with the same error, but slightly further into the program:
Starting program: /src/emx/src/gcc-2.5.8/cc1

Program received signal SIGSEGV, Segmentation fault.
0x004f2a20 in rtx_cost (x=0x41, outer_code=PLUS) at cse.c:679
679       code = GET_CODE (x);
(gdb) bt
#0  0x004f2a20 in rtx_cost (x=0x41, outer_code=PLUS) at cse.c:679
#1  0x004f2e20 in rtx_cost (x=0x60c3f8, outer_code=SET) at cse.c:736
#2  0x004ac2dc in init_expmed () at expmed.c:87
#3  0x0045ae28 in compile_file (name=0x5c96ec "stdin") at toplev.c:1648
#4  0x0045f6fc in main (argc=1, argv=0xfffefd04, envp=0xfffefd0c) at toplev.c:3569
(gdb)
The positive thing is that there was no weird register errors while compiling, and it built 100% normally…? “arm-linux-gnueabihf” almost seems right, specs needs fixing to point to “/lib/ld-linux-armhf.so.3” instead of “/lib/ld-linux.so.3” along with the linker target.
As far as computers go, Raspberry Pi’s are cheap. The latest (and vastly incompatible) Pi4 is no real exception. Now you’d think Microsoft would want to get WoA (Windows on ARM) into as many hands as possible to get people to port apps to the new cpu architecture. But that is not the case.
As of this moment there is no real desktop machines, the only route to go is with the laptops, which are the few models from Lenovo, HP, Acer and Microsoft themselves. Brand new these things are not cheap, and of course people find out quickly enough that the emulation just isn’t quite there (not all that surprising) and of course the lack of native apps doesn’t help. It’s that chicken/egg problem that can only be solved by getting hardware into people’s hands.
Developers!
So getting back to to the Pi, on ETA Prime’s channel I saw this video, which quickly went over how to get Windows 10 up and running in no time flat.
Pi4 (4GB/8GB it doesn’t matter thanks to a DMA bug you can only use 3GB)
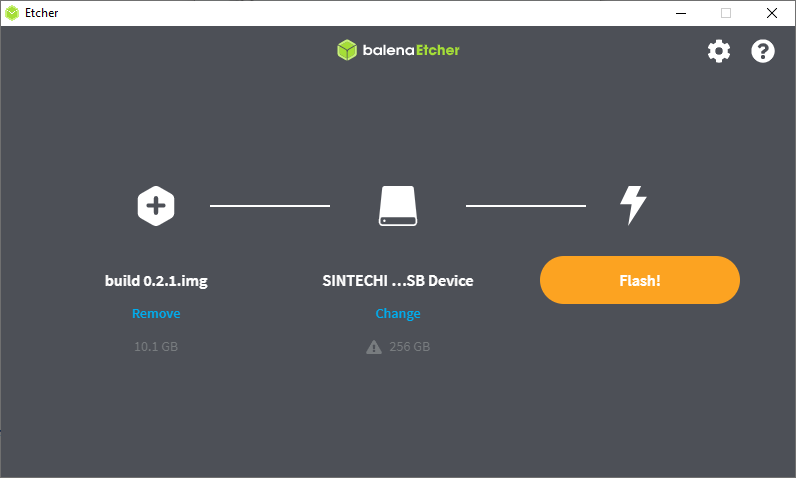
On the Discord look for the #download-links and look for build 0.2.1 After you extract it, the image should be about 10GB
10,100,932,608 build 0.2.1.img
With a MD5 checksum of: aad51a0e02ba947d24d543ff8ed612b0
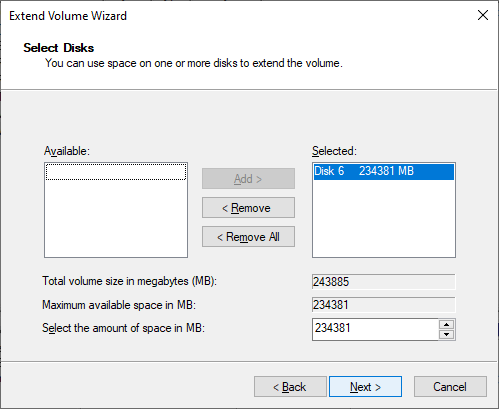
Use etcher to write the image to the SD. It took me about 5 minutes to do so. No bigge. I unplugged the SD/IDE/USB adapter thing I’m using, plugged it back in, and used Windows disk manager to expand the partition to take up the rest of the disk. It’s not terribly complicated to setup.
SSD FlashedRight click and select ExtendThe default option will consume the entire disk
After that slap in the SD to your Pi4 and away you go. Or so I first thought.
Realistically you also need:
A USB Hub
A USB Ethernet adapter (I have some cheapo no name realtek)
A USB audio card
A mini HDMI to regular human sized HDMI cables/adapters
a 5Amp USB charger for extra power!
As I found out rather quickly that the only peripherals that are working is the USB ports. However the USB controller has some DMA bug where it can’t xfer higher than 3GB which caps the current memory ceiling to 3GB.
Otherwise the Pi will think and reboot a few times, and about 15-30 minutes later (I didn’t time it, I walked out) you’ll be up and running Windows 10 on ARM!
It’s heavily customized in that when Windows boots up it is only consuming about 1GB of RAM. So that gives us just under 2GB for user programs. GREAT! Included is the setup program for the latest beta of Microsoft Edge (with the chromium engine) so at least you can actually hit web sites. However Google doesn’t like it, so if you are going to try to watch anything with DRM it will not work.
While many people complain about STEAM, game compatibility, really what on earth were you expecting? Naturally people will want to know how fast it is, and well… It’s not. Although it does have 4 cores, running at 1.5Ghz, there is barely any cache (well compared to an i7/Xeon), and it’s clearly not a power house of a box. The only real test of a machine like this is going to be native stuff. And speaking of, it’s nice that my previous builds for ARM still work! The sales guy that borrwed the ASUS should be back soon so I can do some side by side comparisons of how slow they are.
In addition to DOSBox, Neko98, and frontvm, I managed to get MAME 0.36 cross compiled and I had to disable the DirectX input and output, as although they do compile they have issues on the Pi4. So it’s GDI all the way. That said, it does run:
This isn’t the port you want, or the platform to play it on. I’m using the command line Visual C++ tools to build this, and MAME 0.37 drifted to being more of a MinGW thing, and I just don’t feel like fighting the build process.
Another point of fun, is that this processor & OS does have x86 compatibility you can take things to the extreme with OTVDM, and run Win16 based programs on Windows 10 for ARM! Not that I would know why you want Excel 3.0, but rest assured, it works fine.
The platform supports WSL, so I went ahead and installed Ubuntu 18 & 20… and both have one apparently known catastrophic failure on the Pi’s. When trying to update packages the updater crashes. The fault is apparently in dirmngr, or the usual Linux bandaid of switching distros. There doesn’t appear to be any ‘fix’ to this, so if anyone knows what to do, I’m all ears. Also don’t enable WSL2, it’ll hang at the bootloader. I ended up having to reflash the disk.
In my quick conclusion, is this the RISC Windows workstation of the future? No, not really. It’s more the $50(+peripherals) tyre kicker edition. It’s a cheap way into the platform, to see what the fuss is all about. This machine feels like a low end i3, the CPU just isn’t there, it’s only a BCM2711 Cortex-A72, so there isn’t all that much to be expected. On the other hand it’s FAR FAR FAR cheaper than something like the Surface X. If you have the hardware it’s worth checking out if you are interested in non x86 Windows. Otherwise you aren’t going to miss much.