-
-
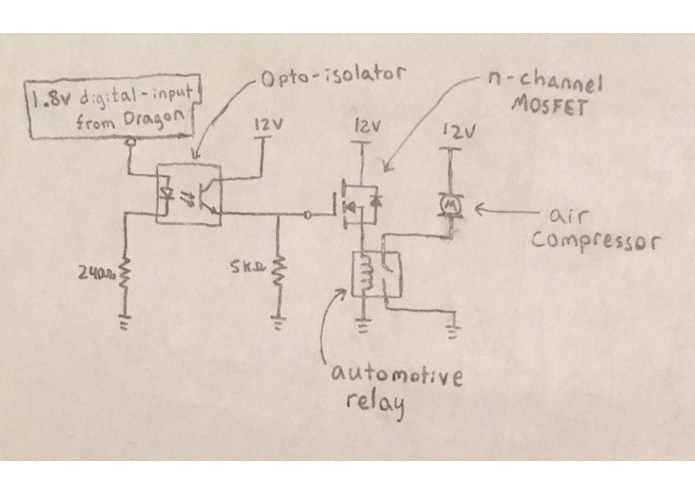
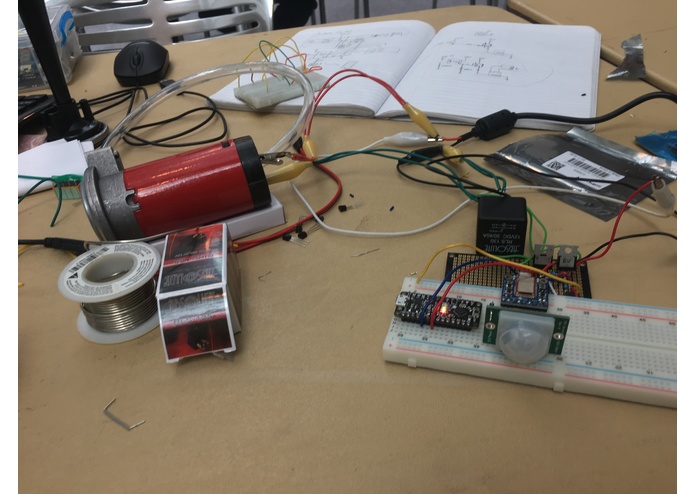
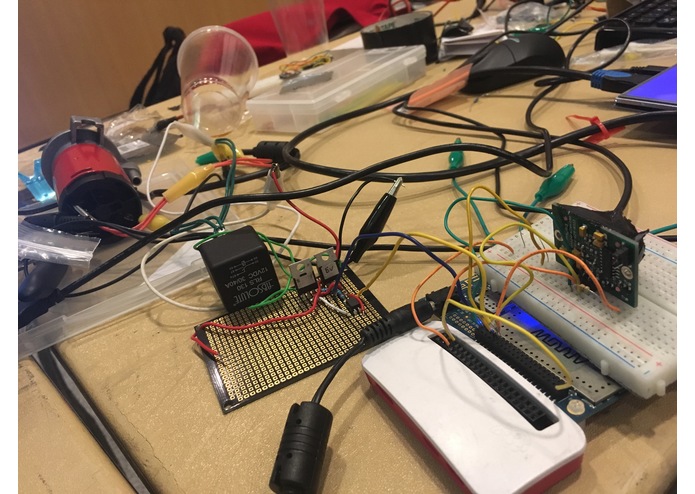
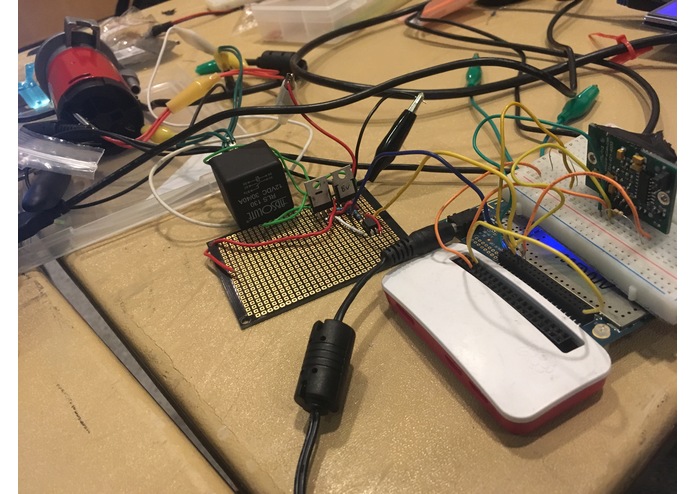
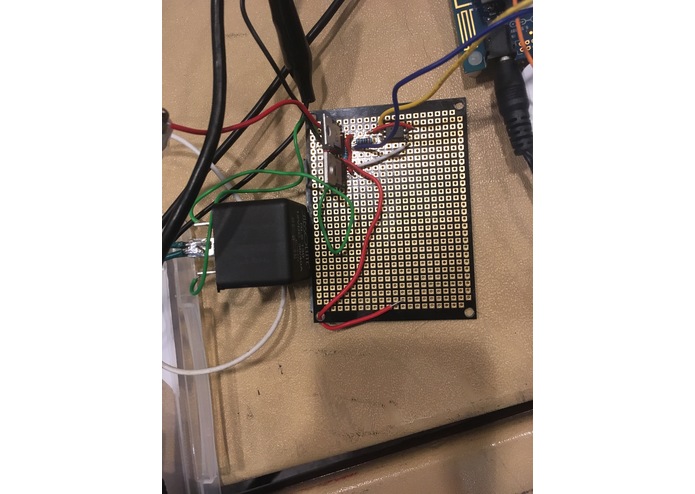
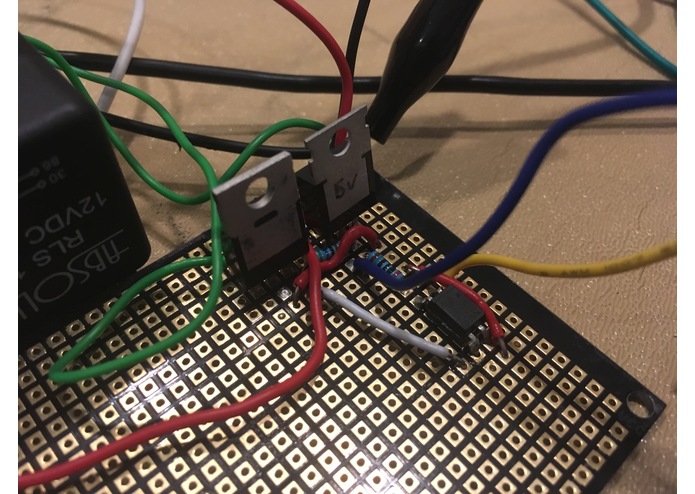
Air Horn Circuit
-
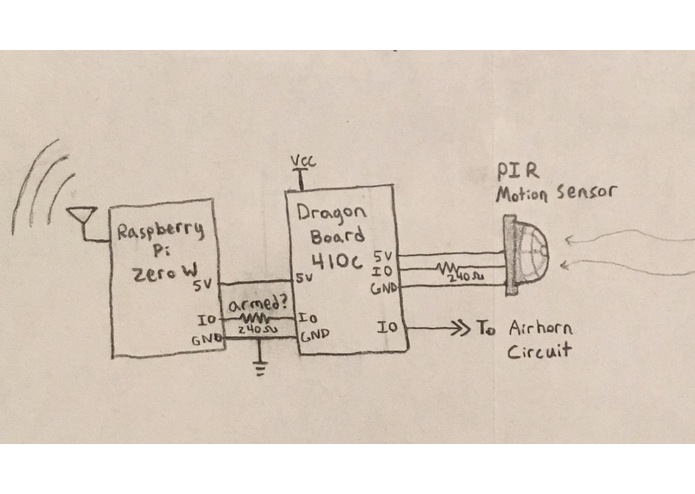
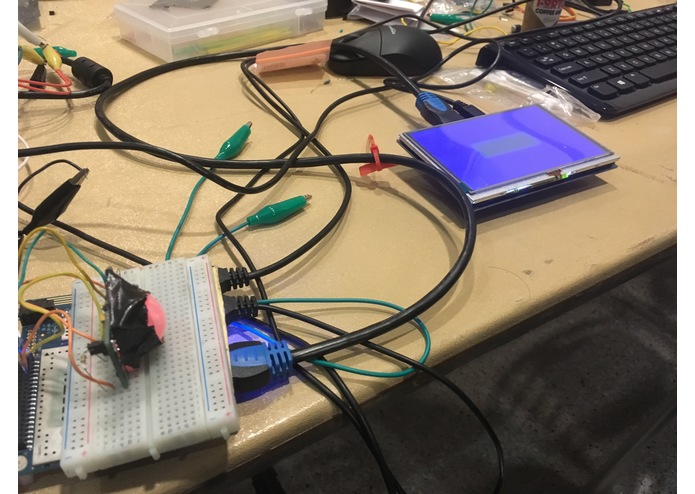
DragonBoard Circuit
-
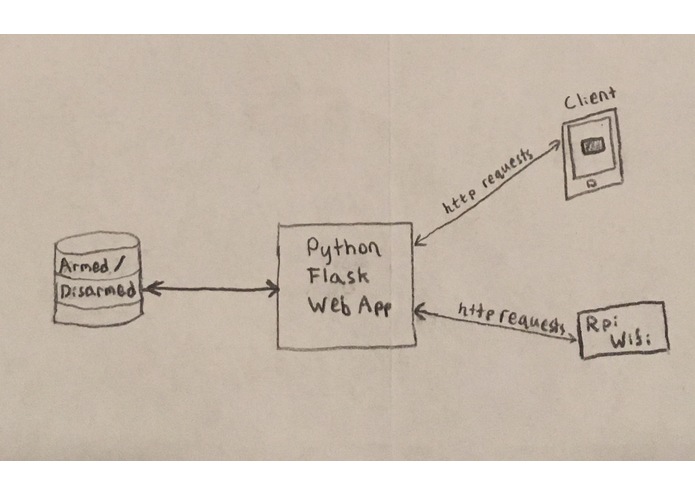
Web App
-
-
-
-
-
-
-


Inspiration
A few weeks ago someone intruded in my parent's house back at home. How did this happen, you may ask? Well, we have a dog that we assumed would protect us (she comes from a protective breed). So generally we keep our door unlocked at night with the assumption that she would protect us and/or alert us of an unwanted presence. However, she miserably failed at this job when an inebriated fellow wandered into our house at 3 in the morning and she didn't make so much as a sound. This man then wandered into my parent's bedroom frantically looking for his shoes. Needless to say, he gave my parents quite the fright. Hence, our airhorn alarm system, Airlarm.
What it does
Airlarm uses a passive infrared sensor to detect motion. When motion is detected the Qualcomm DragonBoard receives a signal and uses that to turn on the electric circuit that controls the air compressor that is attached to the air horn. The alarm can be armed and disarmed via a web application that was written in Python, uses Flask, and is deployed on Heroku
How we built it
Our system is split up into three main components: the electric circuits controlling the air compressor, the DragonBoard / PIR motion sensor system, and the Web application that arms and disarms the whole system.
Air Compressor Circuit: First we prototyped using breadboards, once we could properly control the air compressor and air horn with a small voltage signal, we proto-boarded the circuit for reliability. The circuit used a relay to switch the 12 volts, 10 Amps load to the compressor. To drive the relay we had a MOSFET sink current through the relay coil. To turn on the MOSFET we used an optocoupler so we could use a very small voltage signal to control it.
DragonBoard Circuits: We employed the use of a raspberry pi to connect to wifi and ping our web app. The raspberry pi would then communicate with the DragonBoard to indicate whether the alarm was armed or not. The DragonBoard would use this information and information from the PIR motion sensor to determine when to send signals to the air compressor circuit.
Web App: The web app is written in Python and uses the Flask server library. There are endpoints for HTTP requests to set the state of the alarm to be armed/disarmed and to get the current state of the alarm. The user can connect to the web app through a simple frontend GUI that contains a button to toggle this feature.
Challenges we ran into
-Power Supply not providing enough current -> (used higher gauge wire to current limit the compressor) -relays not functioning properly -> (found replacements) -Bluetooth module signal interference -> (so we used wifi/ DragonBoard) -Loss of Wi-fi connectivity on DragonBoard -> (so we used a RPi for wifi)
Accomplishments that we're proud of
-We built an alarm that's REAL loud (this stuff could save lives)
What we learned
-Learned about high power electronics -Learned how to deploy a web app -Learned about a new computing platform (Qualcomm DragonBoard w/ Snapdragon processor) -Learned to interface Linux with the real world using GPIO and Python
What's next for Airlarm
-more functionalities (as an alarm clock, or as a carbon monxide warning system, etc)
Built With
- air-compressor
- air-horn
- automotive-relay
- debian
- flask
- heroku
- n-channel-mosfet
- opto-isolator
- passive-electronic-components
- pir-motion-detector
- python
- qualcomm-dragonboard-410c
- raspberry-pi


Log in or sign up for Devpost to join the conversation.