Classification
Classifiers identify and categorize incoming data for Logmanager. Every message sent from devices, servers, or services must be defined here to ensure it is correctly parsed and enriched; otherwise, data will pass through the system without additional information.
The Classifiers section is divided into two main areas: Classifiers (user-defined) and Vendor classification.
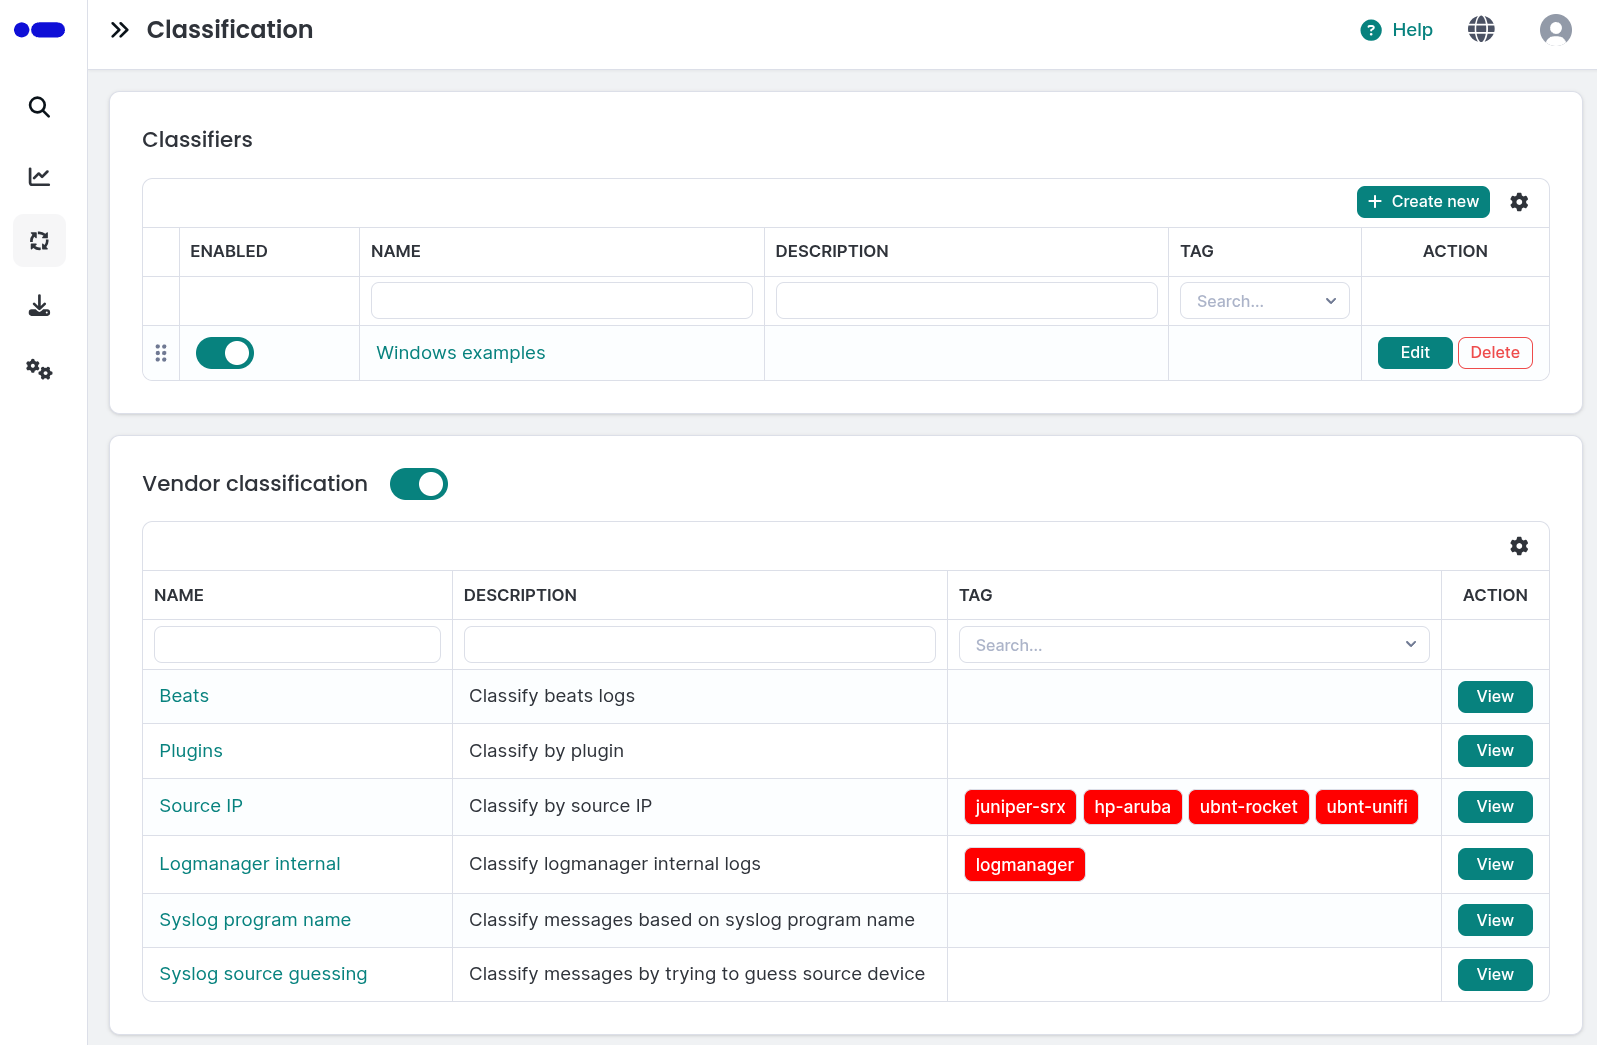
Classifiers and Vendor Classifications
Both tables provide the following information:
- ENABLED: Use the toggle switch to activate or deactivate a specific classification rule.
- NAME: The unique name of the classification.
- DESCRIPTION: A brief summary of the classification’s purpose.
- TAG: Associated tags used for further processing.
- ACTION: Buttons to Edit, Delete, or View the specific rule.
You can add, edit, or delete classifiers to manage how your data is processed.
Logmanager processes messages through classifiers sequentially from top to bottom. A message continues through the list until it hits a termination block within the Blockly logic:
- Pass to parser: This is the final block that transfers the message to a specific parser for data extraction.
If a classifier is disabled or does not end with a pass to parser block, the message automatically moves to the next classifier in the list. To ensure all data is processed, it is recommended to have a final “catch-all” classifier at the bottom of your list with general conditions (e.g., identifying JSON format).
These are custom rules created by users to handle specific environment needs.
- Order: You can change the processing order by dragging and dropping rows using the handle icon on the far left of the table.
- To Add: Click the Create new button in the top right of the Classifiers table.
- To Manage: You can freely Edit the logic or Delete these rules.
These are pre-defined rules provided by Logmanager to identify common log sources like Beats, Plugins, or Syslog programs.
- Vendor Toggle: You can enable or disable the entire Vendor classification using the main toggle next to the section header.
- Visibility: These rules are typically View-only to protect standard log identification logic.
Vendor classification is read-only, but you can open it in View mode, inspect its logic in the Blockly/XML editor, and easily copy it for reuse.
- Click the Create new button to open the Configuration form.
- Enter the following details:
- Enable classifier: Use the toggle at the top of the form to set the initial state of the rule.
- Name: Enter a unique name for the classification rule.
- Description: Provide an optional summary of what this rule identifies.
- Define the logic using the Blockly editor to set conditions and the pass to parser action.
You can switch the Blockly/XML logic editor to fullscreen mode. This is useful when working with complex rules.
While the Blockly tab provides a visual way to build rules, you can also switch to the XML tab. This view shows the raw code representation of the rule, which is useful for:
- Advanced Debugging: Checking the exact parameters of the logic blocks.
- Portability: Using the XML copy button to quickly back up the rule or share the logic with another Logmanager system.
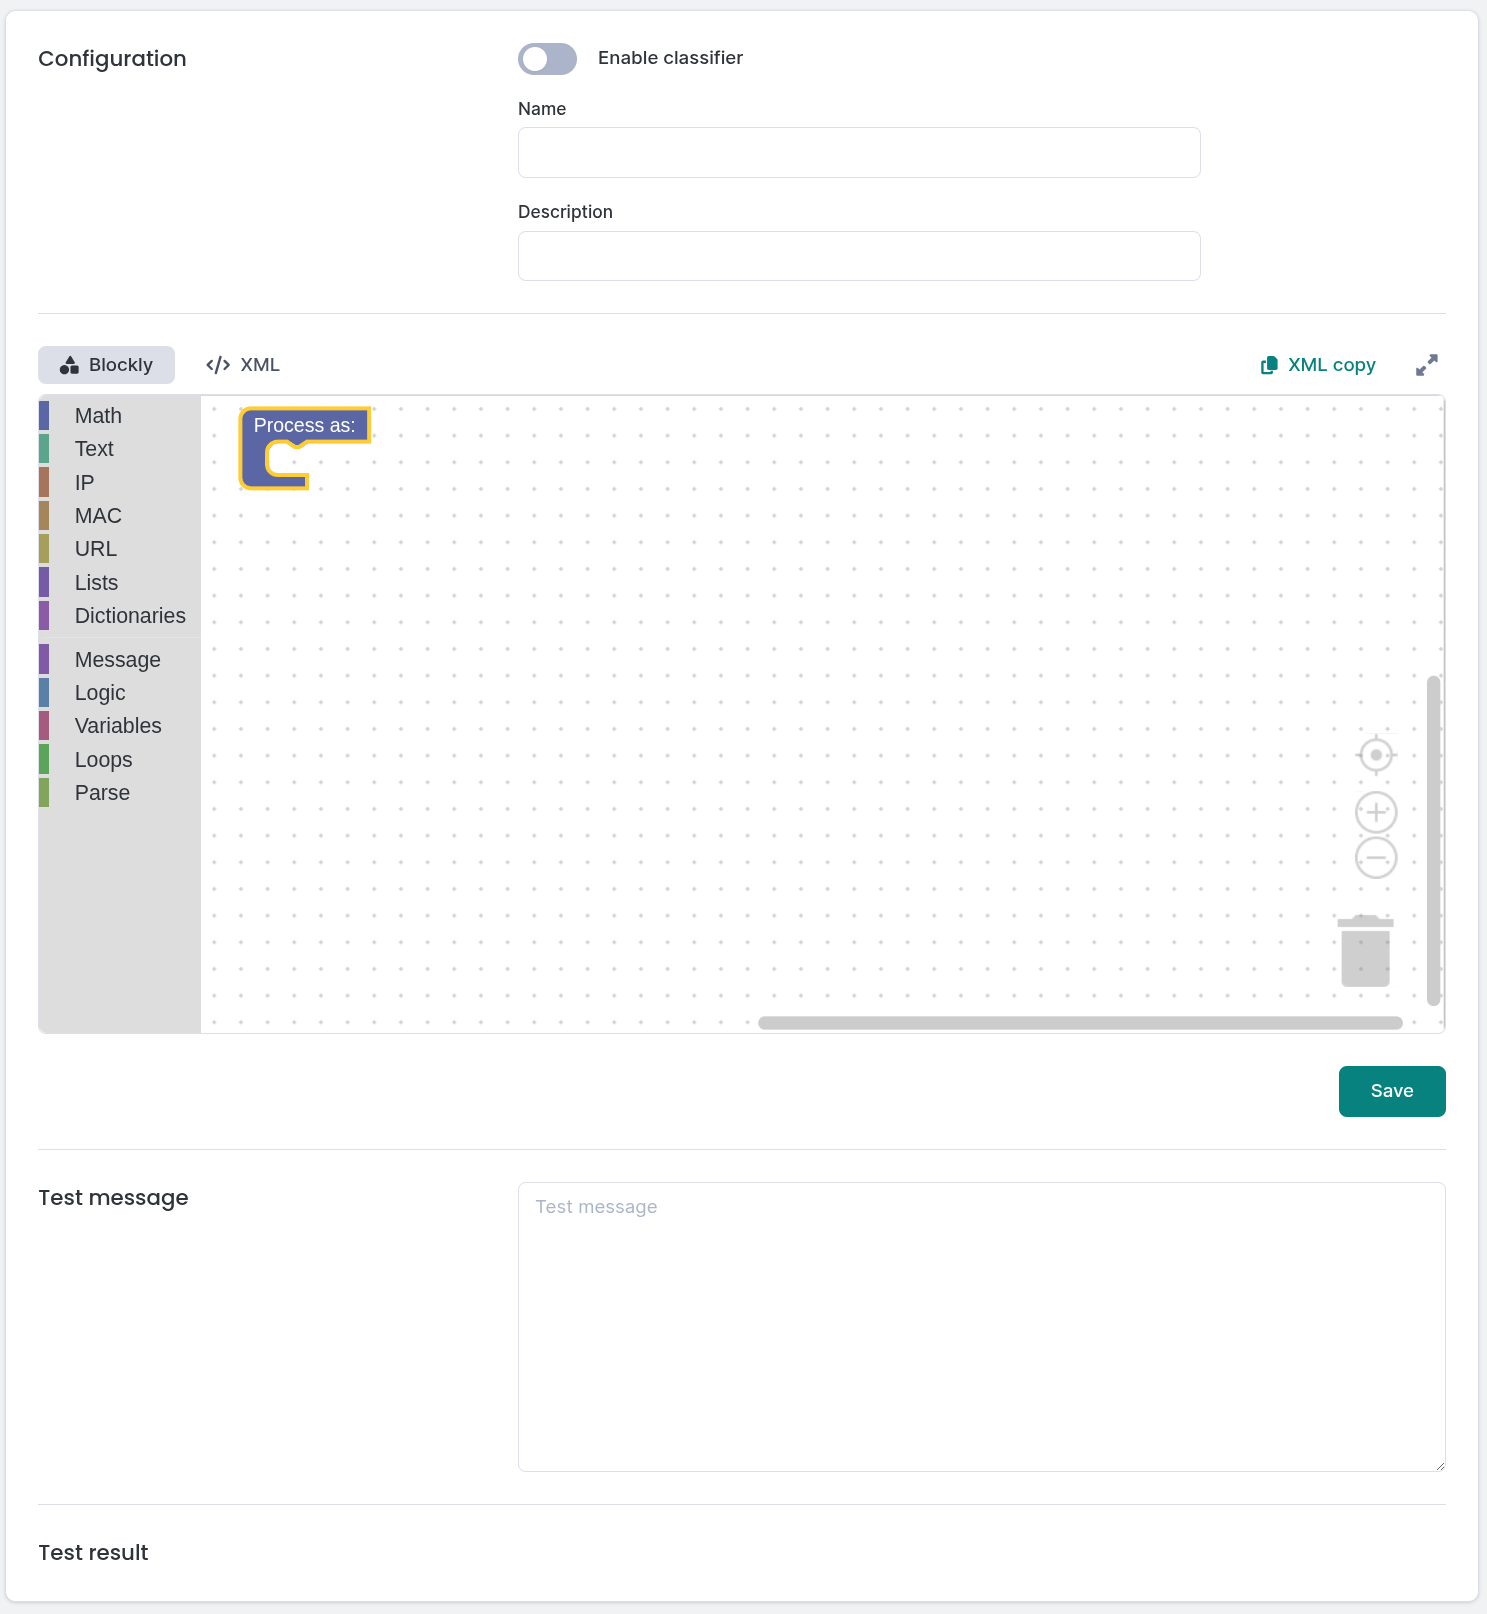
Classifier create form
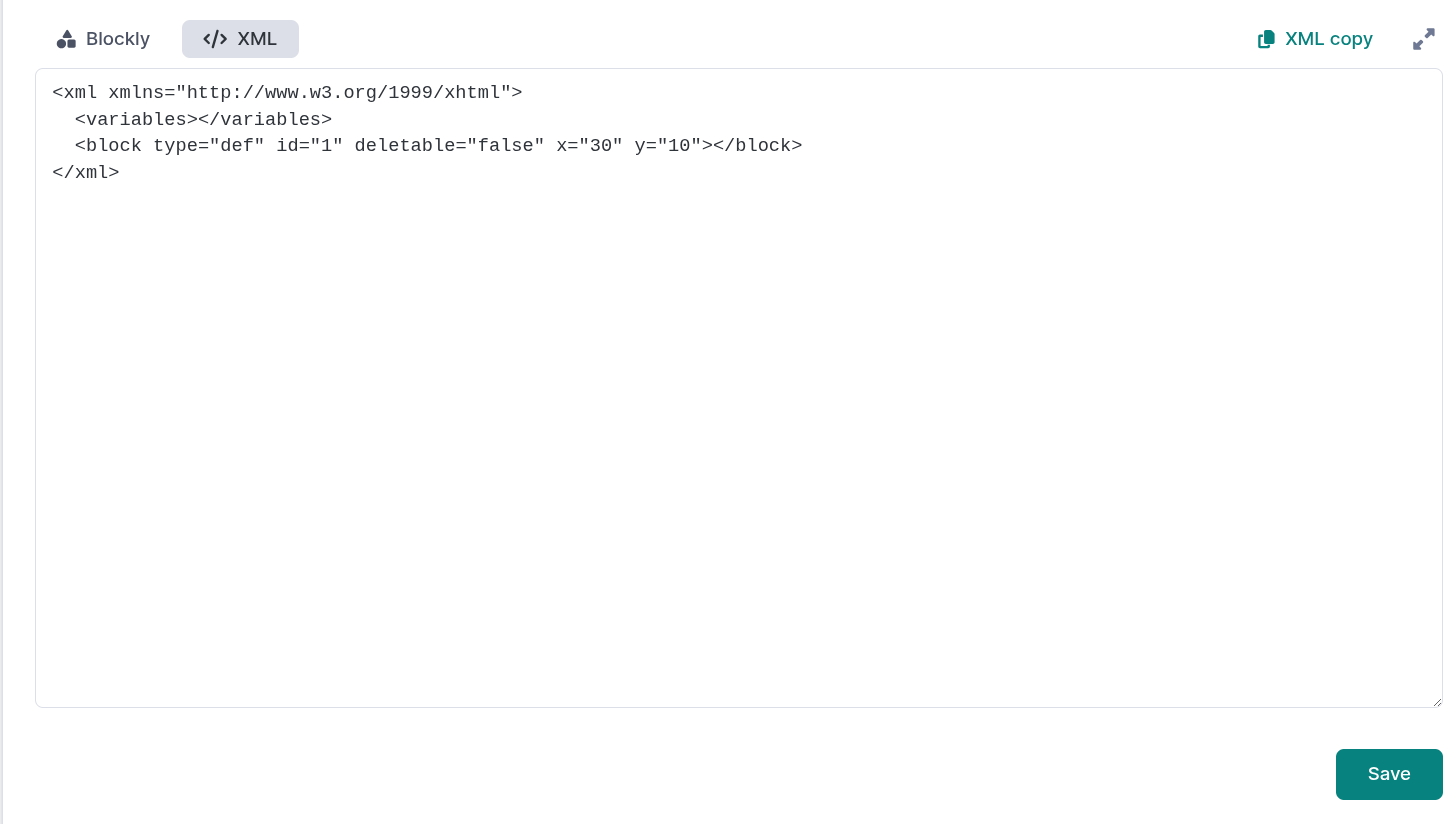
Adding a classification XML
You can use the Test message window to verify your logic. The test window requires a message in JSON format, exactly as it is stored in the Logmanager system.
How to get a test message:
- Navigate to Analysis ‣ Dashboards ‣ Log overview.
- In the All Events table at the bottom, click the event you want to test.
- In the event description, click the View button in the upper left corner to switch the display format.
- Select JSON format and copy the entire message content.
- Return to the Classifier editor and paste the code into the Test message field.
The results will appear in the Test result section, allowing you to see if your conditions correctly trigger the desired parser.
The testing window only shows the live result for the specific classifier you are editing. The message may be further modified later by Parsers or Alert Rules.
Please also be aware that tags are not stripped from test messages in test process. Due to this behaviour, the final message can have less tags.
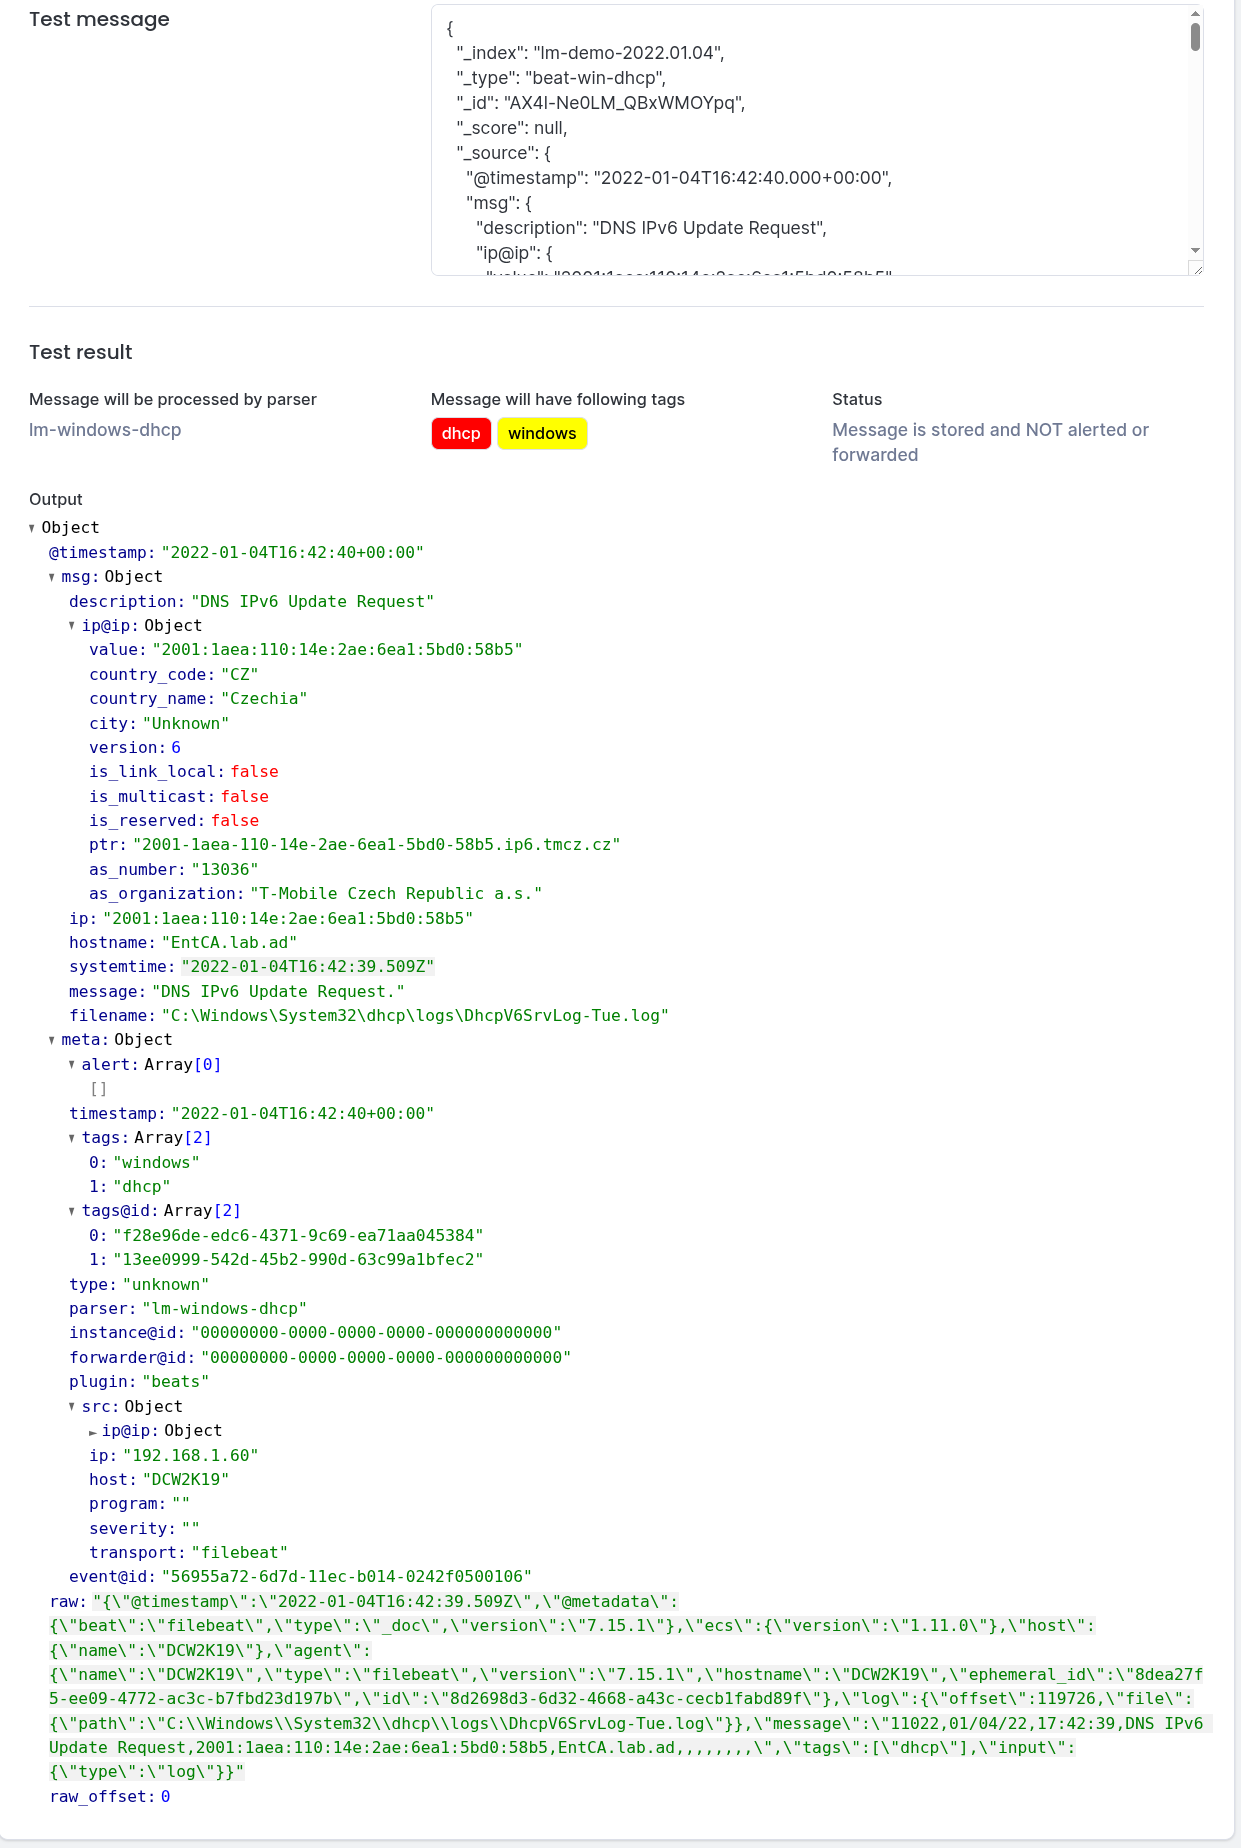
Classifier testing window
To modify a classification, click the Edit button in the corresponding row.
When editing, you can toggle the Enable classifier status, update the Name, Description, and logic schema. You can also use the Test message window to verify your logic:
- Paste a message in JSON format into the Test message field.
- The results will appear in the Test result section to verify if your conditions correctly trigger the desired parser.
Classifier edit form
To remove a classification, click the red Delete button. Confirm the action in the deletion dialog to permanently remove the rule.
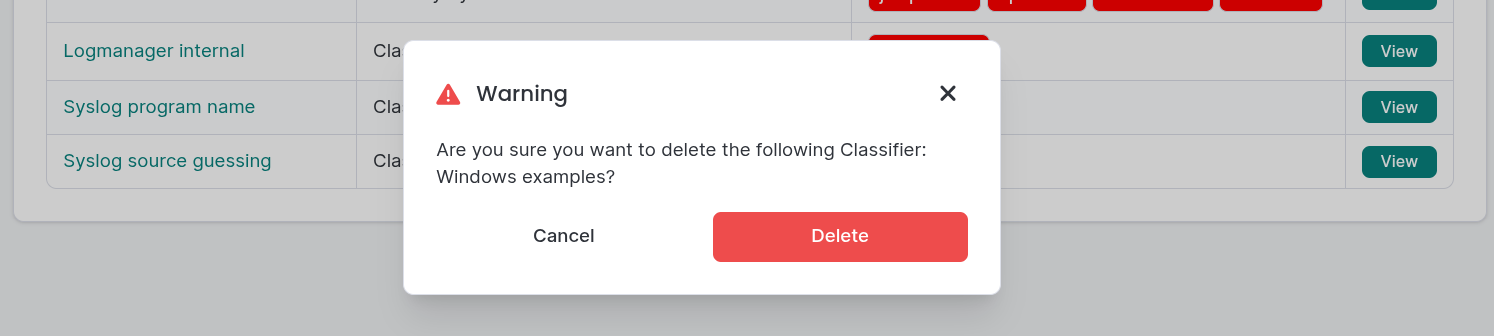
Deleting a classification