
Search the Community
Showing results for tags 'model'.
-
Hi! Not sure if this is the proper place to request something like this.. but I've been thinking, has anyone ever had the idea to make that metro engine from the little metro protectron ad that bethesda released as a teaser for fo3, or a van model? been thinking that this game needs a little more vehicle variety/parity so, would anyone be willing to make these a reality? Again- I am unsure if this is a proper place to ask for something like this but.. it would be really cool to have some stuff like this for modding!
-
i dont have any experience with unreal or moding to begin with but there is these fnaf SB mods i want to update since the creator isnt going to themselves and im trying to figure it out how myself since they only replace the model for freddy and monty, the mods work for ver 4.25.2 (pre Ruin) and i want to work with 4.27.2(post ruin). does anyone know where i can view the model or know what app to update to a newer verision?
-
Title. I have found that there are two or three sound replacer mods for this exact gun pair and yet there is no model replacer to be seen, is there anyone out there savvy enough to give me back some of the heavy weapons nosimage.pngtalgia?

-
WORK IN PROGRESS There's a lot to write, so it's going to take a while. Decided to post this in the meantime because it has solutions to weird problems people may be stuck on. Changelog: - Finished explaining how to export as shapekey. - Updated and added some troubleshooting stuff. - Added important note about material limit in the MOD3 file. - Added step to make sure mesh is assigned to armature before exporting to FBX. - Corrected UV name from main_uv_layer to main_uv_texture - Added more troubleshooting explaining possible import/export and texture/UV problems. - Elaborated further on the texture stretching problem. - Added recommended tools section. - Added suggestion to combine textures and redo UVs to match, in order to counter model material limits. - Added some tips on vertex editing and how to use the 2d/3d cursor to control axis. - Added warning that the DOA5 tool "Keep Normals" may actually be breaking normals for MHW models. - Updated info about importer/exporter. CrazyT fixed the bug preventing the latest version from exporting. - Added some info on how to fix texture problems (checkerboard pattern, etc). Well, I was writing this and then some hotkey opened another browser window, I tried to close it and it closed this window too. Lost everything. So now I have to write it all over again. This time I'm going to write it in another program and paste it in here after. Possible: - Import new models, regardless of vert count. But there are some weird possible issues (see Troubleshooting below). - Reweight models. There's a problem with TransferWeights (see Troubleshooting below). - Import new textures of any size. All types of textures supported. - Edit and add new materials to the MRL3, based on existing shaders. Fur, glow, shine, skin, color customization, etc. - Limited physics editing. Not much is known about the physics formats. - Limited bone editing. Possible to repurpose unused bones, and change rotation/position for some bones. - Breakable parts, such as cutting tail. - Editing monster behavior and movesets. Hex seems to be doing this in his Hex World mod, although I haven't tried it myself. - Effect swapping and possibly editing (I don't know how much about it). - Sounds and BGM. Some sound files can't be edited, and most BGM are in a single large archive. Newly added BGM may be in separate files (ie. Behemoth theme). I also heard looping doesn't work properly. Not possible (currently, as far as I know): - Animation editing. - Adding more materials to the MOD3. Which means you have to make do with the number of materials in the MOD3 (you can redirect these in the MRL3). - New bones, new skeleton, etc. Note that bones don't have names, just numbers. - Cannot scale model/skeleton. But it is possible to change monster scale by editing the monster data elsewhere (ask Hex). - Cannot seem to raise skeleton to mimic high heels. I tried hacking up a skeleton in a hex editor, but couldn't figure out how. - Overriding how the game decides which parts to hide when equipping mantles, or each Palico equipment. Nobody has figured out where the game defines these. Not sure if possible: - Editing elements, weak points, etc. Hex would probably know. - Not sure what the limit is on bone influences. In general you should edit weights with "Auto-Normalize" on, and maybe use the Clean and Normalize All functions to fix weights. - Defining which color channel is customizable. I think there's a general file that does it, but that file likely gets updated on every update. There seems to be multiple types of skeletons. In NPCBS019 (Gathering Hub Girl swimsuit) the "movement" skeleton seems to have condensed data for each bone. Whereas usually each bone's rotation/position data are usually spread out over several lines. I've yet to figure this out. Recommended tools to use: Blender 2.79b (make sure you're using 2.79 for minimal incompatibility issues) https://www.blender.org/ CrazyT's import/export tool. Nexus link is here (some helpful info in the description): https://www.nexusmods.com/monsterhunterworld/mods/242 I recommend trying the latest version on Github: https://github.com/TheCrazyT/BlenderMhwModelImporter But if you seem to have problems no matter what, try this version: https://github.com/TheCrazyT/BlenderMhwModelImporter/tree/b3691996b35537ed03587ad7d951f709038c2c59 Yavne. You need this to fix weird shading, visible seams between combined model parts, etc. https://github.com/fedackb/yavne Dtk mnr's Blender 2.79 tools for DOA5LR: https://www.mediafire.com/folder/9zi2gt8dyllaj/doa5mod#mc91ipeghb8r6 Keep Vertex Normals. keeps vertex normals while editing. WARNING: may actually be breaking normals. Transfer Vertex Data. can transfer selected weights, but doesn't work well if the mesh is too different. You can use transfer weights and then "revert" some parts from a backup mesh, using Transfer Vertex Data. Vertex Groups Utilities. Haven't used this yet, but it's probably useful. Preparing the model: Deciding what model to use as a base: Body meshes (ie. not arms, legs or waist) usually include all bones used throughout the body, except maybe unique head bones (I haven't confirmed). Note that replacing head models with body models usually causes implosions. So it's safe to assume that you should use a head model as a base for headgear. If you intend to repurpose bones, you should probably think about replacing a body model that has lots of extra bones. The Handler models may be good for this (she has extra bones for the book, etc), but some don't have slinger bones (ie. causes crashes when entering combat areas). Also note that you can't add materials to the model, so you should pick a model that has at least the amount of materials that you want to use in the model. If you have to, you can combine textures into a single image, and then edit the UVs to match. Useful tips on vertex editing: - Before you edit anything, always double check to make sure you don't have extra verts selected that you don't want to select. - Highly recommend editing in orthogonal view (hit 5 on numpad) and then rotate or select camera angles with the other numpad keys. - I like to use proportional edit. In viewport, hit O to enable/disable it. When it's enabled and you try to move/rotate/scale, a white circle will be visible. Scale this with mouse scroll wheel. Default curve setting seems good. - For easier modeling disable parts. Position cursor on vertex and use L to select that part, shift+L to deselect. Or select a vert and hit ctrl+L to select the connected part. Hide with H, unhide with alt+H. - You can save selections as vertex groups for easy reference, but don't forget to remove them before export. Tips on using the 3d/2d cursor: When editing, the axis is pretty important. Bounding box = center of current selection. 3d cursor = customizable axis. In viewport, hit N to bring up a toolbar that has a section where you can customize the cursor position. Example of how to use 3d cursor: to lengthen ponytail, position 3d cursor near the base of the ponytail, and you can simply stretch the ponytail outwards from that point. 2d cursor on UV mapping example: when combining textures, set the 2d cursor Y pos to the top of the texture (the number depends on the texture res), select all UVs, hit S to scale, then Y (limit to Y axis), 0.5. This will halve the Y scale of the UVs to the upper half. If you want to scale to the bottom half, leave the 2d cursor on Y position of 0. Combining mesh: How to snap verts. How to snap objects. Combining textures and editing UVs to match: Preparing UV islands: Refer to Ezekial's tutorial for the time being. Fixing smoothness, hard edges and seams: Yavne. https://github.com/fedackb/yavne Inserting the model into an existing MOD3: Note that if you do not recalculate normals when exporting MOD3, they will use the existing normals in the original file. You can use this to your advantage. For example, if you've got the normals looking right and you want to apply a shapekey without changing the normals. you can import the completed normals as its own MOD3 (thus keeping the reference data of the completed normals) and then export the applied shapekey version without recalculating. It'll use the existing normals from the reference of the completed normals MOD3 that you made. Weighting: Two ways to do the weighting. Either make your own/have a weighted model prepared, or tranfer weights from a similar model and then clean them up. If you have a prepared model, you'll have to redo/rename the weights/bone groups so that they match the model you're importing over. Applying shape keys: This is useful for making different proportion versions and "morphing" between them to make variations. Vertex count must match. Also, shapekeys can change the normals so you'll need to adjust the normals after applying shape keys. Here's how to do this: 1. Open two Blender windows. One with the original, one with the shapekey target. 2. Rename the target object names so that they won't clash. I like to use names like "a", "b", "c". Delete the armature or else that'll be copied along with it. 3. Make sure cursor is on the viewport, select the objects you want to copy and hit ctrl+C. Then go to the other Blender window, mouse on viewport again, and hit ctrl+V. 4. For each model you want to add shapes to, first select the target, then the model you want to attach the shapekey to. 5. Go to object data (triangle with vertexes icon on the right) and under Shape Keys click the down arrow and select Join as Shapes. Note that if you export with the shape as 1 it won't actually export with that shape. There's a way around this. 1. Set the shapekeys to look the way you want. Then go to the same object data, Shape Keys, and click the down arrow and select New Shape from Mix. 2. Set this New Shape from Mix to 1. 3. Delete the other shapes from top down (ie. from basis to the new shape) then delete the new shape. 4. The default shape will now be the combined shapekey version. If you want to make morphs that are under 0 or above 1, left click the shapekey name, and an extra section will appear underneath that lets you change the number limits for that mesh. This is useful for if you want to reverse or multiply the effects of a shapekey. Troubleshooting: Textures aren't appearing, texture changes aren't exporting: You must import the original MOD3 with textures. How do I know which bone is which? Scroll through the original model to see which bone groups affect what. You can also try selecting verts and hit N to display the toolbar that shows which bones affect that vert. Note that the bones aren't set up exactly how they work or appear in-game, so even if you find bones by clicking on them visually, they not be that bone. That's why the group weight method is more reliable. Can't export: Make sure all objects/LOD mesh are visible. Make sure you have an object selected (nothing selected will refuse to export) and are in object mode. You may need to make sure each model has an armature modifier (not applied) that points to the MainArmature. I think objects with names that don't match any LOD mesh are ignored. Make sure you don't have any shape keys remaining on the objects, as they may cause issues. Texture is obviously stretched across the model: See fixing seams. Basically, MHW uses one of those engines where the seams of looping UV islands need to be separate vertexes (ie. you can't have separate seams on a single vertex). Otherwise the engine thinks those UV seams are joined, which results in the stretching problem (because your UVs will be forced to connect and drag across islands). There's a way to split the seams (explained in Ezekial's tutorial, I'll cover it myself later). Textures are totally messed up or missing: Make sure you rename the "UV Maps" for the imported objects to "main_uv_texture". Textures are a checkerboard/boxed pattern: That means the MRL3 file is corrupt, broken or missing. You need to use the same MRL3 as the MOD3 you last imported into the scene (it uses the last imported MOD3 as reference data). The reason for this is that MOD3s refer to materials with some kind of hash ID, and if it can't find that in the MRL3, it won't be able to find the materials. The same checkerboard pattern appears if you edit the MRL3 incorrectly and it can't find data inside it. In other words, if it can't find the material it's supposed to. Textures look flat, or custom color affects the entire texture when it shouldn't: The MRL3 can't find the texture files. If it can't find the CMM texture, changing color affects the entire texture. Same goes for if it can't find the EMM file, the entire model glows. Can't see the UVs at all: You have to import the mod3 with textures, or else you can't see or import/export UVs. Error when importing with textures: To import with textures you have to make sure the Scarlet folder is installed along with the import/export tool stuff. If you got the import/export tool via Github (latest version) it doesn't include the files in Scarlet. You have to download them manually (there's a link somewhere on the import/export tool Github) or use the files from the Nexus release (which may not be the latest version). Can't export, base 0 error. This happens with some of the 1.4 versions of the model import export tool, when importing new meshes. The problem has been fixed in the latest version of 1.4. Can't export, -1 error. This may occur if you've edited the mesh in Blender and scaled UVs or mesh -1, or flipped normals. Haven't isolated or figured it out exactly, but the solution is to avoid editing in Blender as much as possible. Unless you know Blender really well (I don't). I've had a situations where I could not restore a mesh after getting the -1 error and had to redo those changes. Import/export tool doesn't seem to be functioning as others use it, can't combine meshes or go over vert count, etc: Make sure you're using the latest version on either Nexus or Github. Sometimes the Github version may have errors (the latest version seems to have problems combining models). You also have to make sure you replace all instances of the import/export tool (I had two, one in the Blender folder and one in my MHW mod work folder, and apparently the latter was still being referred to and was outdated, which was why I was having problems importing models and going over vert count). Model works in some places but crashes in others: Apparently this can be if you're referring to bone groups that don't exist in the skeleton, especially 255 (FF). With the Lion King mod, it worked in the Lunastra cutscene, but for some reason would crash in Teo's cutscene. I never figured out why. It had something to do with my cutting parts of the model and mirroring them via scale, or the way I cut the tail. When I redid those changes, I used "Mirror" instead and that seemed to work, but I still had to flip the mirrored mesh's normals, using Yavne. Model polygons glitch and stretch horribly: Occurs when replacing some LOD meshes, or TransferWeights is being ignored Weight changes are being ignored (especially TransferWeights): 1. Delete the parts you're not using (ie. original model parts that you aren't changing) and export as FBX (default settings). 2. Make sure the mesh parts are attached to the armature (or else skeleton+weights won't export), and export as FBX (default settings). 3. Reimport the FBX. Delete the armature. This will unparent the meshes under it. 4. Reimport the model you're replacing on top. Make sure you untick "clear scene". 5. Replace the LOD mesh as you did before. Weight should now be updated.
-
A mod that adds new parts for Automatron based on the battle droids from Star Wars would be pretty sick. Or a replacement for the assaultron model, idk.

-
Hi! I think it would be great to have an armor skin and textures for jyggalag, to mirror that, if the hero of kvatch can become sheogorath, he can become jyggalag too.... I was thinking to an armor mesh with grey textures as jygga model, or the jyggalag creature himself but I know it's difficult to play as other creatures, while I saw different armor mods, I would be happy just for a armor skin (not knight or priest of order which are too common and indistinguishable). For anyone who would think of my suggestion, thank you in advance.
-
Hi! I think it would be great to have a playable armor skin and textures for jyggalag, to mirror that, if the hero of kvatch can become sheogorath, he can become jyggalag too.... I was thinking to an armor mesh with grey textures as jygga model, or the jyggalag creature himself but I know it's difficult to play as other creatures, while I saw different armor mods, I would be happy just for a armor skin (not knight or priest of order which are too common and indistinguishable). For anyone who would think of my suggestion, thank you in advance.
-
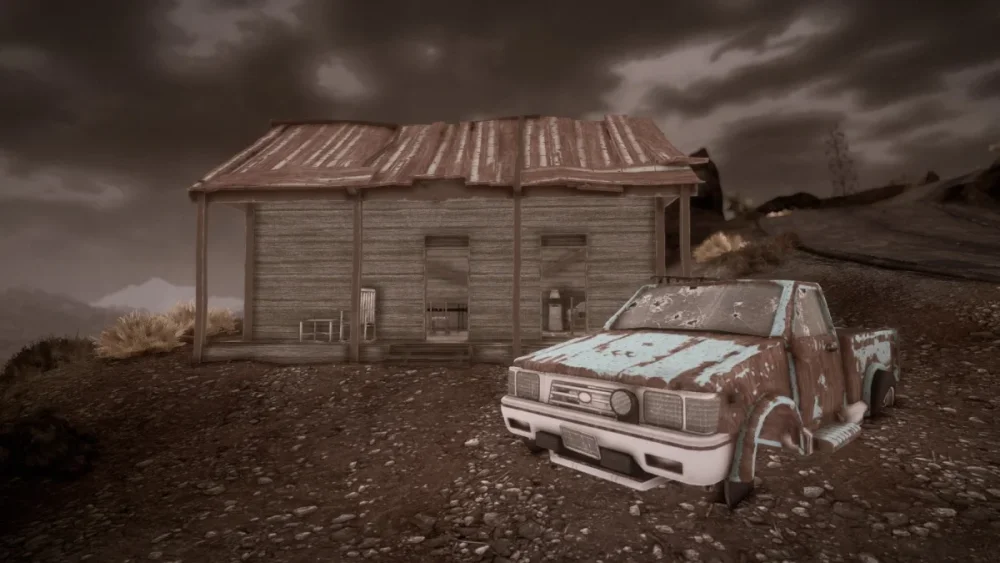
I’ve been thinking about getting back into modding. I tried it when I was a teenager but was never good at it. I have an idea for a town in Fallout New Vegas, and the Cabin Home by Lonewanderer87 is perfect for it. I could’ve sworn I saw that model listed as a Modder’s resource years ago, but I can’t find it now and I think I should be certain before using it. The cabin does not require a separate space to load into, it looks better made than the usual shanty wooden shacks while simultaneously looking like something made post-war. I can’t get into contact with Lonewanderer87, it appears he has not been on the site in years. He did credit the cabin model to “Sandro T,” but I can’t find a user by that name. I’m unsure where to go from here, does anyone know if this cabin was a Modder’s resource, or am I thinking of something else?
-
i find some aspect of the character customisation limiting, which is a shame considering how good it is in this game. for exemples, there is a lack of color choices for some things like skin, teeth or fur and you can't exceed some limits of saturation for eyes everything, which is designed for keeping some realism but let's be honest, most of us make anime characters or monsters for fun. i would also really love to see options to put the beastrens ears on top of their head and the possibility to choose your teeth (mainly because i'm a weirdo fan of vampires) if anyone with competency in coding is up for the task i'm throwing the idea
-
Im requesting subway tunnel objects for the mod Subway Runner Revised. 1 TUNNELS The base game does not have Y or X subway train linking nor proper C curved subway train tracks. (for exterior there are such tracks). For dead end train tracks some kind of loops would be super nice. If people look closer all the interior subway tunnel architecture is for monorail (exterior) trains, either im missing something or its not fully finished in vanilla too (integration of exterior to interior tunnels). 2 PLATFORMS Platforms are side platforms its difficult to create island platforms. 3 ENTRANCE For the TransitStation01 there is collision for the door entrance (lower level) - player char cannot access from one to the other side. If anyone would jump on the train let me know if would greatly appreaciate the help since creating proper tunnel archtiecture would be king for this game, i loved it in FO3.
-
I'm looking for someone capable of creating the mask to be applied as a bandana between a pompadur wig and wrap-around glasses. Links to guides on how to make a mask would be equally helpful.
-
Hey guys - desperately searching for this mod. I’d be willing to pay, but unsure how any of this works. Been wanting this for years, and know it’s probably a long shot. I want something similar to this : basically same werewolf model, with added feathers (especially on arms), and a replaced head and feet to closer resemble this. I wouldn’t need any custom sound or animation, just the custom model and texture. https://i.pinimg.com/originals/24/a1/f1/24a1f1e81d8b2cf3bcfc1d48afcd29d1.jpg
-
Hi! What are "paths" and where can I see them? I would like to be able to view the path that leads from my own texture folder to the model in game, because it seems that some people get purple models, which means that even though the textures are published with the mod, the route from the texture folder to the model is somehow wrong. Do I need SSEEdit to do that? I tried it but I could not see paths anywhere, even though I clicked everything open. (I tried to search with keywords "skyrim"+ "paths" and "mod paths" and even "what is a path" but I did not get any page results explaning this. I am a complete newbie when it comes to all things scripting or even just using SSEEdit for anything other than doing a quick clean.)
-
The Chitin armour always bothered me in that parts of the light armour look more protective and thick than the heavy variant, namely the boots and gauntlets. The boots can be fixed with a simple swap, but for the gauntlets it would be great to have the thick light bracers but with the finger protection from the heavy version, and the thinner-looking heavy bracers with the unprotected fingers of the light bracers. So in shorter terms, leave the wrists/forearms but switch the fingers of the models so one looks clearly light and the other clearly heavy. An alternate method would be taking the extra plating off the light bracers and putting them on the heavy gauntlets, but I don't know which would be easier.
-
Hi all, I am creating a new dog follower based on Dogmeat files. I have been able to clone it, change the name and dialogues and set some basic actions following tutorials and online resources. Also, a custom model has been created, changing the shape of dogmeat and adding different textures. The issue is that I can't get how to include the new .nif model inside the mod. Any suggestions? Thanks in advance.
-
hello im new modding and between my work schedule and my lack of experience ive hit a roadblock the idea was to replace the kinight set in Elden ring with the hooded face plate chaos sorcer lord model from total war Warhammer 3 I'm unsure if this is possible with vastly different games engines but i thought id throw out this idea/request if anyone is interested
-
Is there a way to replace the head model of the advanced suit to that of the classic suit? I love the expressive eyes and the mods of the advanced suit are amazing. I particularly love the darker colors mod, but I'm looking for a way to eliminate the concave dip between the nose and mouth on the advanced suit to match the others. A tremendous thanks and even some cash to any who could help me.
-
this is the model: https://twitter.com/rubrrig/status/1477253528565555203
-
I looked but couldn't find a mod that simply replaced the model of the ranger's wolf summon (and blight wolf summon) with Dog. I don't want to use the Extra Dog Slot mod because of balance and some other wonky issues the mod causes. I just want the wolf (and blight wolf) to look like our pet mabari. But only the summons, not all wolves in the game. Could someone please create this? I would super appreciate it!
-
I'd like to see some mods that completely change/overhaul Peter/Spidey's 3D character model, particularly the face and musculature. I personally think that the musculature for Spider-Man in this game looks awful and both the PS4 and PS5 versions of Peter don't resemble Peter, and they do not look good to me at all, nor do the face models of the other characters for that matter. If there are any modders reading, could you make a mod that gives Peter/Spidey a body and musculature more like the following: https://www.artstation.com/artwork/o20Wbz https://www.artstation.com/artwork/mzwPve https://www.artstation.com/artwork/4bz5w4 https://www.artstation.com/artwork/QrR82E https://www.artstation.com/artwork/29o5y https://www.artstation.com/artwork/mD0Eze https://www.artstation.com/artwork/580vxO https://www.artstation.com/artwork/008nw https://www.artstation.com/artwork/xzD6eO https://www.artstation.com/artwork/d8Y9A3 https://www.artstation.com/artwork/A946Q5 https://cdna.artstation.com/p/assets/images/images/019/434/496/4k/franco-carlesimo-s3-00004.jpg?1563465383 https://media.karousell.com/media/photos/products/2020/03/20/retro_spiderman_wolfpax_1584708062_3c0b2694_progressive.jpg https://i.postimg.cc/KZNfd7xm/PXL-20211010-172236762.jpg https://scontent.fpmr1-1.fna.fbcdn.net/v/t1.6435-9/69370527_2920730764667273_2195480096511361024_n.jpg?_nc_cat=111&ccb=1-7&_nc_sid=973b4a&_nc_ohc=dnA4MPbVFesAX_BDnji&_nc_ht=scontent.fpmr1-1.fna&oh=00_AT-yJukkr0NxLX74Erb1VKJhuNG4SK64YUWO0xTq0h5fQw&oe=63423379 https://www.artstation.com/artwork/Yeen1V https://www.artstation.com/artwork/LZyLl https://www.artstation.com/artwork/3owgl2 and a mod that makes Peter's face looker closer to these and with grey or blue eyes: https://cdna.artstation.com/p/assets/images/images/046/653/602/large/chrystian-jungles-1-interactive-lightmix0000.jpg?1645630566 https://cdna.artstation.com/p/assets/images/images/019/434/500/4k/franco-carlesimo-s3-00005.jpg?1563465387 I would also love to see a mod that adds this variation of the classic suit, inspired by Gabriele Dell'Otto's artwork: https://www.artstation.com/artwork/NGk2qg https://www.artstation.com/artwork/qAw42N and this suit: https://www.artstation.com/artwork/xYdQ6Y a variation of the Raimi suit: https://www.artstation.com/artwork/L3bPBv Alex Ross suit, which he designed for the Raimi Spider-Man movies https://www.washingtonpost.com/resizer/OQBWCm5DejlGwvcpRoRX-xN6Grg=/1484x0/arc-anglerfish-washpost-prod-washpost.s3.amazonaws.com/public/YWAV36FU5M6V7KOFZWEYGML52Q.jpg I really want to get into and learn modding myself, because I would enjoy incorporating these ideas into the game myself. This here gives Spidey better musculature, and while it's not perfect is certainly an improvement over Insomniac's version: https://www.artstation.com/artwork/XB1ryR
-
I have a friend who has a particular hairstyle/curliness that is hard for them to come by in games. I'd assume in part because it could very well just be a finnicky pain to even go about modelling but I don't have much knowledge to say on all of that. If someone is or would be interested I think it would be cool to have an option for people with this level of curl that isn't into the realm of dense tight curls, but not loose flowy curls also. Just putting it out here, but all you modders I have to say good on you for the patience to work through all you have to do to even change/add in hair styles. Looked into it out of curiosity and certainly plenty of things to be mindful of to put it lightly, haha. The hairstyle is called asymmetrical curly pixie hair, I believe.
-
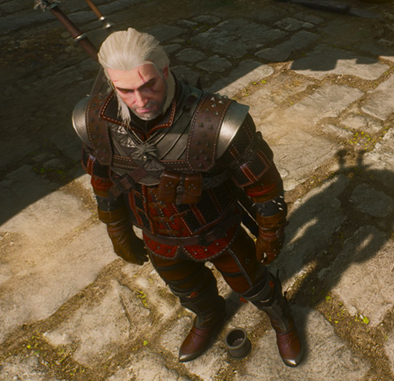
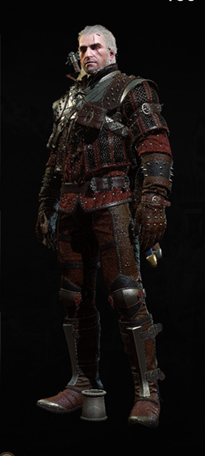
I was playing the Blood & Wine expansion (main game completed) and some sort of item (mug?) appeared between Geralts's legs and is now stuck there. Restarting the game doesn't fix it. Removing all equipment and items also doesn't help. Searching the Steam forums, it seems to happen after Big Feet to Fill quest (statue building quest). Personally I noticed it hours later after completing it, so I can't go to a save game before that quest. There's also seems to be a same bug happening with other items: See this DuckDuckGo search. Is it possible to fix this with a mod? I tried Drop Quest Item but it didn't fix it (I don't even seem to have a mug or similar looking item in the inventory). Even if the item could be modded to a smaller, less noticeable item, it would be an improvement.
-
Soo I have this model and I want to have him as a custom race or a follower. Is it possible only using this model?
-
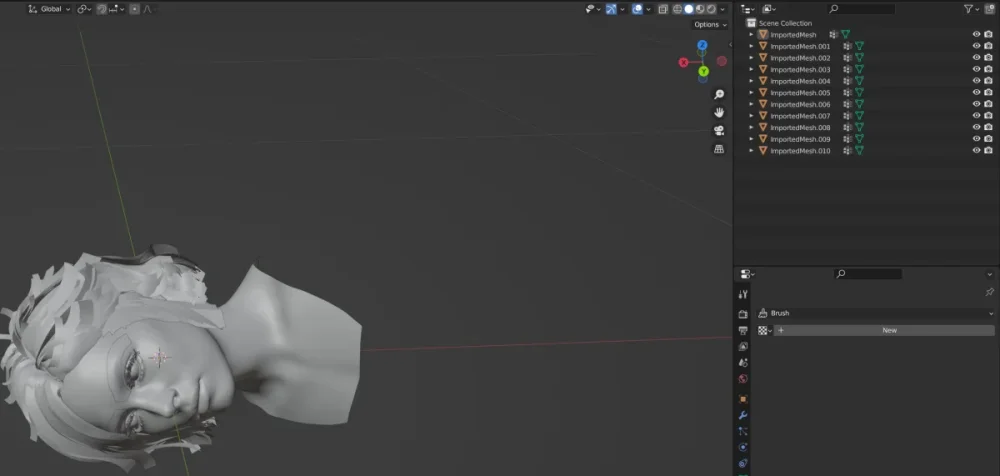
I want to try rendering Sarah Morgan and Andreja in software like Blender, so I have installed Starfield Geometry Bridge, after intermittent attempts, I eventually gave up. I want to export Sarah's model to Blender. Under the guidance of https://www.nexusmods.com/starfield/articles/268, I have completed the import of each mesh.But I feel very confused about all the steps that come next. I found Sarah(00005983) on Esm through xedit. But I don't know where to find Morph. Besides, I don't know which ba2 file to extract .mat. Finally, I am not sure if what I am doing is meaningful, even after successfully importing Meshes and Morphs, it seems that I only got a gray model without any textures. Although I have completed the first step now, I am not sure how to proceed to the next step, let alone the further steps, including her body, clothes, etc. In my opinion, it may be easier for me to duel with The Hunter and win in the real world than for me to independently export character models...
-
Can someone make it look more unique, maybe add horns to it as a throwback to BG1 & 2? By the end of act 3 there are NPCs in the cut-scenes running around with he same exact model as it, it has always annoyed me that an ancient legendary helm is somehow copied and worn by normal guards.


