

My First Tutorial
Okay so I have never ever made a tutorial before and I had a little time today so i thought, why not!! lol so I am going to show you how to make
this tutorial isnt perfect because i forgot to print screen some of my stuf *hits head on desk* so im really sorry if anything doesnt make sense...anyways there are some brushes that were used that I dont remember who made so if you know who made them please let me know...Comment if you found it helpful and any comments about the next tutorial i could make...
This is for PSP 8 =)

~Kristin
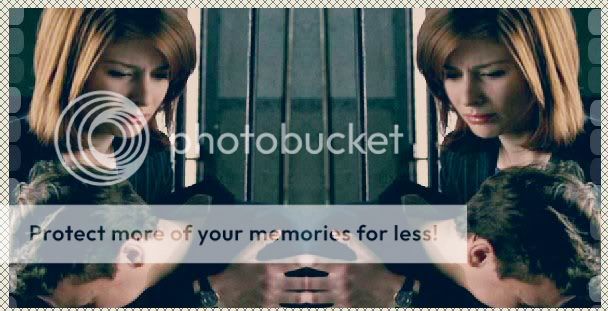
Take a pic that you want to use...I chose this pic of Diane Neal as Casey Novak on Law and Order: SVU
1. open a new project, make it header size, I used 600 x 300
2. Open your picture and resize it to a height of 300 (I have it set so that it auto does the height)
3. copy and paste your picture onto the blank canvas
4. You can make all the adjustments you like on the picture, I duplicated the picture and screened it 2 times and sharpened it to my liking
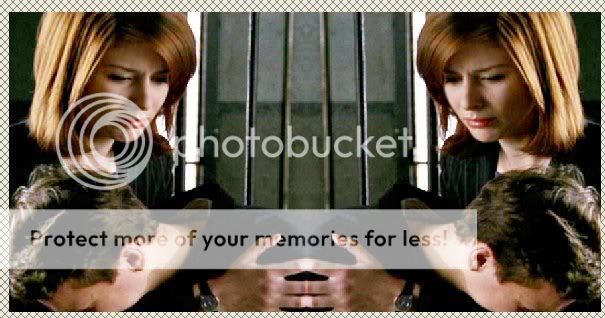
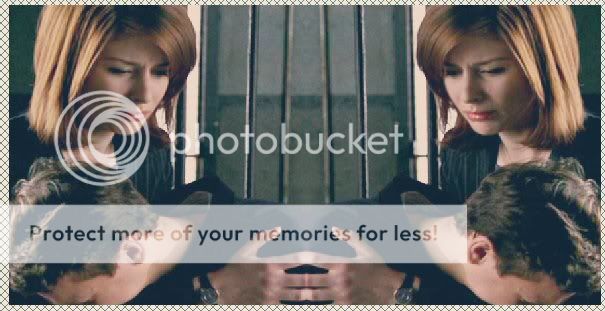
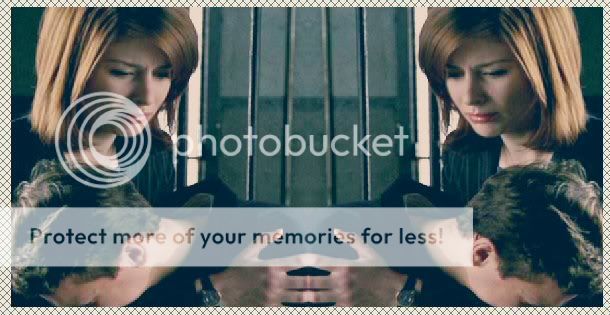
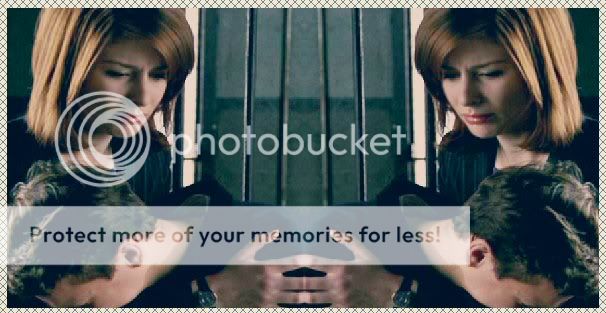
5. once you have done that, merge all the layers together
6. then duplicate the base and go to image-mirror
7. then move the mirrored image and line it up together like so
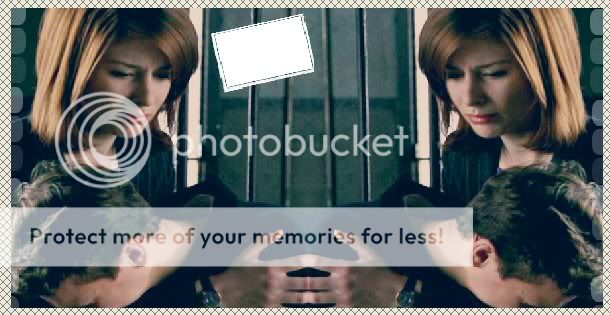
8 Then add a new layer and set it to exclusion, i set mine to 57% but you can set it to your own liking, and add #214561
9. Then add a another new layer and set it to burn #67E2F1, i set mine to 37% but again its all about finding what you like the best
10. Add another new later and set it to burn #DCD4D4, i set mine to 65% but like i said find what you like the best =) this is what i have so far
11. Then I added made by: ???? using the white brush and made it so only some of the dots showed, I added them down each side of the header and changed the opasity to 33%
12. Then I added this made by ??? you could use any frame shaped brush you like tho, and using it in the color white I added it to the middle of the header
13. then i took this pic and resized it and colored it the way i wanted and copy and pasted it onto my header...
I am terrible at making things fit so I used the deform tool to resize it so it fit into the polariod picture part
14. Then I added the same brush and did image-mirror and moved it a little to the right...I took this pic and did the same thing I did to the other picture
(I stupidly forgot to get the pic and I have already exited out,...so just look below to see how i did it...SORRY!!!)
15. Add a new layer, Then I added a brush made by ???? and using the white color I made sure it was at size 300 once i put it where i liked it, i duplicated it and then mirrored it, and set it at opasity 33%
16. add a new layer and add whatever text you like, using font "my nerd" found on fontaddicts I wrote A.D.A Casey Novak...Before you deselect it go to effects....3d effects...and drop shadow, add a black drop shadow and then place the text where you want it.
the next steps are all optional and your own preference but i just added some small text under the A.D.A Casey Novak text and a some tiny script text to the bottom of the header and turn down the opasity on them.
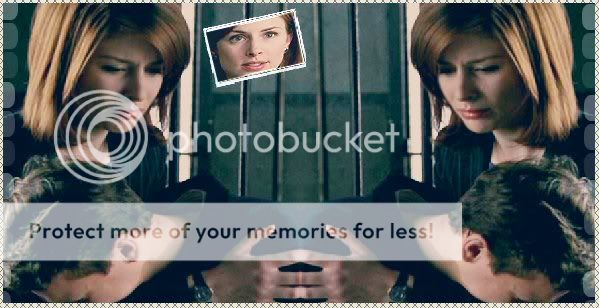
FINAL RESULT:

This was my first tutorial I hope it came out okay...let me know...
1. open a new project, make it header size, I used 600 x 300
2. Open your picture and resize it to a height of 300 (I have it set so that it auto does the height)
3. copy and paste your picture onto the blank canvas
4. You can make all the adjustments you like on the picture, I duplicated the picture and screened it 2 times and sharpened it to my liking
5. once you have done that, merge all the layers together
6. then duplicate the base and go to image-mirror
7. then move the mirrored image and line it up together like so
8 Then add a new layer and set it to exclusion, i set mine to 57% but you can set it to your own liking, and add #214561
9. Then add a another new layer and set it to burn #67E2F1, i set mine to 37% but again its all about finding what you like the best
10. Add another new later and set it to burn #DCD4D4, i set mine to 65% but like i said find what you like the best =) this is what i have so far
11. Then I added
made by: ???? using the white brush and made it so only some of the dots showed, I added them down each side of the header and changed the opasity to 33%12. Then I added this
made by ??? you could use any frame shaped brush you like tho, and using it in the color white I added it to the middle of the header 13. then i took this pic
and resized it and colored it the way i wanted and copy and pasted it onto my header...I am terrible at making things fit so I used the deform tool to resize it so it fit into the polariod picture part
14. Then I added the same brush and did image-mirror and moved it a little to the right...I took this pic and did the same thing I did to the other picture
(I stupidly forgot to get the pic and I have already exited out,...so just look below to see how i did it...SORRY!!!)
15. Add a new layer, Then I added a brush
made by ???? and using the white color I made sure it was at size 300 once i put it where i liked it, i duplicated it and then mirrored it, and set it at opasity 33% 16. add a new layer and add whatever text you like, using font "my nerd" found on fontaddicts I wrote A.D.A Casey Novak...Before you deselect it go to effects....3d effects...and drop shadow, add a black drop shadow and then place the text where you want it.
the next steps are all optional and your own preference but i just added some small text under the A.D.A Casey Novak text and a some tiny script text to the bottom of the header and turn down the opasity on them.
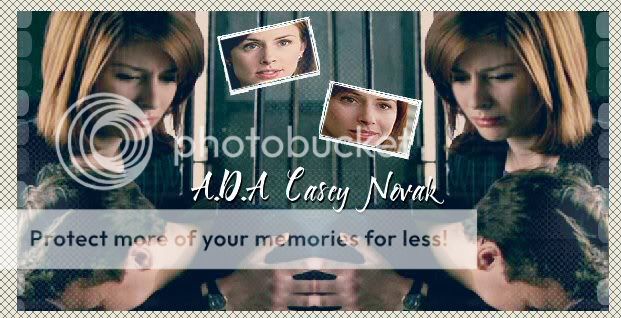
FINAL RESULT:
This was my first tutorial I hope it came out okay...let me know...