
Airtable
Airtable is a cloud-based, flexible spreadsheet-database hybrid platform that lets users organize, collaborate on, and manage data in customizable tables with features like attachments, automation, and integrations.
The Airtable add-on allows you manage your WordPress posts as Airtable spreadsheets, transforming how you and your team handles WordPress content.

The add-on
The Airtable API can be used to integrate your data in Airtable with any external system. The API closely follows REST semantics, uses JSON to encode objects, and relies on standard HTTP codes to signal operation outcomes. To talk with this API, the add-on implements a custom bridge class based on the generic REST bridge that requires Bearer credentials.
An Airtable bridge will synchronize your posts with entries in your Aritable spreadsheets. Each field of your spreadsheet can be mapped to a post field, post meta or taxonomy term.
With Posts Bridge introspection API you’ll be able to inspect spreadsheet fields to easily map them to your post fields and taxonomies.
How to use
The first step to use the add-on is to activate it in the add-ons table in the general settings tab.
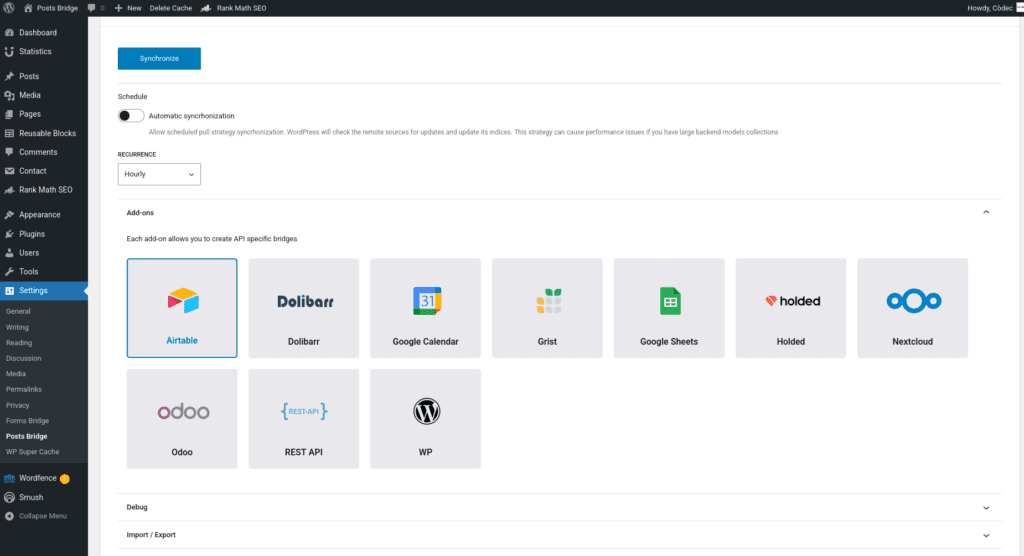
Once activated, a new tab named Airtable will be visible in the settings page. If it’s your first time, it should looks like this:
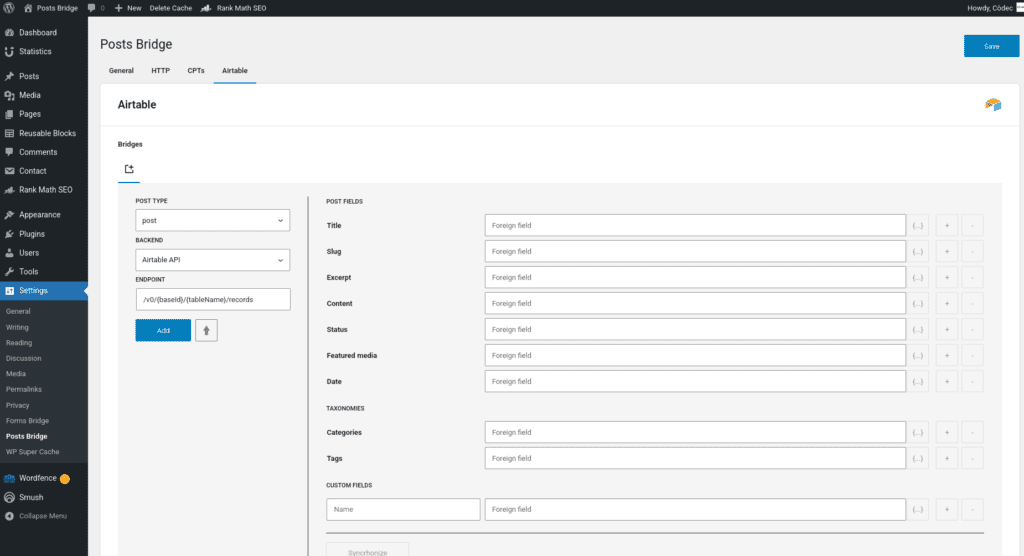
Bridge set up
An Airtable bridge will require the following components:
1. Credential
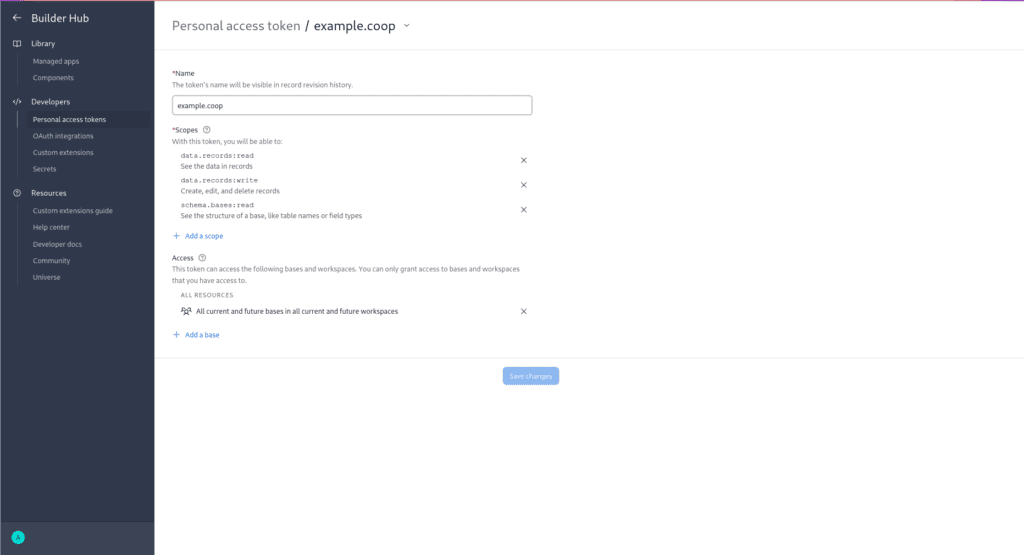
The Airtable API works with Bearer tokens to grant access to its resources. To solve this authentication requirement, the add-on requires you to register a Bearer credential with the one of your Airtable Personal Access Tokens. Go to the Airtable Builder Hub.
When registering the Personal Access Token you should grant the following scopes to the token:
data.records:readschema.bases:read
Once you have the token, you have to go to Settings > Posts Bridge > HTTP > Authentication and register a new authentication credential. Select Bearer as the authentication schema and put the token value as the Access token field.
2. Backend
To configure the Airtable API as a backend, follow this steps:
- Register a new backend with a unique name (Airtable API, for example), and a URL with
https://api.airtable.comas value. - Select the Bearer credential you’ve configured on the previous step.
3. Post type
Posts Bridge allows you to bridge any registered post type from your WordPress site. If you’ve not registered it yet, you can register it with Posts Bridge. Go to the CPTs tab and create a new custom post type. The registration form will inherit the registration defaults, but you can modify its values at any time. The only required fields are Name, Label and Singular label.
4. Bridge
The add-on’s bridge is an extension of the generic REST bridge with some predefined defaults. Like the REST bridge, the addon’s bridge requires a post type, a backend, and an endpoint.
The endpoint of an Airtable bridge should be like /v0/{baseId}/{tableId}/records. The baseId and tableId can be extracted from the table URL. For example, in the URL https://airtable.com/app123456789/tbl987654321/viw000000000 the baseId is “app123456789” and the tableId is “tab987654321”.
The tableId parameter of the endpoint can be replaced by the table name.
Troubleshooting
To troubleshooting your bridges you can use the plugin’s debug console from the General Settings page. Enable the debug mode and submit a sample form response to see what’s going on under the hood.
Common issues
- Authentication failures
- Verify Personal Access Tokens
- Check scope permissions
- Missing data
- Verify column names
- Check field mapping
- Consider API quotas and potential costs