
Timesheets are only available on the Business edition and above, learn more
Timesheets provide a streamlined location to log hours spent on tasks. Add hours directly on the project's Gantt chart, task list or kanban board.
Enter timesheet data to:
- Add task hours directly from different projects
- Copy timesheets from previous weeks
- Auto-fill timesheets
Any logged timesheet hours across project views automatically populate the timesheet.
Time Tracking Feature Video Overview
Watch the brief video on time tracking below for an introduction to time-tracking features with ProjectManager.
Navigating to the Time View
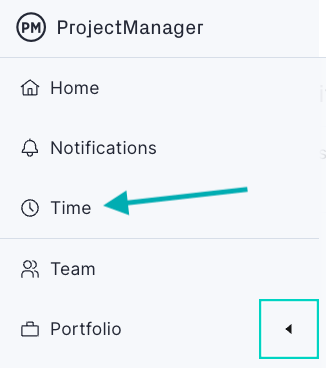
If time tracking is part of your existing edition (available on Business and Enterprise editions), locate the "time" section on the left-hand menu as shown below.
How to Log Hours
To log hours, you first need to add tasks to your timesheet. There are three ways that you can add tasks to your timesheet

Here's a breakdown of the above menu:
- Add tasks: Use this button to manually add tasks. You can also add time for Admin activities under the categories of annual leave, meetings, sick leave and miscellaneous. To add tasks, select the project and then select the tasks to add to your timesheet.
- Copy last week: This button allows you to copy the previous week's timesheet to the current week.
- Auto-fill: This button automatically populates your task list with all your assigned tasks across projects for that particular week. If you click this option and nothing happens, then the tasks that would normally appear are already added to the list.
Tip: Be sure to log hours on the task cards themselves if you want to get the most out of auto-filling your hours worked!
Timesheet Features
Select User
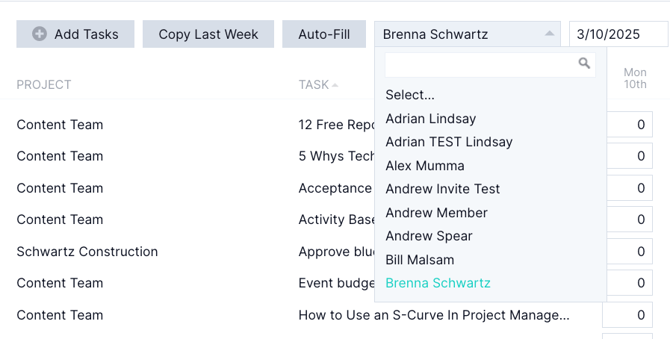
To the right of auto-fill, a drop-down field allows you to select a team member's timesheet. Users with sufficient permissions can select other users' timesheets.
Select the Date Range
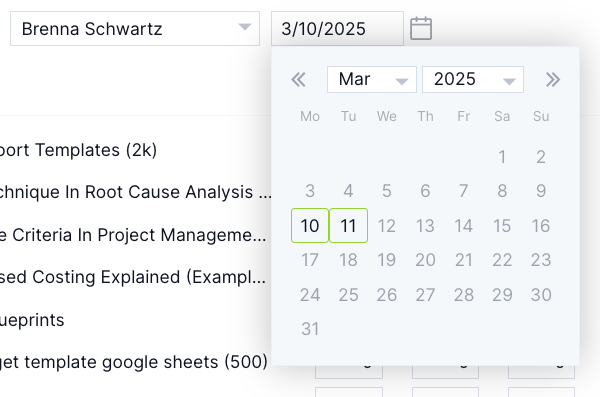
Using the date selection field, you can choose the week that you want to enter timesheets for or view previously submitted timesheets. If a timesheet is no longer in an editable state, then it has been approved.
Add Timesheet Notes
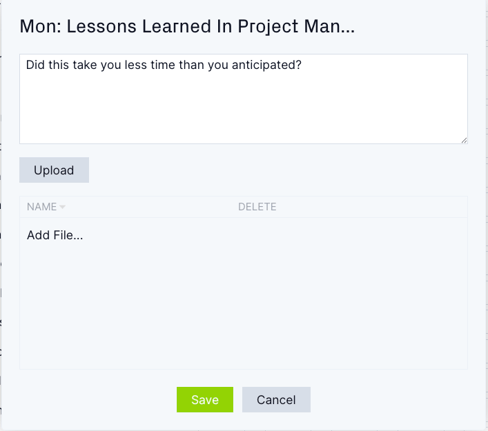
You can add comments and files (such as documents or images) to any timesheet entry by clicking the comment bubble that appears when you hover over a specific date for the task. A popup will appear where you can add a comment.
Export the Timesheet
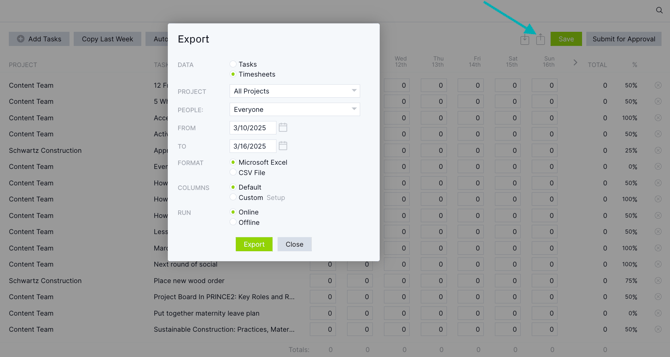
Using the export button, you can export timesheet data (filtered by person, project, and time frame and with selected columns) to Microsoft Excel or CSV formats.
Don't Forget to Save
The save button is located in the upper right-hand portion of the timesheet, and it will be green when there are updates that need to be saved.
Note: Timesheets are only available on Business and above.
Need access? Upgrade your plan today.
Timesheet Approval
If you are assigned a timesheet approver, you'll see "submit to approver" next to the save button. Once you have filled out your timesheet for the week, click "submit to approver."
By default, Global Admins will be able to oversee and approve all submitted timesheets. You can also assign specific approvers to individual employees, this approver will be notified when timesheets are submitted for approval. You can choose an employee's approver in the Users & Teams area. Note that for someone to appear in the approver list they will need the approve timesheets security setting.
Once you have clicked submit to an approver, the person who submitted it cannot edit it unless the approver declines it. However, submitted timesheets can be edited directly by the approver.
If you are a timesheet approver, you'll receive an email that a timesheet needs approval. Upon selecting the link to view the timesheet, you will see a drop-down of people whose timesheets need to be approved.
Once a team member is selected, the options to approve or reject will appear.
How to Set an Approver
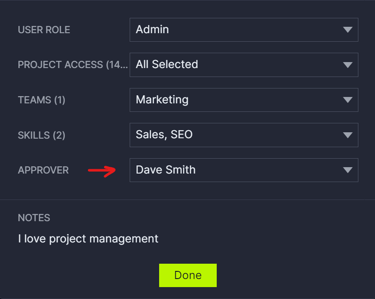
To set a Timesheet approver, access a user's profile. This can be done in the account settings menu in the bottom left, or via the ellipses icon on the Team page or Users & Teams page.
There you'll see an Approver field. Choose from the drop-down who should approve timesheets for that user.
Timesheet Admin Tasks
Default admin tasks are:
- Admin
- Annual leave
- Meetings
- Misc
- Sick leave
You can delete, change the name or create new admin tasks entirely by clicking “edit admin tasks” at the bottom of the add tasks popup. You can only see the button if you are allowed to “create and edit important project info” in the account security settings.
Click on the trashcan icon to delete an admin task, click on the task name to rename it or add a new admin task by typing into the "add new" box.
You can view admin tasks on the timesheet report by selecting "admin." The "all other tasks" or "all projects and all other tasks" options will pull non-project tasks.
Generating Timesheet Reports
You can pull a timesheet report that serves as a record of time entered. This is helpful for teams that need to account for time worked on tasks. For example, you may need to export data to import it into payroll software.
To generate a timesheet report, navigate to Portfolio > Reports. To do this, simply click on "portfolio" on the left-hand portion of your screen and toggle to the "reports" icon in the top menu bar. On the reports page, select "timesheet" on the left-hand menu.
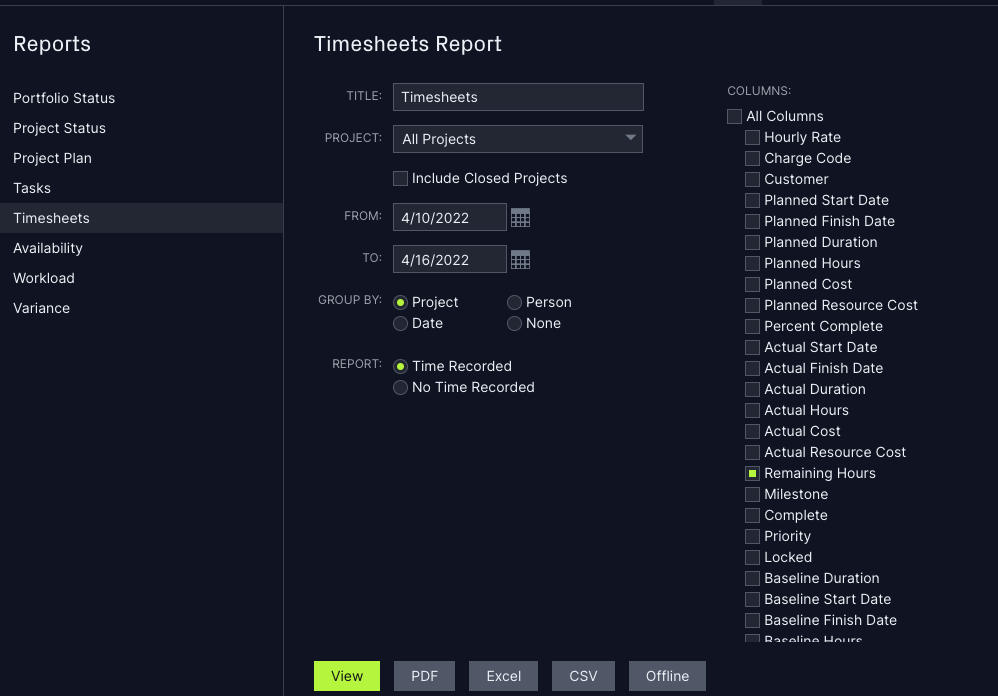
Here, you'll be able to customize the columns you want in the report as well as the people you want to include. View our corresponding page for additional information on timesheet reports!
Rounded Hours
Both planned and actual hours are shown in hours but you can use decimals to record more specific units, for example, you can log one-and-a-half hours by entering 1.5 on your timesheet. It's easy for people to enter time this way but it's important to understand the caveats if you use timesheets at scale.
Let's look at some examples:
- You just finished an hour's work, which consisted of three 20-minute tasks, you enter this as three 0.33hr time entries. If you total these entries you get 0.99 hours no longer the full hour you were trying to record.
- Mathematically, 0.01 hours equals 0.6 minutes which rounds to 1 minute, but 0.02 hours equals 1.2 minutes... which also rounds to 1 minute!
So what's mathematically correct isn't always logical. In these cases, we lean towards logical calculations which represent what the user intended. We consider 1 minute to be the smallest unit of time that needs to be tracked.
What does this mean for you?
- If there are three entries of 0.33 hours, we consider each entry to be 20 minutes long, so it'll be shown as 1 whole hour in total instead of 0.99 hours.
- If someone enters 0.01 hours into a timesheet it'll change to 0.02 hours because this is a closer match to one whole minute.
Restrictions
Summary tasks don't have their own values, they show the combined value of all their subtasks. Therefore you can't log time directly against a summary task but you can log time against its subtasks.
If time has been recorded for a task later changed to a summary task, those logged hours will no longer appear on the summary task itself. However, the original time entries will still be preserved in the timesheets.
It's the same for deleted tasks. If a task is deleted, any time logged for that task will no longer be reflected in the project (since the task has been removed). However, this time will still be preserved in the timesheets. This ensures that timesheets remain an accurate record of how team members spent their time, regardless of any changes made to the project plan.
FAQs
Q: Can I edit timesheets that have already been approved?
A: Yes, approved timesheets can be edited, but only by people with the access all account data security setting. By default, only Global Admins have this setting enabled but you can create custom roles with it too. A timesheet can not be reverted to an un-approved state and returned to the employee.
Q: If an admin or global admin edits an approved timesheet, will it save the change or will the timesheet need to be resubmitted?
A: If a timesheet has been submitted for approval, it can be returned to the user for additional changes and re-submitted until finalized. Once finalized, it becomes permanent. An admin or global admin can make changes for the user, but the timesheet won't get passed back to the user.
Q: If I clear the approved timesheet to try to send it back to the person who submitted it, does the member gain the ability to re-send it? Or will they need to manually re-enter their time again?
A: Even if all of the time entries are cleared/deleted, that time week has been finalized and is locked to the user who submitted it. In this case, the admin would need to manually add the tasks and hours for the user.
Q: What happens if a task is deleted after time has been logged on it?
A: The timesheet always shows what people have spent their time on, even if a task is no longer relevant (it's been deleted or converted to a summary task) the time spent on that task is still retained on the timesheet. You can even edit or copy those timesheet entries. However, actual effort on the associated project will no longer include these hours because that work has been removed from the project.
Please email support@projectmanager.com with any questions.
