Disposable Camera Photography Tips: Capturing Authentic Analog Images
VIEWBUG · Guide

Disposable Camera Photography: Tips & Techniques

Master disposable (single-use) camera photography with tips for film selection, technique, and developing to maximize image quality.

Sign up Now →

Quick Answer

Master disposable (single-use) camera photography with tips for film selection, technique, and developing to maximize image quality.

Last Updated: August 2026 · Written by ViewBug Editorial Team

Understanding Disposable Camera Fundamentals

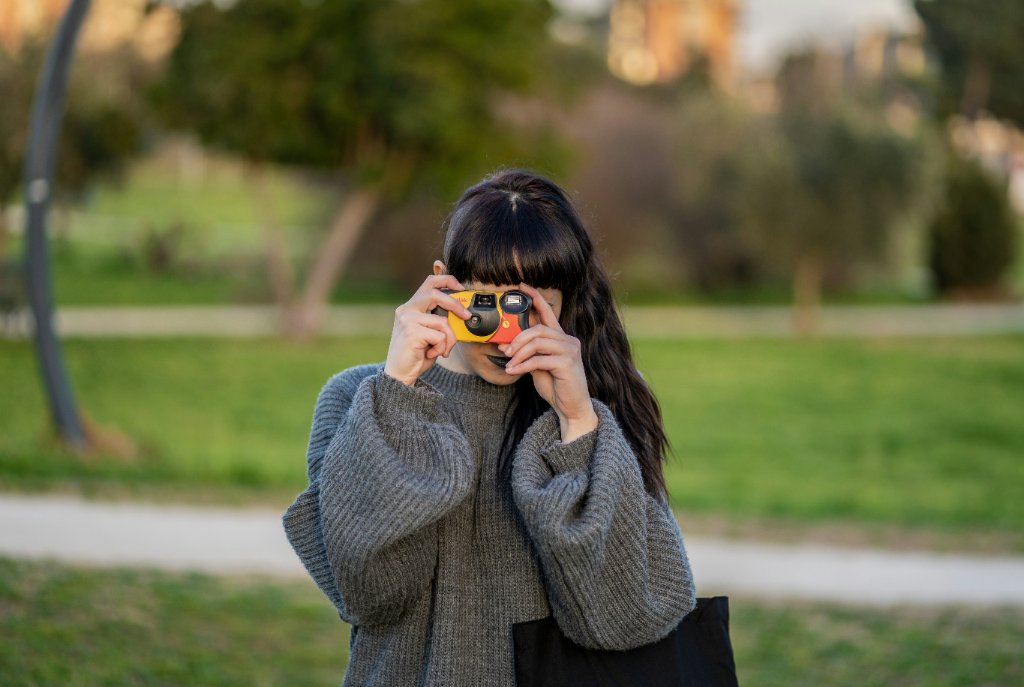
Disposable (single-use) cameras are fully loaded, pre-focused, non-adjustable film cameras. Understanding their technical limitations is key to working within them effectively.

A disposable camera is an optical and mechanical simplicity: a basic lens, fixed aperture, fixed shutter speed, built-in flash, and a spring-driven film advance. You cannot adjust exposure, focus, aperture, or shutter speed. This severe limitation is precisely why disposable cameras create distinctive, authentic photographs—you work with what you have.

Technical specifications (typical disposable camera): 28mm or 30mm focal length (wide angle). Fixed aperture around f/10–f/11. Shutter speed 1/120s or fixed. ISO typically 200 or 400 (check your specific model—usually printed on the camera). Built-in flash with range of ~10 feet.

The charm and limitation: You cannot compensate for poor light, extreme contrast, or focus errors. You cannot frame precisely (viewfinder is crude). You have no control over exposure. This forces you to be intentional about subject matter and timing rather than relying on technical compensation. Many photographers find this liberating.

Film stock variability: Different manufacturers (Fujifilm, Kodak, 3M) load different films in their disposable cameras. Kodak FunSaver typically uses Kodak Gold (warm, saturated), while Fujifilm QuickSnap uses Fujifilm film (different color rendering). This affects your final image color—a consideration if you prefer a specific look.
Key Takeaways

  • Disposable cameras have fixed focus, aperture, and shutter speed—no adjustments possible.
  • The technical limitations force intentional composition rather than technical compensation.
  • Different manufacturers use different film stocks, affecting color and rendering.

Shooting Technique and Exposure Compensation

Despite lack of controls, you can improve exposure and composition through thoughtful technique and understanding the camera's limitations.

Lighting conditions matter enormously: Disposable cameras perform best in bright, even daylight. Their fixed aperture (f/10–f/11) and shutter speed (1/120s) are optimized for daylight. Cloudy days, shade, or indoor light require the flash, and flash range is limited. Avoid shooting indoors without flash; results will be severely underexposed.

Flash usage: The built-in flash has effective range of ~10 feet (some cameras claim 15 feet, but quality degrades beyond 10). Closer subjects (within 5 feet) risk overexposure with harsh shadows; farther subjects may be underexposed or not reach flash-lit distance. Position yourself 5–10 feet from subjects for optimal flash exposure.

Foreground and background exposure: Disposable cameras meter for mid-tones. Shooting a bright sky forces the camera to underexpose everything else. Conversely, shooting a dark subject forces overexposure. Compose to avoid extreme contrast—include some mid-tone elements the camera can meter against.

Focus distance: Disposable cameras are typically focused at infinity or near-infinity (5 feet+). Subjects closer than 5 feet will be out of focus. This is fine for environmental shots but problematic for tight portraits. Plan compositions accordingly.

Viewfinder accuracy: Disposable camera viewfinders are crude and misaligned with the actual lens. Account for parallax error—what you see in the viewfinder may not match what the lens captures, especially for close subjects. Aim slightly higher and wider than you think you want to frame.

Key Takeaways

  • Bright daylight is ideal; shade and indoor require flash (which has ~10-foot effective range).
  • Disposable cameras focus at ~5 feet or infinity; subjects closer than 5 feet will be soft.
  • Viewfinder parallax error requires accounting for—frame higher and wider than desired composition.

Maximizing Image Quality with Disposable Cameras

Within technical limitations, smart choices about subject matter, composition, and film type improve your final results.

Film stock selection: Choose ISO based on your typical shooting conditions. ISO 200 film is good for bright daylight but struggles in shade/clouds. ISO 400 is better for variable light and indoor flash. Some photographers seek out specific film stocks for preferred color (Kodak Gold for warm tones, Fujifilm for different rendering).

Subject matter optimization: Disposable cameras excel at environmental photography, landscapes, and scenes with natural mid-tone distribution. They struggle with high-contrast scenes (backlit subjects, extreme darks and brights). Choose subjects that work within these constraints.

Composition: Frame scenes to minimize focus issues. Wide landscapes where everything is effectively at infinity work better than close-range portraits. Include foreground, midground, and background for depth perception that compensates for fixed focus.

Intentional grain and color shift: Rather than fighting the limitations, embrace them. Film grain and color shifts from disposable cameras are characteristics many photographers intentionally seek. Shoot for the aesthetic rather than fighting against it.

Developing and scanning: The quality of your final images depends heavily on development and scanning. Use a lab experienced with budget film stocks (some labs are careless with disposable camera film). Request high-quality scans (at least 600 DPI, ideally 2400 DPI). Poor lab work wastes excellent negatives.

Key Takeaways

  • Choose ISO based on typical lighting; ISO 400 is safer for variable conditions.
  • Disposable cameras excel at landscapes and environmental photography; avoid high-contrast subjects.
  • Embrace film grain and color shifts as characteristics rather than fighting against them.
  • Lab quality directly affects final image—use experienced labs familiar with budget film.

Developing and Scanning for Best Results

After shooting, development and scanning determine the quality of your final digital images. Poor processing can waste excellent film.

Finding a good lab: Not all photo labs are equal. Large chains often treat disposable camera film carelessly. Find an indie lab specializing in film development with experience processing budget film stocks. Read reviews and ask about their scanning quality and resolution.

Development options: Standard color negative development (C-41) is universal for disposable camera film. Some labs offer push processing (over-exposing in development) if you shot in dim conditions, but this increases grain and color shifts. For most disposable work, standard development is appropriate.

Scanning specifications: Request high-resolution scans (2400 DPI minimum, 4000 DPI ideal for exhibition-quality work). Ask whether they do wet scans (better quality) vs. dry scans. Inquire about color correction—good labs correct color balance, but some allow you to request warm or cool shifts if you prefer the disposable camera's natural color cast.

Digital post-processing: After scanning, minimal post-processing usually serves best. Disposable camera images often have an aesthetic quality—slight color shifts, grain, soft focus—that aggressive sharpening or color correction destroys. Light adjustments (exposure, contrast, vibrance) are fine; avoid over-processing.

Key Takeaways

  • Use indie labs familiar with film; chains often treat disposable film carelessly.
  • Request 2400 DPI minimum scans; 4000 DPI is ideal for exhibition work.
  • Minimize post-processing; embrace the aesthetic rather than correcting away the disposable camera look.

Entering Disposable Camera Photography in Contests

Disposable camera photography has a unique aesthetic that appeals to certain contest judges, especially in categories valuing authenticity and simplicity.

Photography contests that emphasize artistic vision and authentic aesthetic over technical perfection often appreciate disposable camera work. The inherent limitations—fixed focus, no exposure control, light color shifts—create a distinctive visual signature that judges either find compelling or technically deficient depending on the contest's criteria.

Best contest fits: General photography categories (Open, Color, Contemporary), lifestyle categories, and travel photography fare well with disposable camera images. Categories emphasizing technical excellence (Detail, Sharpness, Color) may not appreciate the soft focus and grain.

What judges value in disposable work: Strong composition that overcomes technical limitations. Interesting subject matter or candid moments. Distinctive aesthetic or color palette. Images where limitations feel like intentional style choice rather than technical failure.

Common weaknesses: Underexposed or overexposed images from poor lighting choices. Soft focus that looks accidental rather than stylistic. Uninspiring subject matter that doesn't justify technical limitations. Images that appear poorly shot rather than intentionally artistic.

VIEWBUG contests: Browse VIEWBUG photo contests for Lifestyle, Travel, or Open categories. Submit disposable camera images that have strong composition and interesting subject matter—work where technical limitations feel like intentional aesthetic choice rather than accident.

Key Takeaways

  • Disposable camera work fits best in artistic/lifestyle categories, not technical excellence categories.
  • Strong composition and interesting subject matter compensate for technical limitations.
  • Frame disposable work as intentional aesthetic choice, not technical failure.

Frequently Asked Questions

Related Resources

Continue your photography education with these guides:

The 500 Rule for Astrophotography Explained: Master Star Photography

The 500 Rule for Astrophotography Explained: Master Star Photography

Learn the 500 rule for astrophotography—calculate the maximum shutter speed for sharp star images and avoid star trails.

Read guide
How to Fix Blurry Photos on iPhone

How to Fix Blurry Photos on iPhone

Learn why iPhone photos come out blurry and how to fix it — clean lens, tap to focus, low light tips, action shots, Portrait Mode, and third-party camera apps.

Read guide
Difference Between Optical Zoom and Digital Zoom

Difference Between Optical Zoom and Digital Zoom

Understand the difference between optical and digital zoom, how they work, and why optical zoom is superior for image quality and preserving detail.

Read guide
What Is High Key Photography?

What Is High Key Photography?

Learn what high key photography is, how to set up a high key studio, exposure settings, and when high key lighting creates the best results for portraits and products.

Read guide
Candid Wedding Photography: Tips for Natural Moments

Candid Wedding Photography: Tips for Natural Moments

Learn how to capture authentic candid wedding moments with expert tips on equipment, positioning, timing, and editing for natural, emotion-filled wedding photos.

Read guide

Ready to enter?

Browse open contests on VIEWBUG and submit your best work today.