


xCloud brings another handy integration “Integration with WhatsApp” to its feature basket. With a few clicks, you can now integrate WhatsApp into xCloud hosting to streamline your notification strategy. By integrating with WhatsApp, you can easily get your server, site notifications along with team accounts and actions directly into your WhatsApp.
Follow the step-by-step guide to learn how to integrate WhatsApp in xCloud hosting to enhance team coordination and efficiency.
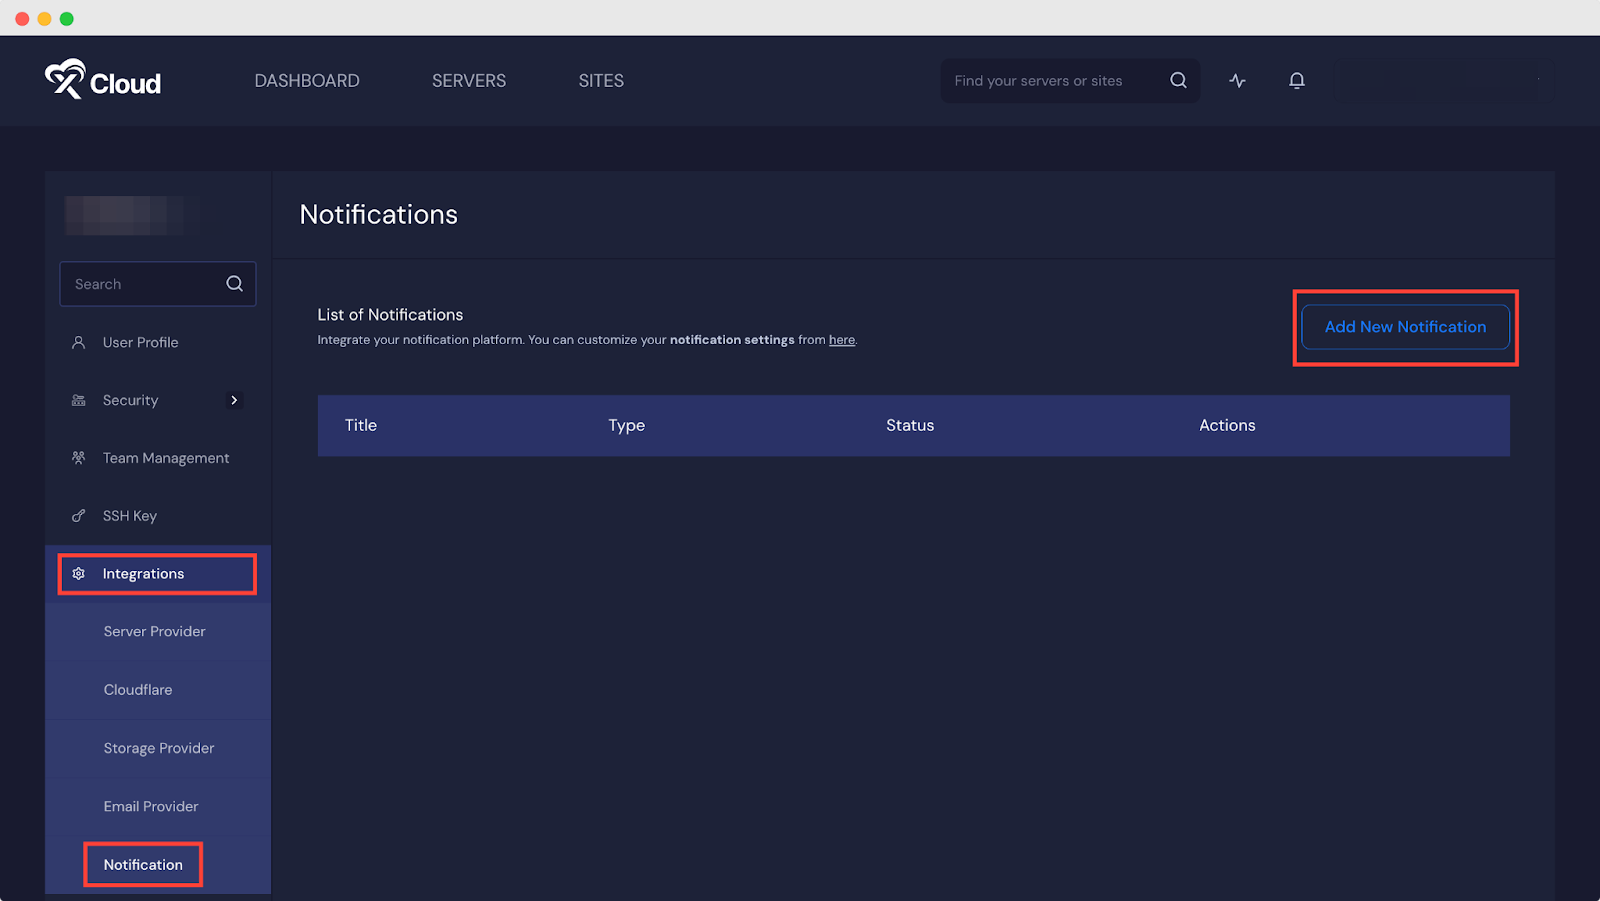
Step 1: Add New Notification #
After logging in to your xCloud account, navigate to Integrations → Notification from the dashboard. Now click on ‘Add New Notification to integrate WhatsApp into xCloud hosting.
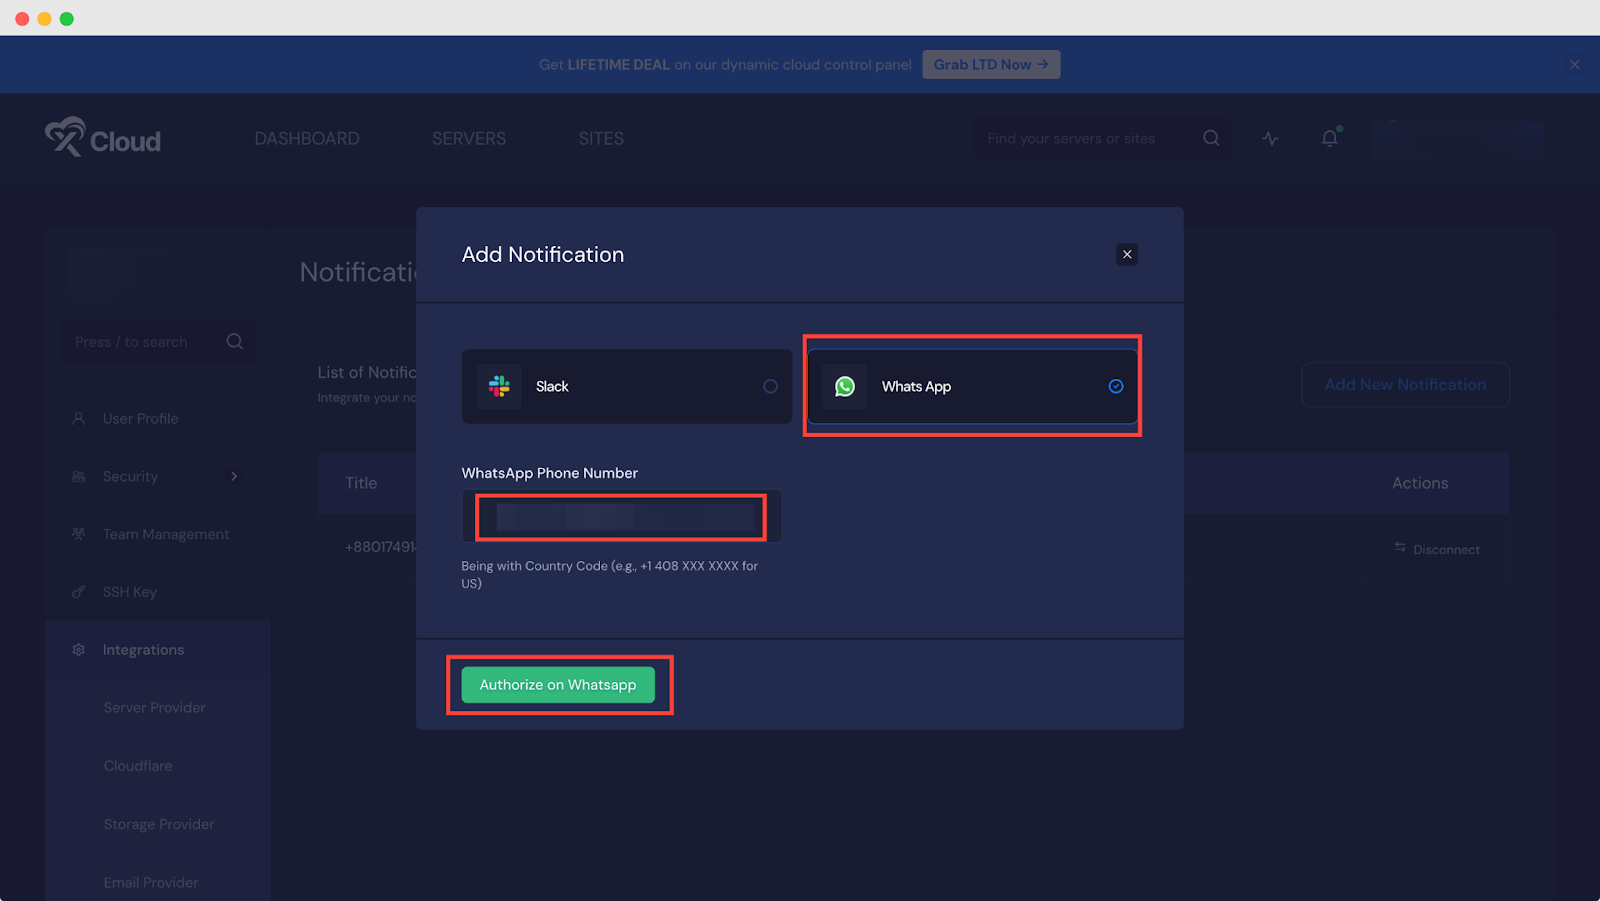
Step 2: Integration With WhatsApp In xCloud #
Now, choose ‘WhatsApp’ from the lists of integrations that xCloud offers. Once you click, the phone number field will pop up – make sure to put your number with the country code. The moment you’re done with filling up the number, click on ‘Authorize on WhatsApp.’
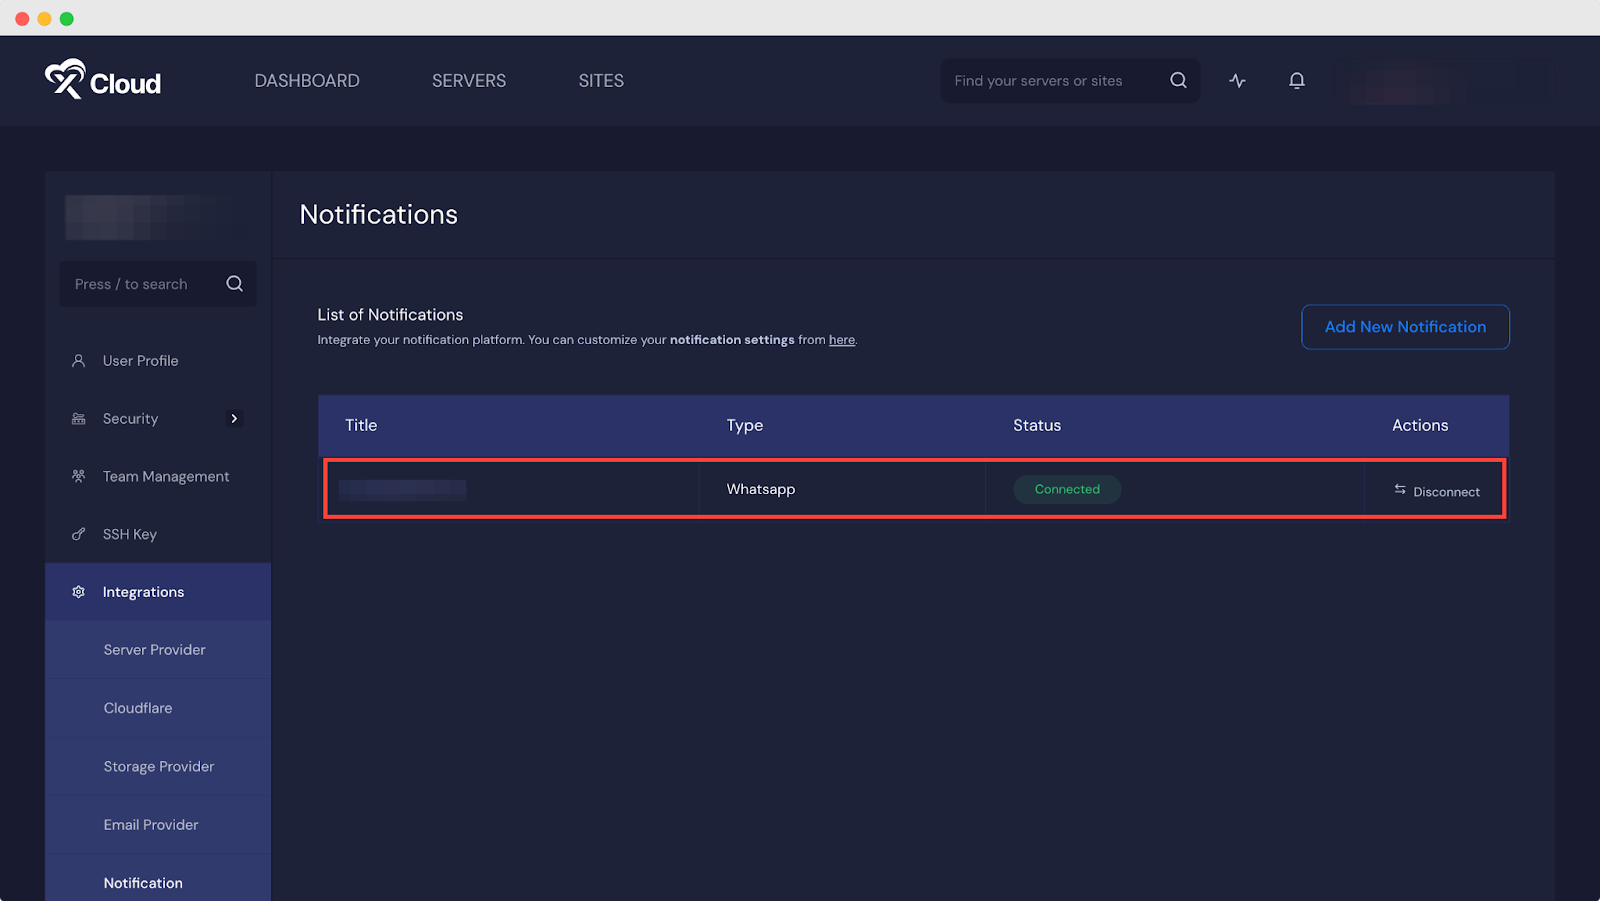
Now, under the ‘List of Notifications’, you can see your integrated WhatsApp number with its Type, Status, and Action. Under Action, you can easily disconnect your WhatsApp from xCloud – all you need to do is click ‘Disconnect.’
Step 3: Choose The Notifications You Want To Get #
To set which notification you would like to get in your WhatsApp, navigate to Team Settings → Notifications. Now mark the WhatsApp option for which you want to get notifications ‘Server’, ‘Site’, ‘Other’ & click on ‘Save Changes.’’
This is how you can easily configure WhatsApp with xCloud hosting & get your server, site notifications along with team accounts and actions directly into your WhatsApp.
Still stuck? Contact our support team for any of your queries.


