You can send content (like pages and posts) to the Trash if you no longer want it. This guide will show you how to move content to the trash, restore it from the trash, and permanently delete content.
If you want to delete all the content on your website and start over, visit our guide on how to Reset Your Site.
To delete a piece of content from your site, follow the steps below.
- Visit your site’s dashboard.
- Click on Pages on the left side (or Posts, Portfolio, or Testimonials, depending on which content you wish to delete.)
- Hover over the title of the content you want to delete.
- Click the Trash link.

Alternatively, you can bulk delete multiple pages by following these steps:
- Select the checkbox next to each page you want to delete.
- Select “Move to Trash” from the “Bulk actions” drop-down.
- Click the “Apply” button to move all the selected pages to the trash.

The page or post will remain in the trash for 30 days. After 30 days, it will be permanently deleted. While a page or post is in trash, it cannot be viewed by the public.
If you’re working on a page or post in the WordPress Editor and decide that you want to delete it, you can move it to the trash using an option in the settings sidebar.
If you do not have the sidebar on the right, click the Settings icon in the top-right corner to bring up the settings. This icon looks like a square with two uneven columns:
- Next to the page or post title, click the ellipses (three dots) icon.
- Click on the “Move to Trash” option.
- In the window that appears, click the “Trash” button to confirm you want to delete the page or post.

![]()
This section applies to sites created with the AI Website Builder (all paid plans) or sites that have enabled the AI assistant (Business and Commerce plans). Open the AI assistant by clicking the AI icon (a four-pointed star) at the bottom of the screen.
The AI assistant on WordPress.com can help you move the current post or page to trash. Note that trashed content is not permanently deleted — it is held in the Trash for 30 days before being automatically removed. Here are some prompts to try:
- “Move this post to trash”
- “Trash this draft — it’s no longer needed”
- “Send this page to trash”
![]()
You can use AI agents like Claude, Cursor, ChatGPT, and more to read and edit your website securely. Enable MCP tool access for AI agents.
AI agents can move posts and pages to trash on your site using a natural language prompt. Use the word “trash” rather than “delete” in your prompt — trashed content is held for 30 days and then permanently removed.
Here are some prompts to try:
- “Move my post titled [post title] to trash”
- “Trash the page called [page title]”
- “Send all posts in the [category name] category to trash”
- “Move posts that haven’t been updated since [date] to trash”
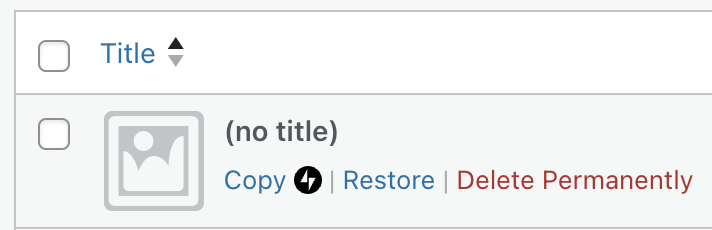
Items in the trash can be restored within 30 days of being trashed. Trashed items will automatically be deleted after 30 days. Follow these instructions to restore content from the trash:
- Visit your site’s dashboard.
- Click on Pages on the left side (or Posts, Portfolio, or Testimonials, depending on which content you wish to delete.)
- Click on the “Trash” tab at the top.
- Hover over the title of the content you want to restore.
- Click the “Restore” link.

The content will be moved to the Drafts tab, where it will stay indefinitely until you publish or delete it again.
You can erase content from the Trash permanently by following the steps below.
⚠️
Once you choose to permanently delete an item, it cannot be restored!
- Visit your site’s dashboard.
- Click on Pages on the left side (or Posts, Portfolio, or Testimonials, depending on which content you wish to delete.)
- Click on the “Trash” tab at the top.
- Hover over the title of the content you want to permanently delete.
- Click the “Delete Permanently” link.
If an item has been permanently deleted from your site by another authorized user, there is no way to recover it. Be careful to assign the proper user role for sites with multiple users.
Items deleted from the trash cannot be restored. If you need to recover a deleted item, here is a tip that may work in some cases.
The Internet Archive is an online library containing billions of snapshots of websites taken since 1996. The archive is accessible via the Wayback Machine which you may be able to use to access past snapshots of a site and recover deleted content.
Visit the Internet Archive Wayback Machine and enter the URL of the deleted post or page (or your website address if you don’t have the exact link). If your site is in the archive, you can see available snapshots sorted by date. Select a snapshot to view your site as it looked on that date.
Note that your site will not be guaranteed to be in the archive. Private sites and sites hidden from search engines will not have any snapshots.
