Why Custom Registration Fields Matter for Course Providers #
Elevate your course experience by unlocking powerful student insights with custom registration fields. Custom registration fields help you better understand your students’ experience, goals, and learning needs from the start. Using the information collected, you can match students to the right level courses, adjust your course content and materials to align with their specific objectives, and accommodate different learning requirements and preferences.
Collecting this data also empowers you to make more informed decisions about new course development, marketing, and course improvements. Using a personalized approach helps you make informed decisions with new data points, and generates a higher rate of student satisfaction.
Remember: Only ask for information you’ll actually use to improve your courses or student experience. Each field should have a clear purpose!
The guide below will walk you through the process of creating and implementing custom fields to collect the information you need to increase engagement and streamline learning experiences.
Getting Started #
- You’ll need an active LearnDash Registration Form on your website. This form must already exist so you can insert your custom fields.
- Download the ZIP plugin file from the ACF website. You can find the free version as well as the premium version of the plugin here.
Once you are there, you’ll see a “Download” button with the most current software version number. Click on that to Download the latest version for your installation - Now you should have an advanced-custom-fields ZIP file in your Downloads folder. Note that some browsers (specifically Safari) automatically unzip ZIP files upon download. If you see a folder instead of a ZIP file, you’ll need to ZIP that folder before proceeding.
- Next you need to upload the ZIP file to your WordPress website.
- To do this, navigate in your WordPress admin to “Plugins > Add New Plugin”. From there click on “Choose File”. That will open your computer’s file system for you to find the ZIP file you previously downloaded. Choose that and click the Install Now button.
Note: For the purposes of this article, you just need the free version!
Creating Your Custom Fields #
Once you’ve activated ACF and have your Registration form, go to ACF > Custom Fields section in your WordPress admin dashboard. Click Add New to create a Fields Group and name the Fields Group so you can identify it as part of your registration system. For example: “Extra Registration Fields”. Then, add your Custom Fields.
- Field Type: Select the appropriate field type for each custom field. You have various field types available, like text areas, radio buttons, check boxes, etc.
- Field Label: Provide a label for each field.
- Additional Options: You can make fields required, set character limits, and add placeholder text.

Set Location Rules #
To ensure your custom fields appear on the LearnDash Registration Form, you’ll need to set up Location Rules:
- Create a New Rule: In the location rules section, create a rule to display the fields on the user form.
- Set User Form to “All”: Ensure the rule is set to “User Form is equal to All”.
- Save Changes: Click “Save Changes” to apply your new settings.

The new Custom Registration Fields created with ACF will magically appear on the LearnDash Registration Form. Nothing else needed!

Viewing Custom Field Data in WordPress User Profile #
Custom fields are visible in two places: on the registration form itself, and on the User Profile Page once the user registers.
Additionally, administrators can view and edit these fields from the WordPress admin dashboard. The fields will also populate any values that the students have entered while submitting the LearnDash Registration Form.
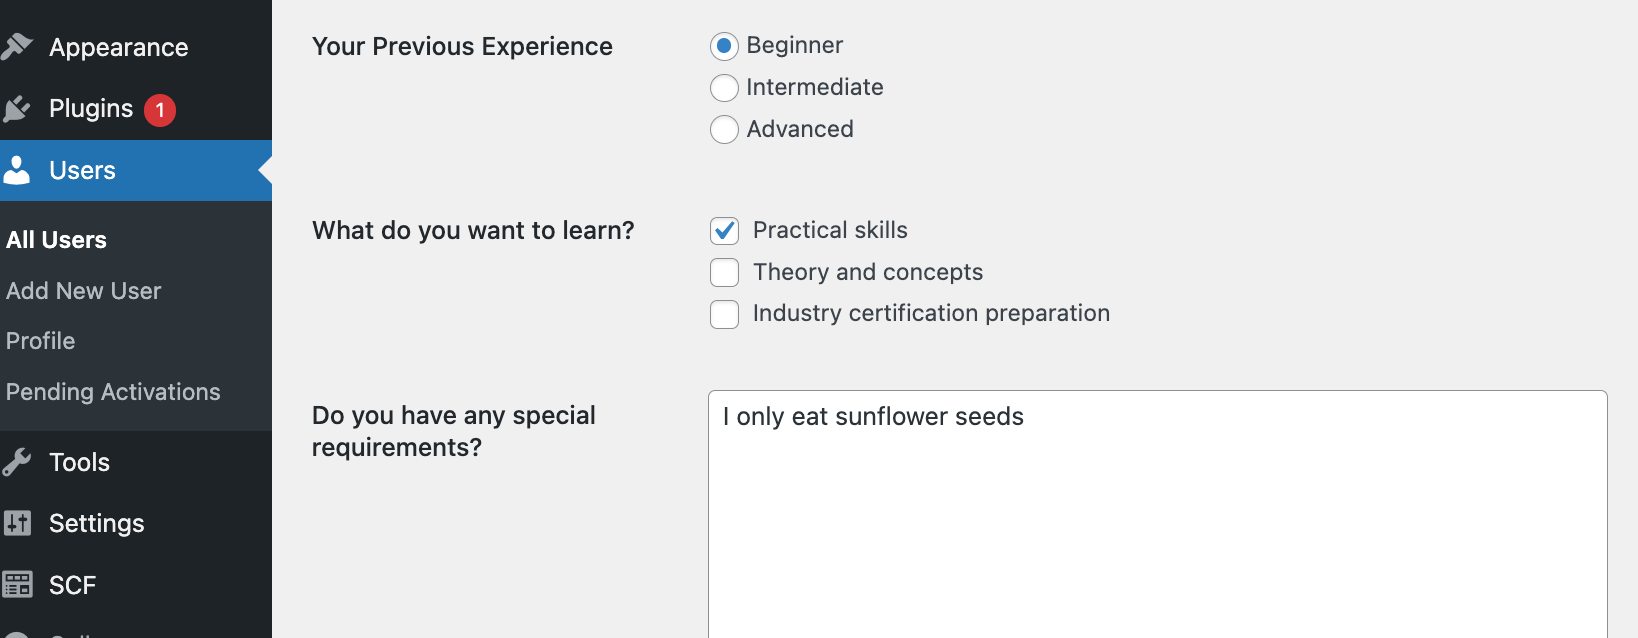
- User Profile Page: Users will see the additional fields on their profile page.
- Admin Dashboard: Administrators can view and edit custom field data by navigating to the “All Users” section and editing a specific user.