
Running Ubuntu on a VMware virtual machine without VMware Tools is like driving a sports car in first gear—sure, it works, but you’re not getting the full experience. Whether you’re tweaking a dev environment or managing VMs at scale, installing VMware Tools is a quick win that unlocks smoother performance, better integration, and essential features like clipboard sharing and drag-and-drop.
If you’re ready to tighten up your VM workflow and get Ubuntu playing nicely with your host system, this walkthrough has you covered.
Tutorial requirements
To complete this tutorial, you will first need to ensure that you meet the following requirements.
- A computer, server, or virtual machine that is running Ubuntu operating system (OS) version 14.04 or later.
- Root access or sudo access to your Ubuntu OS so that you can install new software.
- An internet connection to download the new software.
If one or more of the listed requirements are unmet, you should address them first and then proceed.
3 methods to Install VMware Tools on Ubuntu
You can install VMware Tools on a machine running Ubuntu in three different ways:
- Using the Open VM Tools Package to install the VMware Tools software.
- Installing the set of services known as VMware Tools via the graphical user interface (GUI).
- Making use of the terminal to install VMware Tools.
Here are the instructions for all three …
Method 1: Use the open VM tools package to install VMware tools
Step 1A: Open the terminal
If you’re running a GUI version of Ubuntu, use the sidebar or search bar to navigate to the Linux terminal.
You can use the keyboard shortcut Ctrl+Alt+T as another alternative. However, you can skip this step if you are running a terminal version of Ubuntu.
Step 1B: Update package information
Before you install VMware Tools on Ubuntu, it is important to ensure that your operating system has the latest package information. To do this, you need to use the below apt-get update command, which will automatically update any outdated package information:
sudo apt-get updateOnce this process is complete, you will see the following message: Done.
Step 1C: Install VMware tools on GUI-based Ubuntu
Now, you are ready to install the Open VM Tools package. Use the following command to install it to a GUI-based version of Ubuntu:
sudo apt-get install open-vm-tools-desktopStep 1D: Install VMware tools on terminal-based Ubuntu
If you are using a terminal-based version of Ubuntu, you should use the following command instead:
sudo apt-get install open-vm-toolsOptional: Reboot the machine
Finally, reboot the system to complete the installation process with the below command:
sudo rebootMethod 2: Use the graphical user interface (GUI) to install VMware tools
This method requires the use of a VMware Workstation virtual machine (VM) to install VMware Tools on a GUI-based version of Ubuntu.
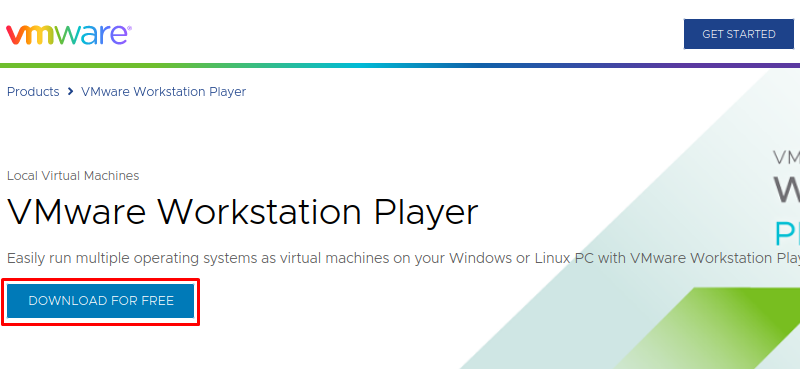
Step 2A: Download VMware Workstation
For this method, you will use VMware Workstation. If you don’t have it installed, you can download it from its official website. See the image below for reference:
Step 2B: Run the installation
Run the installation file by opening the terminal and using the following command. Make sure to replace the $username and other directories with the correct path to your downloads directory:
sudo bash /home/$username/Downloads/VMware-Player-Full-17.0.2-21581411.x86_64.bundleSee the image below for reference:

Step 2C: Install VMware Workstation
Install the software by clicking the Next button in the installation wizard until the process is complete. You will also have the option of choosing a free trial version. See the image below for reference:

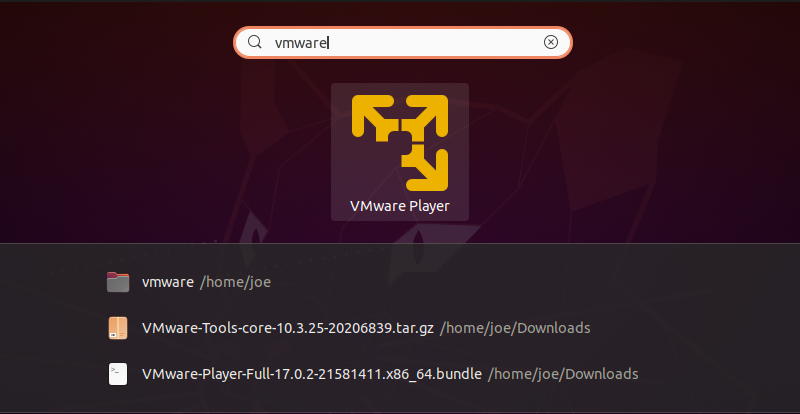
Step 2D: Open the VMware Workstation
Use the sidebar or search bar to open VMware Workstation. See the image below for reference:
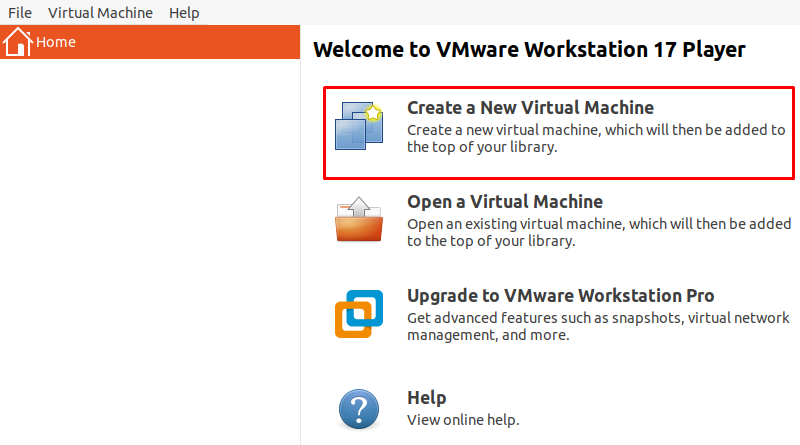
Step 2E: Use VMware Workstation to create a new Ubuntu virtual machine
After you open the application, select the first option titled Create a New Virtual Machine. You will then need to provide an Ubuntu image to complete the setup wizard for the new machine. See the image below for reference:
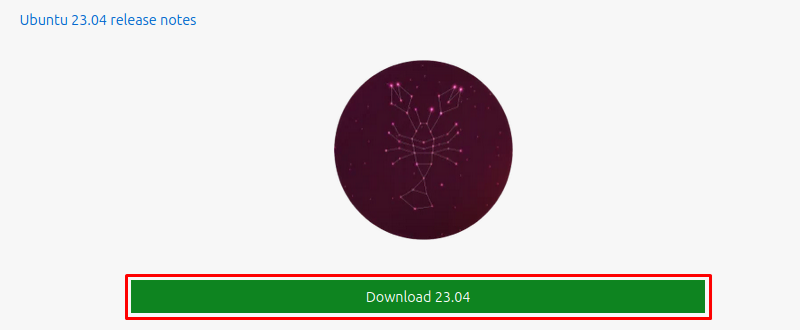
Step 2F: Download an Ubuntu image
To create a virtual machine, you need an Ubuntu image. If you don’t have one, download it from the official website. See the image below for reference:
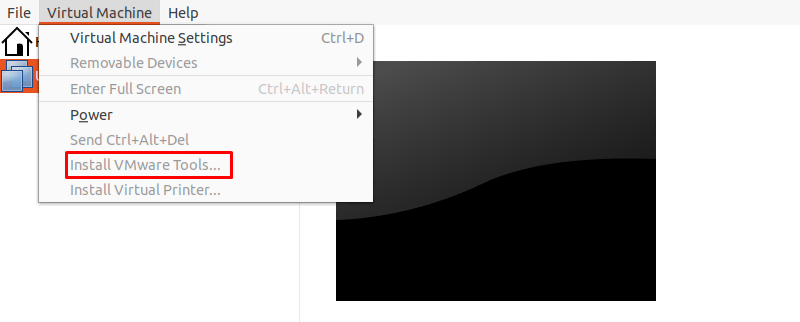
Step 2G: Start the installation process for VMware tools
Now that you have a virtual Ubuntu machine running in VMware Workstation, you can install VMware Tools. Click the Virtual Machine menu item in Workstation’s upper left menu and then Install VMware Tools. This action will mount a new virtual drive to your Ubuntu virtual machine. See the image below for reference:
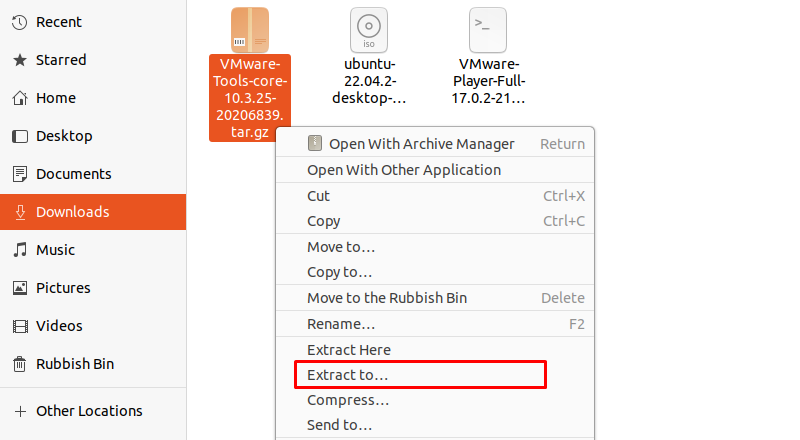
Step 2H: Extract the archive
Next up, you should extract the VMware Tools archive located on the new virtual disk. To do this, navigate to the archive using the file explorer, right-click, and select Extract To. See the image below for reference:
Step 2I: Install VMware tools
Navigate to the directory where you have extracted the installation files and run the vmware-install.pl script:
sudo ./vmware-install.pl -fSee the image below for reference:

Step 2J: Reboot the machine
Finally, reboot your system to complete the installation process with the below command:
sudo rebootSee the image below for reference:

Method 3: Use the terminal to install VMware Tools
This method requires the use of a VMware Workstation VM to install VMware Tools on a terminal-based version of Ubuntu. If you don’t currently have VMware Workstation installed, you first need to follow steps from the second method presented above for its installation.
Step 3A: Mount the image manually
Use the following two commands to create a new mount point directory and mount the image:
sudo mkdir -p /mnt/cdromsudo mount /dev/cdrom /mnt/cdromStep 3B: Open the image
Then, open the image directory and find the archive:
cd /mnt/cdromStep 3C: Extract the archive
Extract the archive from the image using the following command. Make sure to replace $VMwareTools with its full file name and $destination with your desired destination for the extracted files:
sudo tar -xf $VMwareTools.tar.gz -C /$destinationStep 3D: Run the VMware Tools installation
You can now navigate to the script file and run the installation with the below:
sudo ./vmware-install.pl –fStep 3E: Reboot the machine
Finally, reboot your system with the below command to complete the installation process:
sudo rebootGetting started with VMWare on Ubuntu
VMware offers many benefits to the world of virtualization and cloud infrastructure. As mentioned, among other things, VMware Tools enables better management of guest virtual machines and extends the communication capabilities between guest and host machines.
Use whichever of these methods is your favorite: They all do the trick. The first involves using the Open VM Tools package, while the second and third methods take advantage of VMware’s Workstation software.
Do you need help deciding on the best hosting company for your specific needs? Do you need guidance setting up a good VMware hosting solution? Then you are in the right place. Click through below to explore options or talk with one of our experts right now.
If you are still unsure if VMware is suitable for your needs, take a look at Liquid Web’s robust dedicated server plans. We also offer a range of cloud-based server solutions, perfect for anyone looking to maximize the flexibility of VMware.