Secure QA Process
Everything starts with a Merge Request
We expect and require all contributions to our products to go a merge request with a formal review. As such, we follow the Merge Request workflow and code review guidelines articulated in GitLab’s developer documentation. We would, however, like to highlight a few items from these documents and add a few additional considerations for reviewers and authors.
Additional considerations for Merge Request reviewers
- The best way to unblock a peer or community member is to provide feedback in a timely manner. If you are at capacity and cannot facilitate a review in the SLO to which we aspire, please let folks know in the merge request so another reviewer may be found.
Additional considerations for Merge Request authors
- Being a globally distributed organization can, and frequently does, add latency to back-and-forth communication between folks. Don’t take it personally if it’s taking longer than you expected to get feedback on your changes.
Secure QA Process
The secure analyzers verify merge requests by running a new commit against downstream test projects for their supported languages/frameworks (i.e. the gemnasium analyzer of Dependency Scanning will trigger tests against php, go, and several other test projects). The verification is done by comparing the generated report output against an expected report committed to the analyzer’s repository. If analyzer behavior has changed, then the pipeline will fail because the contents of the expected and generated reports will no longer match.
The expectations for the Dependency Scanning, SAST, and Secrets Detection analyzers are stored in the project’s qa/expect directory with a sub-directory for each particular framework/language type.
Test Projects
The test projects reside in the Secure tests subgroup and their use and best practices are found in the common README.
Changing Analyzer Behavior
If a change to an analyzer changes the report output, then the expected report must change as well.
In SAST, Dependency Scanning, Secret Detection the expected reports are stored with the analyzer in a path corresponding to the test project in a subdirectory for the language/framework. For example, the expected report for scanning the dependencies of java-maven is stored in gemnasium-maven/qa/expect. This way if an analyzer’s behavior changes, the expectation can be changed and packaged in the same commit.
For License Compliance, expectations are stored in the test project’s qa/expect directory (e.g. ruby-bundler/qa/expect).
More information about can be found in the Security Products test projects repository.
Testing on OpenShift
We currently do not have automated tests for OpenShift. If you want to see how a change affects the analyzer behavior on OpenShift, you can test it by setting up an OpenShift environment. There are two methods to do this:
1. Automated Script
The distribution team has shared an automated script for setting up an OpenShift cluster. While untested by our group, this method could potentially streamline the cluster creation process.
2. Manual Setup
You can setup an OpenShift cluster following the steps below assuming that you already have access to the GitLab Sandbox Cloud.
-
Login to https://gitlabsandbox.cloud/.
-
Create an AWS sandbox account and login to the AWS console by following steps
1to3from Static Analysis Group EC2 development machine setup guide. -
Once you are logged into the AWS console, you can search for “OpenShift” in the search field in the upper left corner, which should show
Red Hat OpenShift Service on AWSunder the Services category. ROSA provides an integrated OpenShift experience with AWS. Click on this search result to proceed.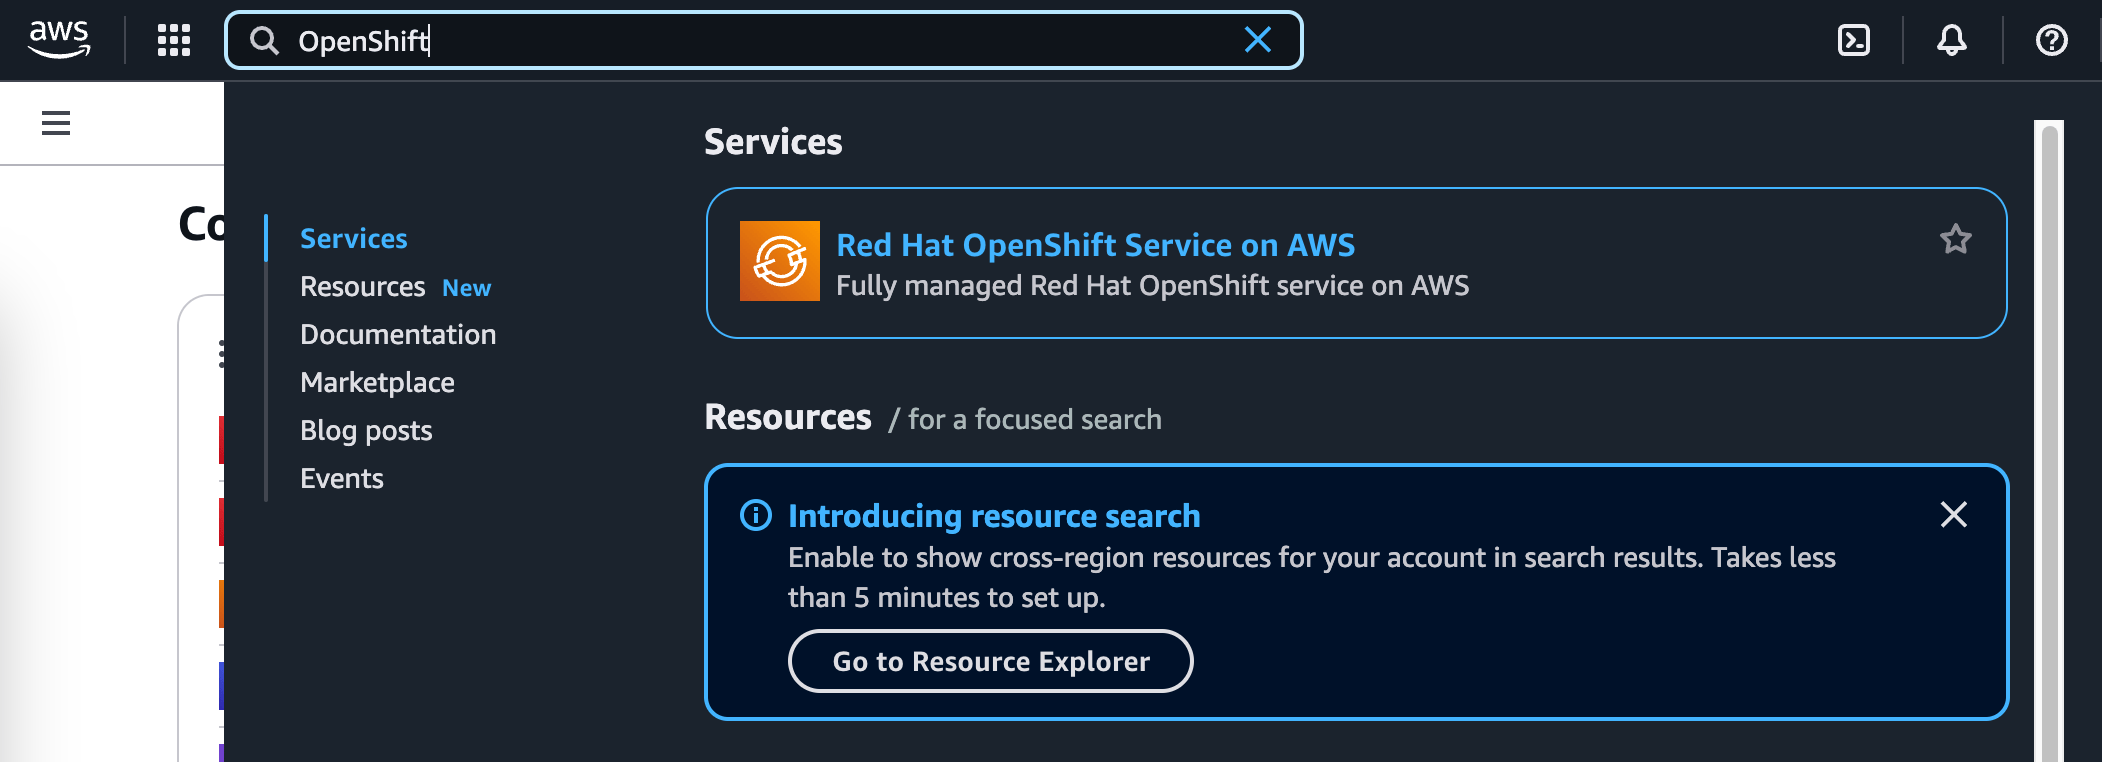
-
You are redirected to the
Red Hat OpenShift Service on AWS (ROSA)landing page. Click on theGet startedlink in the left sidebar, or theGet startedorange button.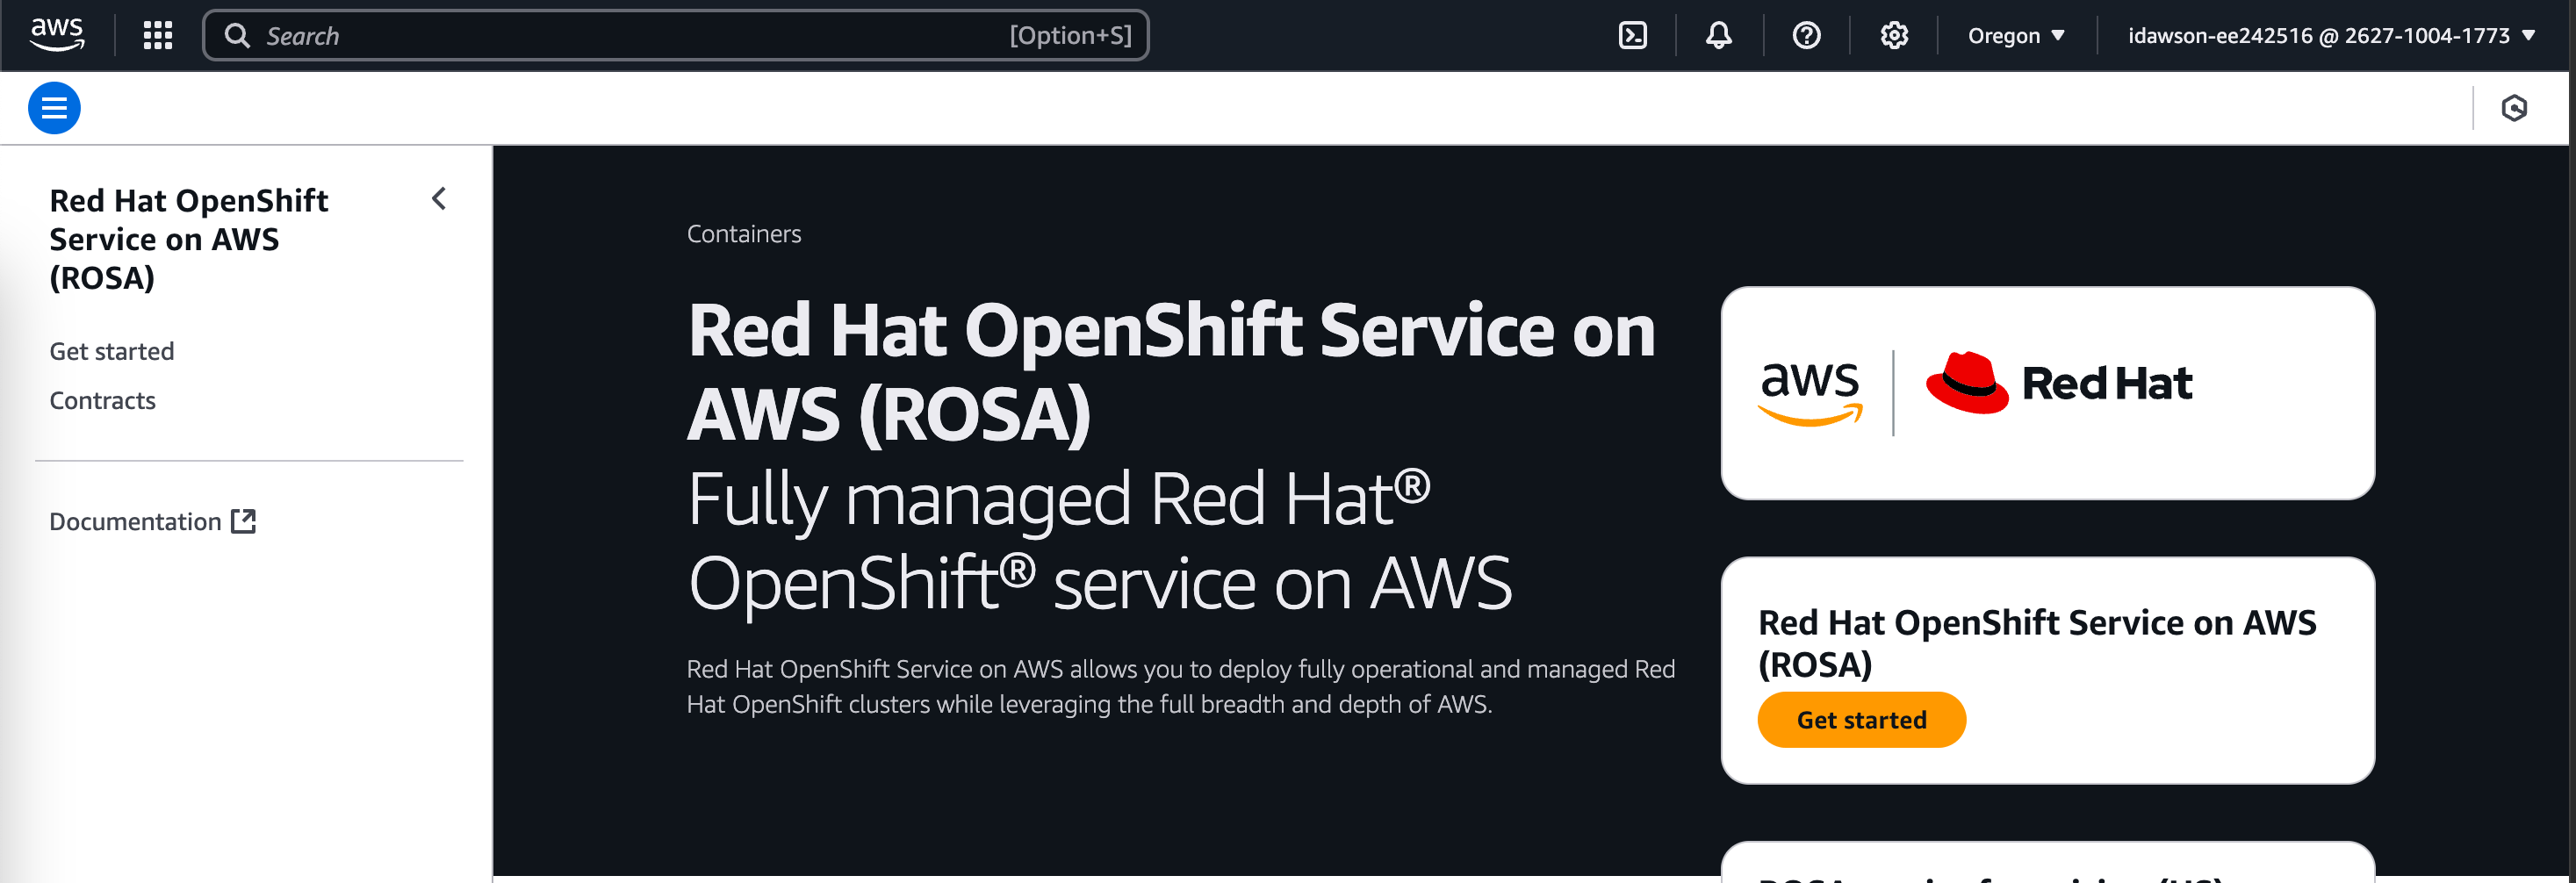
-
You will then be redirected to the
Verify ROSA prerequisitespage:
Click on the
Enable ROSA HCP and ROSA classicbutton in theROSA enablementsection, and keep the boxI agree to share my AWS account number...checked. TheROSA enablementsection will then explainYour request to enable ROSA is pending and may take several minutes to resolve. We recommend keeping this page open so that you can review any errors. -
After a few minutes, the
ROSA enablementsection will be updated and display the following messages:You have agreed to share your AWS account number and email address with red hat.You have enabled ROSA and HCP and ROSA classic.
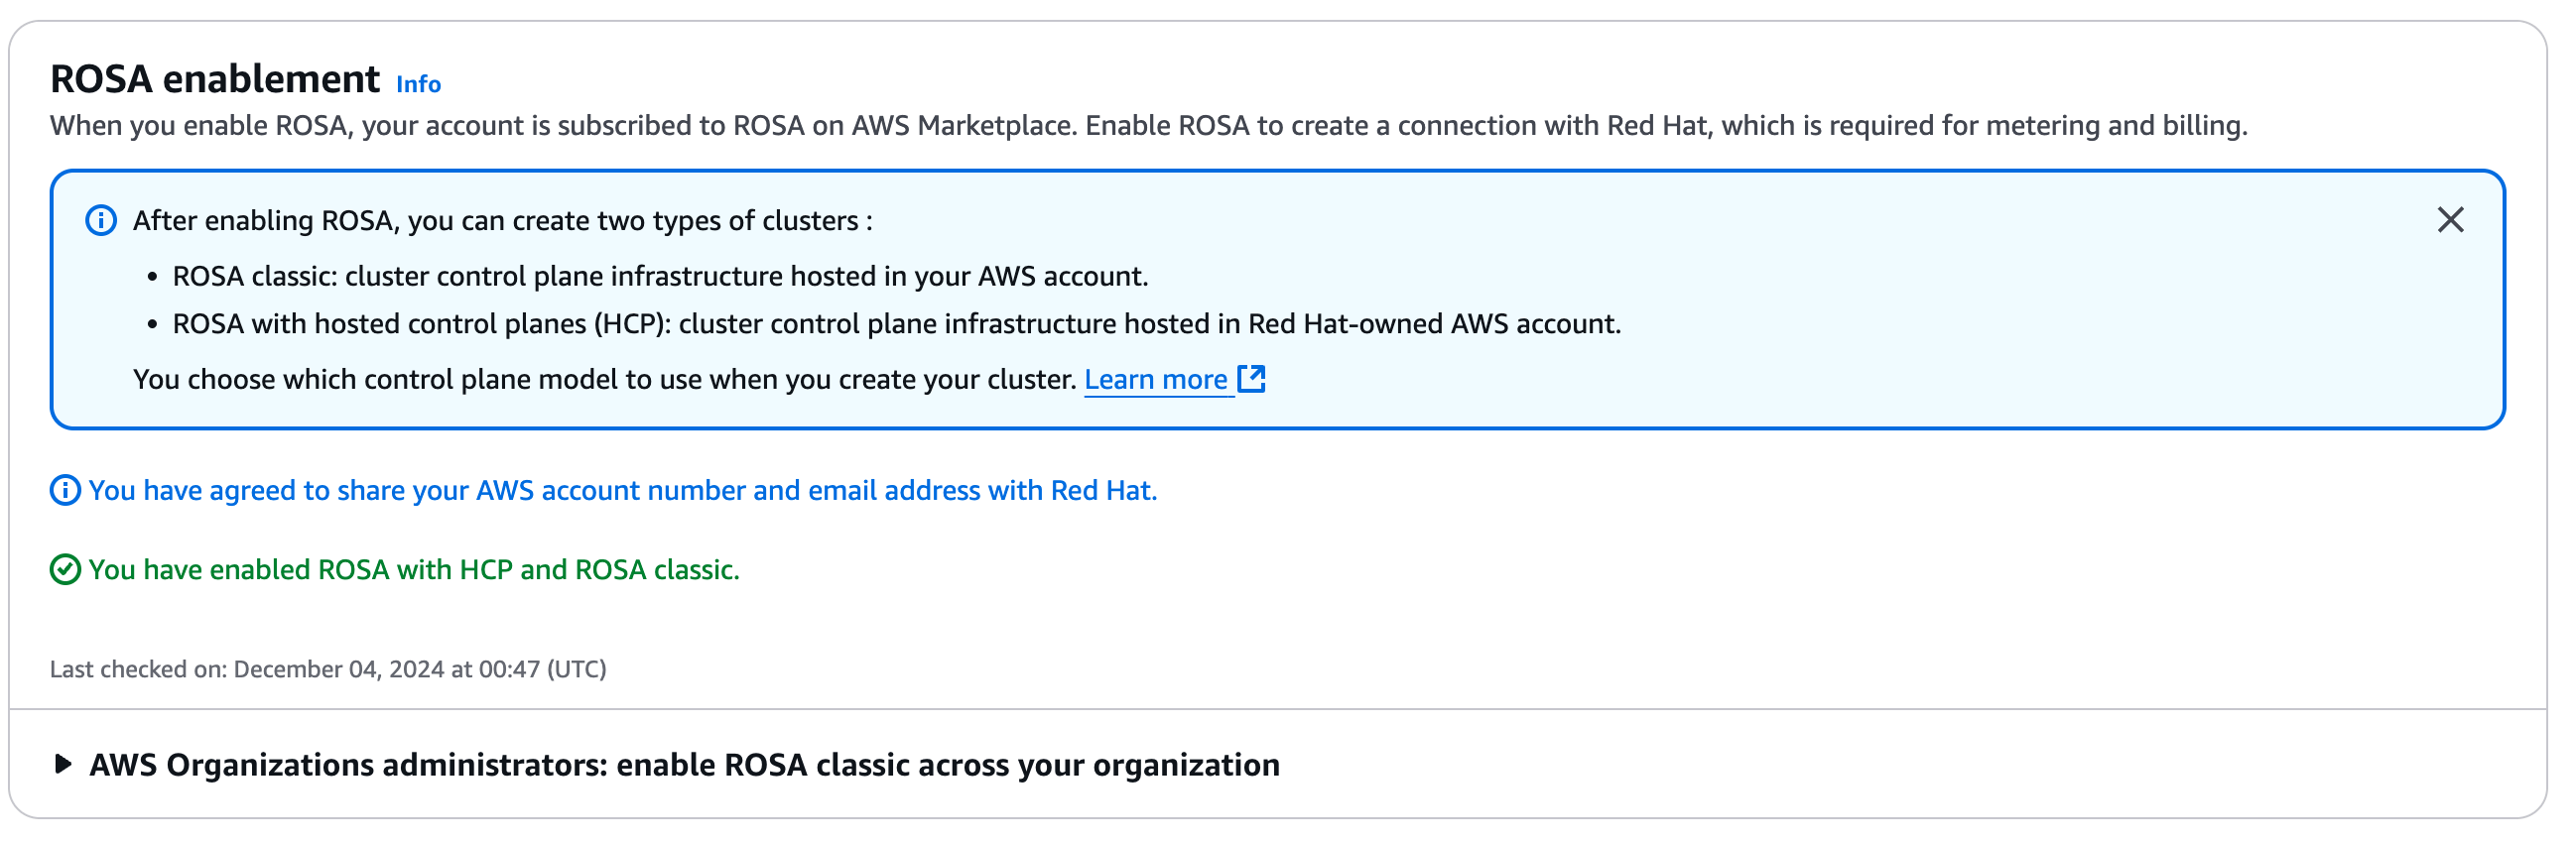
-
Click on the
Continue to Red Hatorange button in the bottom right corner. This will redirect you to https://sso.redhat.com and request you toLog in to your Red Hat account:
-
Click on
Log in with Googleand use yourgitlab.comgmail account. You will be redirected to theRegister for a Red Hat accountpage: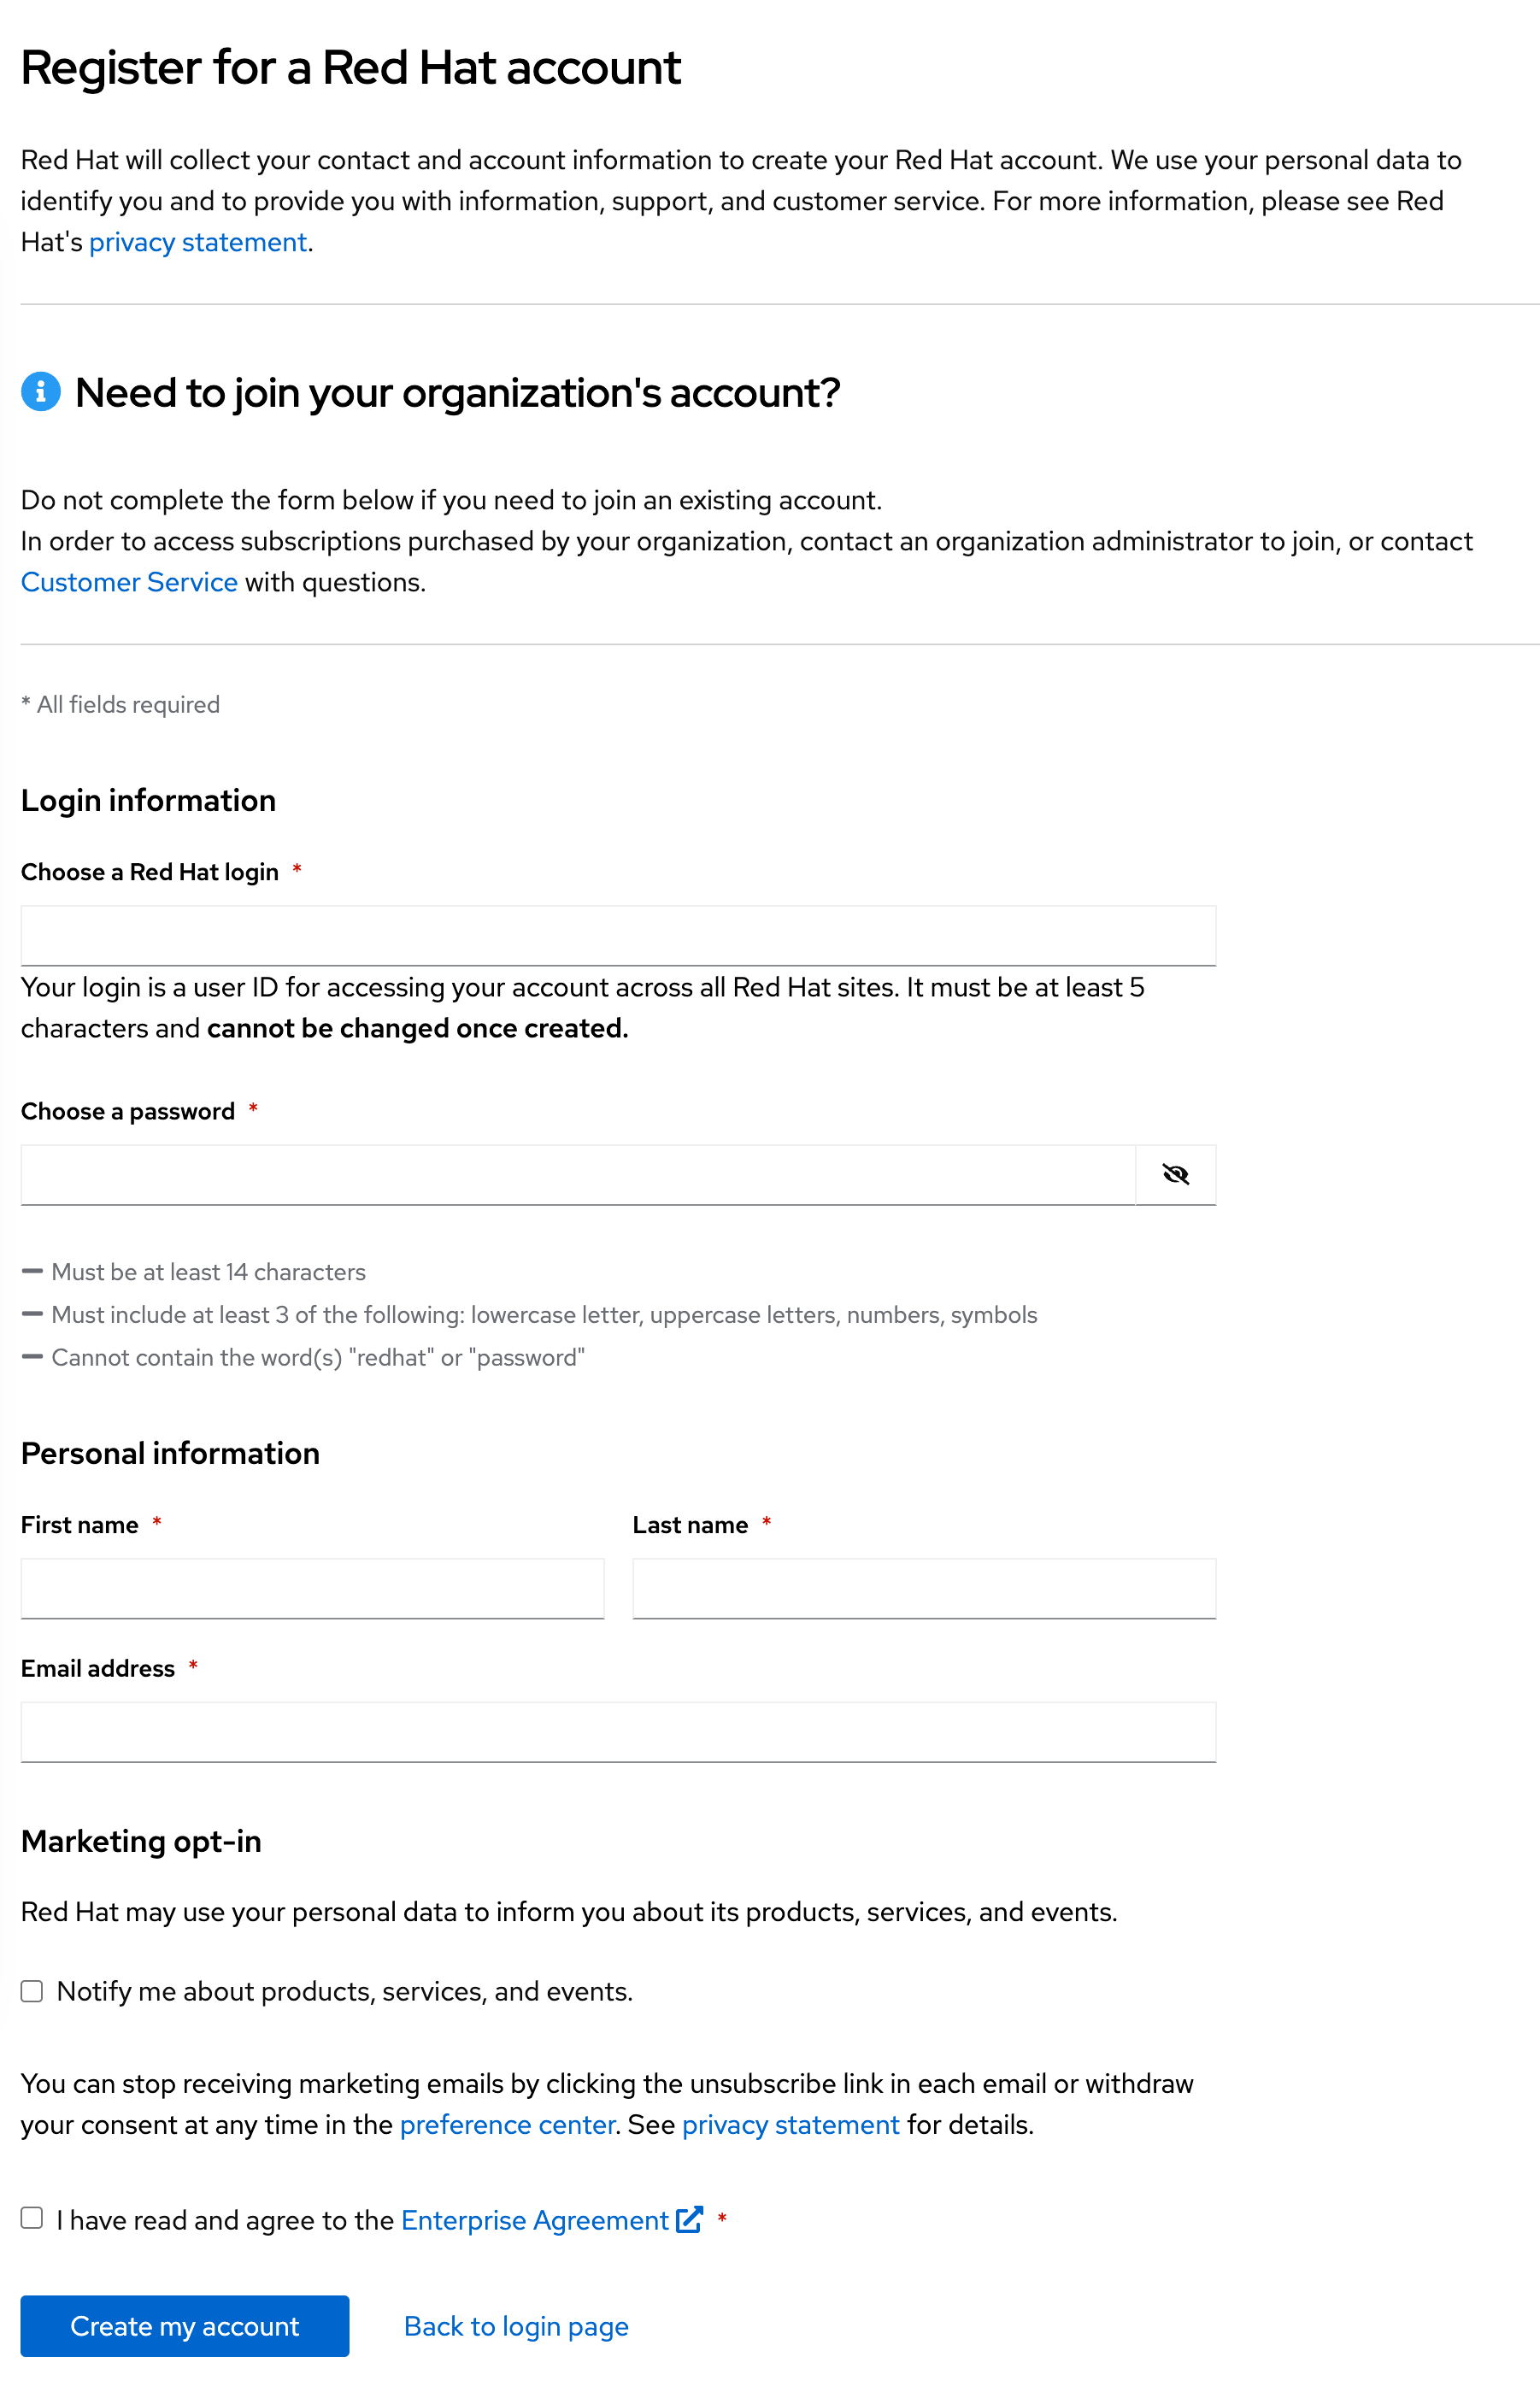
Complete the required fields, using your
gitlab.comgmail account for theEmail address, then click onCreate my account. -
You should now be redirected to a page to
Complete your account connection. Check theI have read and agreed to the terms and conditionscheckbox, then click on theConnect accountsbutton: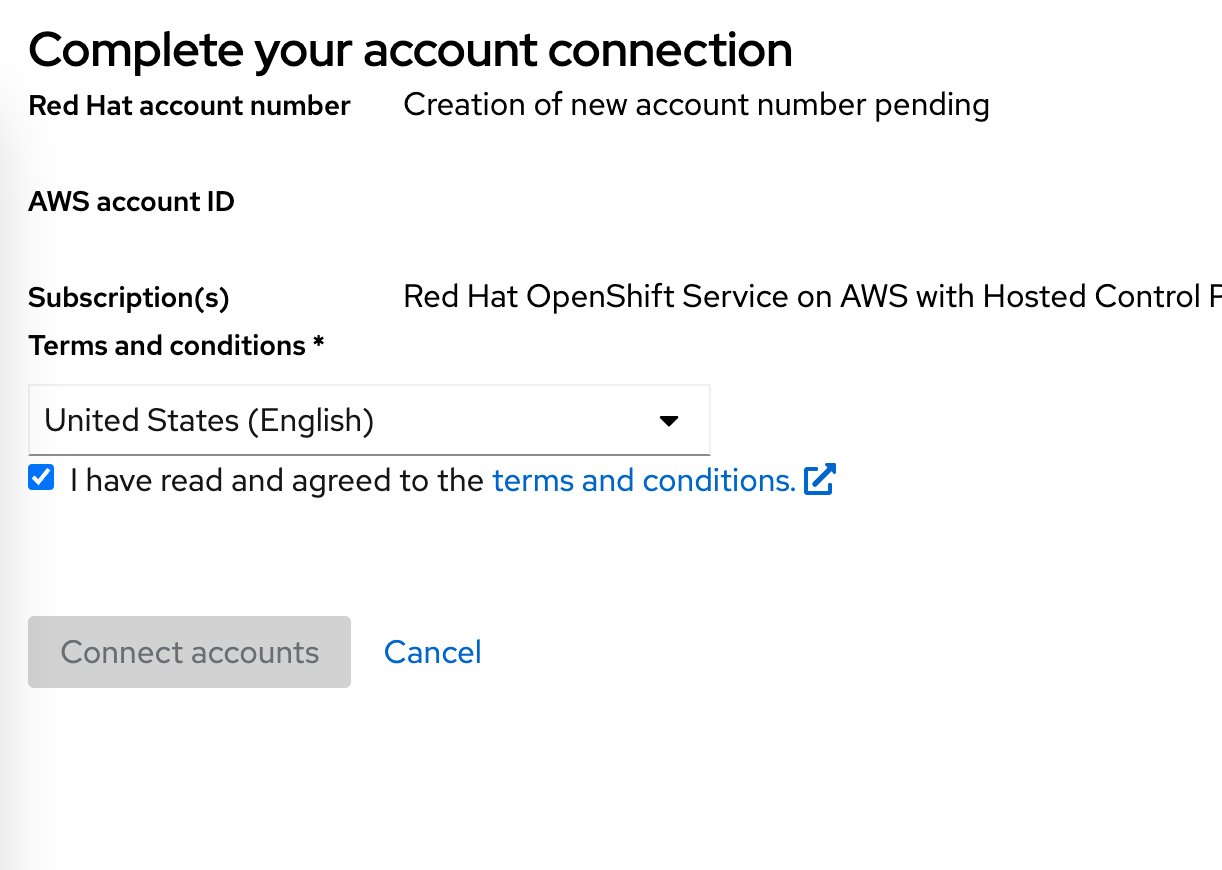
-
You’ll then be redirected to another page explaining
We need a little more information. Complete the required fields, using yourgitlab.comgmail account for theEmail address, and selectPersonalforAccount type: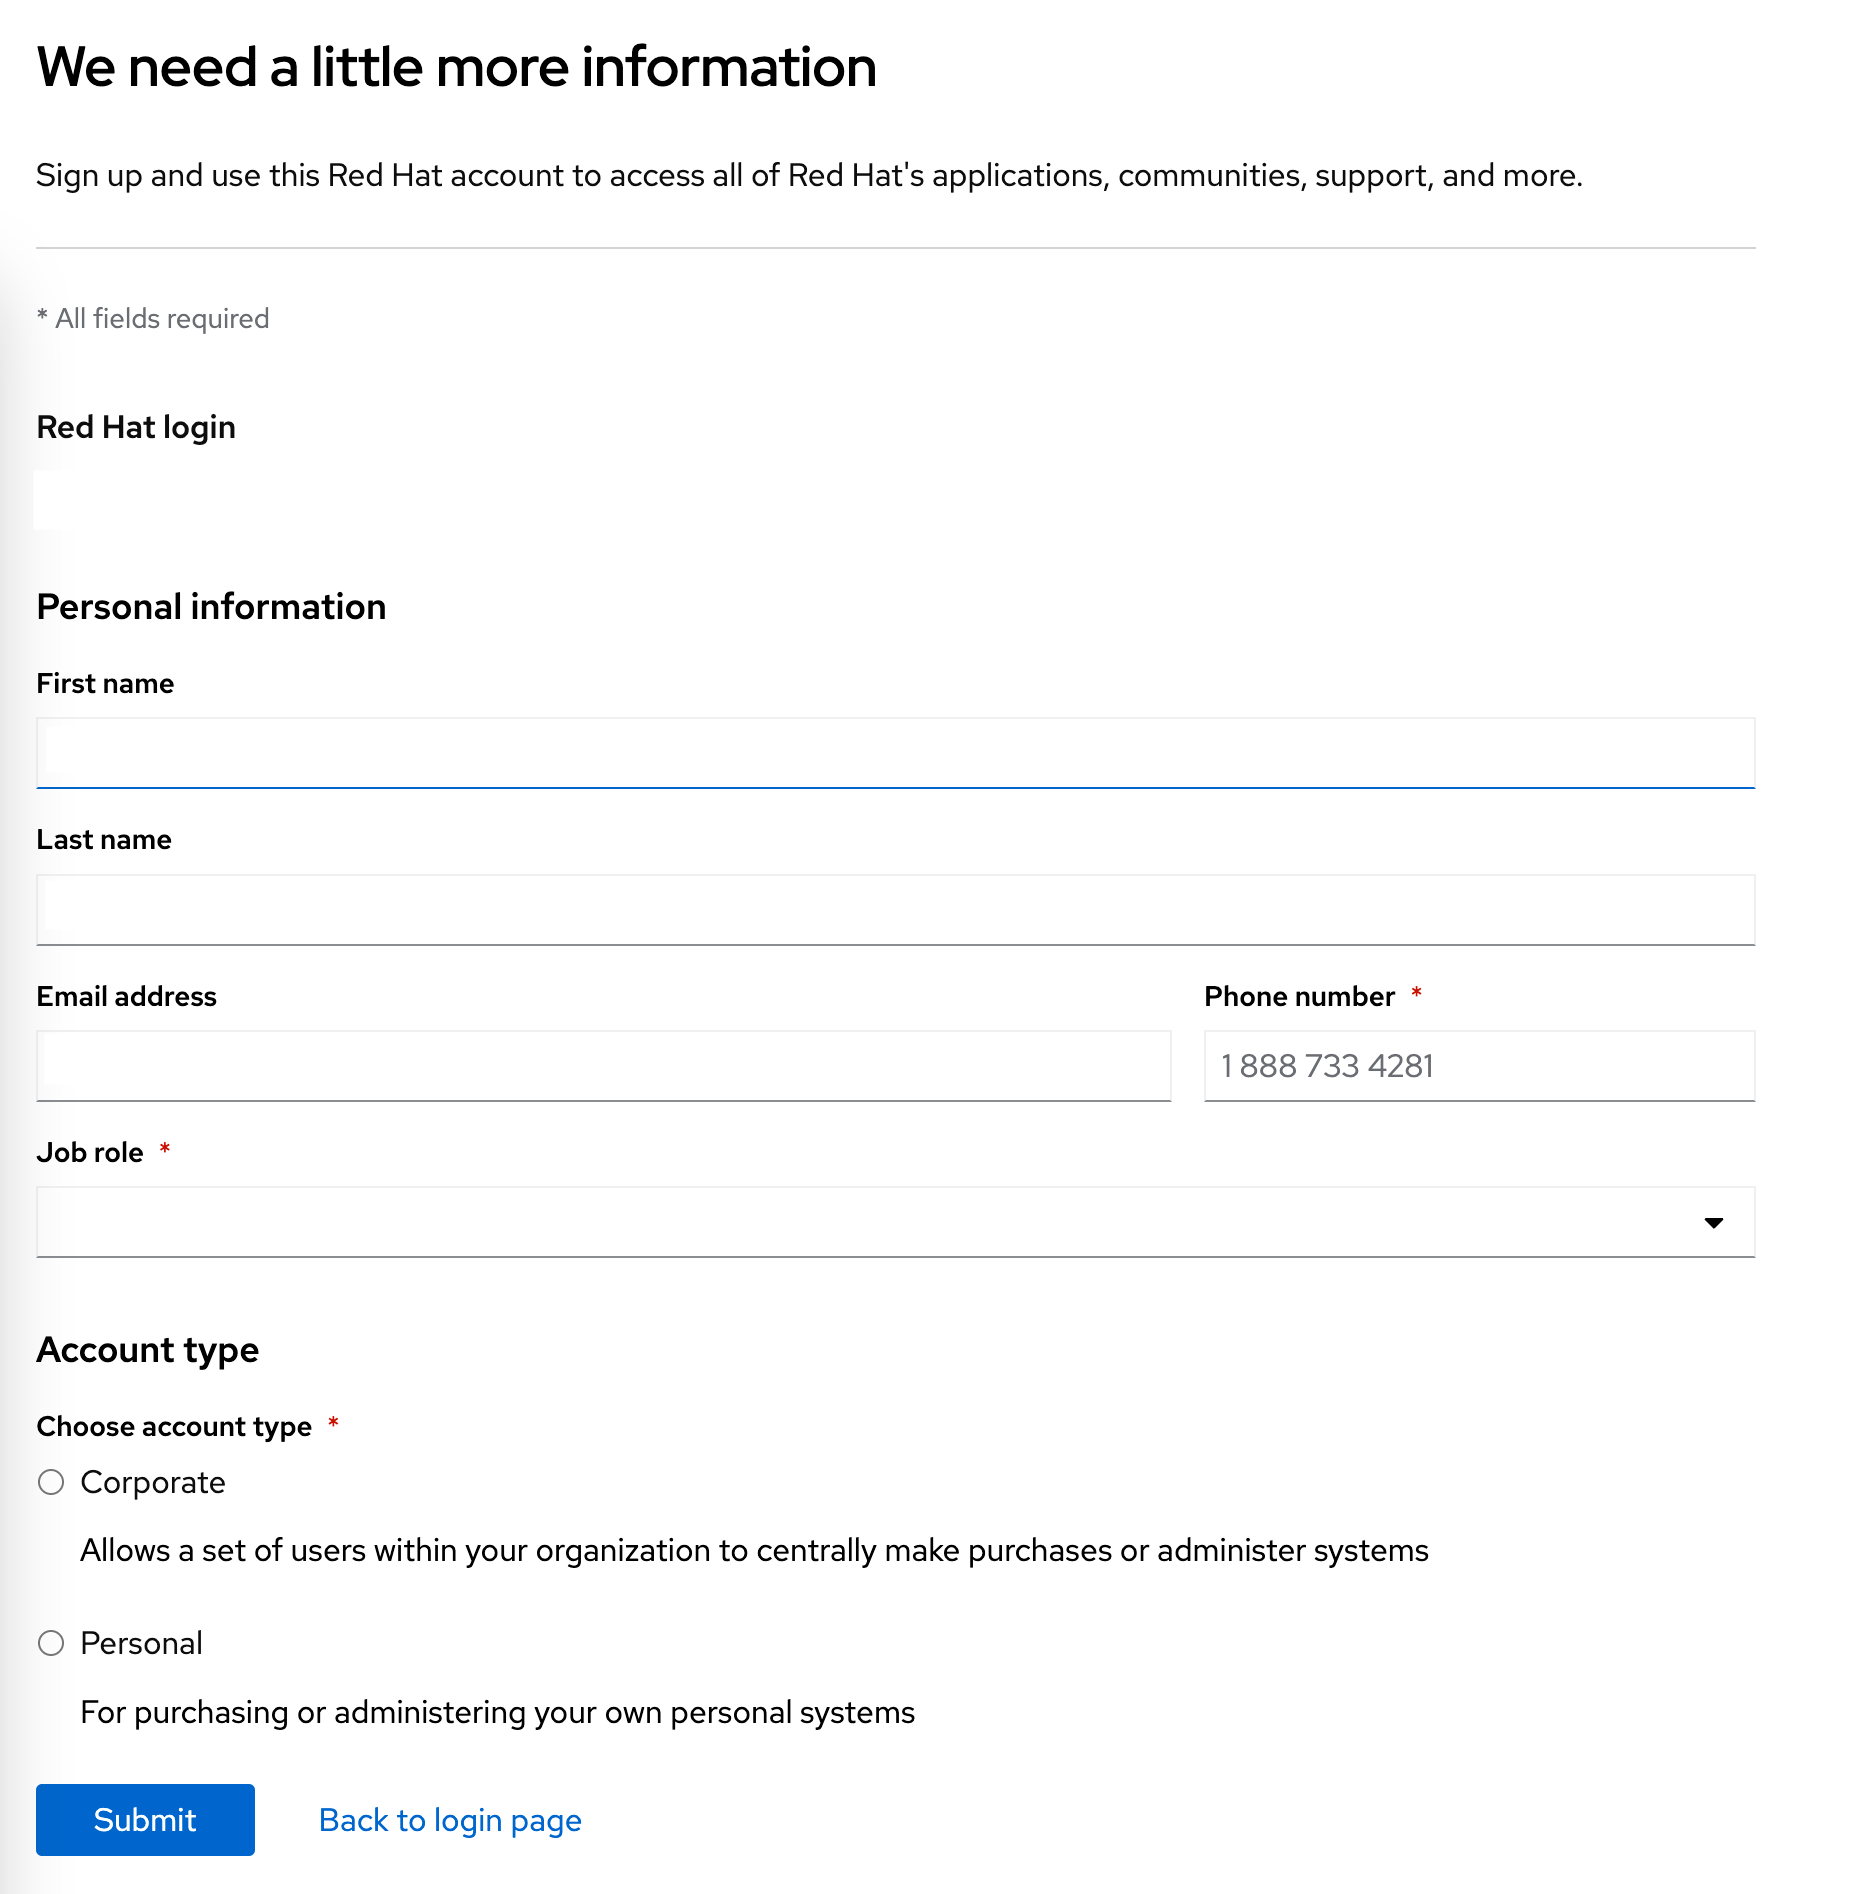
-
The
Terms and conditionsbox will now be displayed, click onView Terms and Conditionsand accept them: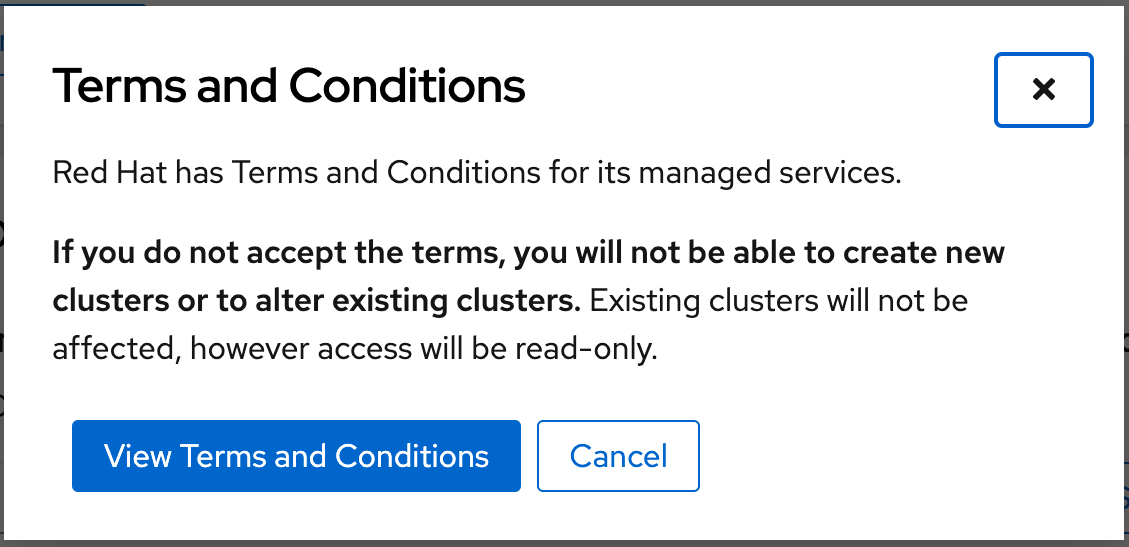
-
You’ll now be redirected to the Red Hat Hybrid Cloud Console Overview screen, and can set up an OpenShift cluster by clicking the
Create clusterin theRed Hat OpenShift Service on AWS (ROSA)dialog box: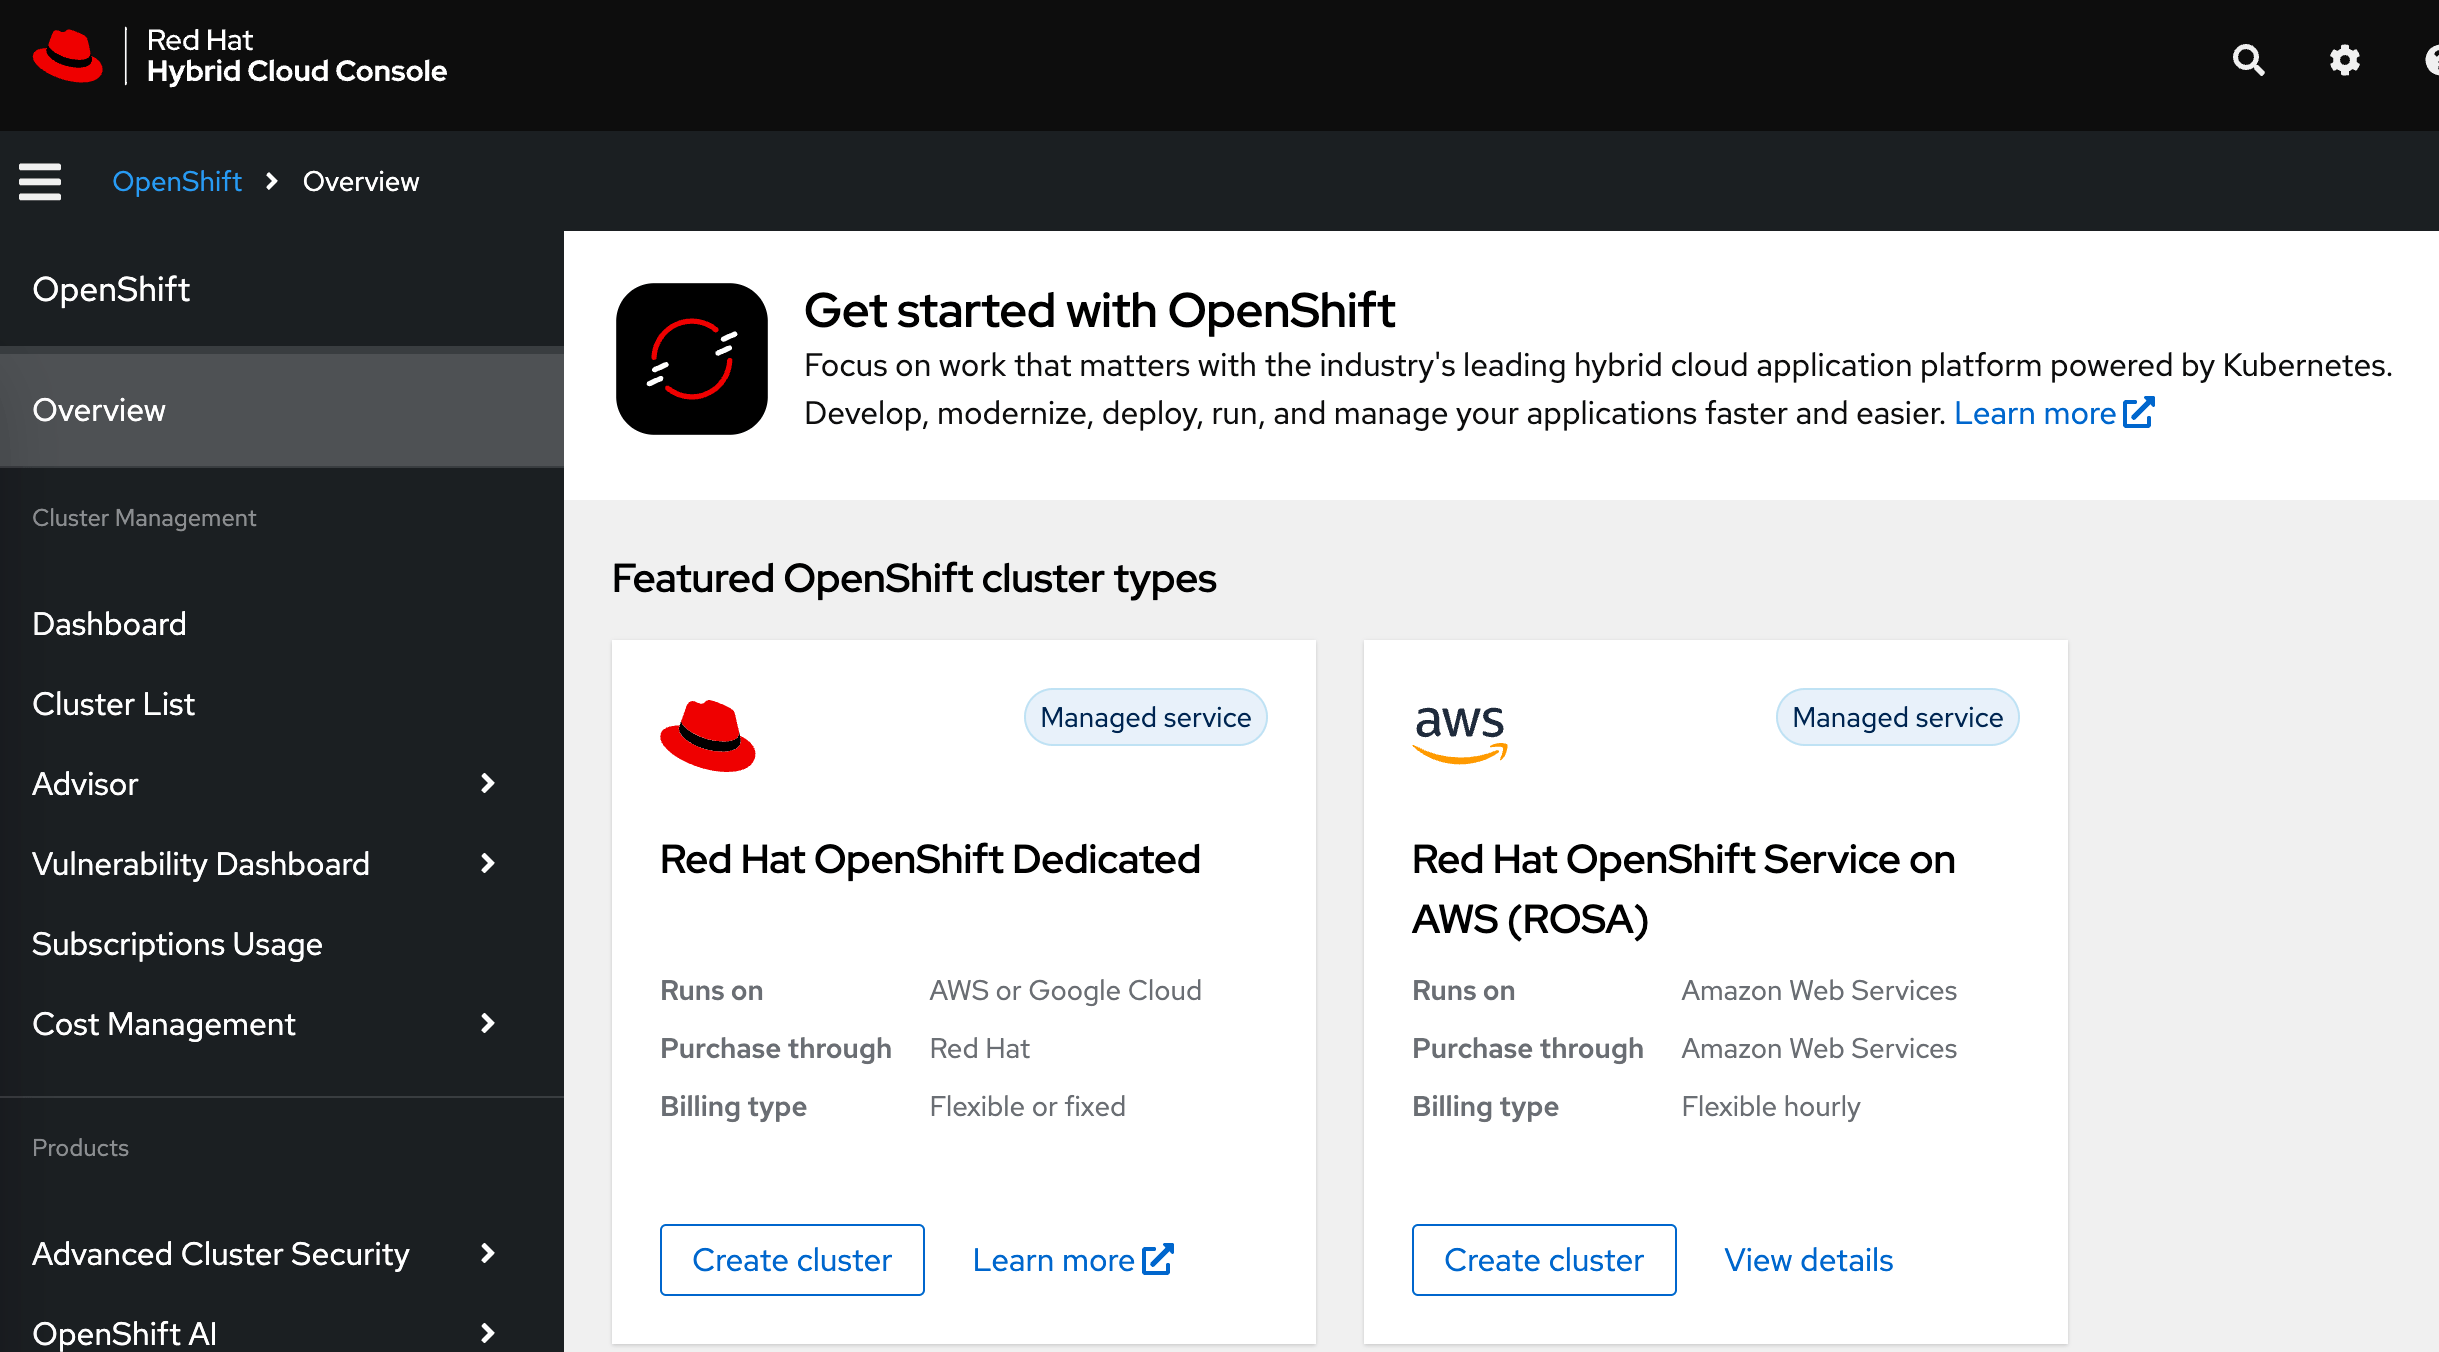
If you are only planning to use the cluster for testing, it is recommended to select the
OSD Trialwith a free trial period of 2 months. After this period, the cluster will be deleted. The free trial enables you to upgrade to a paid tier within time frame of two months. -
Once the cluster is set up, we have to create a user to login to the OpenShift cluster; you can select
Cluster List > <your cluster>and selecthtpasswdforIdentity Provider. UnderCluster Roles and Accessyou can create the user for accessing the OpenShift cluster. Make sure that this user belongs to the groupsdedicated-adminandcluster-admins. -
Afterwards you can click on the
Open consolebutton and login with the cluster admin user you created in the previous step. -
Once you are logged into the OpenShift cluster, you can now install the GitLab Runner Operator by selecting
Operators > Operator Hub. You can search GitLab Runner, click on the search result and then click on theInstallbutton as explained here. -
In order to set up the runner in the OpenShift cluster, you can follow the instructions that are included in the README of the operator.
Note that the runner token referenced in the
gitlab-runner-operator README.mdcan be obtained by selectingCI/CD Settings > Runners > New Runnerfrom a GitLab project.The runner setup requires the command line tool
oc(OpenShift client) to be installed. Before usingocyou have to authenticate against your cluster. You can find the authentication credentials by clicking on your OpenShift cluster admin user name and then selectingCopy login comand. Note, that the default runner setup allows containers to be executed with root privileges. In order to restrict access to non root users, you can provide the configuration below:[[runners]] name = "gitlab-runner" url = "https://gitlab.com" executor = "kubernetes" [runners.kubernetes] [runners.kubernetes.pod_security_context] run_as_non_root = true run_as_user = 1000After applying this configuration with
oc create configmap my-runner-config --from-file=config.toml, you can update the runner config as illustrated below and apply it withoc appy -f gitlab-runner.yml.apiVersion: apps.gitlab.com/v1beta2 kind: Runner metadata: name: gitlab-runner spec: gitlabUrl: https://gitlab.com buildImage: alpine token: gitlab-runner-secret tags: openshift config: my-runner-config -
The OpenShift runner should now appear green in your GitLab project settings
CI/CD Settings > Runners.
68e14fe8)
