◦ Comprehensive security
◦ 24/7 support
WordPress Guide → Post
How to Build a Complete WordPress Blog Step by Step
Starting a blog can feel overwhelming, but it doesn’t have to be. You might want to share ideas, build a brand, or create income. Whatever your goal, this guide gives you clear, step-by-step instructions to set up, write, and grow your blog without fluff or jargon. Let’s get started.
Get fast, reliable hosting for WordPress
Power your site with the industry’s fastest, most optimized WordPress hosting
Why choose WordPress.org for your blog?
You might have picked up that we’re going to be showing you how to build a WordPress blog. After all, it’s the most popular blogging platform in the world – flexible, beginner-friendly, and powerful enough to grow with you.
However, it’s available in two flavors: WordPress.org and WordPress.com. Despite the similar names, the two offer very different levels of control, flexibility, and features.
Here’s a handy comparison guide to help you make the right choice:
| Feature | WordPress.com | WordPress.org |
| Cost | Free plan available, paid upgrades needed. | You choose your provider and plan. |
| Control | Limited design and plugin options. | Full control over themes, plugins, and code. |
| Monetization | Ads and revenue options restricted. | Monetize freely with ads, sponsors, or stores. |
| Storage | 3GB on free plan, more with upgrades, | Based on your hosting – typically more space and flexibility. |
| Maintenance | Handled for you. | You manage it all – with the freedom to choose how. |
| Best for | Beginners wanting simplicity. | Independent creators who want full ownership and scalability. |
Verdict: We recommend using WordPress.org. While WordPress.com is ideal for personal blogs with basic features and limited customization, WordPress.org offers full control over design, functionality, and monetization. The flexibility and scalability of WordPress.org make it the preferred choice for businesses and professional bloggers seeking long-term growth.
Pre-launch essentials
Before you can set up your WordPress site, here are a couple of things you should do to make the process smoother:
- Define your blog topic and target audience so you can create content that resonates with the right readers and drives engagement.
- Choose a memorable domain name that reflects your blog’s focus and is easy for visitors to recall.
- Set aside 30 to 60 minutes for setup to ensure everything from domain registration to WordPress installation runs smoothly.
- Budget $50 to $100 for the first year to cover the cost of domain registration and hosting.
Technical setup
With the stage set, it’s time for your first act: securing reliable hosting, then installing WordPress.
Hosting and domain registration
Web hosting is the service that stores your blog files online. A domain name is your blog’s web address.
Liquid Web offers managed WordPress hosting starting at $24/month, providing a reliable and hassle-free experience. With one-click WordPress installation, you can skip the technical setup and get your blog live quickly.
Our 99.999% uptime guarantee ensures your site remains consistently available, giving you peace of mind that your blog is always online for your readers.
You can either purchase your domain name through your hosting provider or a domain registrar. Choose a domain name that’s short, memorable, and relevant to your blog’s topic. For example, if you’re blogging about photography, something like “JaneDoesPhotos.com” could be a good fit.
Once you have both your hosting plan and domain name, you’ll be ready to move on to setting up WordPress.
WordPress installation and setup
A managed WordPress hosting service like Liquid Web’s will handle WordPress installation for you. Luckily, it’s easy enough to do yourself.
Every hosting provider and control panel will work a little differently, but in general, installing WordPress looks like this:
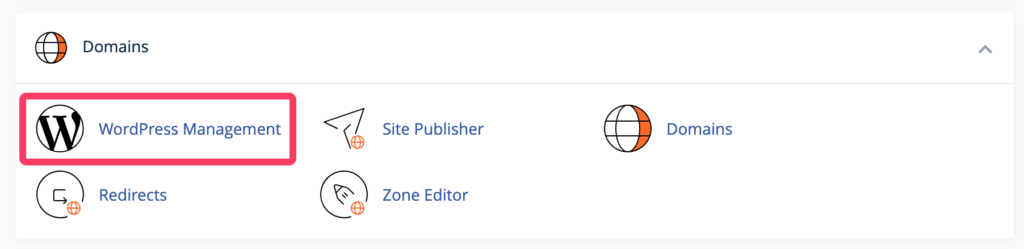
- Log in to your hosting account control panel.
- Find the WordPress installation tool. In cPanel, for example, there’s a WordPress Management tool under Tools > Domains.
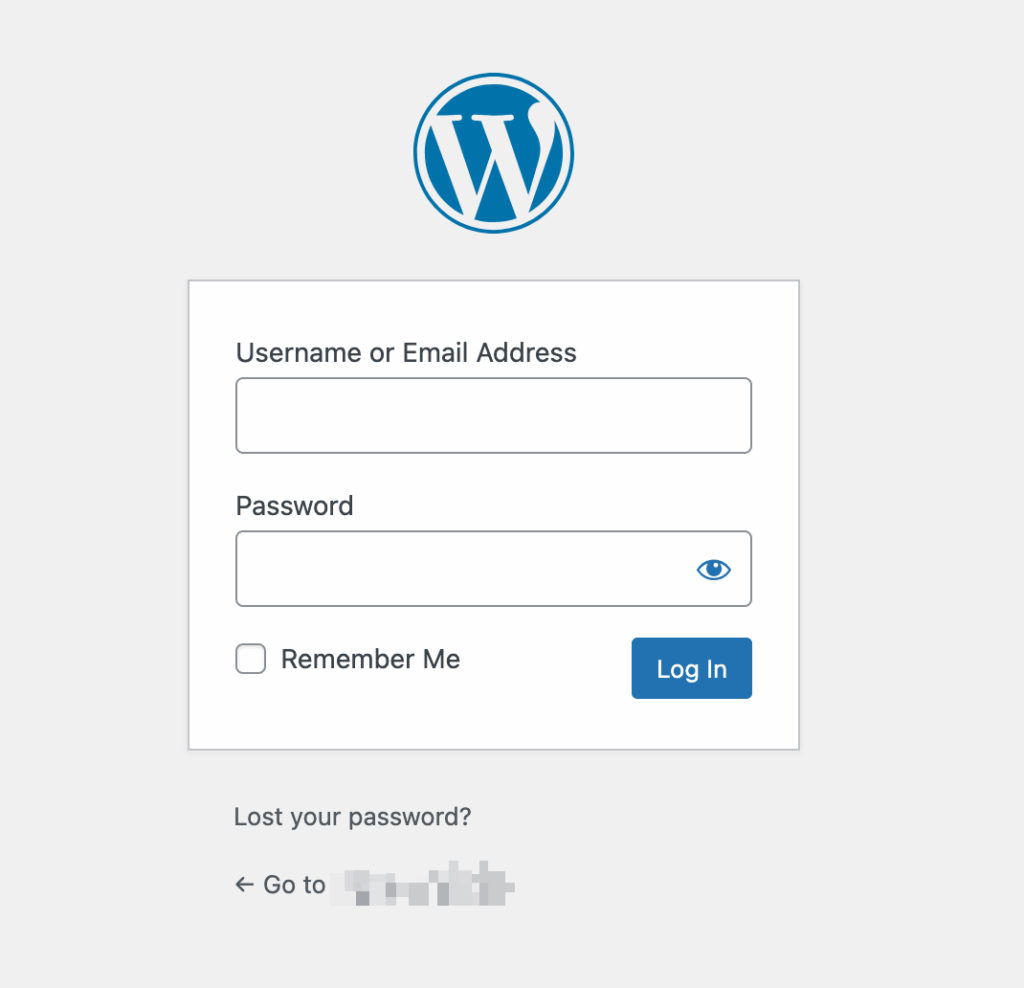
Follow the on-screen instructions to complete the installation. To log into your site later, just navigate to yoursite.com/wp-admin, where you should see the following screen:
Now that WordPress is installed, you’ll need to choose a theme that defines how your blog will look. Themes control the layout, colors, typography, and overall design of your blog.
- In your WordPress dashboard, go to Appearance > Themes.
- Click Add New to browse free themes in the WordPress theme repository. You can also upload a premium theme if you’ve purchased one.
- Use the Live Preview button to see how the theme will look on your site before activating it.
- Once you’re happy with a theme, click Activate.

Note that if you haven’t added much (or any) content to the site, your preview might not look like much. It will look better as you build the blog.
Now that you have your theme in place, it’s time to make your blog your own by adjusting some basic settings.
- General Settings: Go to Settings > General to adjust your site title, tagline, and timezone. Make sure to set your preferred permalink structure under Settings > Permalinks to ensure consistent and SEO-friendly URLs across your site.
- Site identity: Go to Appearance > Customize to add your site logo, adjust your site colors, fonts, and more.
- Widgets and menus: Customize your site’s header, footer, and sidebar by going to Appearance > Widgets. You can add various widgets, such as search bars, recent posts, or social media links.
Essential first steps
Your WordPress blog is ready to go, but there are still a couple of things you could do to buff it up a bit.
Security plugins
Install security plugins to protect your blog from hackers. Wordfence Security provides a firewall to block malicious traffic, while All In One Security adds login protection, preventing unauthorized access and brute force attacks. Regularly update and configure these plugins for optimal protection.
SEO foundation
Set up SEO plugins to improve your blog’s search engine ranking. Yoast SEO helps optimize your content by guiding keyword placement and analyzing readability. Its recommendations should be enough to enhance your content’s chances of ranking higher in search results and attracting more traffic.
Legal pages
Ensure legal compliance by adding essential pages as early as possible to avoid legal issues:
- A Privacy Policy outlines how you collect and use data from visitors.
- Terms of Service set the rules for site usage.
- A Cookie Notice informs visitors about cookies, ensuring GDPR compliance.
Content creation
With your blog set up and customized, it’s time to write your first blog post!
- In your WordPress dashboard, go to Posts > Add New Post.
- Add a catchy title and write your content in the editor. WordPress has a user-friendly block editor that lets you add images, videos, and formatting without any coding skills.
- Use categories and tags to organize your content and make it easier for readers to find related posts.
- Preview your post and click Publish when you’re ready to go live.
While publishing a post whenever inspiration strikes you is fine, some intentional content planning could take you further:
- Define your core topics with three to five themes that align with your interests and what your audience wants to read. For example, a personal finance blog might focus on budgeting, investing, side hustles, and saving tips. Sticking to clear categories keeps your blog focused and organized.
- Know your audience by understanding who they are and what they’re looking for. Think about their experience level, goals, and challenges – this will guide your tone, topic depth, and overall content approach.
- Set content goals that match your capacity. Whether it’s one post a week or two a month, choose a rhythm you can stick to. Consistency builds trust and keeps your blog active without overwhelming you.
- Brainstorm post ideas regularly so you’re never starting from scratch. Keep a list of potential topics based on audience questions, trends, or personal insights to maintain momentum and variety.
- Use a simple editorial calendar to stay organized. A spreadsheet, kanban board, or basic calendar works well – just track the title, publish date, category, and status. Planning a few weeks ahead makes writing easier and more consistent.
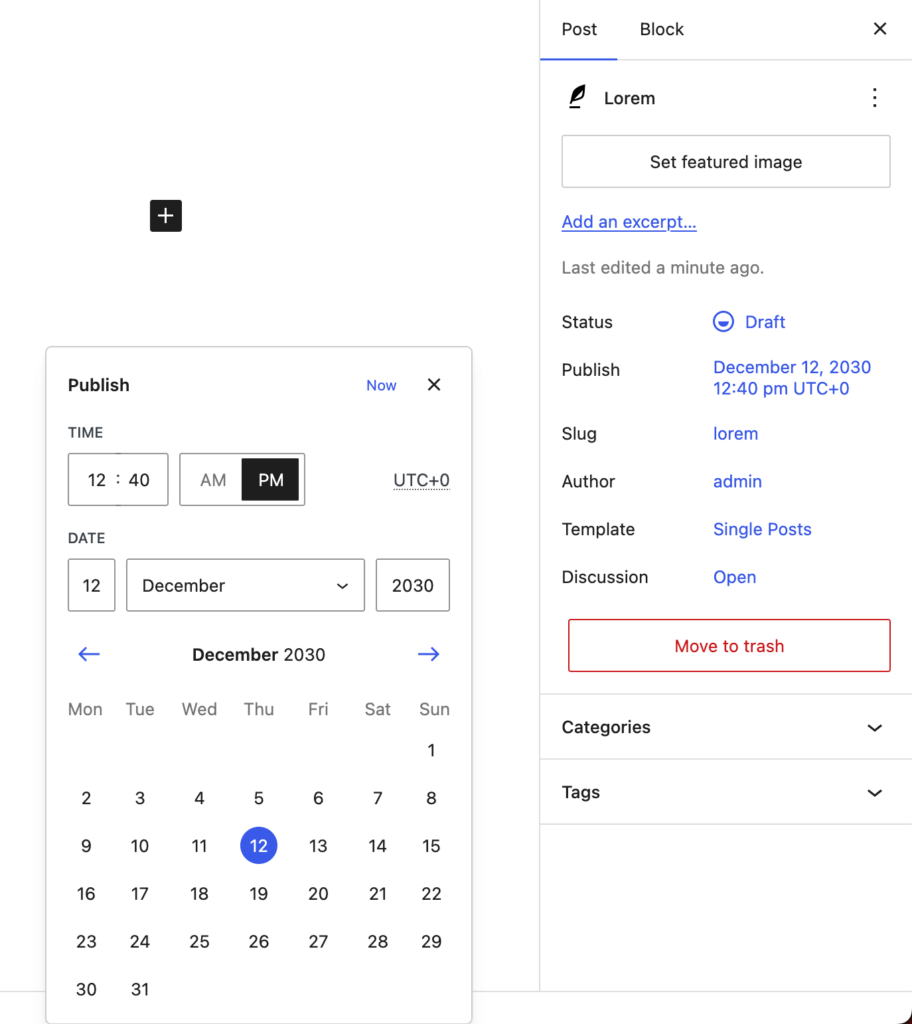
Worried you can’t stick to a schedule? WordPress lets you schedule posts in advance – from mere hours to years if needed – so they go live exactly when you want them to! Just switch to the Post tab in the menu on the left and change the Publish setting from Immediately to whenever you want it to happen.
For example, here’s a post we’ve set to publish on December 12, 2030 at 12:40 a.m. UTC:
Now that you know you can schedule posts way in advance, you can create and keep to an editorial calendar. At minimum, it should include the article title and publish date, but we recommend adding categories, statuses, and additional notes so it still makes sense six months later.
Here’s a simple example of an editorial calendar for a travel blog with a weekly posting schedule:
| Date | Post title | Category | Status | Notes |
| July 20 | 10 Travel Hacks for 2025 | Travel Tips | Drafting | Add photos from last trip |
| July 27 | Rome on a Budget | Budget Travel | Scheduled | Scheduled for 9 AM |
| Aug 3 | What to Pack for Europe | Packing Lists | Idea | Research trending gear |
Growth foundations
Finally, you need to lay the groundwork for growing your blog:
- Set up an email list early, even if your audience is small. Use tools like MailerLite, Mailchimp, or Kit to collect emails through a simple sign-up form or pop-up. This gives you a direct line to your readers and protects your audience from algorithm changes on social platforms.
- Integrate social media to expand your reach and build community. Add social sharing buttons to your posts and link your blog in your profiles. Choose one or two platforms where your audience spends time and focus your energy there.
- Explore basic monetization paths once you have consistent traffic or a loyal niche audience. Start with affiliate links to products you trust, enable display ads using a platform like Google AdSense, or offer your own digital products (like guides or templates).
Next steps for your new WordPress blog
Starting a blog on WordPress.org gives you full control over your site and the freedom to customize it however you want. There are other options for simple blogs, but if you hope to grow an audience and monetize your site, WordPress.org is one of the best options.
Start by selecting and registering a domain name. Choose something that fits the tone of your site and that’s easy for people to remember. Add a theme that matches your brand and install plugins that enhance functionality and user experience; SEO, security, contact forms, social media integration, the works.
And when you’re ready to go live, Liquid Web can help. Our WordPress hosting options configure business-class servers and support plans specifically for WordPress websites.
Click through below to explore all of our WordPress hosting options, or chat with a WordPress expert right now to get answers and advice.
Additional resources
What is WordPress? →
A complete beginner’s guide to WordPress.org
Easy SEO for WordPress →
7 tips for optimizing your site than even a beginner can do
Beginner’s Guide to WordPress themes →
Learn how they work, what to look for, how to choose, and more