How to install Joomla on Linux (AlmaLinux)
Specifically tailored for your Liquid Web server environment, this article is your comprehensive guide to installing Joomla on AlmaLinux. Whether you’re a beginner trying to set up your first website or an experienced developer looking to harness Joomla’s power, this guide will take you through the installation process step-by-step. With Joomla running on your Liquid Web server, you can unlock a world of possibilities for your website’s functionality and design.
Key points found in this article
The reader will gain a better understanding of the following main topics contained in this post:
- What is Joomla?
- Downloading and installing Joomla on AlmaLinux
- Configuring an Apache Virtual Host for Joomla
- Configuring the firewall
- Using Joomla
- Updating Joomla
- Uninstalling Joomla
What is Joomla?
Joomla is a free, popular, open-source content management system (CMS) that allows users to build online apps and websites quickly. What sets Joomla apart from other CMS platforms is its flexibility and extensibility, offering a wide range of features and functionalities through its extensions and templates. Joomla’s user-friendly interface makes it accessible to users of all skill levels, while its active community ensures ongoing support and updates. Joomla’s ability to create dynamic and interactive websites sets it apart from other CMS platforms, making it an excellent choice for people and businesses looking to build a solid online presence.
Prerequisites
Here are the prerequisites for installing Joomla using our instructions:
- Operating system. Ensure that your Liquid Web server is running AlmaLinux 8.
- SSH access. You need root or sudo access to your Liquid Web server to install and configure Joomla.
Once all the prerequisites have been me, you can install Joomla on AlmaLinux following the steps documented in the next sections.
Step #1. Access your Liquid Web server
To access your Liquid Web server via SSH for Joomla installation, follow these steps provided.
1.1. Open the Terminal (Mac/Linux) or Command Prompt (Windows)
To find these applications, you can either go to your system’s applications or search for them in the start menu.
1.2. Connect to your Liquid Web server
Use your server’s IP address or hostname followed by the ssh command. Replace your_server_ip with your server’s IP address or hostname and your_username with the SSH username that Liquid Web provided:
ssh your_username@your_server_ip1.3. Enter your password
You’ll be prompted to enter your SSH password provided by Liquid Web.
1.4. Verify your connection
Once connected, you should see a command prompt indicating that you are now logged in to your Liquid Web server via SSH. You can now proceed with installing Joomla on your Liquid Web server.
Step #2. Update your AlmaLinux system
As a customer of Liquid Web, ensuring your server’s operating system is up to date is crucial for maintaining security and optimizing performance with regard to the Joomla installation. To update the AlmaLinux system, execute the following command:
sudo dnf updateStep #3. Install the LAMP server technology stack
Joomla requires a MySQL database to store data, an Apache HTTP webserver to serve its content online, and PHP to handle its functionality effectively. To install the LAMP (Linux, Apache, MariaDB, PHP) stack on AlmaLinux with Liquid Web servers, follow the steps in the next sections.
3.1. Install Apache
We’ll begin by installing the Apache HTTP Web Server. To install Apache, execute the following command:
sudo dnf install httpdOnce installed, start and enable the Apache service to start on boot:
sudo systemctl start httpd
sudo systemctl enable httpd
To verify the status of the Apache service, execute the following command:
sudo systemctl status httpd3.2. Install MariaDB
Then, we can Install MariaDB. Joomla 5.x requires MariaDB 10.4 or MySQL 8.0.13 as a minimum.
To install MariaDB, first add the MariaDB repository:
sudo tee /etc/yum.repos.d/MariaDB.repo<<EOF
[mariadb]
name = MariaDB
baseurl = http://yum.mariadb.org/10.11/almalinux8-amd64
module_hotfixes=1
gpgkey=https://yum.mariadb.org/RPM-GPG-KEY-MariaDB
gpgcheck=1
EOF
To install MariaDB, execute the following command:
sudo dnf install mariadb-server mariadbTo start the MariaDB service and configure it to execute on boot, execute the following commands:
sudo systemctl start mariadb
sudo systemctl enable mariadb
To verify the status of the MariaDB service, execute the following command:
sudo systemctl status mariadbMariaDB installation is not secure by default. From MariaDB 10.5.2, mysql_secure_installation is the symlink, and mariadb-secure-installation is the binary name. To secure your MariaDB installation, execute the following command and follow the instructions:
sudo mariadb-secure-installationOnce it is finished, restart the MariaDB service to reflect the changes:
sudo systemctl restart mariadb3.3. Install PHP
Joomla does not support PHP version 7.2, currently available in the AlmaLinux repositories. The RPM Repository provided by Remi is the only way to install PHP 8.1. However, please be careful that adding other repositories could compromise system stability and security. We advise you to be cautious and investigate any repositories you add.
To install the EPEL (Extra Packages for Enterprise Linux) release, execute the following command:
sudo dnf install epel-releaseThen, add the remi repositories by executing the following command:
sudo dnf install https://rpms.remirepo.net/enterprise/remi-release-8.rpmNext, execute the following command to update repositories:
sudo dnf updateOnce it is finished, execute the following command to reset the PHP module to its default state:
sudo dnf module reset phpFinally, execute the following commands to enable the Remi PHP 8.1 module and install PHP and related dependencies:
sudo dnf module enable php:remi-8.1
sudo dnf install php php-curl php-bcmath php-gd php-soap php-zip php-mbstring php-mysqlnd php-xml php-intl php-zip
To verify the installed PHP version, execute the following command:
php -v3.4. Create the database
Once you log in to the MariaDB shell, execute the following command:
mariadbTo create a database and database user, execute the following commands. Replace joomla_password with a strong and secure password and joomla_db and joomla_user with your database details:
CREATE DATABASE joomla_db;
CREATE USER 'joomla_user'@'localhost' IDENTIFIED BY 'joomla_password';
Then, execute the following command to grant and flush the database user all privileges:
GRANT ALL ON joomla_db.* TO 'joomla_user'@'localhost';
FLUSH PRIVILEGES;
Finally, execute the following command to exit from the MySQL command prompt:
exitStep #4. Download and install Joomla
Joomla is not included in the default repository. The latest version of Joomla needs to be manually downloaded from the official Joomla website. As of this writing, the latest version of Joomla is 5.0.3.
First, change the directory to webroot directory /var/www/html/:
cd /var/www/html/4.1. Download Joomla
Then, execute the following command to download Joomla:
sudo wget https://downloads.joomla.org/cms/joomla5/5-0-3/Joomla_5-0-3-Stable-Full_Package.zipHere is the output:
[root@Joomla-AL ~]# cd /var/www/html/
[root@Joomla-AL html]# sudo wget https://downloads.joomla.org/cms/joomla5/5-0-3/Joomla_5-0-3-Stable-Full_Package.zip
--2024-03-17 06:07:13--  https://downloads.joomla.org/cms/joomla5/5-0-3/Joomla_5-0-3-Stable-Full_Package.zip
Resolving downloads.joomla.org (downloads.joomla.org)... 104.26.15.15, 104.26.14.15, 172.67.74.86, ...
Connecting to downloads.joomla.org (downloads.joomla.org)|104.26.15.15|:443... connected.
-----
-----
HTTP request sent, awaiting response... 200 OK
Length: 28423331 (27M) [application/zip]
Saving to: 'Joomla_5-0-3-Stable-Full_Package.zip'

Joomla_5-0-3-Stable-Full_Package.zip                        100%[=========================================================================================================================================>]  27.11M  18.7MB/s    in 1.4s

2024-03-17 06:07:15 (18.7 MB/s) - 'Joomla_5-0-3-Stable-Full_Package.zip' saved [28423331/28423331]
4.2. Extract the file
Once Joomla is downloaded, execute the following command to extract the file:
sudo unzip Joomla_5-0-3-Stable-Full_Package.zipThen, remove the downloaded package:
sudo rm -rf Joomla_5-0-3-Stable-Full_Package.zipStep #5. Configure Apache Virtual Host for Joomla
Now you can configure the Apache Virtual Host for Joomla.
5.1. Set the permissions for the files and folders
To set the files and folder permissions, execute the following commands:
sudo chown -R apache:apache /var/www/html/
sudo chmod -R 775 /var/www/html/
5.2. Create an Apache Virtual Host configuration file
To access the Joomla admin panel using the domain name, we need to create an Apache Virtual Host configuration file:
sudo nano /etc/httpd/conf.d/your-joomla-domain.confAdd the following information for your configuration to the file, replacing your-joomla-domain with your actual domain and /var/www/html with your Joomla directory:
<VirtualHost *:80>
    ServerName your-joomla-domain.com
    DocumentRoot /var/www/html
    <Directory /var/www/html>
         Options FollowSymlinks
         AllowOverride All
         Require all granted
    </Directory>

    ErrorLog /var/log/httpd/your-joomla-domain.com_error.log
    CustomLog /var/log/httpd/your-joomla-domain.com.log combined
</VirtualHost>
After making changes, press the Ctrl + X keys to exit, then press the Y key to confirm saving, and finally press the Enter key to confirm the file name.
Then, check the syntax of the Apache configuration file by executing the following command:
sudo httpd -tHere is the output:
[root@Joomla-AL ~]# sudo httpd -t
Syntax OK
5.3. Restart Apache
Then you can restart Apache to reflect the changes:
sudo systemctl restart httpdStep #6. Configure the firewall
To permit HTTP and HTTPS web traffic to pass through the firewall, execute the following commands:
sudo firewall-cmd --zone=public --permanent --add-service=http
sudo firewall-cmd --zone=public --permanent --add-service=https
Then, reload the firewall rules to apply any changes made by executing the following command.
If your server has a cPanel or Plesk control panel, you can install Joomla for your domain using the Softaculous Apps Installer for cPanel or the Applications Tab in Plesk.
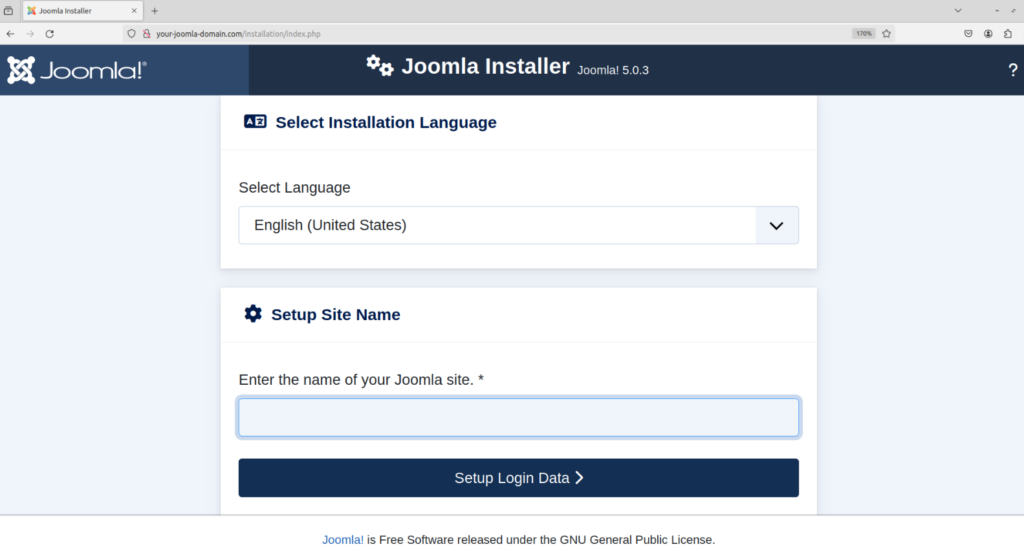
Step #7. Access the web interface
To access the Joomla web interface, open a web browser and navigate to your Joomla site using your domain name (for example, http://your-joomla-domain.com). You will see the screen below:
You can now proceed with the Joomla installation process, as mentioned below.
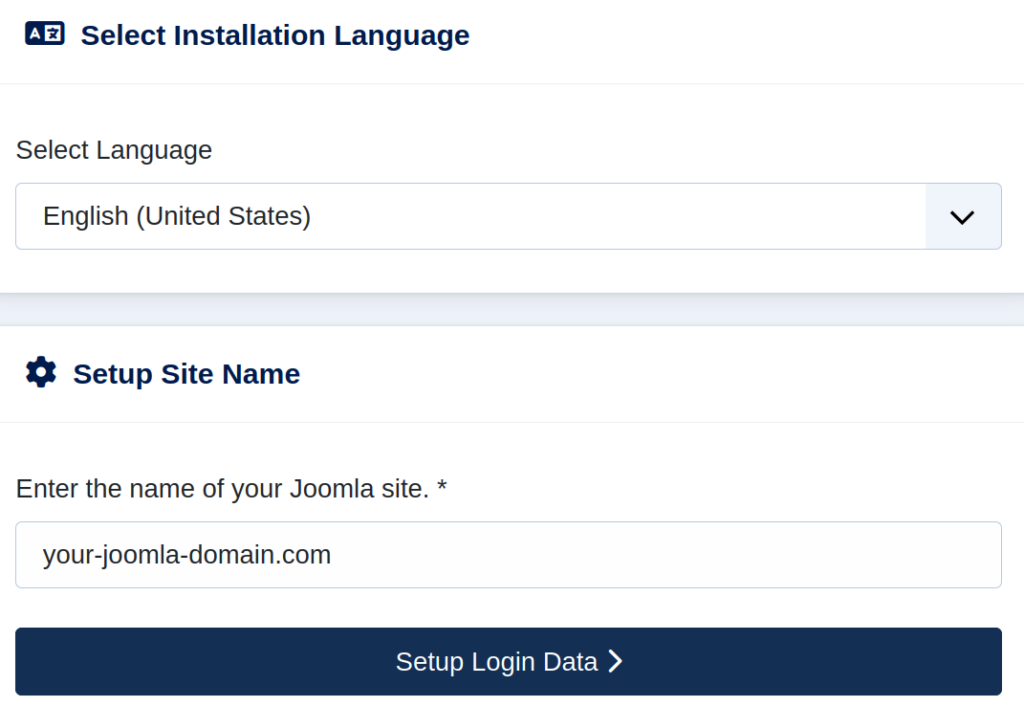
7.1. Select installation language and enter domain name
After choosing your preferred language and entering your domain name, click the Setup Login Data button:
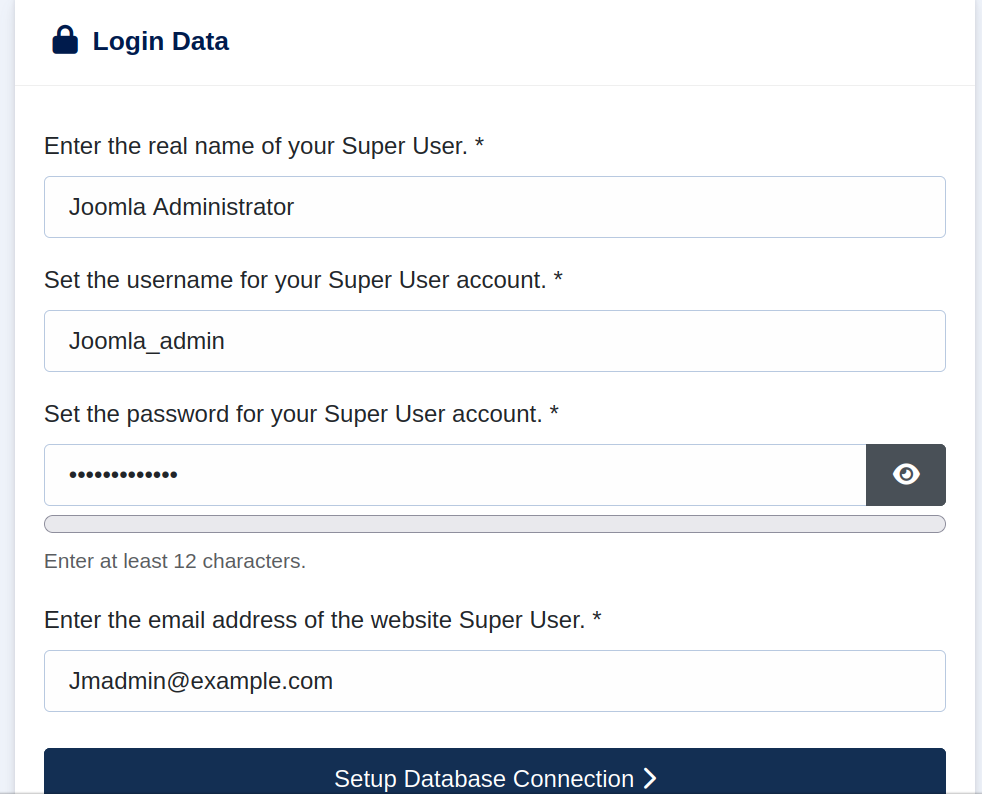
7.1. Establish the Super User account
Create a Super User, set credentials, and then click the Setup Database Connection button:
7.2. Configure the database and install Joomla
Select the database type, provide your database credentials, set the Connection Encryption value, and then click Install Joomla:

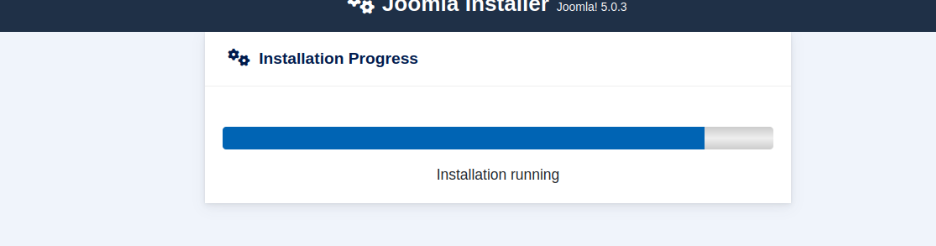
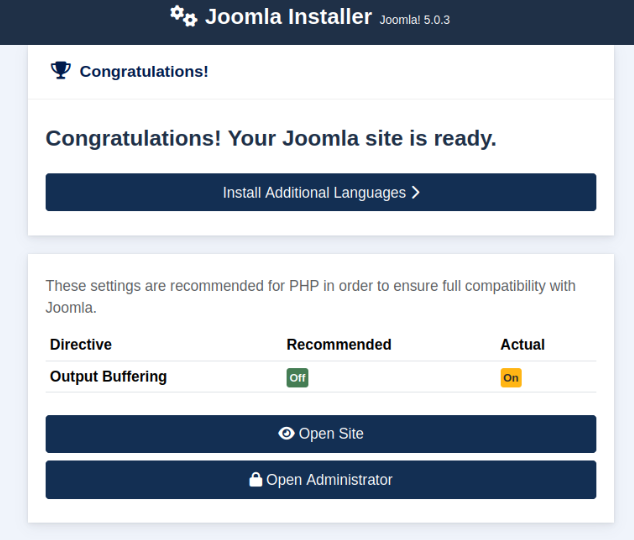
The screen that appears after clicking on Install Joomla is as follows:
After installation is finished, the screen that follows will appear:
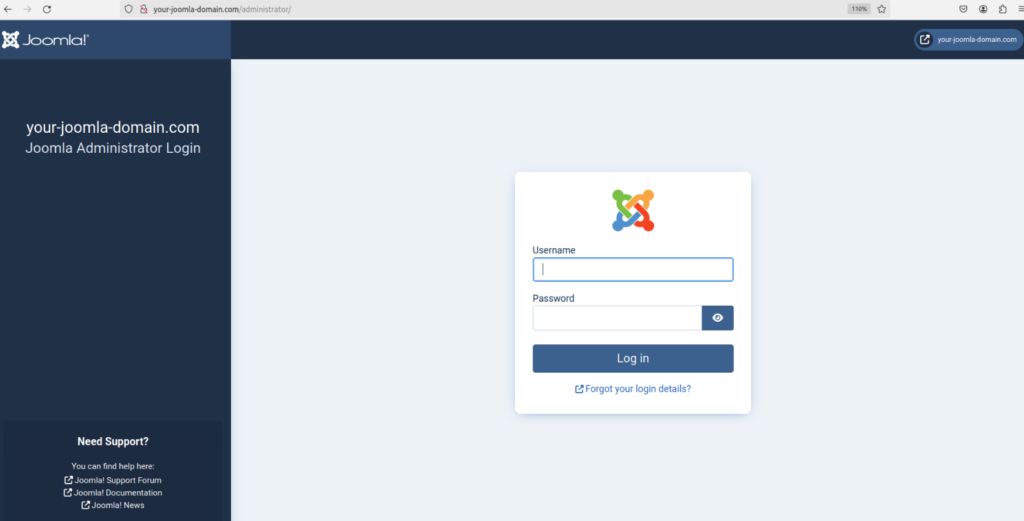
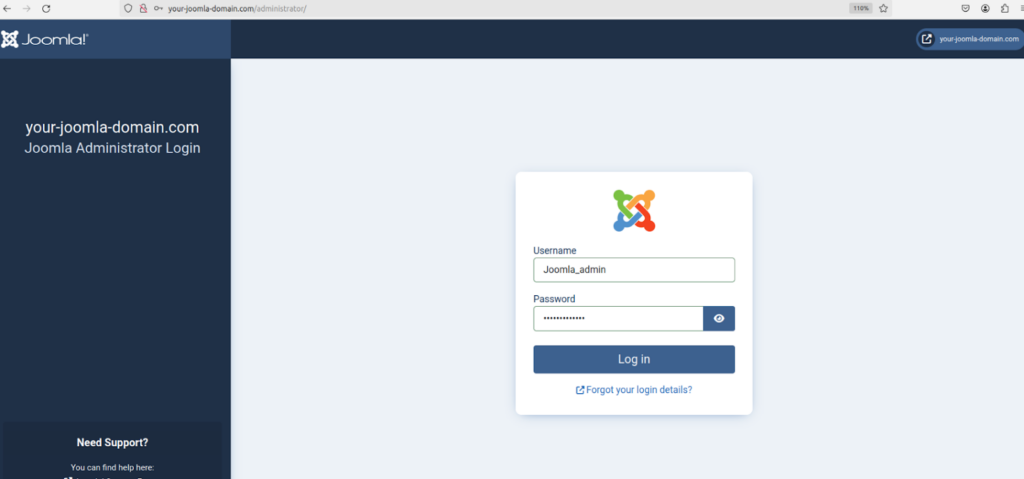
7.3 Test Joomla administrator login screen
Then, click Open Administrator to view the Joomla administrator login screen:
How to use Joomla
Once Joomla is installed, you can log in to the Joomla administrator dashboard by navigating to http://your-joomla-domain.com/administrator and entering the username and password you set during installation:
The Joomla administrator dashboard looks as follows:

You can manage your website’s content, design, and functionality from the dashboard.
How to update Joomla
Make sure you back up the files and database on your Joomla website before making any updates. You can update Joomla via the command line or the Joomla admin panel.
Updating Joomla via the command line
To update Joomla via the command line, follow these steps:
1. Log into your Liquid Web server via SSH.
2. Create a backup of your Joomla site files and database.
3. To check for available updates, execute the following command:
php cli/joomla.php core:check-updates
For example, you will receive the output about the Joomla 5.0.3 update as follows if you are using Joomla 5.0.0:
Checking for updates...
Update found: Joomla 5.0.3 is available
4. Download the latest Joomla update package to a temporary location or a directory outside the Joomla installation and extract the updated package.
5. To prevent users from accessing the site during the update, you can enable Maintenance Mode. Modify the configuration.php file in your Joomla root directory:
sed -i "s/\$config\['offline'\] = '0';/\$config\['offline'\] = '1';/g" <Joomla Directory>/configuration.php
6. To update Joomla to the latest version, execute the following command:
php cli/joomla.php core:updateWhen you update Joomla 5.0.0 to 5.0.3, you will see the following output:
Updating Joomla to version 5.0.3...
Joomla updated successfully to version 5.0.3
7. To clear Joomla’s cache, execute the following command:
php cli/joomla.php cache:clear
8. To disable the Maintenance Mode, modify the configuration.php file again:
sed -i "s/\$config\['offline'\] = '1';/\$config\['offline'\] = '0';/g" <Joomla Directory>/configuration.php9. Visit your Joomla site to verify that the update to version 5.0.3 was successful and that everything is working as expected.
Remember to replace <Joomla Directory> with the actual path to your Joomla installation directory. The Joomla directory’s contents should remain intact during the update process, as you are extracting the new Joomla package to a temporary directory or a directory outside the Joomla installation and updating Joomla from there. Once the Joomla update is successful, you can delete the temporary directory where you uploaded the Joomla package.
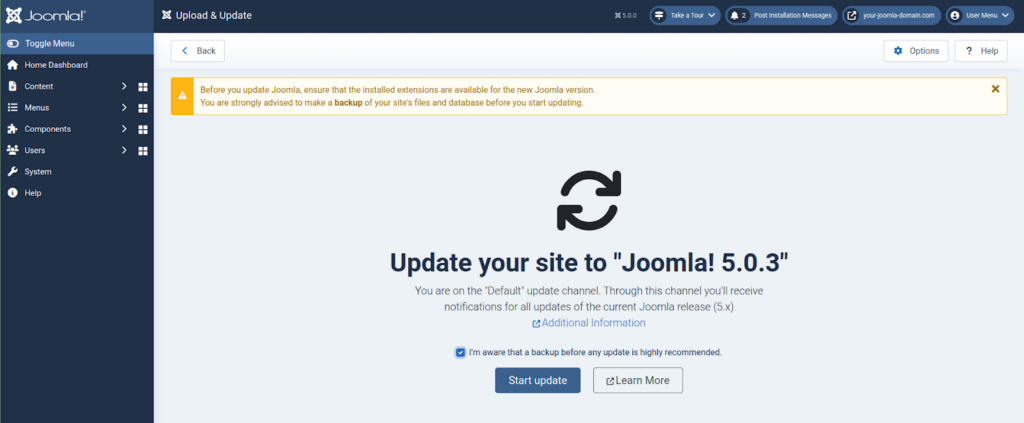
Updating Joomla via the admin panel
To update Joomla via the admin pane, follow these steps:
1. Log into your Joomla admin panel.
2. Go to System > Under Update, and click Joomla.
3. Check the checkbox with the label “I’m aware that a backup before any update is highly recommended.”
4. Then, click the Start Update button.
For example, you will receive the message about the Joomla 5.0.3 update as follows if you are using Joomla 5.0.0:
How to uninstall Joomla
The uninstall process is straightforward using these steps:
1. To remove Joomla Files, execute the following command:
rm -rf /var/www/html/your-joomla-directory/2. To remove the database, follow the below steps:
2.1. Access the database with a tool such as phpMyAdmin or via the MySQL command line.
2.2. Drop the Joomla database:
DROP DATABASE your_joomla_database;
2.3. Remove database user:
DROP USER 'joomla_user'@'localhost';2.4. Remove any configuration files or settings related to Joomla, if necessary.
2.5. If you configured a virtual host for Joomla, remove the configuration file:
rm -rf /etc/httpd/conf.d/your-joomla-domain.confWarning: The rm -rf command should be used carefully to remove configuration files since misuse could cause permanent loss of critical system data and possibly harm your system.
2.6. Restart Apache to reflect the changes.
With regard to all the steps above, make sure to replace /var/www/html/your-joomla-directory/ with the actual path to your Joomla installation directory and your_joomla_database and joomla_user with the name of your Joomla database and database user.
Preparing for your Joomla installation on AlmaLinux
Installing Joomla on AlmaLinux with Liquid Web servers is a straightforward process that can be completed quickly and efficiently. This article has detailed instructions on installing Joomla so that you can establish your website and get it running quickly. Following these steps, you can use Joomla’s powerful functionality to create a website that meets your requirements.
When it comes to hosting Joomla on AlmaLinux, purchasing Liquid Web hosting plans is a wise choice. Liquid Web’s hosting plans are optimized for Joomla, ensuring your website runs smoothly and efficiently. With high-performance servers, 24/7 support, and robust security measures, Liquid Web hosting plans provide the reliability and performance you need to succeed. Choosing Liquid Web hosting plans for Joomla installation on AlmaLinux is a wise investment to help you create a successful website.