Getting Started with WHM and cPanel
Control your server without being a command line guru with WHM. Even if you only host one website on your server, you can make many server-level adjustments keep your website running smoothly. You also use WHM to manage specific accounts on cPanel, your domain-level management system.
Logging into WHM for the First Time
When you created your server, a WHM account was automatically created. The easiest way to log into WHM is through your Liquid Web account.
- Log into your Liquid Web account.
- Click on My Servers in the left side menu.

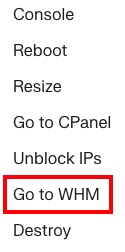
- Find the server that you want to access from the list of servers and click the three dot menu to the right of its name.

- From the menu, click Go to WHM.


Tip: |
You can also log into WHM by going directly to the login screen from your browser. Enter your domain name with /whm at the end in your browser bar, and press Enter to be directed to your WHM login page. It should look something like this:mysite.com/whm Remember to replace “mysite.com” with your domain name. |
Navigating the WHM Interface
After you log into WHM, you’ll see a long list of navigation links to the left and navigation tiles in the middle of your screen. Clicking on the left navigation links will open drop-down menus and change the navigation tiles in the center of the screen.
You can also navigate WHM by using the search bar on the top left of the screen. It’s often faster to use the search bar than to click the navigation buttons. Search results show up immediately in the left-hand navigation as you type.
Important WHM Features
The first time you log into WHM, the list of options and features can be intimidating. Many of the features, however, are for advanced users or are more easily managed elsewhere. Let’s break down the most useful sections of WHM as you start to manage your server and create websites.
- Change Root Password
- Backup Configuration
- List Accounts
- Create a New Account
- ConfigServer Security & Firewall
- Generate an SSL Certificate and Signing Request
Change Root Password
Change Root Password is under Server Configuration in the left-hand navigation. Or, search for “Change Root Password” in the search bar. Click on Change Root Password to open the configuration.
What does it mean to change the root password? The root password is your main server password. It will change your login credentials for WHM. If you log into your server via command line as root, you’ll also use your new password then. You might want to change your root password if someone no longer needs access to your server or because your security policy requires periodic password changes.
Changing your root password is straightforward:
- Enter a new password and then confirm your new password.
- When the passwords match, click Change Password.

The next time you log into WHM, you’ll use your new password.
Password Security: |
| A strong password uses a mix of upper- and lower-case letters, numbers, and special characters. Using words found in the dictionary weakens your password. It’s vital to use a strong password to secure your server. If someone guesses your password, they could delete your entire website and even corrupt any backups on your server. Learn more in our article: Best Practice: Creating a Secure Password |
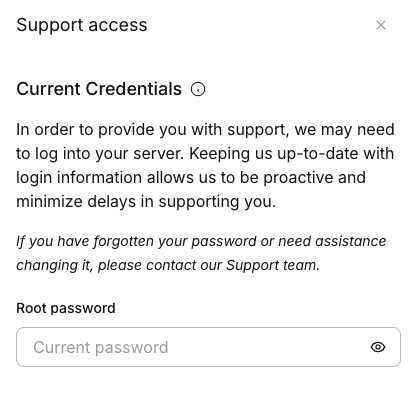
Reporting Your Current Password
It’s important to keep your root password secure. Don’t tell people your password or write it down next to your keyboard. If you have any problems with your server, Liquid Web needs your root password to log into your server to help you. Whenever you change your root password, use the Manage interface to securely tell Liquid Web your new password.
- Log into your Liquid Web account.
- Click on My Servers in the left side menu.
- Click on the name of the server for which you need to update records.
- Scroll down to the Server Credentials block and click on Update our records.

- From the slide out, you can update the root password, alternative usernames and passwords, ssh port number, add a WHM access key, or leave additional specials instructions. Click Submit to save your changes.


Liquid Web takes your security very seriously. We only use your root password when you need help and we’ve authenticated your identity.
Backup Configuration
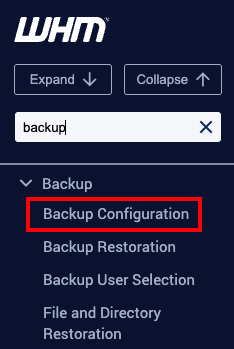
Backup Configuration is under Backup in the left-hand navigation. Or, search for “Backup” in the search bar. Then, click on Backup Configuration.
Backups are necessary in case something happens to your website or your server. Think of it as insurance for your website. When you configure backups in WHM, you are backing up your cPanel account(s). Backing up your cPanel accounts can help you if something goes wrong, but they are best used as part of a backup strategy. A backup strategy might include periodically backing up your server files to a local computer, a secondary server at Liquid Web, a server not at Liquid Web, or a combination of any of these options. You backup strategy will depend on what you use your server for. No matter what, we recommend setting up backups through WHM.
In a nutshell, the Backup Configuration page is where you decide what you want backed up and how often. When you are ready to configure your backups, read Configuring cPanel Backups in WHM.
List Accounts
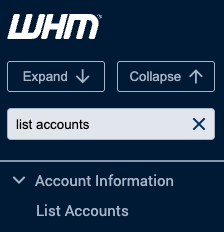
List Accounts is under Account Information in the left-hand navigation. Or, search for “List” in the search bar. Then, click on List Accounts.
The List Accounts section of WHM lists all of your active cPanel accounts. You can easily see which domains already have cPanel accounts. Access any cPanel account by clicking on the orange cPanel logo next to a domain name.
If you click the [+] to the left of a domain name, you can modify a cPanel account. This includes changing the password, changing the IP address for the domain, modifying the account’s settings, and deleting the account.
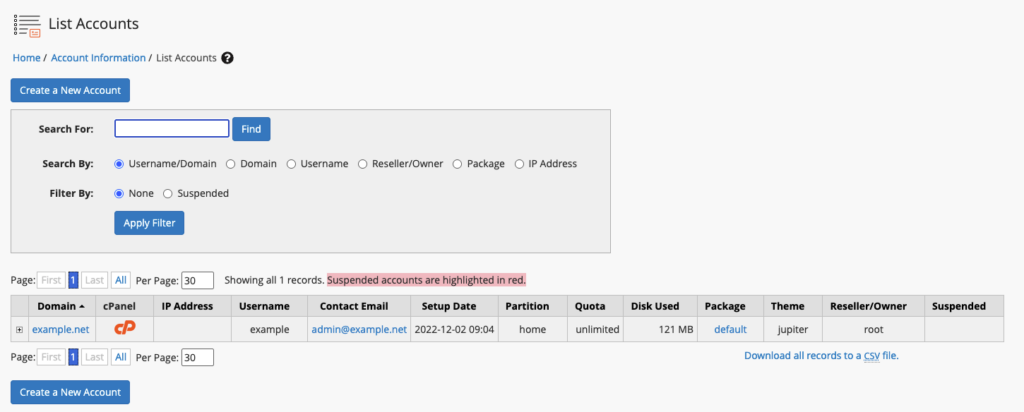
The List Accounts section is useful for quickly logging into cPanel accounts: many of the other settings are for advanced users.
Tip: |
You can also log into cPanel for a domain by going directly to the login screen from your browser. Just enter your domain name and /cpanel at the end in your browser bar and press Enter to be directed to the cPanel login screen. It should look something like this:mysite.com/cpanel Remember to replace “mysite.com” with your domain name. |
Create a New Account
Create a New Account is under Account Functions in the left-hand navigation. Or, search for “Create” in the search bar. Then, click on Create a New Account.
WHM is great at managing server-level tasks. To manage each individual domain, however, you use cPanel. With cPanel, you can create email addresses, install services like WordPress, and control other aspects of your domain. Creating a cPanel User Account has a full walkthrough of this process.
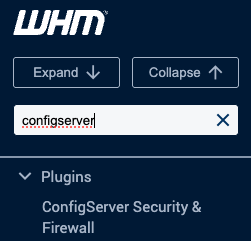
ConfigServer Security & Firewall
ConfigServer Security & Firewall is under Plugins in the left-hand navigation. Or, search for “Firewall” in the search bar. Then, click on ConfigServer Security & Firewall.
ConfigServer Security & Firewall (CSF) is cool because it takes everything you’d see in a command line firewall configuration file and breaks it up to be more easily editable. Server firewalls are important because they help protect your server from outside threats.
If you look around at the ConfigServer Security & Firewall section, you’ll see many different options. Editing your firewall configuration files is an advanced technique, but it’s good to know you have the capability! The most important feature in CSF is blocking and unblocking IP addresses to increase your site’s security. (You can also unblock your IP address in your Liquid Web account.)
Another important part of your CSF configuration is the Firewall port configuration. Ports are like tiny holes in your firewall that let certain things, like email, reach your server. It’s important to have the ports open that you need, but not to leave extra ports open. Having extra ports open leaves your server vulnerable. The ports you’ll need for normal services are already open on your server, and any other ports are closed. Services that require opening other ports will have specific instructions on which ports to open.
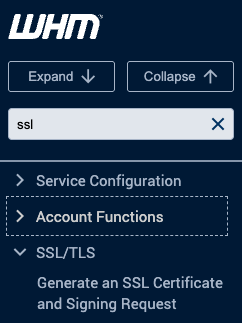
Generate an SSL Certificate and Signing Request
Generate an SSL Certificate and Signing Request is under SSL/TLS in the left-hand navigation. Or, search for “SSL” in the search bar. Then, click on Generate an SSL Certificate and Signing Request.
SSL certificates use encryption to make your internet communications more secure. When you visit a website, your browser reads the site’s SSL certificate to make sure the site is legitimate. An SSL certificate is made up of a few different parts, including information about the website and a seal of approval from a certificate authority. A certificate authority is a third party vendor who is trusted to verify website identity.
SSL certificates are very important for ecommerce websites: when you see “https://” instead of “http://,” you know you’re visiting a website with a valid SSL certificate and it is safer to share your payment and other personal information.
Many people install SSL certificates on their domains for peace of mind. It’s not difficult to install your own SSL certificate, and logging into your Liquid Web account will show you the current cost of an SSL certificate (which depends on the number of years you purchase) and help you order one. Ordering an SSL Certificate is a great resource to get started.