journalctl Command in Linux with Examples
Last Updated :
18 Nov, 2025
journalctl is a Linux command used to view and manage system logs maintained by the systemd-journald service. It provides a centralized and efficient way to access and analyze log data.
- Displays system, service, and kernel logs in a structured format.
- Helps in monitoring and troubleshooting system issues.
- Stores logs in a binary format for better performance and querying.
- Commonly used in systemd-based distributions like Ubuntu, Debian, and Kali Linux.
Let us consider an example to display all logs by journalctl command:
Command:
journalctl
Output:
 Display all Logs
- This command will display the recent log messages from all units in reverse chronological order, starting from the most recent entries.
Syntax:
journalctl [options] [unit]
Here,
- [options] = The various command-line options available to customize the output.
- [unit] = The specific system unit or log source to query. If no unit is specified, `journalctl` will display the message from all available units.
Working with journalctl command
Given below is the working of the journalctl command in Linux along with practical examples for better understanding.
1. Reversing the log order
- To reverse the order or to display the new entries first.
Command:
journalctl -r
Output:
 Reversing Logs
- This command displays logs in reverse chronological order, showing the most recent entries at the top.
2. Limiting the number of log entries
If you only want to display a specific number of log entries, you can use the -n option followed by the desired number
journalctl -n 2
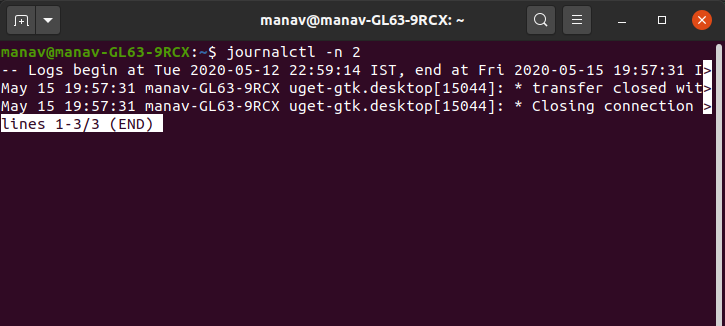 Limiting the number
 This will display just 2 log entries.
3. Filtering logs by keyword
To retrieve log entries containing a specific keyword or phrase, you can use the grep command in combination with journalctl.
journalctl | grep Centaur
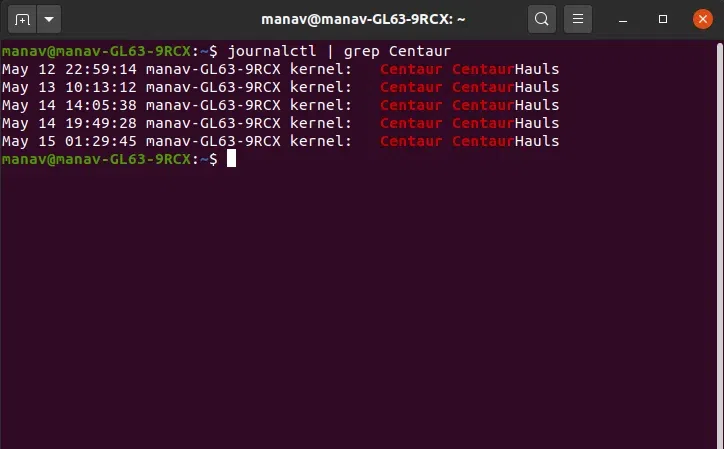 Filtering Logs by keyword
 This will display all the entries containing the word Centaur in them.
4. View Logs for a Specific Service
- To display logs for a specific systemd unit or service:
Command:
sudo journalctl -u apache2
Output:
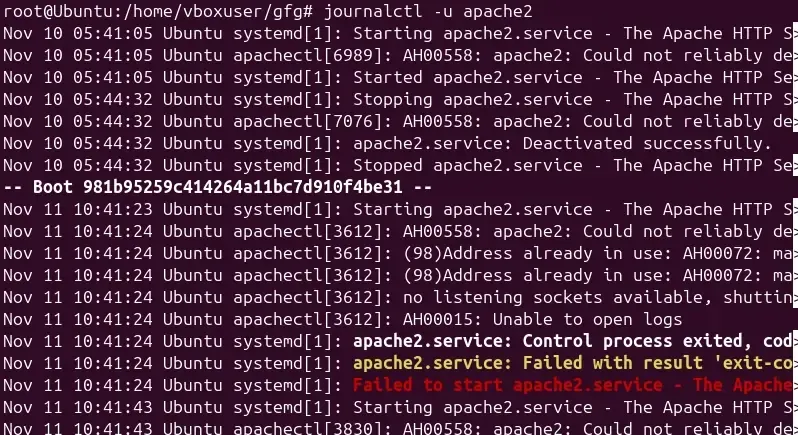
- Shows complete log history for apache2 service from all boot sessions
- Displays timestamps, process IDs, and detailed messages about service starts, stops, and errors
- Useful for tracking service behavior over time and diagnosing recurring issues
You can also check recent logs only:
Command:
sudo journalctl -u apache2 -n 20
Output:
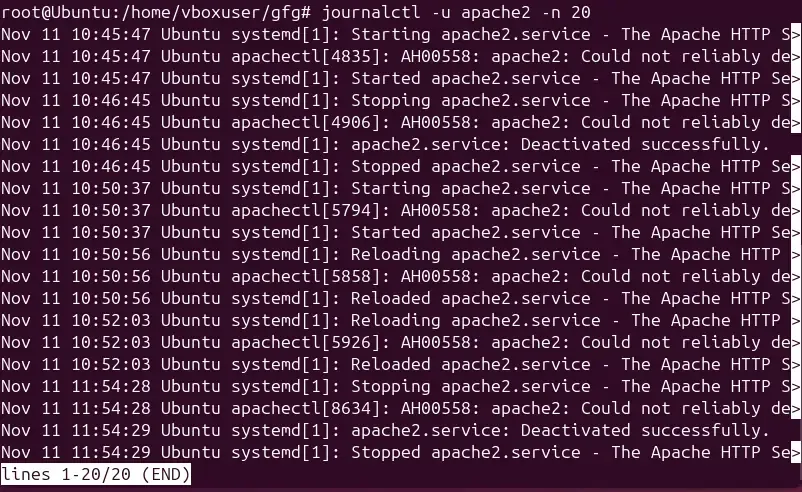
- Displays only the last 20 log entries for apache2 service
- Limits output to most recent events, making it easier to check latest activity
- Combines service filtering with line limit for quick troubleshooting
Options of journalctl Command in Linux
The journalctl command provides several useful options to refine log queries and retrieve specific information. Below are some commonly used options with examples and sample outputs
1. Filtering logs by priority level
- To display log entries based on their priority level, you can use the -p option followed by the desired level (e.g., emerg, alert, crit, err, warning, notice, info, or debug). For instance
Command:
journalctl -p warning
Output:
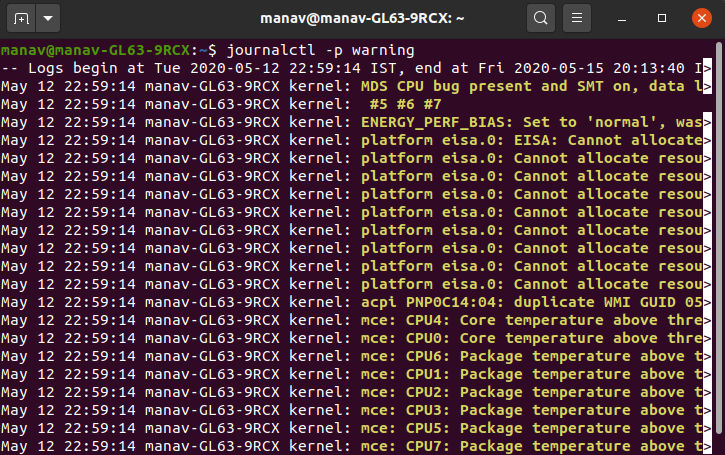 Filtering logs by priorty
- It displays all log entries with priority as a warning.
- You can change how logs are displayed using the -o option. For example, use the verbose mode to show detailed log information.
journalctl -o verbose
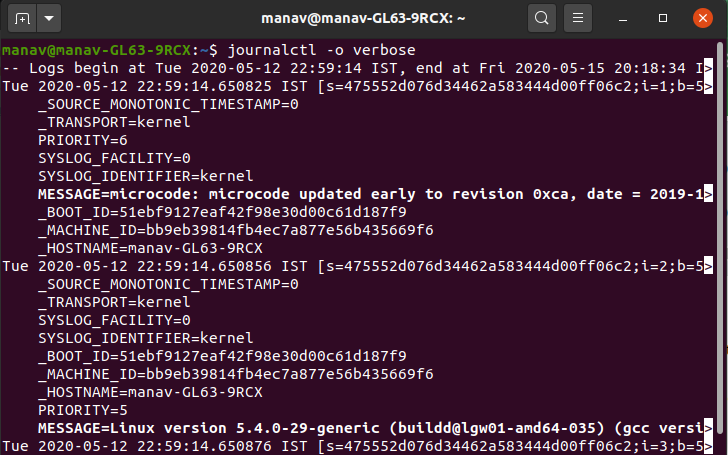 customizing output
- Displays log entries with maximum detail, showing all fields and metadata for each record
- Includes detailed information like timestamps, PIDs, hostnames, and internal journal fields
- Helpful when deep analysis is needed to understand complete log context
3. Listing system boots
- To view information about previous system boots, you can use the --list-boots option.
journalctl --list-boots
 listning system boots
- Lists all system boot sessions with boot IDs, dates, and times
- Shows boot reference numbers (0 for current boot, negative numbers for previous boots)
- Enables viewing logs from specific past boots using their boot ID
4. Accessing help documentation
- To access the journalctl command's help section, you can use the --help option.
journalctl --help
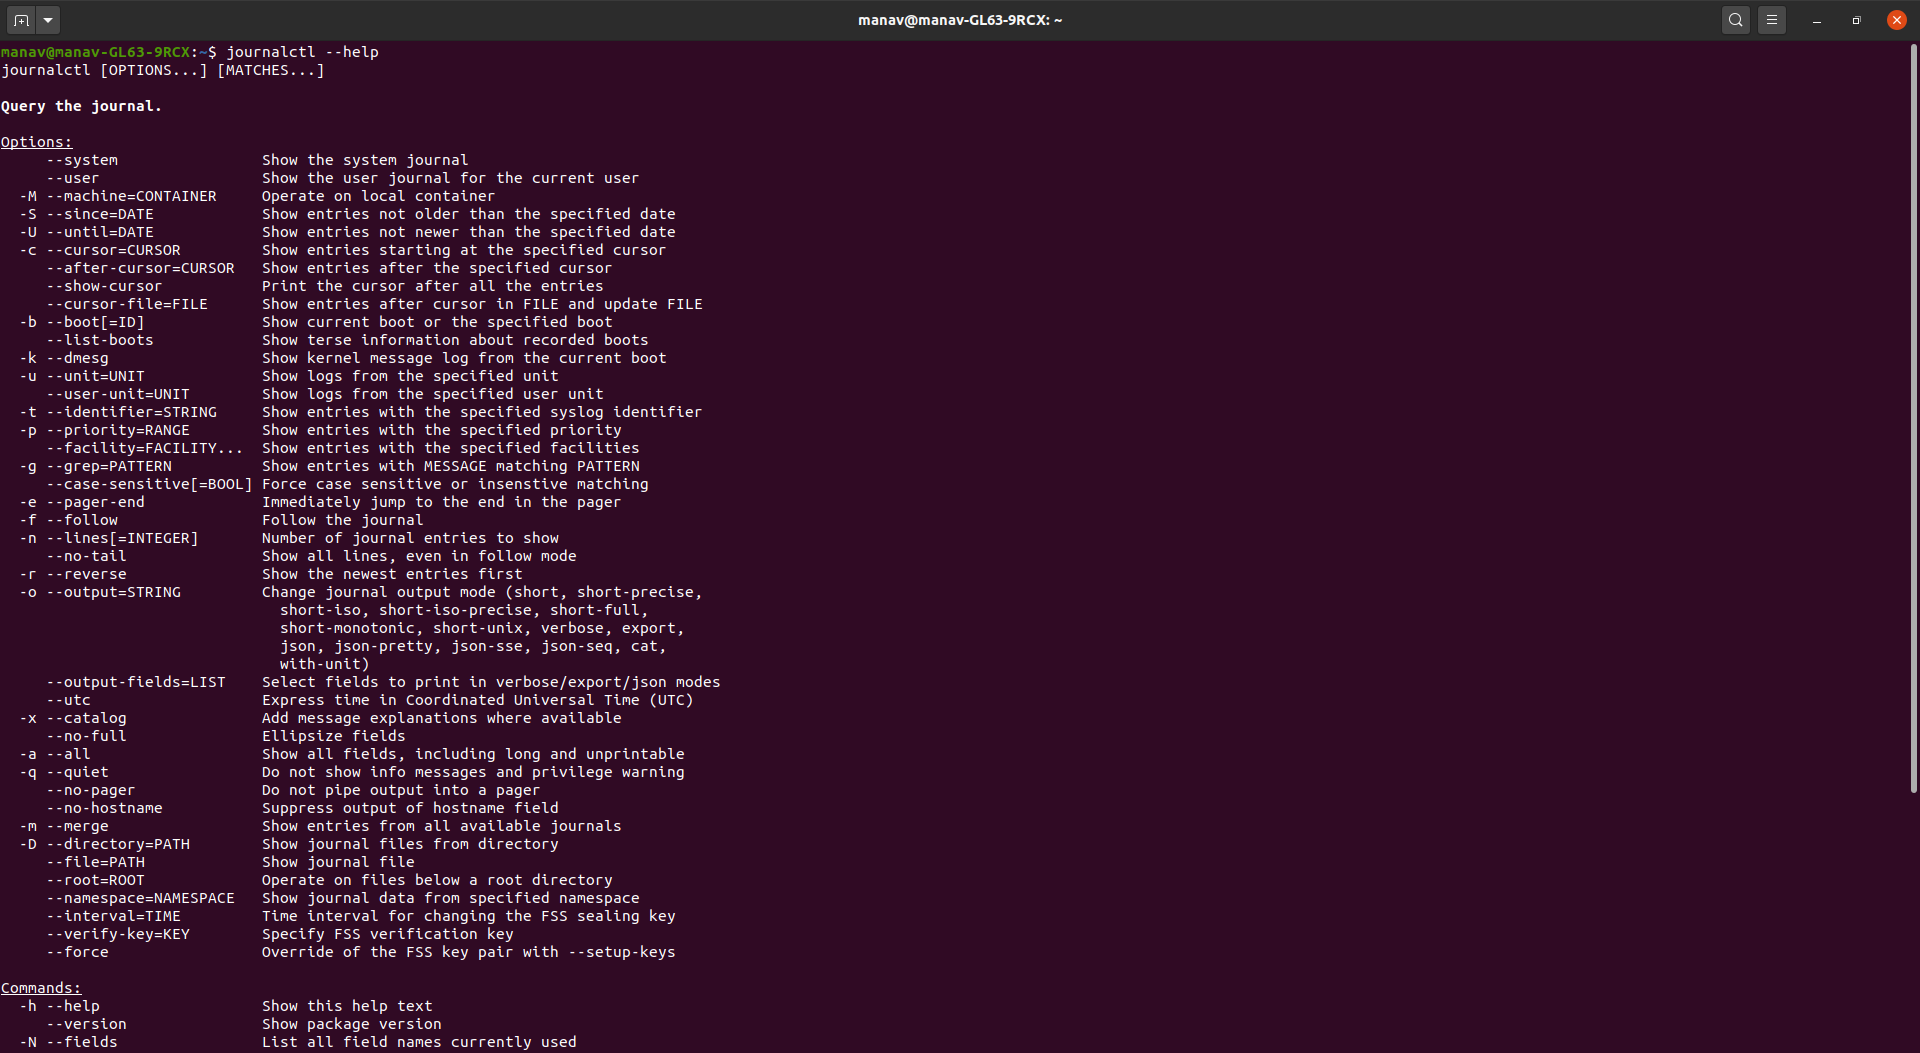 Accessing Help
- This command displays detailed information about the command's usage, options, and functionalities.
Setting the System Time
To set the system time using timedatectl and view the changes with journalctl, follow these steps:
sudo timedatectl set-time 'YYYY-MM-DD HH:MM:SS'
timedatectl status
journalctl --since "YYYY-MM-DD HH:MM:SS" --until "YYYY-MM-DD HH:MM:SS"
Replace YYYY-MM-DD HH:MM:SS with the appropriate time range.
Example:
Here is and example to set the time step by step in Linux
Step 1: Set the System Time
Command:
sudo timedatectl set-time '2025-11-11 10:45:00'
Output:
(no output — means the command succeeded)
- Your system clock is now manually updated.
Step 2: Verify the Change
Check the current system time:
timedatectl status
Output:
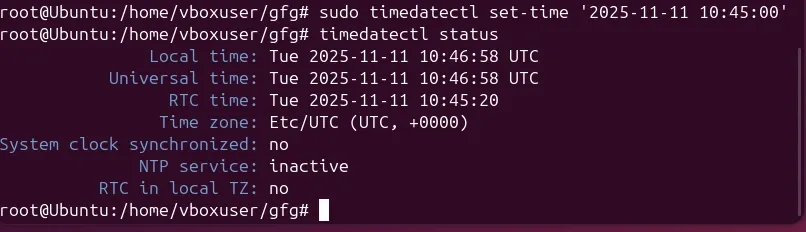
- The line “NTP service: inactive” confirms that automatic time sync is disabled and your manual time is applied.
Explore
Getting Started with Linux
Installation with Linux
Linux Commands
Linux File System
Linux Kernel
Linux Networking Tools
Linux Process
Linux Firewall
Shell Scripting & Bash Scripting
Linux Administrator System