
If you’re building an online course platform, you need a way to organize content hierarchically: courses contain modules, modules contain lessons, lessons contain videos etc. WordPress hierarchies, categories and tags aren’t really built for this.
That’s where BricksMembers Content Structures come in.
This guide explains what structures are, why they’re better than categories, and how to use them to organize your membership content.
What Are Content Structures?
Content Structures let you organize posts hierarchically with move-buttons simplicity.
Example structure:
Course: WordPress Mastery
├── Module 1: Getting Started
│   ├── Lesson 1.1: Installing WordPress
│   ├── Lesson 1.2: Choosing a Theme
│   └── Lesson 1.3: Essential Plugins
├── Module 2: Building Pages
│   ├── Lesson 2.1: Introduction to Bricks
│   ├── Lesson 2.2: Creating Your First Page
│   └── Lesson 2.3: Responsive Design
└── Module 3: Advanced Topics
    ├── Lesson 3.1: Custom Post Types
    └── Lesson 3.2: Dynamic Data
Each item is a regular WordPress post. The structure defines the hierarchy and order.
Why Use Structures Instead of Categories?
WordPress Categories: Flat Organization
Categories are flat. A post can be in multiple categories, but there’s no inherent hierarchy or order.
Problems with categories:
- ❌ No clear parent-child relationships between posts (only between categories)
- ❌ Can’t easily reorder (no arrow buttons or visual controls)
- ❌ Hard to navigate per scope (no “next lesson” or “previous lesson” within course, module etc.)
- ❌ Bricks Query Loops etc. reach their limits quickly
WordPress Hierarchical Posts: Limited and Inflexible
WordPress supports hierarchical posts (like Pages), but this approach has significant limitations for course content:
Problems with hierarchical posts:
- ❌ No menu order control: Hierarchical posts are sorted alphabetically by title or by date, not by a custom sequence
- ❌ No simple reordering: You can’t easily reorder child posts within a parent with arrow buttons or visual controls
- ❌ Limited depth: Navigating deep hierarchies (Course → Module → Lesson → Video) becomes unwieldy in the admin
- ❌ No flexible level naming: Can’t customize what each level is called (e.g., “Module” vs “Section”)
- ❌ Can’t have multiple structures: A post can only have one parent, so you can’t organize the same content in different ways
- ❌ Performance issues: Querying hierarchical relationships becomes slow with many posts
Example problem: If you want Lesson 1.1 to come before Lesson 1.2, you’d have to name them “01 – Lesson 1.1” and “02 – Lesson 1.2” or manually set menu_order values in the database. There’s no simple interface with arrow buttons to move items up and down. There are plugins for that. But well, we want to reduce the amount of plugins as much as possible, right?
BricksMembers Structures: Purpose-Built for Courses
Structures are hierarchical. Each post has a specific parent and position in the sequence.
Benefits of structures:
- ✅ Guaranteed order (you control the sequence)
- ✅ Parent-child relationships between posts (lessons belong to modules etc.)
- ✅ Easy reordering with arrow buttons (move up/down) interface
- ✅ Easy navigation (next/previous within the structure)
- ✅ Progress tracking per structure
- ✅ Drip content based on structure position
Creating Your First Structure
Let’s create a simple course structure.
Step 1: Create the Structure
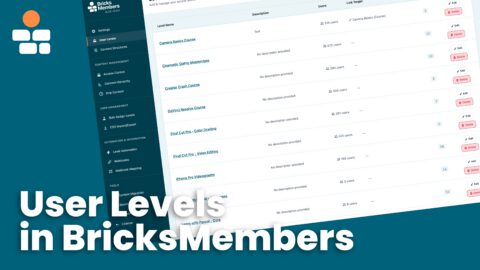
- Go to BricksMembers → Content Structures
- Fill in the Structure Name: Give it a unique name (e.g., “WordPress Mastery Course”)
- Choose the Number of Levels (2-6):
- 2 Levels: Course → Lessons
- 3 Levels: Course → Modules → Lessons
- 4 Levels: Course → Modules → Lessons → Topics
- 5+ Levels: For very complex structures
- These are just examples. Name them as you want.
- Progress Tracking Level (optional): Select which level should be tracked for completion (e.g., “Lessons”). Only visible if progress tracking is enabled in BricksMembers → Settings. You can still select that later, after creating the structure.
- Admin Menu Icon (optional): Choose a Dashicon for the WordPress admin menu (e.g., Book, Learn, Education). A preview of the selected icon is shown.
- Custom Permalink Slug (optional): Override the URL slug for this structure (e.g., use “course” instead of “my-course-type”). Leave empty to use the top-level post type slug. This will result in URLs like “/custom-slug/course-name/module-name/lesson-name”.
- Configure each level: For each level (e.g., Level 1, Level 2), fill in:
- Singular Name: How a single item is called (e.g., “Course”, “Module”, “Lesson”). The form is pre-filled with suggested names based on the number of levels.
- Plural Name: How multiple items are called (e.g., “Courses”, “Modules”, “Lessons”).
- Slug: URL-friendly name (e.g., “course”, “module”, “lesson”). The system validates slugs to prevent conflicts with existing structures.
- You can use the same slugs as you have for custom post types, to make existing posts available in your structure instantly (WP allows registering the same post type multiple times without errors). This is useful for migrations. So you don’t have to recreate all your existing posts.
- Click Create Structure at the bottom of the form
Your structure is created, but it’s empty. Let’s add content.
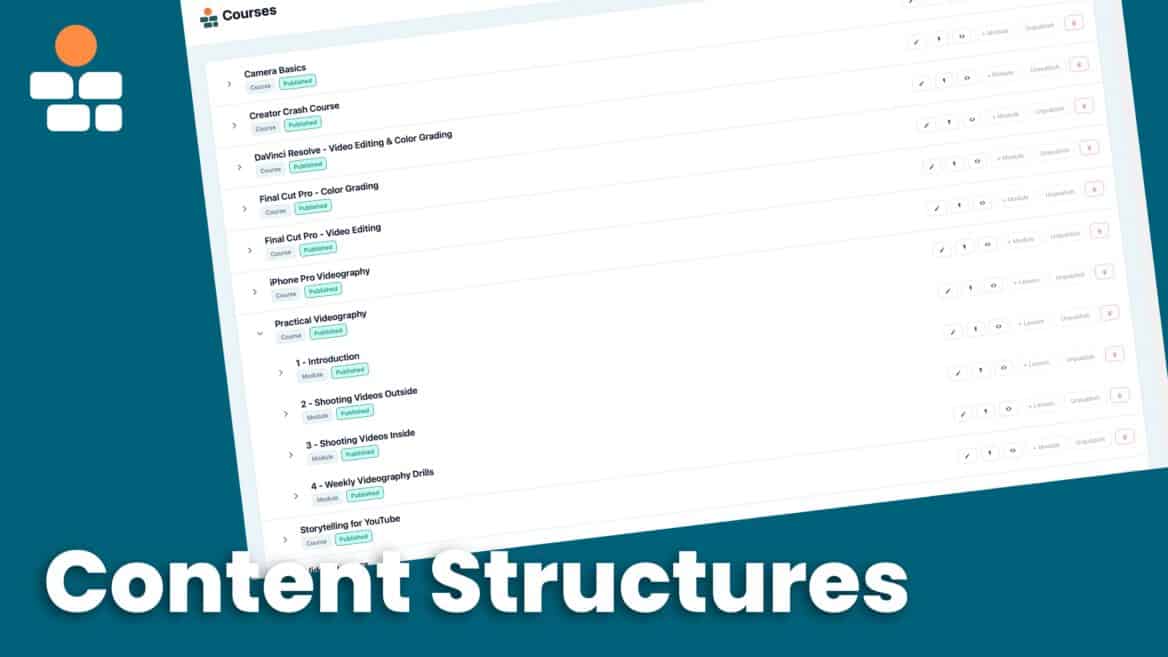
Step 2: Access Your Structure Admin Interface
After creating your structure, a new menu item appears in the WordPress sidebar (e.g., “Courses” or whatever you named your structure).
- Look in the WordPress sidebar for your structure name
- Click on it to open the structure admin interface
This interface shows all posts in your structure in a hierarchical tree view.
Step 3: Add Posts to Your Structure
To create posts in your structure, you must first enable Edit Mode:
- In the structure admin interface (from the WordPress sidebar), click Edit Mode in the top right
- The Add New [Post Type] button becomes active (e.g., “Add New Course”)
Creating Top-Level Posts
- With Edit Mode enabled, click the Add New [Post Type] button in the header
- A modal appears asking for the post title and optional content
- Enter your post title (e.g., “Introduction to WordPress”)
- Click Create
- The post is created and immediately appears in the structure tree view
Creating Child Posts (e.g., Modules or Lessons)
- With Edit Mode enabled, find the parent post in the tree (e.g., a Course)
- Click the + [Child Type] button next to it (e.g., “+ Module”)
- A modal appears with the parent relationship already set
- Enter the post title and optional content
- Click Create
- The child post appears under its parent in the tree view
Remember to Save
All posts created in Edit Mode are staged until you click Save Edits. This allows you to create multiple posts and organize them before saving everything at once.
Step 4: Reorder Posts (Optional)
To change the order of posts in your structure, use Edit Mode:
- In the structure admin interface (from the WordPress sidebar), click Edit Mode in the top right
- Arrow buttons appear next to each post:
- ↑↑ Move to top
- ↑ Move up one position
- ↓ Move down one position
- ↓↓ Move to bottom
- Reorder posts as needed using these buttons
- You can also create, delete, publish, or unpublish posts while in Edit Mode
- Click Save Edits when done
All changes are applied at once, and the structure is recomputed only once (instead of after every individual change).
Understanding Structure Levels
When you create a structure, you define how many levels it has. Here’s what each level means:
Level 2 Structure (Course → Lessons)
- Top level: Courses
- Level 2: Lessons
- Use case: Simple courses with no modules
Level 3 Structure (Course → Modules → Lessons) ⭐ Recommended
- Top level: Courses
- Level 2: Modules
- Level 3: Lessons
- Use case: Most online courses
Level 4 Structure (Course → Modules → Lessons → Topics)
- Top level: Courses
- Level 2: Modules
- Level 3: Lessons
- Level 4: Topics
- Use case: Very detailed courses
Level 5-6 Structures
- For extremely complex hierarchies
- Rarely needed
Pro Tip: Start with Level 3. You can always create a new structure with more levels later if needed.
Edit Mode: Batch Changes
Edit Mode is a special mode for making multiple changes at once without triggering recomputation after every change.
When to Use Edit Mode
Use Edit Mode when you need to:
- Create multiple posts at once
- Delete multiple posts
- Reorder many posts
- Change post status (publish/unpublish) for multiple posts
- Move posts between parents
How Edit Mode Works
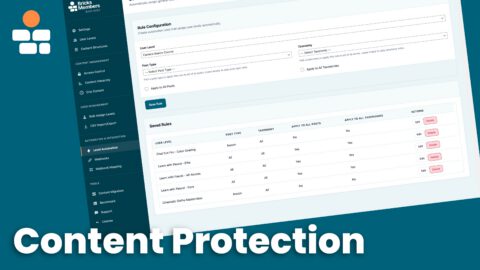
- Go to BricksMembers → Content Structures
- Click Edit next to your structure
- Click Enter Edit Mode
- Make all your changes (create, delete, reorder, publish, unpublish)
- Click Save Edits
All changes are applied at once, and the structure is recomputed only once (instead of after every change).
Outside Edit Mode:
- You can view, edit (content), and quick edit posts
- You CANNOT create, delete, reorder, or change status
- This prevents accidental changes
Inside Edit Mode:
- You can do everything
- Changes are staged locally
- Nothing is saved until you click “Save Edits”
Example: Creating a New Course
- Enter Edit Mode
- Click Add New Post → “Module 1: Getting Started”
- Click Add New Post → “Lesson 1.1: Installing WordPress” (parent: Module 1)
- Click Add New Post → “Lesson 1.2: Choosing a Theme” (parent: Module 1)
- Click Add New Post → “Module 2: Building Pages”
- Click Add New Post → “Lesson 2.1: Introduction to Bricks” (parent: Module 2)
- Click Save Edits
All 5 posts are created, the structure is computed, and progress/drip are updated—all in one operation.
Duplicate Posts with Children
Need to create a similar course structure? Use the Duplicate with Children feature to copy an entire hierarchy in one click.
- Enter Edit Mode
- Find the post you want to duplicate (e.g., a course or module)
- Click the copy icon (duplicate button) next to the post
- The post and ALL its children are duplicated instantly
- Duplicated posts appear with “Copy of” prefix and are set to Draft status
- Edit titles, content, author (via the header author icon), assigned quiz, protected downloads, categories, and tags using Quick Edit
- Click the publish button (checkmark icon) on any draft post to mark it for publishing
- Click Save Edits to commit all changes
What gets copied:
- Post titles (with “Copy of” prefix)
- Post content
- Video URL, duration, and thumbnail
- Featured images
- Required membership levels
- Categories and tags
- Parent-child relationships (hierarchy is preserved)
Example: If you duplicate a course with 3 modules and 15 lessons, you get a complete copy of the entire course structure—ready to customize.
Publishing Draft Posts
Draft posts (including duplicated posts) show a publish button (checkmark icon) in Edit Mode. Click it to mark the post for publishing without opening the Quick Edit modal.
- The status badge changes from “Draft” to “Published” immediately
- The publish button disappears (post is now marked for publishing)
- Changes are saved when you click Save Edits
This is a quick way to publish multiple posts without editing each one individually.
Structure Path Computation
Behind the scenes, BricksMembers computes a “structure path” for each post. This is a JSON field that stores:
- The post’s position in the hierarchy
- Its parent and ancestors
- Its order number
- Boundary information (for fast child lookups)
You don’t need to understand the technical details. Just know that:
- Structure paths are computed automatically
- They make navigation and progress tracking fast
- They’re updated when you reorder posts
Using Structures with Other Features
Progress Tracking
When Progress Tracking is enabled, you can track progress per structure.
Example:
- User completes 5 out of 10 lessons in “WordPress Mastery Course”
- Progress: 50%
- Display with:
{brm_progress:percent:structure}dynamic tag
Drip Content
Structures work perfectly with drip content.
Example:
- Unlock lessons one per week, in order
- Require previous lesson completion before unlocking the next
- Use structure boundaries to define “previous within this module”
Navigation
Use the BricksMembers Post Navigation element to show next/previous links within the structure.
Example:
- On “Lesson 1.2,” show:
- Previous: “Lesson 1.1”
- Next: “Lesson 1.3”
- Automatically respects structure boundaries
Query Loops
Filter Bricks query loops to show only posts within a structure.
Example:
- Show all lessons in the current module
- Show all modules in the current course
- Show all courses the user has access to
Best Practices
Naming Conventions
Good:
- “Module 1: Getting Started” (clear, numbered)
- “Lesson 1.1: Installing WordPress” (hierarchical numbering)
- “WordPress Mastery Course” (descriptive structure name)
Avoid:
- “Lesson 1” (not descriptive enough)
- “asdf” (meaningless)
- “The first lesson in the module about WordPress basics” (too long)
Structure Depth
Recommended: Level 3 (Course → Module → Lesson)
Too shallow: Level 2 (Course → Lesson)
- Hard to organize large courses
- No logical grouping
Too deep: Level 5+ (Course → Section → Module → Lesson → Topic → Subtopic)
- Overwhelming for users
- Hard to navigate
Post Types
Use custom post types for better organization:
- Create a “Courses” post type for top-level items
- Create a “Lessons” post type for lessons
- Keeps your blog posts separate from course content
Or use regular posts if you prefer simplicity:
- Everything is a post
- Use structures to organize
- Simpler setup
Reordering
Use Edit Mode for large reordering operations:
- Faster (one recomputation instead of many)
- Safer (changes are staged, not immediate)
- Clearer (you see all changes before saving)
Use arrow buttons outside Edit Mode for small tweaks:
- Quick adjustments
- Immediate feedback
Common Questions
Q: Can a post be in multiple structures?
A: No. Each post belongs to one structure (or none). This ensures clear hierarchy and prevents confusion.
Q: Can I change a post’s parent after creation?
A: Yes. Edit the post and change the BRM Parent Level field, or use the arrow buttons in the structure editor to move it.
Q: What happens if I delete a parent post?
A: Its children become orphaned. You’ll need to reassign them to a new parent or delete them.
Q: Can I export/import structures?
A: Not currently. This is planned for a future update.
Q: Do structures work with custom post types?
A: Yes! Select your custom post type when creating the structure.
Q: Can I have multiple structures for the same post type?
A: Yes. For example, you could have separate structures for “Beginner Course” and “Advanced Course,” both using the “Lessons” post type.
Q: How do I delete a structure?
A: Go to BricksMembers → Content Structures, click Delete next to the structure. The posts remain, but the structure hierarchy is removed.
Q: Can I duplicate an entire course with all its modules and lessons?
A: Yes! In Edit Mode, click the duplicate button (copy icon) on any post. It will duplicate that post and ALL its children (modules, lessons, etc.) in one operation. All duplicates start as drafts, so you can edit them before publishing.
Q: Why are my duplicated posts set to Draft?
A: This is intentional. Duplicated posts start as drafts so you can review and edit them before publishing. Use the publish button (checkmark icon) in Edit Mode to quickly publish individual posts, or edit titles/content via Quick Edit first.