Search the Community
Showing results for tags 'gui'.
-
Version 2.9.93
16,495 downloads
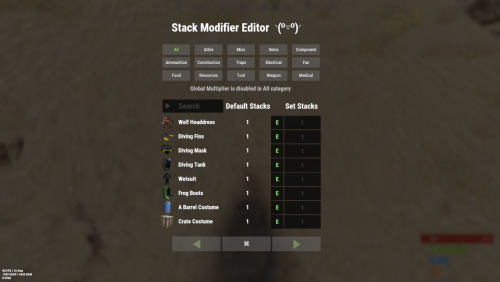
Stack Modifier is a performance-focused plugin that enhances and refines item stacking behavior in Rust. Includes a built in GUI Editor for quick and easy setup of stack sizes! This plugin uses harmony for the best performance! Features Includes GUI Editor - Blocks Player movements while using GUI Editor Including Keybinds! Adds NEW Stacking Support for the following. STACKING TAG support, crafted, spawned, picked-up, etc. Repair Bench, broken item stacks, spam repair! Melee Weapon throwing! Item Condition Merging! Stacks of Items not breaking one 1 in the stack breaks. liquids ( like bota bags etc ) Stacking of Fuel Containers (hats, tools, etc.) Stacking of Guns Weapon Attachments Stacking of Skins Works with SkinBox plugins Supports stacking armor slot armors Supports Genetic Stacking Supports Food Spoil stacking Stacking of Custom Items Stacking of Custom Items with Custom Display Names Stacking of Key Cards without losing the stack when swiping Stacking Candy Cane Club without losing the stack while lick Support for modified presents for unwrapping Limits wearable clothing items to stack sizes of 1! ( on the player wear container only ) Limits weapon attachments to stack sizes of 1! ( On the weapon its self! so you can have bigger stacks! ) The largest possible value in C# is 2,147,483,647 Which means anything over this stack-size will break the plugin Patches All Industrial Conveyor stack issues! ( Yes custom items no problems! ) -- THIS IS NOW IT"S OWN PLUGIN AS AN ADDON. 4-2-2025 Patches Stacks being lost when stacked items break! Like mining! Etc Patches Stacks being lost when Melee weapons are thrown! Like spear! Etc STACK MODIFIER INDUSTRIAL ADDON: Known Conflicts RoadBradley & HeliSignals Are doing item creations wrong and setting the item.name field as vanilla item display names thus breaking stack support. ( don't set a vanilla display name only set them if its custom names as the fix ) Conveyor Stacks Not needed & conflicts, stack-modifier already does this & has config settings for it. Davids Shop UI ( recently changed how his default data files are createdfor items ) ( you need to generate a new Items.json file and re-do custom items / pricing inside it to fix stack bugs with old data files ) Magic Coin uses some of the same hooks set up config in it correctly to not conflict Custom Skin Stack Fix not needed this handles it properly Stack Size Controller cannot have 2 of the same plugins basically Extra Loot causes a stacking bug when a reboot occurs with skinned items preventing old skinned items from stacking with new skinned items IndustrialCustomSkinsFix not needed stack-modifier has the same patch in it. IQAlcoholFarm by BadMandarin/Mercury is not supported & will cause stack bugs / problems ( could be supported with an author update, but current version is not supported ) ItemPerks by imthenewguy Causes stack bugs/problems just by having this plugin on your server due to harmony patching done inside it + repair logic is bugged. Item creation is also not handled properly resulting in duplication issues with Conveyor movements nothing can be done about that. ( plugin requires a full rewrite for proper support & repairs. ) Custom Item Definitions causes stack bugs/problems and I am not going to support a plugin that heavily modifies vanilla game items in that way its simply far too much work to try and support. I'd have to import almost half of that plugins code just for mine to accurately handle stack logic for it & for plugins that use that plugin. Plugins that do not handle Item Creation Correctly: ( Which break stacks ) Custom Item Drops by Machine ( Always sets the vanilla display name when its supposed to be null for vanilla items ) XP System by fastburst ( Always sets the vanilla display name when its supposed to be null for vanilla items ) Copy Paste ( Items created by copy paste its self will not stack since item creation is not handled properly ) This list will be constantly updated as devs fix their code accordingly & new ones are discovered to be flawed. Getting Started - Click Either Link to play video Video One Video Two Permissions stackmodifier.admin - Allows players access to the UI Editor. Chat Commands /stackmodifier -- Opens Editor UI, Must enable config option "Enable UI Editor": true /stackmodifier.reset ( is also console cmd ) -- Requires stackmodifier.admin perm ( resets stack-sizes ) /resetvenders -- Requires being an admin, only resets facepunches messed-up vendors, not all /stackmodifiercolor <inputpanel|inputtext|text|transparent> <color> <alpha|ex, 0.98> Example /stackmodifiercolor inputpanel #207086 0.25 UI Editor Commands set 8 -- Inside a categories Search Bar, type set and a value and it will apply it to the whole category, reset -- Inside a categories Search Bar type reset hit the enter key or click out of the field and it resets it. multiply -- Inside a categorie use the Search Bar & type multiply and a value and it will apply it to the whole category. if you reset or set, re-click the Category Tab to refresh it before making more changes! Otherwise you will have to do your first edit twice for it to start working again UI Editor Without Images? * At the top of the config you will see the following setting set to true save and reload. "Disable Images for UI Editor": false, < Disables images and allows full use Having Problems? * Warning this plugin is not compatible with custom-skins-stacks-fix plugin since this already handles everything. * If you already have a plugin that modifies the rust stack sizes you will first need to remove that plugin. * Then you simply load Stack Modifier onto your server open the config and start editing the Modified values to your new stack-size amounts! * When you are done simply save and reload the plugin! ( oxide. reload StackModifier ) * Alternatively you can utilize the built-in UI Editor and not ever need to touch the config! * Admins - Auth level 2 will always be ignored. * This plugin is not compatible with BetterVanish, I only support Vanish from umod. How to revert to vanilla? * Run the reset command while having the stackmodifier.admin perm or Unload Stack Modifier, delete the config, and restart your server. * It will reset the config back to vanilla settings allowing you to start over. API Hooks Interface.CallHook("OnStackSizeUpdated"); //called after the plugin updates the stack sizes on server reboots & when reloading the plugin. //It's also still called right after the UI editor is closed from modifying. //Inside the oxide hook I use called OnItemAddedToContainer theirs a hook of mine, if called mine will not touch it or fix the stacks. if (Interface.CallHook("OnIgnoreStackSize", player, item) != null) return; ## Configuration { "Disable Industrial Conveyor Patch (true = disabled)": false, "Industrial Conveyor Max Stack Size Per Move Default = 60": 130, "Industrial Conveyor Move Frequency Default = 5 (Lower = faster moving)": 3, "Disable Weapon Attachment stack fix (Unsubscribes from both OnWeaponModChange & CanMoveItem)": false, "Disable Wearable Clothes fix (Unsubscribes from OnItemAddedToContainer)": false, "Disable Ammo/Fuel duplication fix (Recommended false)": false, "Disable Candy Cane Club Lick fix & unwrap fix (Unsubscribes from OnItemAction)": false, "Disable OnCardSwipe fix (Unsubscribes from OnCardSwipe)": false, "Enable VendingMachine Ammo Fix (Recommended)": true, "Enable UI Editor": true, "Disable Images / Toggles off Images for UI Editor": false, "Sets editor command": "stackmodifier", "Sets reset command for both console & chat": "stackmodifier.reset", "Sets editor color command": "stackmodifiercolor", "Sets Default Category to open": "All", "Stack Modifier UI Title": "Stack Modifier Editor ◝(⁰■¿⁰)◞", "UI - Stack Size Label": "Default Stacks", "UI - Set Stack Label": "Set Stacks", "UI - Search Bar Label": "Search", "UI - Back Button Text": "◀", "UI - Forward Button Text": "▶", "UI - Close Label": "✖", "Colors": { "InputPanel": { "Hex": "#0E0E10", "Rgb": "0.0549019607843137 0.0549019607843137 0.0627450980392157 0.98" }, "InputText": { "Hex": "#FFE24B", "Rgb": "1 0.886274509803922 0.294117647058824 0.15" }, "TextColor": { "Hex": "#FFFFFF", "Rgb": "1 1 1 1" }, "Transparency": { "Hex": "#", "Rgb": "0 0 0 0.95" } }, "Category Stack Multipliers": { "Attire": 1, "Misc": 1, "Items": 1, "Ammunition": 1, "Construction": 1, "Component": 1, "Traps": 1, "Electrical": 1, "Fun": 1, "Food": 1, "Resources": 1, "Tool": 1, "Weapon": 1, "Medical": 1 }, "Stack Categories": { "Attire": { "hat.wolf": { "DisplayName": "Wolf Headdress", "Modified": 10 }, "horse.shoes.basic": { "DisplayName": "Basic Horse Shoes", "Modified": 10 } }, "Misc": { "fogmachine": { "DisplayName": "Fogger-3000", "Modified": 10 }, "sickle": { "DisplayName": "Sickle", "Modified": 10 } }, "Items": { "kayak": { "DisplayName": "Kayak", "Modified": 10 }, "map": { "DisplayName": "Paper Map", "Modified": 10 } }, "Ammunition": { "ammo.grenadelauncher.buckshot": { "DisplayName": "40mm Shotgun Round", "Modified": 20 }, "ammo.rocket.sam": { "DisplayName": "SAM Ammo", "Modified": 10 } }, "Construction": { "door.double.hinged.metal": { "DisplayName": "Sheet Metal Double Door", "Modified": 10 }, "building.planner": { "DisplayName": "Building Plan", "Modified": 10 } }, "Component": { "bleach": { "DisplayName": "Bleach", "Modified": 2 }, "vehicle.module": { "DisplayName": "Generic vehicle module", "Modified": 10 } }, "Traps": { "trap.bear": { "DisplayName": "Snap Trap", "Modified": 30 }, "samsite": { "DisplayName": "SAM Site", "Modified": 10 } }, "Electrical": { "ceilinglight": { "DisplayName": "Ceiling Light", "Modified": 10 }, "wiretool": { "DisplayName": "Wire Tool", "Modified": 100 } }, "Fun": { "firework.boomer.blue": { "DisplayName": "Blue Boomer", "Modified": 200 }, "telephone": { "DisplayName": "Telephone", "Modified": 10 } }, "Food": { "apple": { "DisplayName": "Apple", "Modified": 100 }, "woodtea.pure": { "DisplayName": "Pure Wood Tea", "Modified": 100 } }, "Resources": { "skull.human": { "DisplayName": "Human Skull", "Modified": 10 }, "wood": { "DisplayName": "Wood", "Modified": 10 } }, "Tool": { "tool.instant_camera": { "DisplayName": "Instant Camera", "Modified": 10 }, "bucket.water": { "DisplayName": "Water Bucket", "Modified": 10 } }, "Weapon": { "gun.water": { "DisplayName": "Water Gun", "Modified": 10 }, "spear.wooden": { "DisplayName": "Wooden Spear", "Modified": 10 } }, "Medical": { "blood": { "DisplayName": "Blood", "Modified": 100 }, "bandage": { "DisplayName": "Bandage", "Modified": 30 } } } }$24.99- 201 comments
- 23 reviews
-
- 23
-

-

-

-

-
- #stacks
- #rust stacks
- (and 22 more)
-

Version 2.3.2
18,658 downloads
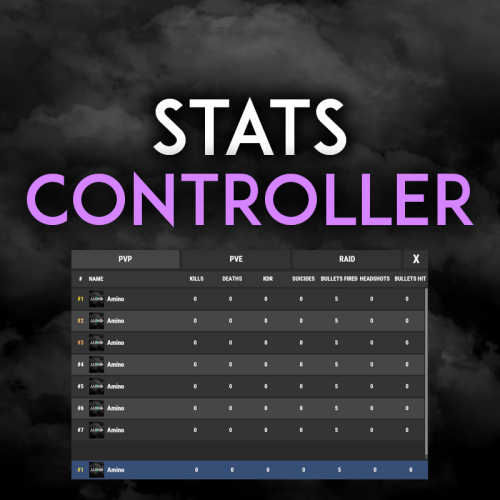
GUI with personal stats, leaderboard, per-category stats, and #1 player custom chat titles Tables with personal bests per category, top scoring player per category, and top-30 players per category. The same tables can be viewed for clans, rather than players. Server-wide top-list per category can be advertised on a timer. Tables have clickable headers for ascending/descending sort Multiple leaderboard snapshots (top single player for each category) can be taken for SQL/web use. Can also issue rewards (in command format) either on your command or automatically after wipe. Rewards are in a separate PlayerRanksRewards.json data file. Multiple commands issued as one reward should, be, comma, separated. Use {id} as a placeholder for player's Steam ID. Optional uMod dependencies. Clans. Economics. EventManager. Friends. PlaytimeTracker. BetterChat. (for titles) Permissions. playerranks.use - Allows players to use GUI, if 'RequiresPermission' is true. playerranks.admin - Allows admin UI and command access. playerranks.excludefromstats - Allows players to toggle /pr optout - taking their stats out of public displays. playerranks.excludedfromstats - Force a player to be excluded from stats playerranks.optout - Used behind the scenes for user preference persistence across wipes. By default, stats for admins are not publicised. Chat commands. The plugin will respond to whatever commands you have specified in the config for `chatCommandAliases` The defaults are { "pr", "ranks", "rank" }; This documentation will use 'pr' for its examples. Player commands. /pr - Open PlayerRanks GUI /pr chat - Enable/Disable chat announcements. /pr optout - Have your stats removed from, or included in, public displays. /pr reward <category name> - Issues rewards for the category. /pr reward - Issues rewards for all categories. Requires playerranks.excludefromstats permission. Admin commands. /pr save - Save the database /pr wipe - Wipe the database /pr del - Remove all stats for that player's steamID /pr wipecategory <categoryname> - Remove all of user stats for that category Console commands. playerranks.save - Save the database playerranks.wipe - Wipe the database playerranks.reward <category name> - Issues rewards for the category. playerranks.reward - Issues rewards for all categories. SaveLeaderboard - Takes a snapshot of the current #1 players for all categories. Configuration. General options. displayClanStats - True/False record_ClanMate_Kills - Toggle killing of clan-members contributing to PVPKills. record_FriendsAPI_Kills - Toggle killing of 'Friends' contributing to PVPKills. record_RustIO_Friend_Kills - Toggle killing of RustIO friends contributing to PVPKills. record_Rust_Teams_Kills - Toggle killing of Rust team mates contributing to PVPKills. blockEvents - Toggle EventManager contributing to ranks. statCollection - True/False RequiresPermission - Makes user /pr access by 'playerranks.use' permission only. allowadmin - Toggle admin stats in public displays. chatCommandAliases - { "pr", "ranks", "rank" } useTimedTopList - Toggle public broadcast rotation. TimedTopListAmount TimedTopListTimer TimedTopListSize - Font size for chat output. TimedTopListNumbered - Adds ordered numbering to chat output (1st,2nd,etc). deleteOnBan - true/false PVPHeadshotsOnly - true/false CountHeadshotsOnlyIfKill - true/false saveTimer (minutes) lastLoginLimit - in days.Deletes data for users who haven't logged in since X days ago. Value of 0 means disabled. wipeOnDeath - true/false WipeOnNewMap - Wipes PlayerRanks data base when a new map is detected. CommandOpensTop30 = false KDRExcludesSuicides = false PVPKillsCountsSleeperKills = false PlayTime_HH_MM = false CountPlantsOnlyFromPlanters = true GlobalTitleBroadcast = true - Tells everyone (true) or just the taker and loser of a title (false) useIntenseOptions - Enable/disable.Toggle gathering of information, and displays, relating to: StructuresBuilt ItemsDeployed ItemsCrafted EntitiesRepaired StructuresDemolished Resources Gathered GUI. UiTextColourStrong = "<color=#b3522b>"; UiTextColourWeak = "<color=#bdbdbd>"; ChatTextColourStrong = "<color=#d4d3d3>"; ChatTextColourWeak = "<color=#bdbdbd>"; ButtonColour = "0.7 0.32 0.17 1"; CategorySortButtonColour = "0.48 0.2 0.1 1"; GuiTransparency = 0.9; Useful tool for picking CUI colours - RGB Decimal. Titles (requires BetterChat) EnablePlayerTitles = false; MaxDisplayedTitles = 3; MaxTitlesBeforeLineBreak = 3; TitleStart = "["; TitleEnd = "]"; AddTitleHoldersToGroup = true; DestroyGroupOnUnload = false; Categories. Each category has the following options in config. "PVPKills": { "EnabledInPersonal": true, "EnabledInTop1": true, "EnabledInTop30": true, "IncludeInChatBroadcast": true, "Title": "[Killer]", "ShowTitleInPlayerChatMessages": true, "ChatPriority": 1, "BroadcastTitleChanges": true }, Title. Leave blank to have no title. Players with titles are automatically placed in a group of the category name. Players are removed when they lose #1, and all groups are emptied on unload. SQL - optional. Database Name Host Password Port Username tablename - Main data table name that PR will create. LBtableName - Leaderboards table name that PR will create. Use MySQL - true/false autoWipe - true/false (wipes SQL with main database) The SQL database will be created on the first save, whether automatic or manually with command /pr save. Category List. PVPKills PVPDistance PVEKills PVEDistance NPCKills NPCDistance Sleepers Killed HeadShots Deaths Suicides KDR (kill to death ratio) SDR (suicide to death ratio) SkullsCrushed TimesWounded TimesHealed HeliHits HeliKills APC Hits APCKills BarrelsDestroyed Explosives Thrown Arrows Fired Bullets Fired Rockets Launched MLRS Fired WeaponTrapsDestroyed Drops Looted Fish Caught Structures Built Structures Demolished Items Deployed Items Crafted Entities Repaired Resources Gathered Plants Gathered Structures Upgraded Economics** ServerRewards** PlayTime** (DD:HH:MM:SS) MySQL Only. Online/Offline Status** ActiveDate - Player's last login date. ** - These options are reported by Player Ranks, but not incremented or maintained by Player Ranks. Resetting Player Ranks database will not set these entries to zero, as they are read from elsewhere. Wipe Playtime Tracker data and/or Economics data to set these to zero. API ResetClan(string clanname) ResetPlayer(ulong ID) Key Binds. Personal stats and leader board can be bound to toggle as follows, using H J as examples: bind h callPersonalStatsUI bind j callLeaderBoardUI Notes. Data for banned players is automatically removed. Heli Kills are attributed to the player who hit the heli the most - not the last hitter. If a player dies from his wounds, the person who wounded him gets the PVP kill. PVP distance is recorded based on the wounding shot.Free- 452 comments
- 15 reviews
-
- 24
-
-
-
- #statistics
- #leaderboard
- (and 12 more)
-

Version 1.4.7
1,243 downloads
Introducing Total Control – The Ultimate Rust Server Administration Tool Total Control is a powerful, full-GUI admin plugin designed to give Rust server owners and admins unprecedented control. Whether you’re running hardcore survival or a casual PvE playground, Total Control puts every system at your fingertips live, in-game. Dynamic Schedule System Plan and automate your server’s evolution with ease — no more manual toggling or config edits. The Schedule System lets you: Automate server changes over time – Adjust gather rates, stack sizes, smelting speeds, rewards, raid protection, or PvE/PvP status automatically. Create up to 6 configuration sets per feature (1 default + 5 extra) – Schedule different setups for each stage of your wipe. Scale your server naturally – Increase resource rates as wipes progress or gradually tweak settings to keep gameplay fresh. Fully integrated with the GUI – Configure all schedules directly in-game with the Total Control UI — no external files required. Run your server exactly how you want, exactly when you want — automatically. Core Server Settings Skip Night / Time Freeze – Automate day/night or let players vote, including custom voting percentages and skip limits. Day & Night Length – Configure how long the day lasts and how short nights are. Custom Vote Commands – Define your own chat commands beyond /day. PvE/PvP Modes & Raid Protection – Toggle instantly or schedule on timers, with player HUD indicators. Now includes an option to use in-game or local time. Economy & Progression StackSize Control – Set multipliers per item or entire categories. Gather Rate Control – Fine-tune every item’s resource yield. Easy Item Management – Add or remove items to the GatherRate and StackSize pages directly via chat commands using item shortnames. (Shortnames list: https://www.corrosionhour.com/rust-item-list) Smelting & Cooking – Adjust speeds, outputs, and fuel use. Rewards & Incentives Reward players for kills, gathering, mining, defeating Bradley/Patrol Heli, or emptying crates to encourage active gameplay. Choose between Economics, ServerRewards, scrap payouts or reward all three simultaneously. Configure loot-splitting for Bradley and Heli: split rewards based on damage dealt or grant the full amount to the player landing the final blow. Accessible In-Game Any admin with permission can open the Total Control UI with /tc and adjust settings live no server file access required. Whether your admins are across town or across the globe, they can fine-tune all settings directly in-game. Permissions & Commands Permission: TotalControl.OpenGui (access admin UI) Chat Commands: /tc To open TotalControl /addgather <shortname> Add item to GatherRates page. /removegather <shortname> Remove item to GatherRates page. /addstack <shortname> Add item to StackSize page. /removestack <shortname> Remove item to StackSize page. Join the Community Stay up to date, promote your server, report bugs, or get support: https://discord.gg/AkwHUs8Qma$29.99 -
Version 1.2.4
550 downloads
Very simple, extremely dynamic stats plugin with an amazing UI! Offers tons of customizability, change UI colors, and select between 2 pre-made UI options. Support's Welcome Controller UI so you can have your stats cleanly integrated into your info menu. Enable and disable stats from showing on whatever you want. Category filters that also show you what place you are within each category! FEATURES - Supports Welcome UI Controller by Amino - Includes new scrolling UI! - Select what stats you want to show on the main screen - Select what stats you want to show on the personal screen - Disable and enable whatever stats you want - Display user currency and playtime - Kills - Deaths - KDR - Suicides - Headshots - Bullets hit - Animals killed - PVE Stats - Raid Stats - ETC* CONFIG SNIPPET FOR STAT OPTIONS "PlayerKills": { "Enabled": true, "DisplayOnMainUI": true, "DisplayOnPersonalUI": true, "IsMainPersonalStat": true, "PointsChange": 1.0, "ItemID for stat image": 0, "IMG Link for stat image (takes priority over ItemID)": "", "Category (PVP, PVE, RAID)": "PVP" }, Need support or want updates about what is coming to the plugin? Join the support discord here https://discord.gg/RVePam7pd7$19.99 -

Version 1.0.3
26 downloads
AdminWarn is intended for situations where players clearly exceed server rules or must be explicitly warned. It is not a lightweight or easily dismissible notification. The purpose is not to preserve gameplay flow, but to deliver a clear and serious warning. Warnings are delivered instantly and ignore conditions such as safe zones or PvP status. Stop guessing whether your warning messages in chat were actually noticed. Tired of sending important warnings as an admin via RCON or global chat and never being sure who actually read them? AdminWarn is built to give admins certainty. AdminWarn is designed for manual warning delivery. This is not an automated warning system. Every warning is intentionally sent by an admin using commands. At the same time, AdminWarn handles warnings smartly and automatically in the background. Warnings sent to offline players are stored and shown automatically when the player next joins, even days later. For individual online players, warnings remain stored until acknowledged, then are automatically cleared. All data is wipe-aware and cleaned up automatically on server wipes. Instead of relying on admin-sent chat warnings that can get lost, ignored, or missed while players are AFK, AdminWarn delivers a mandatory, player-specific GUI warning directly on the player’s screen. Each warning includes a configurable sound effect, using only built-in, local in-game sounds. No external or custom audio files are used. This is not an auto chat message. It is a visual warning that requires player acknowledgment. Even if the player closes the game without confirming it, the warning will reappear on the next login until acknowledged. No hard movement lock is applied. Warnings can be sent via RCON, server console, or in-game admin console (F1). In-game commands /warn and /warnall are used to manually send warnings. /warn can target individual players whether they are online or offline, while /warnall applies only to online players. Discord webhook logs clearly confirm when warnings are acknowledged. Global warnings apply only to online players and do not generate Discord logs, preventing spam and rate-limit issues. How It Works? 1) Admin sends warning (chat/RCON) → Message is delivered via GUI with sound 2) Player must acknowledge → Cannot play until clicking button (No movement lock, only a visual GUI barrier) 3) Offline player support → Warnings sent to offline players are saved and displayed via GUI when they join 4) Data management → Auto-clears on wipe Key Features - GUI warning that requires player confirmation - Works online/offline - Warnings save for offline players - Global warnings - Warn all online players at once - Discord logging - Track acknowledged warnings - Wipe detection - Auto-clear data on server wipe - Professional interface - Clean GUI with sound effects - UTC-based date display - All timestamps are shown in UTC (Coordinated Universal Time) Performance AdminWarn is built with an optimized and efficient code structure, making its presence virtually unnoticeable on the server. It runs smoothly during long uptimes and maintains stable hook memory and performance values under normal server conditions. Wipe Behavior - Restarts: Data preserved (approved warnings are auto-deleted for data optimization) - Server wipe: All warning data automatically cleared - No manual cleanup needed (Most of the time, it is not necessary) Commands ➤ Admin Chat Commands: /warn <player>|<steam64ID> <message> /warnall <message> ➤ Console/RCON Commands: warn <player>|<steam64ID> <message> warnall <message> Note: Player names are not unique and may include different alphabets or special characters. To avoid ambiguity, using Steam64ID is strongly recommended when sending warnings. Permissions Oxide/Carbon oxide.grant group admin adminwarn.admin c.grant group admin adminwarn.admin Discord Webhook Logging When enabled, sends acknowledgement logs to Discord: Player name Warning message Read status (online/after reconnect) Timestamp Does NOT log warning sending (only acknowledgements) Does NOT log global warning acknowledgements (due to DC rate limits) Configuration { "Clear data on wipe": true, "Discord Log Enabled": false, "Discord Webhook URL": "", "Show Date in GUI": true, "Warning sound": "assets/prefabs/building/wall.frame.shopfront/effects/metal_transaction_complete.prefab" } Lang/en { "NoPermission": "You don't have permission to use this command.", "WarnUsage": "Usage: /warn <player name or steamid> <message>", "PlayerNotFound": "Player not found. Use SteamID for offline players.", "DuplicateWarning": "Duplicate warning prevented for player {0}", "WarningSent": "Warning sent to {0}: {1}", "WarningSaved": "Warning saved for offline player {0}.", "WarnAllUsage": "Usage: /warnall <message>", "WarnAllSent": "Global warning sent to {0} online players: {1}", "ConsoleWarnUsage": "Usage: warn <player name or steamid> <message>", "ConsoleWarnAllUsage": "Usage: warnall <message>", "AcknowledgeThanks": "Thank you for acknowledging the warning.", "GuiTitle": "SERVER WARNING", "GuiButtonText": "✔ I ACKNOWLEDGE", "GuiDatePrefix": "Date", "GuiWarningFormat": "Hello {0}, you have received a warning." }$18.99- 6 comments
-
- 1
-
-
- #admin
- #admin tools
- (and 42 more)
-
Version 2.2.8
2,289 downloads
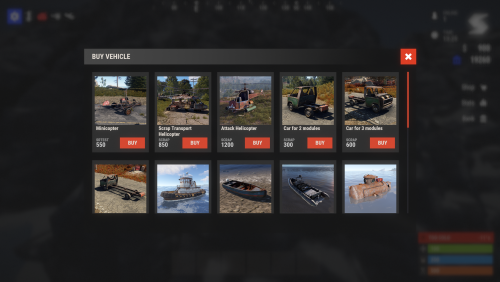
Immerse yourself in the world of Rust with the VehicleBuy plugin! This powerful tool allows authorized players to easily access the /vehiclebuy command, which opens an intuitive interface for purchasing a variety of vehicles. With multiple payment options, including Items, Economics, and Server Rewards, you can enjoy a smooth gaming experience. Additionally, the Buy Cooldown feature helps maintain balance in the game. Upon purchasing a vehicle, players receive a unique gift: a skinned crate for land vehicles or a lifebuoy for water vehicles, which can be conveniently stored in their inventory. Features of VehicleBuy User-Friendly Interface: Access vehicle purchases through an easy-to-navigate GUI. Flexible Payment Methods: Choose from various payment options to suit your preferences. Customizable Settings: Administrators can adjust prices and fees as needed. Convenient Vehicle Recall: Use the /callback command to quickly retrieve your vehicle. Easy Re-packaging: Re-package vehicles using the /pickup command or by hitting them with a hammer. Commands /vehiclebuy: Open the vehicle purchase interface (for players) /callback "VehicleName": Retrieve your purchased vehicle /pickup: Re-package your vehicle or hit it three times with a hammer Admin Command: (VehicleName.add SteamID): Spawn vehicles directly into players' inventories vehiclebuy.template [fullscreen/inmenu]: Customize your UI templates with options for fullscreen or in-menu displays (only server console) Permissions vehiclebuy.use: Allows players to use the /vehiclebuy command and access the vehicle purchase interface. vehiclebuy.free: Grants players the ability to acquire vehicles for free, bypassing the payment requirements. vehiclebuy.pickup: Permits players to use the /pickup command to re-package their vehicles. vehiclebuy.recall: Allows players to use the /callback command to retrieve their vehicles. Video Overview old overview: Test Server Join our test server to experience all our unique features firsthand! Copy the IP address below to start playing! connect 194.147.90.239:28015 FAQ Q: Where can I see an example of a config? A: Config Q: How do I add VehicleBuy to the ServerPanel menu? A: Follow these simple steps: 1. Open ServerPanel menu in-game and click "+ADD CATEGORY" button 2. Set these exact parameters: Type: Plugin Plugin Name: VehicleBuy Plugin Hook: API_OpenPlugin 3. Click "SAVE" button to create the category Note: If VehicleBuy doesn't appear in ServerPanel menu, make sure both plugins are loaded and you typed the parameters exactly as shown above. Q: I'm using the KazuraVehicles plugin and VehicleBuy doesn't work / throws errors. What should I do? A: IMPORTANT: if you're using KazuraVehicles, you MUST enable a special dependency inside VehicleBuy, otherwise it simply will NOT work. 1) Open the plugin file Plugins/VehicleBuy/VehicleBuy.cs (or oxide/plugins/VehicleBuy.cs on your server). 2) At the very top of the file, find this line: // #Requires: KaruzaVehiclesCommon 3) Change it EXACTLY to this (just remove the # after // // Requires: KaruzaVehiclesCommon 4) Save the file and reload the plugin with o.reload VehicleBuy (Oxide) or c.reload VehicleBuy (Carbon). If you skip ANY of these 4 steps, VehicleBuy + KazuraVehicles will NOT work correctly. Do all 4.$15.95 -
Version 3.3.7
12,800 downloads
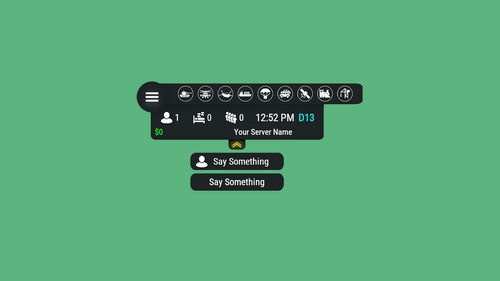
Features: You can add any plugin event in the UI (if it has hooks, usually specified in the plugin description) Has ingame UI menu for configure your Hud The time format is adjusted to the player (depending on his language in the game), it checks which time format is used for this language You can also enable an additional menu that opens on the arrow. You can add various buttons to this menu, for example, to open a store, your server menu, etc. Almost all elements are customizable [for example: visibility of each element, Logo, Icons, Color e.t.c (check config down below)] Commands: /h setup - open UI for ingame config /h - show all Server Hud UI commands /h open - open Server Hud UI /h events - open Events Bar /h close - close Server Hud UI /h hide - hide Server Hud UI Q&A: Q: Where i can find a base icon for creating my events icons? A: Take a base icon below this message and using f.e photoshop for create you personal event icon! Q: Where i can find a ready to use icons? A: Here some links to ready to use icons packs(1 free, 2 paid): https://codefling.com/customizations/free-custom-hud-icons https://codefling.com/customizations/custom-hud-icons-paid https://codefling.com/customizations/server-hud-custom-icon-pack API: string API_PlayerHudState(string id) CanHudChangeState(BasePlayer player, string currentState, strint nextState) Config: { "Auto reload [If you change the config and save the file the plugin will reload itself]": true, "Main setup": { "Overall layer [you will see the hud in your inventory]": false, "Size ALL [0% - inf]": 100, "Logo [HUD interact button]": "https://media.discordapp.net/attachments/335512864548847617/1134455399756607549/logo.png", "Events background opacity [0% - 100%]": 100, "Background opacity [0% - 100%]": 100, "Position": { "Align [TopLeft | TopRight | BottomLeft | BottomRight": "TopLeft", "Left | Right - offset": 40, "Top | Bottom - offset": 25 }, "Server name": "Your Server Name", "Active players": { "Icon": "https://cdn.discordapp.com/attachments/335512864548847617/1134455395813965934/active.png", "Color": "#fff", "Enable": true }, "Sleep players": { "Icon": "https://cdn.discordapp.com/attachments/335512864548847617/1134455395138670652/sleep.png", "Color": "#fff", "Enable": true }, "Queue players": { "Icon": "https://cdn.discordapp.com/attachments/335512864548847617/1134455393972654171/line.png", "Color": "#fff", "Enable": true }, "Time": true, "Player position [hide permisson - hud.streamer]": { "Enable": true, "true - grid | false - x,z coordinates": true, "Color": "cyan" }, "Economy plugin [Economics | ServerRewards]": { "Currency": "$", "Value color": "#10ff10", "Enable": true }, "Info messages": { "Update interval [in seconds]": 60, "Align [BottomCenter | TopCenter | TopRight]": "BottomCenter", "Width [in px]": 260, "Offset [top | bottom]": 0, "Offset [right]": 15, "Outline color": "#000", "Overall [you will see messages in your invenotory]": true, "Enable": true, "Messages": [ "Welcome to Your Server Name", "Good luck" ] }, "Additional menu": { "Auto close timer [seconds | 0 - disable]": 60, "Auto close after command use": true, "Open/Close button color": "yellow", "Commands background opacity [0% - 100%]": 100, "Enable": true, "Commands": [ { "Background image": "https://media.discordapp.net/attachments/335512864548847617/1134455392420761671/command.png", "Icon [optional]": "https://media.discordapp.net/attachments/335512864548847617/1134455395813965934/active.png", "Command": "chat.say Hello there", "Text": "Say Something", "Outline color": "#000", "Is Console": true }, { "Background image": "https://media.discordapp.net/attachments/335512864548847617/1134455392420761671/command.png", "Icon [optional]": "", "Command": "/shop", "Text": "Say Something", "Outline color": "#000", "Is Console": false } ] } }, "Base Events": [ { "Name": "Bradley", "Active color": "#10ff10", "Icon": "https://media.discordapp.net/attachments/335512864548847617/1134455316654850049/bradley.png", "Color": "#fff", "Enable": true }, { "Name": "PatrolHeli", "Active color": "#10ff10", "Icon": "https://media.discordapp.net/attachments/335512864548847617/1134455315073597530/heli.png", "Color": "#fff", "Enable": true }, { "Name": "CH47", "Active color": "#10ff10", "Icon": "https://media.discordapp.net/attachments/335512864548847617/1134455317485342803/ch47.png", "Color": "#fff", "Enable": true }, { "Name": "Cargo", "Active color": "#10ff10", "Icon": "https://media.discordapp.net/attachments/335512864548847617/1134455317086879794/cargo.png", "Color": "#fff", "Enable": true }, { "Name": "AirDrop", "Active color": "#10ff10", "Icon": "https://cdn.discordapp.com/attachments/335512864548847617/1134455316143161374/airdrop.png", "Color": "#fff", "Enable": true } ], "Custom Events": [ { "Hook OnEventStart": "OnConvoyStart", "Hook OnEventStop": "OnConvoyStop", "Name": "Convoy", "Active color": "#10ff10", "Icon": "https://media.discordapp.net/attachments/335512864548847617/1134455318030598154/convoy.png", "Color": "#fff", "Enable": false }, { "Hook OnEventStart": "OnSputnikEventStart", "Hook OnEventStop": "OnSputnikEventStop", "Name": "Sputnik", "Active color": "#10ff10", "Icon": "https://cdn.discordapp.com/attachments/335512864548847617/1134455315488854016/sputnik.png", "Color": "#fff", "Enable": false }, { "Hook OnEventStart": "OnArmoredTrainEventStart", "Hook OnEventStop": "OnArmoredTrainEventStop", "Name": "ArmoredTrain", "Active color": "#10ff10", "Icon": "https://cdn.discordapp.com/attachments/335512864548847617/1134455315841155173/train.png", "Color": "#fff", "Enable": false }, { "Hook OnEventStart": "OnHarborEventStart", "Hook OnEventStop": "OnHarborEventEnd", "Name": "Harbor", "Active color": "#10ff10", "Icon": "https://cdn.discordapp.com/attachments/335512864548847617/1134455318332592219/harbor.png", "Color": "#fff", "Enable": false } ] }$14.99- 611 comments
- 34 reviews
-
- 42
-
-
-
-

-
- #hud
- #interface
- (and 6 more)
-
Version 1.2.4
528 downloads
A simple, minimalist, and modern hud with events, player counter, and other things for your server. Are you tired of using complex game panel plugins with an ugly interface? Now you can have a simple and minimalist interface on your server with just basic events and player counters, and you can configure it however you want. ★ Most native events. ★ Game time with overrides for day and night. ★ Simplified player counter. ★ Sleepers counter. ★ Excavator event. ★ Large Oil rig & Small Oil rig events. ★ Economics & IQEconomic integration. ★ Minimize & maximize button. /mhtoggle - Toggle between showing or hiding the UI (Needs admin perm or missionminimalisthud.toggle) GALLERY:$12.99- 50 comments
- 3 reviews
-
- 2
-
-
- #hud
- #minimalist
- (and 9 more)
-

Version 1.0.0
119 downloads
Plugin Description: Our Rust Whitelist Plugin is the ultimate solution for maintaining control over your server. This plugin offers a user-friendly graphical user interface (GUI) that allows you to easily add or remove players from the whitelist, provided they've been on your server before. In addition, you can configure the plugin to send notifications to your Discord server when players are added to or removed from the whitelist. Key Features: - Intuitive GUI: Our plugin features a clear and visually appealing user interface. Here, you can add or remove players with a simple button press. - Whitelist by SteamID: You have the ability to directly add users to the whitelist via the GUI. - Toggle On/Off: With a straightforward click, you can enable or disable the whitelist. The user interface makes it exceptionally easy. - Automatic Activation/Deactivation: You can configure the whitelist to automatically activate or deactivate at specific times, based on your defined time intervals. - Discord Notifications: You can opt to receive notifications on your Discord server whenever a player is added to or removed from the whitelist. This feature can be easily enabled or disabled in the plugin's configuration. - Configurable Whitelist Messages: You can customize the whitelist messages in the plugin's configuration to provide your players with a personalized experience. Permissions: whitelist.add: Grants the ability to add players to the whitelist. whitelist.remove: Allows for the removal of players from the whitelist. whitelist.admin: Provides full access to whitelist management. whitelist.enable: Activates the whitelist. whitelist.disable: Deactivates the whitelist. whitelist.ui: Permits the use of the graphical user interface (UI). Commands: Chat Commands: /whitelist: Opens the graphical user interface (GUI). The whitelist.ui permission is required. With our Rust Whitelist Plugin, you'll maintain full control over your server and simplify whitelist management. Manage your player list, enable or disable the whitelist as needed, enjoy the user-friendly GUI, and opt for Discord notifications if you desire. Get our plugin now to enhance the security and manageability of your Rust server. { "Enable 'add' discord message?": true, "Enable 'remove' discord message?": true, "Discord webhook (for added to whitelist players)": "webhook", "Discord webhook (for removed from whitelist players)": "webhook", "Kick message": "You are not on this server's whitelist" }$21.95- 6 comments
- 3 reviews
-
- 1
-
-
- #whitelist
- #gui
- (and 1 more)
-
.thumb.gif.3c9c0e18006368d634273095544fb983.gif)
Version 1.2.1
1,261 downloads
Enhance your Rust server with the HUD Info Panel System, a highly customizable HUD interface that empowers players to tailor their gaming experience. Display critical server stats and ongoing events with a sleek, user-friendly design, and enjoy seamless integration with other plugins via a robust API. With extensive customization options, this plugin adapts to any play style! Features of HUD Info Panel System Fully customizable HUD panels with drag-and-drop positioning Real-time tracking of 24+ server events and entities Built-in economics display (supports Economics/ServerRewards) Custom button system with image/command binding Dynamic event icons with color customization Multi-anchor positioning (UpperLeft/UpperRight) Automatic panel hiding system Optimized for performance Showcase Commands /panel hide - hide panel /panel show - show panel Permissions The plugin registers various permissions for different features and settings. Ensure players have the necessary permissions to access specific customization options. Panel Anchors UpperLeft UpperRight API The plugin provides an API method to notify it of custom event statuses. Here's an example of how to use it in another plugin: public class EmptyPlugin : RustPlugin { [PluginReference] private Plugin PanelSystem; private void OnServerInitialized() { EventChangeStatus("UserNotify", true); } private void Unload() { EventChangeStatus("UserNotify", false); } private void EventChangeStatus(string key, bool spawned) { PanelSystem.Call("OnEventChangeStatus", key, spawned); } } And the corresponding configuration in PanelSystem: { "Enabled": true, "Image": "https://i.imgur.com/asflpJe.png", "Permission": "", "Type": 7, "Panel Settings": { "Enabled": true, "Permission": "", "Switch": true, "Color": true, "Size": true }, "Size Settings": { "Sizes": [ { "Size": 25.0, "Lang Key": "sizeBig", "Permission": "" }, { "Size": 20.0, "Lang Key": "sizeMedium", "Permission": "" }, { "Size": 15.0, "Lang Key": "sizeSmall", "Permission": "" } ], "Default Size (index)": 0 }, "Color Settings": { "Default Active Color ID": 0, "Default Inactive Color ID": 2 }, "Key (MUST BE UNIQUE)": "UserNotify" } Available Panel Types The HUD Info Panel System supports a diverse set of panel types to display various server stats and events: Online Sleepers Time CH47 Helicopter Bradley Airdrop Economics Custom CargoShip Button WipeBlock Convoy ArmoredTrain Sputnik SpaceEvent AirEvent ArcticBaseEvent GasStationEvent ShipwreckEvent HarborEvent JunkyardEvent SatDishEvent WaterEvent PowerPlantEvent KillBoss TravellingVendor Caravan DungeonEvents FAQ Q: How do I make the buttons hide when I click on the logo? A: In the logo settings, specify the command to hide the buttons (panelsystem.buttons). Example: https://pastebin.com/Ksggh718$21.95 -
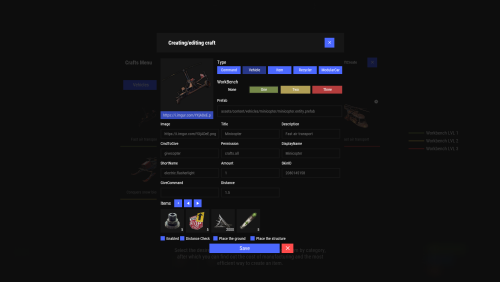
Version 2.10.23
1,661 downloads
Crafting system that allows you to create items, cars, vehicles, recyclers, etc! Commands craft open interface crafts.setwb [categories: cat1 cat2 ...] set new custom workbench Permissions You can set permission in config, for example: "Permission (ex: crafts.use)": "crafts.use", crafts.setworkbench - allows you to use the "crafts.setwb" command (set custom workbenches) Craft Types Command Vehicle Item Recycler ModularCar How to install a custom workbench 1. Spawn the workbench (for example, in RustEdit or a plugin) 2. In the game, go to him and use the command "crafts.setwb" and specify the necessary categories. Example: /crafts.setwb Misc 3. Go to config (oxide/config/Crafts.json) and configure this workbench (use SafeZone, workbench level, etc.) VIDEO FAQ Q: Where can I see an example of a config? A: Config$19.95 -
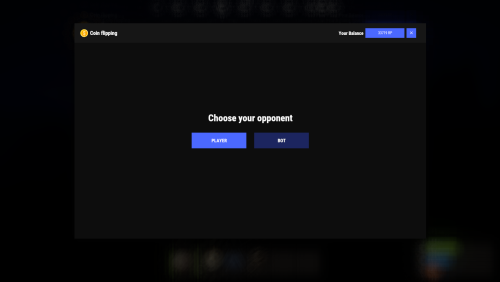
Version 1.0.10
133 downloads
Adds a coin flipping mini game to your server. Players can try their luck by playing against both a bot and a real player. Commands flip - open interface Permissions coinflipping.use - open interface coinflipping.players - play against players coinflipping.npcs - play against npcs coinflipping.createroom - create a room Config { "Commands": [ "flip" ], "Work with Notify?": true, "Economy": { "Type (Plugin/Item)": "Plugin", "Plugin name": "Economics", "Balance add hook": "Deposit", "Balance remove hook": "Withdraw", "Balance show hook": "Balance", "ShortName": "scrap", "Display Name (empty - default)": "", "Skin": 0 }, "Interface": { "Show coin in header?": true, "Coin Image": "https://i.imgur.com/GBVGvQa.png" }, "Values for Bot Game": [ 100, 200, 300 ], "Min Bet for Bot Game": 100, "Min Bet for Player Game": 100, "Permissions Settings": { "Opening the interface": "coinflipping.use", "Playing against players": "coinflipping.players", "Playing against NPCs": "coinflipping.npcs", "Creating a room": "coinflipping.createroom" } }$19.95 -
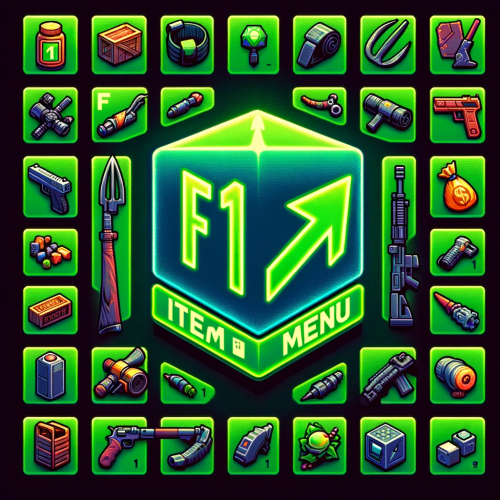
Version 1.1.2
130 downloads
The "F1 Item Menu" plugin allows players to open an interactive menu to select items in Rust and add them to their inventory using a simple command. The plugin provides a user-friendly interface with a search function and page navigation for convenient browsing of available items. Command: /f1menu - Opens the F1 item menu, allowing the player to select items and add them to their inventory. Permissions: f1itemmenu.f1 - This permission is required to use the /f1menu command. How to Use the Plugin: 1. To open the menu, the player enters the /f1menu command, provided they have the f1itemmenu.f1 permission. 2. In the menu, the player can search for items by entering a search term and clicking "Search." 3. The player can navigate through the available items by clicking the arrow buttons (< and >) to go to the previous or next page. 4. After selecting an item, the player is presented with another menu to specify the quantity of the chosen item. 5. The player can then choose the desired quantity (1, 10, 100, 1000, 10000) and click "Close" to exit the menu. 6. The selected item is automatically added to the player's inventory. { "Enable Discord Webhook": true, "Webhook URL": "", "Username": "Rust Server", "Avatar URL": "", "Discord Message Format": "Player **{playerName}** has taken **{quantity}** of **{itemName}**." }$15.95 -
Version 1.1.57
6,170 downloads
Clans is an all-in-one manager that lets you create, manage and invite players all from one stunning interface. Toggle friendly fire, view clan, and player leaderboards, create and break alliances, modify gather rates for clan members and set clan skins to identify clan members abroad easily. Features Beautiful user interface Performance Allied clans Gather rate for players (allows you to set how much each clan member must collect resources. For example: each member of the clan must collect 10 thousand sulfur, so that later it can be used to craft explosives and attack another clan) Clan skins (allows you to set common skins for all clan players. All the clothes on the players of the same clan will be the same, which allows you to distinguish your own from the enemies during the battle) The clan TAG min- and max-length can be defined in the config The clan overview shows offline member names Clan members can toggle friendly-fire protection for clan mates and allies Clan creation can check TAG’s against a blocked word list Clan tagging can be optionally disabled Old (not updated since x days) clans can be automatically purged Clans rating Players rating Setting a personal avatar for your clan Autowipe with wipe (optional) Commands clans (display clan menu) clans help (get information about commands) clan create (create a clan) clan leave (leave from your clan) clan join (open UI with invitations) clan ff (toggle friendlyfire status) clan allyff (toggle friendlyfire status for allies) clan invite <name/steamid> (invite a player) clan withdraw <name/steamid> (cancel an invite) clan kick <name/steamid> (kick a member) clan allyinvite <clanTag> (invite a clan to ally) clan allywithdraw <clanTag> (cancel the offer of an alliance) clan allyaccept <clanTag> (accept the offer of an alliance) clan allycancel <clanTag> (cancen the offer of an alliance) clan promote <name/steamid> (promote a member) clan demote <name/steamid> (demote a member) clan disband (disband your clan) clans.loadavatars (download avatars of all players) clans.manage list - lists all clans, their owners and their member-count clans.manage listex - lists all clans, their owners/members and their on-line status clans.manage show [name/userId] - lists the chosen clan (or clan by user) and the members with status clans.manage msg [clanTag] [message] - sends a clan message clans.manage create [name/userId] [clanTag] - creates a clan clans.manage rename [oldTag] [newTag] - renames a clan clans.manage disband [clanTag] - disbands a clan clans.manage invite [clanTag] [name/userId] - sends clan invitation to a player clans.manage join [clanTag] [name/userId] - joins a player into a clan clans.manage kick [clanTag] [name/userId] - kicks a member from a clan clans.manage owner [clanTag] [name/userId] - sets a new owner clans.manage promote [clanTag] [name/userId] - promotes a member clans.manage demote [clanTag] [name/userId] - demotes a member clans.reborn.convert (convert data from Clans Reborn plugin) clans.umod.convert (convert data from uMod Clans (v0.2.2+) plugin) clans.convert.olddata (convert data from old data) clans.convert.old.stats – used to update player data when upgrading from older versions of the game to 1.1.31 and above. Permissions clans.cancreate (permission to create a clan) clans.canjoin (permission to join a clan) clans.canleave (permission to leave a clan) clans.candisband (permission to disband a clan) clans.cankick (permission to kick a clan member) clans.admin (permission to use command 'clans.manage') Loot Types None – used for disabled loot Gather – used for gathering loot LootCrate – used for a loot crate Look – used to look at loot Kill – used to kill entities Craft – used for crafting items HackCrate – used for hacking a loot crate FAQ Q: Where can I see an example of a config? A: Config Q: Does the Clans plugin support other plugins? A: Yes, this Clans plugin has an API similar to other popular clans plugins. If the plugin works with Clans - it works with this plugin too. Q: How do I enable the display of clan ratings on the screen? A: You need to install the Clans Top plugin Q: Does the Clans plugin work with other Rust plugins? A: The Clans plugin is designed to work with a wide range of other Rust plugins, but compatibility may vary depending on the specific plugins you are using.$45.95 -

Version 2.4.16
16,532 downloads
Enjoy a highly customizable Shop that can be configured in game! Use NPCs as shopkeepers, and set up a shop with ease using the game interface to add, edit, or remove items on the fly! Features of Shop Beautiful user interface with multiple templates (Fullscreen, In-Menu V1/V2/V4) Shopping Basket - add multiple items to cart and purchase them all at once Search functionality - search for items by name across all categories Pagination - efficient item browsing with page-by-page navigation Discount system (by permissions) with per-item custom discounts Automatic shop filling (+ the plugin has support for the ItemCostCalculator plugin) Selling items (players can sell items to the store and receive money for it) Sell containers configuration - choose which containers (main, belt) players can sell from Blocked skins - prevent selling of specific item skins High performance with optimized item loading Adding/editing/removing items IN GAME with visual editor Supports NPC shops (HumanNPC integration) Supports Custom Vending Machines Supports NoEscape plugin integration Supports Duel/Duelist - blocks shop access during duels Convert from ServerRewards Favorite items system - players can mark items as favorites Buy Again feature - quick repurchase of previously bought items By default, the plugin has English, Russian and Chinese translations LangAPI integration for custom translations Transfer money between players directly in the plugin (including offline players option) Shop allows you to use multiple economy plugins at once (players can choose what they want to pay with) For each item, you can choose which payment methods are available and how much they will cost, based on the selected method Cooldown system - per-item buy/sell cooldowns with per-permission overrides Wipe cooldown - block items for purchase/sale after server wipe Respawn cooldown - prevent shop access immediately after respawn Buy/Sell limits - lifetime and daily limits per permission Max buy/sell amount - limit items per transaction Force buy - fast purchase without confirmation dialogs Plant genes configuration for plant items Weapon configuration - spawn weapons with ammo and attachments Content system - configure container contents (liquid, weapon mods, etc.) Customizable UI - full color customization and formatting options Offline Image Mode - use local images instead of downloading from internet Image loading on login - preload images when players connect Console and file logging - comprehensive logging system ServerPanel integration - add Shop to ServerPanel menu Notify/UINotify integration for notifications Auto-wipe settings - automatically reset cooldowns, limits, and player data on wipe Discord Logging - Track all purchases, sales, and transfers directly in your Discord server via webhooks with customizable embeds API methods for other plugins to interact with Shop Commands shop - open shop interface shop.install – starts the shop installation process shop.refill <recovery_rate> - refill shop again recoveryRate: A value between 0 and 1 that determines the multiplier for the cost of selling items. For example, shop.refill 0.5 means that items will have a sale cost of 50% of their purchase cost. shop.convert.sr [clear] - convert items from ServerRewards to Shop. The option clear means clearing Shop items before converting shop.setvm [categories: cat1 cat2 ...] - add custom VM in config shop.setnpc [categories: cat1 cat2 ...] - add NPC in config shop.remove all - a console command to remove all items and categories from the plugin shop.remove item [category name/all] - a console command to remove an item (or all items) shop.remove category [category name/all] - a console command to remove a category (or all categories) shop.fill.icc [all/buy/sell] - a console command for updating prices of items in the store using ItemCostCalculator. all - updates both Price and SellPrice, buy - updates Price, sell - updates SellPrice shop.convert.from.1.2.26 – command to convert Shop plugin version 1.2.26 to version 1.3.0+ shop.reset – resets store data, including templates, configurations, and items. shop.reset template – resets the store interface template data. shop.reset config – resets store configuration data. shop.reset items – resets store items data. shop.reset full – completely resets all store data (templates, configurations and items). shop.manage – used to manage the Shop plugin. shop.manage economy list – displays a list of all available economic systems in the plugin. shop.manage economy set <economy_ID> <name> – sets the selected economic system by plugin ID and name. The command updates the corresponding economic system on the server and saves the changes in the configuration. FOR EXAMPLE: shop.manage economy set 0 Economics – sets the main economy plugin to "Economics". shop.manage economy set 1 ServerRewards – sets the additional economy system with ID 1 to "ServerRewards". shop.wipe – manually trigger wipe (resets cooldowns, limits, and player data) shop.change – change item category (used in editor) shop.item – console command for item actions Permissions shop.setvm - for command "shop.setvm" shop.setnpc - for command "shop.setnpc" shop.free - for free item purchases shop.admin - admin permission shop.bypass.dlc - allows bypassing Facepunch ToS item restrictions (WARNING: your server may be banned for this) API Methods The Shop plugin provides API methods for other plugins to interact with it: API_OpenPlugin(BasePlayer player) – opens the shop UI for a player. Returns empty string if failed, or UI data if successful. API_GetShopPlayerSelectedEconomy(ulong playerID) – returns the economy ID (0 = main, 1+ = additional) that the player has selected for shopping. Note: Other plugins can call these methods using Shop.Call("API_MethodName", ...) syntax. Sort Types None Name Amount PriceDecrease PriceIncrease Category Types None – normal category for items Favorite – category for favorite items Hidden – hidden category, available only in NPC stores or Vending Machines Video P.S. Video of the old version, video for the V2+ version is now in development Showcase Full screen Templates Template OLD STYLE Template NEW RUST In-Menu Templates Template V1 (V1.1) Template V1 (V1.1) with BASKET Template V2 Template V2 with BASKET Template V4 Template V4 with BASKET Installer Editor Discord Logging Track all shop activity via Discord webhooks: purchases, sales, and money transfers. TEST SERVER Join our test server to view and experience all our unique features yourself! Copy the IP Address below to start playing! connect 194.147.90.239:28015 FAQ Q: I get the message "The plugin does not work correctly, contact the administrator!”. What should I do? A: This means that your plugin is not installed. To install the plugin, use the command "/shop.install”. You need to have "shop.admin” permission to access this command. Q: Where can I see an example of a config? A: Config Q: How to use BankSystem to store the economy A: "Economy": { "Type (Plugin/Item)": "Plugin", "Plugin name": "BankSystem", "Balance add hook": "Deposit", "Balance remove hook": "Withdraw", "Balance show hook": "Balance", "ShortName": "", "Display Name (empty - default)": "", "Skin": 0, "Lang Key (for Title)": "LangTitle", "Lang Key (for Balance)": "BalanceTitle" }, Q: How to use ServerRewards to store the economy A: "Economy": { "Type (Plugin/Item)": "Plugin", "Plugin name": "ServerRewards", "Balance add hook": "AddPoints", "Balance remove hook": "TakePoints", "Balance show hook": "CheckPoints", "ShortName": "", "Display Name (empty - default)": "", "Skin": 0, "Lang Key (for Title)": "LangTitle", "Lang Key (for Balance)": "BalanceTitle" }, Q: How to use Economics to store the economy A: "Economy": { "Type (Plugin/Item)": "Plugin", "Plugin name": "Economics", "Balance add hook": "Deposit", "Balance remove hook": "Withdraw", "Balance show hook": "Balance", "ShortName": "", "Display Name (empty - default)": "", "Skin": 0, "Lang Key (for Title)": "LangTitle", "Lang Key (for Balance)": "BalanceTitle" }, Q: How to use IQEconomic to store the economy A: "Economy": { "Type (Plugin/Item)": "Plugin", "Plugin name": "IQEconomic", "Balance add hook": "API_SET_BALANCE", "Balance remove hook": "API_GET_BALANCE", "Balance show hook": "API_REMOVE_BALANCE", "ShortName": "", "Display Name (empty - default)": "", "Skin": 0, "Lang Key (for Title)": "LangTitle", "Lang Key (for Balance)": "BalanceTitle" }, Q: How to use scrap to pay for items A: "Economy": { "Type (Plugin/Item)": "Item", "Plugin name": "", "Balance add hook": "", "Balance remove hook": "", "Balance show hook": "", "ShortName": "scrap", "Display Name (empty - default)": "", "Skin": 0, "Lang Key (for Title)": "LangTitle", "Lang Key (for Balance)": "BalanceTitle" }, Q: How to add KIT as shop item A: https://pastebin.com/4szBQCgz Q: How to add Command as shop item A: https://pastebin.com/bcCkzBEL Q: How do I make a weapon spawn with ammo in it? A: You need to configure the "Weapon" section in the item config: "Weapon": { "Enabled": true, "Ammo Type": "ammo.rifle.explosive", "Ammo Amount": 128 } Q: How do I make items spawn some content (liquid, weapon modifications)? A: You need to configure the "Content" section in the item config: "Content": { "Enabled": true, "Contents": [ { "ShortName": "weapon.mod.lasersight", "Condition": 100.0, "Amount": 1, "Position": -1 } ] }, Q: How to turn off the sell feature? A: You need to turn off "Enable item selling” in the config, or do it in the item setting in the game. "Enable item selling?": false, Q: How to use the ItemCostCalculator with Shop? A: You need to use command "shop.refill" (command to refill the Shop) Q: What should be the size of images for item icons? A: Typically, the image dimensions for item icons are 512x512 pixels, but any square image can suffice. Q: I get the error "UI is unavailable for player. Reason: Menu UI is not initialized". How to fix it? A: This error occurs when the interface template is not installed or configured. Follow these steps: 1. Reset the template using the command: shop.reset template (use only template to avoid data loss). 2. Install the interface via shop.install in the game (to visually select a template) or through the console. Note: Ensure you have the shop.admin permission to execute these commands. Q: How do I add Shop to the ServerPanel menu? A: Follow these simple steps: 1. Open ServerPanel menu in-game and click "+ADD CATEGORY" button 2. Set these exact parameters: Type: Plugin Plugin Name: Shop Plugin Hook: API_OpenPlugin 3. Click "SAVE" button to create the category 4. Reset Shop template and install it: Type in console: shop.reset template (IMPORTANT: use only "template"!) Then type: shop.install Note: If Shop doesn't appear in ServerPanel menu, make sure both plugins are loaded and you typed the parameters exactly as shown above. Q: I see black images with Rust logo or get error 429 when loading images. What should I do? A: These issues occur when there are problems downloading images from the internet. The Shop plugin sends images to ImageLibrary but is not responsible for the downloading process itself. Error 429 typically occurs due to rate limits imposed by image hosting services like Imgur (see HTTP 429 documentation for more details). To fix this, enable Offline Image Mode which will use local images instead: Enable the mode in config: Open "oxide/config/Shop.json" (or "carbon/config/Shop.json" for Carbon) Set "Enable Offline Image Mode": true Set up the images: Create folder "TheMevent" in "oxide/data" (or "carbon/data" for Carbon) Download PluginsStorage (click "CODE" → "Download ZIP") Extract the ZIP and copy all contents to the "TheMevent" folder Reload the plugin: Type o.reload Shop (Oxide) or c.reload Shop (Carbon) Note: If you want to add your own custom images, place them in the "TheMevent" folder and reference them with the "TheMevent/" prefix. For example: "TheMevent/Icon1.png", "TheMevent/MyCustomIcon.jpg", etc. Q: What placeholders are available for commands and what do they do? A: You can use these placeholders in shop commands and they will be automatically replaced when a player purchases a command item: %steamid% - Replaced with the player's Steam ID (e.g., "76561198000000000") %username% - Replaced with the player's display name (e.g., "PlayerName") %player.x% - Replaced with the player's X coordinate position %player.y% - Replaced with the player's Y coordinate position %player.z% - Replaced with the player's Z coordinate position Example usage in shop commands: "Command (%steamid%)": "say Welcome %username%!|teleport %steamid% %player.x% %player.y% %player.z%" Note: Multiple commands can be separated by the "|" character, and they will be executed in sequence when the item is purchased. Q: How to set different prices for different currencies (RP and balance)? A: You can configure separate currency prices for each item. Edit the file oxide/data/Shop/Shops/Default.json and find the item you want to modify. In the "Currencies" section, set different prices for each economy: "Currencies": { "Enabled": true, "Currencies": { "0": {"Price": 1000}, "1": {"Price": 500} } } This means players pay 1000 from their main balance (Economics) or 500 RP from their ServerRewards balance. Economy ID 0 = main economy, ID 1 = ServerRewards. Q: How to create a shop using HumanNPC plugin and set specific categories? A: To create a shop with HumanNPC, follow these steps: Create an NPC using HumanNPC plugin Get the NPC ID (you can find it in the HumanNPC config or use the command humannpc.list) Use the Shop command to add the NPC: shop.setnpc [categories: cat1 cat2 ...] Example: shop.setnpc categories: Weapon Ammunition Tools - adds the NPC with Weapon, Ammunition, and Tools categories shop.setnpc categories: * - adds the NPC with all available categories Note: You need the shop.setnpc permission to use this command. Make sure both HumanNPC and Shop plugins are loaded on your server. Q: How to add Custom Vending Machines to Shop plugin? A: To add Custom Vending Machines to Shop, follow these steps: Place a Custom Vending Machine in your world Look at the vending machine and use the command: shop.setvm [categories: cat1 cat2 ...] Example: shop.setvm categories: Weapon Ammunition - adds the vending machine with Weapon and Ammunition categories shop.setvm categories: * - adds the vending machine with all available categories Note: You need the shop.setvm permission to use this command. The vending machine will be automatically added to the Shop configuration. Q: How does the Shopping Basket feature work? A: The Shopping Basket allows players to add multiple items to a cart before purchasing. Players can add items to the basket, review their selection, and purchase everything at once. The basket shows the total cost and allows players to remove items before checkout. This feature must be enabled in the template settings. Q: How does the Search functionality work? A: The Search feature allows players to search for items by name across all categories. Simply type in the search box and the shop will filter items matching your query. Search works across all enabled categories and respects permission settings. The search feature can be enabled/disabled in the template configuration. Q: What are Wipe Cooldown and Respawn Cooldown? A: These are time-based restrictions: Wipe Cooldown: Blocks items from being bought/sold for a specified time after a server wipe. This is useful for preventing powerful items from being purchased immediately after wipe. Configure in config: "Wipe Cooldown": true and "Wipe Cooldown Timer": 3600 (seconds). Respawn Cooldown: Prevents players from opening the shop immediately after respawning. Helps prevent abuse. Configure in config: "Respawn Cooldown": true and "Respawn Cooldown Timer": 60 (seconds). Q: How do Daily and Lifetime Limits work? A: Limits control how many times players can buy/sell items: Lifetime Limits: Total number of times a player can buy/sell an item across their entire account. Set to 0 for unlimited. Daily Limits: Maximum number of times per day a player can buy/sell an item. Resets daily. Set to 0 for unlimited. Limits are per-permission, so you can set different limits for VIP players, regular players, etc. The plugin uses the highest limit among all permissions the player has. Q: What is the "Buy Again" feature? A: Buy Again allows players to quickly repurchase items they have bought before. This feature shows a history button in the shop UI (if enabled) and requires a permission. To enable, set "Buy Again Settings": {"Enabled": true, "Permission": "shop.buyagain"} in the config. Q: How do I configure blocked skins for selling? A: You can prevent players from selling specific item skins. In the config, add entries to "Blocked skins for sell": "Blocked skins for sell": { "rifle.ak": [52, 25], "pistol.m92": [100, 200] } Q: How do I configure which containers players can sell from? A: In the config, set "Settings available containers for selling item": "Settings available containers for selling item": { "Enabled": true, "Containers": ["main", "belt"] } Available container names: "main" (inventory), "belt" (hotbar), "wear" (clothing), etc. Q: What are Auto-Wipe Settings? A: Auto-Wipe Settings automatically reset certain data when you run the shop.wipe command. Configure in config: "Auto-Wipe Settings": { "Cooldown": true, "Players": true, "Limits": true } Cooldown: Resets all item cooldowns Players: Resets all player data (favorites, economy selection, etc.) Limits: Resets all buy/sell limits Q: How do I customize price formatting? A: In the config, set "Formatting Settings" to control how prices are displayed: "Formatting Settings": { "Buy Price Format": "G", "Sell Price Format": "G", "Shopping Bag Cost Format": "G", "Balance Format": "G" } Format options: "G" (general), "N" (number with separators), "C" (currency), "F" (fixed-point), etc. See .NET number formatting for all options. Q: How do I enable transfers to offline players? A: In the config, set "Allow money transfers to offline players?": true. By default, this is disabled for security reasons. Q: How do I configure Duel/Duelist integration? A: To block shop access during duels, set "Blocking the opening in duels?": true in the config. Make sure you have the Duel or Duelist plugin loaded. Q: What do all shop item settings mean and how should I configure them? A: Below is a short explanation of the most important item fields and how they affect the plugin. Type – what this entry does: Item (gives an in-game item), Command (runs server commands), Plugin (calls another plugin hook), Kit (gives a kit). ID – unique numeric ID of the item inside Shop. Used internally (for logs, favorites, editor); normally you don’t change it manually. Image – custom UI icon key. If empty, Shop will try to use the item icon found by ShortName. Permission – Oxide/Carbon permission required to see and use this item. Leave empty to make the item available to everyone, or set e.g. shop.vip for VIP‑only items. Title – custom title shown in the UI. If empty, the plugin will try to use DisplayName, then the in‑game display name of the item, or fall back to an empty string. Description – additional text shown in the item window. Optional, purely visual. Command (%steamid%) – used when Type = Command. The plugin will execute this command on the server. You can use placeholders like %steamid%, %username%, %player.x%, %player.y%, %player.z%. Each purchase can run multiple commands (split internally by |). Kit – kit name for Type = Kit. The plugin will give a kit with this name when the player buys the item. Plugin – used for Type = Plugin. Contains plugin name, hook name and amount. When the item is purchased, the specified hook will be called in the target plugin. DisplayName (empty – default) – overrides the in‑game item name shown to the player (for Type = Item). If empty, the plugin uses the original item display name (optionally via Lang API). ShortName – shortname of the item (e.g. rifle.ak). This is required for Type = Item; it is used to find ItemDefinition, icon, stack size, etc. Skin – workshop skin ID for the item. Only used when Type = Item. Is Blueprint – if enabled, Shop will give the item as a blueprint instead of the regular item. Amount – how many items are given/sold per one purchase. For blueprints this is how many separate blueprint items are created. Enable item buying? (CanBuy) – if disabled, the item cannot be bought (only sold, if selling is enabled). Price – default purchase price. Can be overridden per‑economy in Currencies – if a currency is configured for buying, its price will be used instead of this value. Enable item selling? (CanSell) – if disabled, players cannot sell this item back to the shop. Sell Price – default sell price. Can also be overridden in Currencies for selling. Buy Cooldown / Sell Cooldown – base cooldown in seconds between purchases/sales of this item. Can be overridden by per‑permission cooldowns below. Buy Cooldowns / Sell Cooldowns – per‑permission cooldowns. Keys are permission names (e.g. shop.vip), values are cooldown seconds. The plugin uses the lowest cooldown among permissions that the player has. Use custom discount? – if enabled, the item will use its own Discount map instead of the global discount configuration. Discount (%) – per‑permission discount percentages for this item (only if custom discount is enabled). The highest discount from permissions that the player has will be applied. Sell Limits / Buy Limits – global lifetime limits per permission. A value of 0 means “no limit”. The plugin selects the highest limit among permissions the player has. Daily Buy Limits / Daily Sell Limits – per‑day limits (reset by the plugin’s daily logic). 0 means “no daily limit”. Max Buy Amount / Max Sell Amount – maximum number of items that can be bought/sold in a single transaction (0 disables this limit). Force Buy – if enabled, the item will use fast purchase flow (without extra confirmation windows, depending on UI settings). Prohibit splitting item into stacks? – if enabled, the plugin will try to give the item in a single stack instead of splitting it into multiple stacks, when possible. Purchase/Sale block duration after wipe – time (in seconds) after a wipe during which this item cannot be bought/sold. Useful for limiting powerful items early in the wipe. Localization – per‑language messages for the item title. If enabled and a translation exists for the player’s language, it will override the normal title. Content – configuration of contents for containers (e.g. boxes, weapons with attachments, etc.). You can add inner items (shortname, amount, condition, position). Weapon – additional settings for weapons (ammo type, ammo amount, etc.). Applied when the item is created. Genes – plant gene configuration. If enabled, the plugin will set specified genes on the created item. Currencies – per‑economy price configuration. You can set different prices for each enabled economy plugin (by economy ID) for both buying and selling. If a currency is configured and enabled for the player’s selected economy, its price takes priority over the default Price/Sell Price. Q: What do shop category settings mean and how should I configure them? A: Categories group your shop items and control how they are shown, sorted and filtered for players. Enabled – turns this category on or off. If disabled, the category and all its items will not appear in the shop UI at all. Category Type – controls special behavior of the category: None – a normal category that shows the items you added to Items. Favorite – a virtual category that shows each player’s favorite items (based on their own favorites list). Items here are taken from other categories the player marked as favorite. Hidden – a hidden category. It is stored in data and can be used for management, but is not shown in the normal category list in UI. Title – the name of the category displayed in the UI. If Localization is enabled and contains a translation for the player’s language, that localized text will be shown instead of this value. Permission – permission required to see and use this category. If you leave it empty, all players can see the category (subject to item‑level rules). If you set e.g. shop.category.vip, only players with that permission will see this category in the shop. Sort Type – how items inside the category are sorted: None – items are shown in the order they are stored/edited. Name – items are sorted alphabetically by their PublicTitle (what the player sees). Amount – items are sorted by Amount (stack size) in ascending order. PriceIncrease – items are sorted by price from cheaper to more expensive. PriceDecrease – items are sorted by price from more expensive to cheaper. Sorting is applied every time the category items are requested. Items – the list of ShopItem entries that belong to this category. For normal categories (Type = None/Hidden) this is what will be displayed in the item grid. For Favorite categories this list is not used for display – the plugin uses the player’s favorites instead. Localization – optional localized title for the category. When enabled, the plugin will try to show a translated title based on the player’s language. If no translation is found, it falls back to the Title field. How visibility and filtering work – when the shop builds a category: For normal categories, only items that are available for the player (permission, currencies, buy/sell rules, etc.) are included. Skip/take pagination is applied on top of that filtered list to show items page by page. For favorite categories, the plugin takes the player’s favorite items, applies sorting, and displays them in this special category. Reordering categories and items – categories and items can be moved up/down (or left/right) in the in‑game editor. This changes the order in which categories are shown in the UI and the default order of items when Sort Type = None. Q: How do I enable and use ADMIN MODE? A: ADMIN MODE is a visual in-game editor that allows you to manage your shop without editing files manually. Step 1: Enable ADMIN MODE Ensure you have the shop.admin permission Open shop with /shop command Click the "ADMIN MODE" button in the header (shows "■" when active) Step 2: Create/Edit Categories To create a new category: With ADMIN MODE enabled, click the "+" button in categories list Fill in category details (Title, Enabled, Type, Permission, Sort Type) Click "SAVE" To edit an existing category: Click the "Edit" button (pencil icon) next to the category Modify settings Click "SAVE" or "CANCEL" Step 3: Create/Edit Items To create a new item: Open the target category Click "+ADD ITEM" button Select item from the selection panel Configure all item properties (price, amount, permissions, etc.) Click "SAVE" To edit an existing item: Click the "Edit" button on the item Modify properties Click "SAVE" or "CANCEL" Additional ADMIN MODE Features: Use ↑↓ arrows to reorder categories Use ←→ arrows to reorder items within categories Use "DELETE" button in editor to remove categories/items All changes save automatically - no manual file editing needed Q: Where are shop files stored and what do they contain? A: Shop plugin data is organized in the following structure: Configuration (oxide/config/Shop.json or carbon/config/Shop.json) Plugin settings (permissions, commands, economy configuration) Notification settings Discord logging configuration Global plugin options Shop Data (oxide/data/Shop/Shops/Default.json or carbon/data/Shop/Shops/Default.json) This is the main shop inventory file All categories and their settings All items with prices, permissions, cooldowns, limits Item configurations (weapons, content, currencies, etc.) Edited through ADMIN MODE or manually UI Template (oxide/data/Shop/UI.json or carbon/data/Shop/UI.json) Interface template configuration Colors, sizes, positions Display settings Reset with: shop.reset template then shop.install Player Data (oxide/data/Shop/Players/ or carbon/data/Shop/Players/) Individual player files (one per player)$29.95 -
.thumb.png.7486c0454896918260392db17073079b.png)
Version 1.1.1
165 downloads
Vehicle Hud is for your Vehicles(Modular Cars, MiniCopter, ScrapTransportHeli, RowBoat, Rhib, Snowmobile & new AttackHelicopter). This plugin provides players with a more detailed and visually appealing heads-up display (HUD) when operating various vehicles within the game. It aims to improve the usability and accessibility of your vehicles. Videos ScreenShots Many Designs Coming Soon In Future updates If you want to talk to me about Custom Vehicle Hud design or Any issues message me on Discord Discord: iftebinjan Useable Permission vehiclehud.use (If use permission set to true) vehiclehud.admin (You will need it change the Vehicle Hud) Useable Commands Use /vh to change the Vehicle Hud Configuration { "Use Permission": false, "Ui Update Interval": 1, "Change Hud Design": 1, "Vehicle Hud #1": { "Hud #1 Ui Settings": { "Ui Change(Hud/Overlay)": "Hud", "AnchorMin": "0.649 0.024", "AnchorMax": "0.831 0.176", "OffsetMin": "-0.554 -1.197", "OffsetMix": "-0.148 -0.648" }, "Hud #1 Ui Icons": { "Vehicle Light": { "Icon": "https://i.postimg.cc/Qx148TNL/editedcar-light.png", "Active Color": "#10ff10", "InActive Color": "#6CD2E1", "Text Font": "robotocondensed-regular.ttf" }, "Vehicle Engin": { "Icon": "https://i.postimg.cc/MZh3JDSb/editedengine.png", "Active Color": "#6CD2E1", "InActive Color": "#DC143C", "Text Font": "robotocondensed-regular.ttf" }, "Vehicle Lock": { "Icon": "https://i.postimg.cc/qBtDFF9v/editedcar-locked.png", "Active Color": "#6CD2E1", "InActive Color": "#DC143C", "Text Font": "robotocondensed-regular.ttf" }, "Vehicle Fuel": { "Icon": "https://i.postimg.cc/cC83cwkd/Fuel.png", "Active Color": "#6CD2E1", "InActive Color": "#DC143C", "Text Font": "robotocondensed-regular.ttf", "Text Color": "#ffffff" }, "Vehicle Health": { "Icon": "https://i.postimg.cc/Jz8TGzts/editedwrench.png", "Icon Color": "#6CD2E1", "Text Font": "robotocondensed-regular.ttf", "Text Color": "#ffffff" }, "Vehicle Grid": { "Icon": "https://i.postimg.cc/hhWdZvNT/edited-Location.png", "Icon Color": "#6CD2E1", "Text Color": "#ffffff", "Text Font": "robotocondensed-regular.ttf" }, "Vehicle Speed": { "Icon": "https://i.postimg.cc/MH2WBQCk/Untitled-design-1-removebg-preview.png", "Icon Color": "#6CD2E1", "Number Size": 20, "Number Color": "#ffffff", "Text Color": "#6CD2E1", "Text Size": 20, "Text Font": "robotocondensed-bold.ttf" } } }, "Vehicle Hud #2": { "Hud #2 Ui Settings": { "Ui Change(Hud/Overlay)": "Hud", "AnchorMin": "0.113 0", "AnchorMax": "0.341 0.161", "OffsetMin": "0.044 -0.001", "OffsetMix": "-0.644 -0.766" }, "Hud #2 Ui Icons": { "Vehicle Light": { "Icon": "https://i.postimg.cc/Qx148TNL/editedcar-light.png", "Active Color": "#008000", "InActive Color": "#808080", "Background Color": "0 0 0 0.6745098" }, "Vehicle Engin": { "Icon": "https://i.postimg.cc/MZh3JDSb/editedengine.png", "Active Color": "#008000", "InActive Color": "#DC143C", "Text Size": 14, "Text Font": "robotocondensed-regular.ttf", "Text Color": "#ffffff", "Background Color": "0 0 0 0.6745098" }, "Vehicle Lock": { "Icon": "https://i.postimg.cc/zfvwfph0/car.png", "Active Color": "#008000", "InActive Color": "#DC143C", "Background Color": "0 0 0 0.6745098" }, "Vehicle Fuel": { "Icon": "https://i.postimg.cc/cC83cwkd/Fuel.png", "Active Color": "#008000", "InActive Color": "#DC143C", "Text Font": "robotocondensed-regular.ttf", "Text Color": "#ffffff", "Text Size": 14, "Background Color": "0 0 0 0.6745098" }, "Vehicle Speed": { "Number Size": 20, "Number Color": "#008000", "Text Color": "#008000", "Text Size": 14, "Text Font": "robotocondensed-bold.ttf", "Background Color": "0 0 0 0.6745098" }, "Vehicle Gear Shift": { "Icon": "https://i.postimg.cc/bvfSXgbn/gearshift.png", "Icon Color": "#008000", "Text Size": 14, "Text Color": "#ffffff", "Text Font": "robotocondensed-regular.ttf", "Background Color": "0 0 0 0.6745098" }, "Vehicle Heli Height": { "Icon": "https://i.postimg.cc/qByYscb1/whitehelicopter.png", "Icon Color": "#008000", "Text Size": 14, "Text Color": "#ffffff", "Text Font": "robotocondensed-regular.ttf", "Background Color": "0 0 0 0.6745098" }, "Vehicle Boat": { "Icon": "https://i.postimg.cc/Jzz80Qf2/motor-powered-boat.png", "Icon Color": "#008000", "Background Color": "0 0 0 0.6745098" } } }, "Vehicle Hud #3": { "Hud #3 Ui Settings": { "Ui Change(Hud/Overlay)": "Hud", "AnchorMin": "0.661 0.01", "AnchorMax": "0.838 0.165", "OffsetMin": "0.388 0.165", "OffsetMix": "-0.242 -0.884", "Background Color UI": { "HEX": "#172027", "Opacity (0 - 100)": 70.0 } }, "Hud #3 Ui Icons": { "Vehicle Light": { "Icon": "https://i.postimg.cc/Qx148TNL/editedcar-light.png", "Active Color": "#008000", "InActive Color": "#808080" }, "Vehicle Engin": { "Icon": "https://i.postimg.cc/MZh3JDSb/editedengine.png", "Active Color": "#808080", "InActive Color": "#DC143C" }, "Vehicle Lock": { "Icon": "https://i.postimg.cc/W45s5RcJ/padlock.png", "Active Color": "#808080", "InActive Color": "#DC143C" }, "Vehicle Fuel": { "Icon": "https://i.postimg.cc/cC83cwkd/Fuel.png", "Active Color": "#808080", "InActive Color": "#DC143C", "Text Font": "robotocondensed-regular.ttf", "Text Color": "#808080", "Text Size": 14 }, "Vehicle Speed": { "Number Size": 20, "Number Color": "#ffffff", "Text Color": "#808080", "Text Size": 14, "Text Font": "robotocondensed-bold.ttf", "Icon": "https://i.postimg.cc/RVxpKQTf/zYv7RDY.png", "Icon Color": "#808080" }, "Vehicle Gear Shift": { "Icon Color": "#808080" }, "Vehicle Health": { "Icon": "https://i.postimg.cc/Jz8TGzts/editedwrench.png", "Icon Color": "#808080", "Text Font": "robotocondensed-regular.ttf", "Text Size": 14, "Text Color": "#808080" }, "Vehicle Heli Height": { "Icon": "https://i.postimg.cc/xCRZQ2T0/helicopter.png", "Icon Color": "#808080", "Text Size": 14, "Text Color": "#808080", "Text Font": "robotocondensed-regular.ttf" }, "Vehicle Boat": { "Icon": "https://i.postimg.cc/0NGK6qnL/boat.png", "Icon Color": "#808080" } } } } Check Out My Other plugins as Well$9.99 -
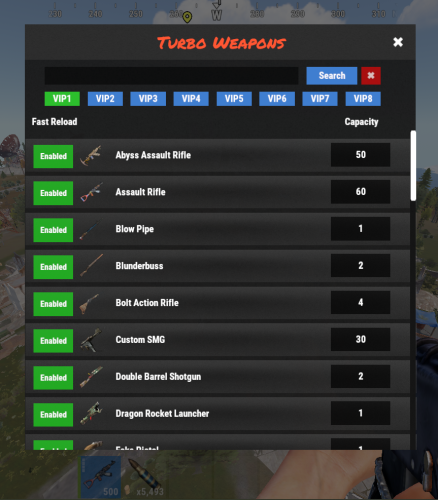
Version 2.3.3
701 downloads
Transform your Rust server’s combat dynamics with TurboWeapons, a powerful plugin that allows you to customize firearm magazine capacities based on player VIP levels. Whether you want to reward your dedicated players with enhanced firepower or maintain balanced gameplay, TurboWeapons provides a flexible and intuitive system to achieve your goals. Key Features Three Distinct VIP Levels: Implement VIP1, VIP2, and VIP3 permissions (turboweapons.vip1, turboweapons.vip2, turboweapons.vip3), each offering unique magazine capacities for firearms. Tailor the firepower rewards to match your server’s progression and economy. Customizable Magazine Capacities: Assign separate MagazineCapacityVip1, MagazineCapacityVip2, and MagazineCapacityVip3 settings for each firearm in your configuration. Ensure that each VIP tier receives appropriate enhancements without affecting other levels. User-Friendly Configuration UI: Administrators can easily manage and adjust magazine capacities through an intuitive in-game UI. The updated interface replaces the old multiplier buttons with dedicated VIP selection buttons, allowing for seamless switching and editing of capacities for each VIP level. Fast Reload Support: Enhance gameplay with optional fast reload capabilities. Administrators can toggle fast reload settings per firearm, providing a tactical advantage to players who hold the necessary permissions. Dynamic Ammo Management: TurboWeapons intelligently handles ammo consumption and replenishment based on player permissions and VIP levels. It ensures that magazine capacities align with the configured settings, maintaining a balanced and engaging combat experience. Dependency Integration: Seamlessly integrates with popular plugins such as ImageLibrary, LangAPI, Notify, and SkillTree, allowing for extended functionality and customization. Configuration Flexibility: Customize each firearm’s magazine capacities independently for each VIP level. Adjust settings to fit your server’s unique balance requirements and player progression systems. Commands Admin Chat Commands: /turboweapons – Opens the TurboWeapons configuration UI. Permissions turboweapons.admin – Grants access to UI edit features. turboweapons.vip1 turboweapons.vip2 turboweapons.vip3 Dependencies ImageLibrary – Required for managing and displaying weapon icons in the UI. LangAPI – Optional, for enhanced language support and localization. Notify – Optional, for sending in-game notifications to players. Configuration TurboWeapons offers a comprehensive configuration system, allowing administrators to define default settings and customize each firearm’s capacities per VIP level. The configuration file includes: { "Use Notify Plugin": true, "Use LangAPI Plugin": true, "Weapon Configurations": [ { "Weapon Shortname": "blunderbuss", "Magazine Capacity (VIP1)": 2, "Magazine Capacity (VIP2)": 2, "Magazine Capacity (VIP3)": 2, "Fast Reload (VIP1)": false, "Fast Reload (VIP2)": true, "Fast Reload (VIP3)": true }, { "Weapon Shortname": "hmlmg", "Magazine Capacity (VIP1)": 60, "Magazine Capacity (VIP2)": 60, "Magazine Capacity (VIP3)": 60, "Fast Reload (VIP1)": false, "Fast Reload (VIP2)": true, "Fast Reload (VIP3)": true }, { "Weapon Shortname": "homingmissile.launcher", "Magazine Capacity (VIP1)": 1, "Magazine Capacity (VIP2)": 1, "Magazine Capacity (VIP3)": 1, "Fast Reload (VIP1)": false, "Fast Reload (VIP2)": true, "Fast Reload (VIP3)": true }, { "Weapon Shortname": "lmg.m249", "Magazine Capacity (VIP1)": 100, "Magazine Capacity (VIP2)": 100, "Magazine Capacity (VIP3)": 100, "Fast Reload (VIP1)": false, "Fast Reload (VIP2)": true, "Fast Reload (VIP3)": true }, { "Weapon Shortname": "minigun", "Magazine Capacity (VIP1)": 300, "Magazine Capacity (VIP2)": 300, "Magazine Capacity (VIP3)": 300, "Fast Reload (VIP1)": false, "Fast Reload (VIP2)": true, "Fast Reload (VIP3)": true }, { "Weapon Shortname": "multiplegrenadelauncher", "Magazine Capacity (VIP1)": 6, "Magazine Capacity (VIP2)": 6, "Magazine Capacity (VIP3)": 6, "Fast Reload (VIP1)": false, "Fast Reload (VIP2)": true, "Fast Reload (VIP3)": true }, { "Weapon Shortname": "pistol.eoka", "Magazine Capacity (VIP1)": 1, "Magazine Capacity (VIP2)": 1, "Magazine Capacity (VIP3)": 1, "Fast Reload (VIP1)": false, "Fast Reload (VIP2)": true, "Fast Reload (VIP3)": true }, { "Weapon Shortname": "pistol.m92", "Magazine Capacity (VIP1)": 15, "Magazine Capacity (VIP2)": 15, "Magazine Capacity (VIP3)": 15, "Fast Reload (VIP1)": false, "Fast Reload (VIP2)": true, "Fast Reload (VIP3)": true }, { "Weapon Shortname": "pistol.nailgun", "Magazine Capacity (VIP1)": 16, "Magazine Capacity (VIP2)": 16, "Magazine Capacity (VIP3)": 16, "Fast Reload (VIP1)": false, "Fast Reload (VIP2)": true, "Fast Reload (VIP3)": true }, { "Weapon Shortname": "pistol.prototype17", "Magazine Capacity (VIP1)": 18, "Magazine Capacity (VIP2)": 18, "Magazine Capacity (VIP3)": 18, "Fast Reload (VIP1)": false, "Fast Reload (VIP2)": true, "Fast Reload (VIP3)": true }, { "Weapon Shortname": "pistol.python", "Magazine Capacity (VIP1)": 6, "Magazine Capacity (VIP2)": 6, "Magazine Capacity (VIP3)": 6, "Fast Reload (VIP1)": false, "Fast Reload (VIP2)": true, "Fast Reload (VIP3)": true }, { "Weapon Shortname": "pistol.revolver", "Magazine Capacity (VIP1)": 8, "Magazine Capacity (VIP2)": 8, "Magazine Capacity (VIP3)": 8, "Fast Reload (VIP1)": false, "Fast Reload (VIP2)": true, "Fast Reload (VIP3)": true }, { "Weapon Shortname": "pistol.semiauto", "Magazine Capacity (VIP1)": 10, "Magazine Capacity (VIP2)": 10, "Magazine Capacity (VIP3)": 10, "Fast Reload (VIP1)": false, "Fast Reload (VIP2)": true, "Fast Reload (VIP3)": true }, { "Weapon Shortname": "revolver.hc", "Magazine Capacity (VIP1)": 6, "Magazine Capacity (VIP2)": 6, "Magazine Capacity (VIP3)": 6, "Fast Reload (VIP1)": false, "Fast Reload (VIP2)": true, "Fast Reload (VIP3)": true }, { "Weapon Shortname": "rifle.ak", "Magazine Capacity (VIP1)": 30, "Magazine Capacity (VIP2)": 30, "Magazine Capacity (VIP3)": 30, "Fast Reload (VIP1)": false, "Fast Reload (VIP2)": true, "Fast Reload (VIP3)": true }, { "Weapon Shortname": "rifle.ak.diver", "Magazine Capacity (VIP1)": 30, "Magazine Capacity (VIP2)": 100, "Magazine Capacity (VIP3)": 30, "Fast Reload (VIP1)": false, "Fast Reload (VIP2)": true, "Fast Reload (VIP3)": true }, { "Weapon Shortname": "rifle.ak.ice", "Magazine Capacity (VIP1)": 30, "Magazine Capacity (VIP2)": 30, "Magazine Capacity (VIP3)": 30, "Fast Reload (VIP1)": false, "Fast Reload (VIP2)": true, "Fast Reload (VIP3)": true }, { "Weapon Shortname": "rifle.bolt", "Magazine Capacity (VIP1)": 4, "Magazine Capacity (VIP2)": 4, "Magazine Capacity (VIP3)": 4, "Fast Reload (VIP1)": false, "Fast Reload (VIP2)": true, "Fast Reload (VIP3)": true }, { "Weapon Shortname": "rifle.l96", "Magazine Capacity (VIP1)": 5, "Magazine Capacity (VIP2)": 5, "Magazine Capacity (VIP3)": 5, "Fast Reload (VIP1)": false, "Fast Reload (VIP2)": true, "Fast Reload (VIP3)": true }, { "Weapon Shortname": "rifle.lr300", "Magazine Capacity (VIP1)": 30, "Magazine Capacity (VIP2)": 30, "Magazine Capacity (VIP3)": 30, "Fast Reload (VIP1)": false, "Fast Reload (VIP2)": true, "Fast Reload (VIP3)": true }, { "Weapon Shortname": "rifle.m39", "Magazine Capacity (VIP1)": 20, "Magazine Capacity (VIP2)": 20, "Magazine Capacity (VIP3)": 20, "Fast Reload (VIP1)": false, "Fast Reload (VIP2)": true, "Fast Reload (VIP3)": true }, { "Weapon Shortname": "rifle.semiauto", "Magazine Capacity (VIP1)": 16, "Magazine Capacity (VIP2)": 16, "Magazine Capacity (VIP3)": 16, "Fast Reload (VIP1)": false, "Fast Reload (VIP2)": true, "Fast Reload (VIP3)": true }, { "Weapon Shortname": "rifle.sks", "Magazine Capacity (VIP1)": 15, "Magazine Capacity (VIP2)": 15, "Magazine Capacity (VIP3)": 15, "Fast Reload (VIP1)": false, "Fast Reload (VIP2)": true, "Fast Reload (VIP3)": true }, { "Weapon Shortname": "rocket.launcher", "Magazine Capacity (VIP1)": 1, "Magazine Capacity (VIP2)": 1, "Magazine Capacity (VIP3)": 1, "Fast Reload (VIP1)": false, "Fast Reload (VIP2)": true, "Fast Reload (VIP3)": true }, { "Weapon Shortname": "rocket.launcher.dragon", "Magazine Capacity (VIP1)": 1, "Magazine Capacity (VIP2)": 10, "Magazine Capacity (VIP3)": 1, "Fast Reload (VIP1)": false, "Fast Reload (VIP2)": true, "Fast Reload (VIP3)": true }, { "Weapon Shortname": "shotgun.double", "Magazine Capacity (VIP1)": 2, "Magazine Capacity (VIP2)": 2, "Magazine Capacity (VIP3)": 2, "Fast Reload (VIP1)": false, "Fast Reload (VIP2)": true, "Fast Reload (VIP3)": true }, { "Weapon Shortname": "shotgun.m4", "Magazine Capacity (VIP1)": 6, "Magazine Capacity (VIP2)": 6, "Magazine Capacity (VIP3)": 6, "Fast Reload (VIP1)": false, "Fast Reload (VIP2)": true, "Fast Reload (VIP3)": true }, { "Weapon Shortname": "shotgun.pump", "Magazine Capacity (VIP1)": 6, "Magazine Capacity (VIP2)": 6, "Magazine Capacity (VIP3)": 6, "Fast Reload (VIP1)": false, "Fast Reload (VIP2)": true, "Fast Reload (VIP3)": true }, { "Weapon Shortname": "shotgun.spas12", "Magazine Capacity (VIP1)": 6, "Magazine Capacity (VIP2)": 6, "Magazine Capacity (VIP3)": 6, "Fast Reload (VIP1)": false, "Fast Reload (VIP2)": true, "Fast Reload (VIP3)": true }, { "Weapon Shortname": "shotgun.waterpipe", "Magazine Capacity (VIP1)": 1, "Magazine Capacity (VIP2)": 1, "Magazine Capacity (VIP3)": 1, "Fast Reload (VIP1)": false, "Fast Reload (VIP2)": true, "Fast Reload (VIP3)": true }, { "Weapon Shortname": "smg.2", "Magazine Capacity (VIP1)": 30, "Magazine Capacity (VIP2)": 30, "Magazine Capacity (VIP3)": 30, "Fast Reload (VIP1)": false, "Fast Reload (VIP2)": true, "Fast Reload (VIP3)": true }, { "Weapon Shortname": "smg.mp5", "Magazine Capacity (VIP1)": 30, "Magazine Capacity (VIP2)": 30, "Magazine Capacity (VIP3)": 30, "Fast Reload (VIP1)": false, "Fast Reload (VIP2)": true, "Fast Reload (VIP3)": true }, { "Weapon Shortname": "smg.thompson", "Magazine Capacity (VIP1)": 20, "Magazine Capacity (VIP2)": 20, "Magazine Capacity (VIP3)": 20, "Fast Reload (VIP1)": false, "Fast Reload (VIP2)": true, "Fast Reload (VIP3)": true }, { "Weapon Shortname": "snowballgun", "Magazine Capacity (VIP1)": 50, "Magazine Capacity (VIP2)": 50, "Magazine Capacity (VIP3)": 50, "Fast Reload (VIP1)": false, "Fast Reload (VIP2)": true, "Fast Reload (VIP3)": true }, { "Weapon Shortname": "speargun", "Magazine Capacity (VIP1)": 1, "Magazine Capacity (VIP2)": 1, "Magazine Capacity (VIP3)": 1, "Fast Reload (VIP1)": false, "Fast Reload (VIP2)": true, "Fast Reload (VIP3)": true }, { "Weapon Shortname": "t1_smg", "Magazine Capacity (VIP1)": 18, "Magazine Capacity (VIP2)": 18, "Magazine Capacity (VIP3)": 18, "Fast Reload (VIP1)": false, "Fast Reload (VIP2)": true, "Fast Reload (VIP3)": true } ], "Version": { "Major": 2, "Minor": 1, "Patch": 0 } } TurboWeapons empowers you to create a more engaging and customizable combat environment on your Rust server. Reward your VIP players with enhanced firepower, maintain game balance, and provide an enriched gameplay experience with this versatile plugin!$15.00 -
Version 2.11.4
1,403 downloads
FEATURES: Selling custom items with a modified skin and display name Commands for sale as an item, allows you to use the command whenever the player wants, can be changed to instant use after purchase Creating a trader with the right set of items Players can check item description before they buy it Refill system Players can see marker on the map to check what the bot can sell them Local positions for Monuments (after wipe you don't need to change positions anymore) [Dependent on MonumentFinder] Commands: permission for use commands and edit the npc shop - npcshop.admin /settrader (use for create new trader) /remtrader (use for remove trader by his name) /newtraderpos (look directyl at the bot) then /newtraderpos update (use on new position) or /newtraderpos cancel (if you unselect the bot) Hooks: void OnNPCShopItemBuy(BasePlayer buyer, Item saleItem, Item priceItem) - called when player buys an item Example of plugin config My Discord Profile$18.99 -

Version 1.1.7
114 downloads
WelcomePlus is a lightweight, community-driven plugin developed to make your server feel welcoming with personalised greeting messages that actually matter. Features Rank-Based Welcome Messages - Customisable messages based on player permissions Playtime Tracking - Track total playtime and current session time Interactive GUI - Modern interface accessible via /wp or /welcomeplus Multi-Language Support - English and Spanish included, easy to add more Admin Tools - Player lookup, statistics, and data management Opt-Out System - Players can disable automatic welcome messages Command Aliases - Fully configurable command aliases External Language Files - Easy translation management via JSON files Separate Welcome Messages File - Edit welcome messages independently from language files Permissions welcomeplus.use - Required to receive welcome messages (if enabled in config) welcomeplus.vip - VIP rank permission welcomeplus.admin - Admin rank permission welcomeplus.owner - Owner rank permission Custom Rank Permissions: Define your own ranks and permissions via the config file's `CustomRankPermissions` block. Installation & Setup 1. Download and drop WelcomePlus.cs into your oxide/plugins/ folder 2. Download and place the lang/ folder in oxide/lang/WelcomePlus/ 3. (Optional) Place WelcomePlus_WelcomeMessages.json in oxide/data/ for custom welcome messages 4. Restart your server or run oxide.reload WelcomePlus 5. Configure ranks and permissions in the generated config file (optional) 6. Customise welcome messages in WelcomePlus_WelcomeMessages.json (optional) That's all - the plugin works out of the box with sensible defaults! Quick Start Commands Players: /wp - Open main menu /playtime or /pt - View your playtime /session - View current session /playtimeleaderboard or /ptl - View top 10 players Admins: /wp stats - Plugin statistics /wp reset <player> - Reset player data /wp defaults or /wp resetconfig - Reset config and welcome messages to defaults /playtime <player> - View any player's stats Configuration The plugin generates a config file at oxide/config/WelcomePlus.json with all settings. Key options: Custom Rank Permissions - Define rank labels and their permissions UI/Text Toggle - Choose between GUI panels or chat messages Welcome Settings - Enable/disable first-time and returning player messages Command Aliases - Customise all command aliases Welcome Messages File - Edit welcome messages in `oxide/data/WelcomePlus_WelcomeMessages.json` Reset to Defaults - `/wp defaults` command resets config and welcome messages to defaults Welcome Messages File Welcome messages are stored in oxide/data/WelcomePlus_WelcomeMessages.json (automatically created on first run). This file contains all rank-specific welcome messages and is separate from language files for easier editing. File Structure: FirstTime - Messages for first-time players (by rank) WelcomeBack - Messages for returning players (by rank) Supports multiple messages per rank (randomly selected) Supports placeholders: {name}, {rank}, {total}, {session} Language Files Language files are in oxide/lang/WelcomePlus/: en.json - English (default) es.json - Spanish To add more languages, create new JSON files (e.g., fr.json) following the same structure. Note: Language files contain UI text and system messages. Welcome messages are primarily stored in the welcome messages file, with language files as fallback. Custom Ranks Define custom ranks in the config: "CustomRankPermissions": { "default": "", "vip": "welcomeplus.vip", "mod": "welcomeplus.mod", "batman": "welcomeplus.batman", "admin": "welcomeplus.admin", "owner": "welcomeplus.owner" } Priority System: Rank priority is determined by config order (first entry = highest priority) If a player has multiple permissions, the rank appearing first in config wins Example: If "staff" appears before "mod" and player has both, "staff" messages are used Automatic Permission Registration: Permissions from CustomRankPermissions are automatically registered No code changes needed - just add to config and reload Then add rank-specific messages to WelcomePlus_WelcomeMessages.json: Add rank key to FirstTime section for first-time messages Add rank key to WelcomeBack section for returning player messages Messages fall back to language files if not found in welcome messages file Support Discord: @olvrdncnsctt For detailed documentation, see README.txt. For version history, see WelcomePlusChangelog.txt. README.txt WelcomePlusChangelog.txt$8.99 -
Version 1.4.0
43 downloads
Buttons is a Rust plugin that allows server owners to add customizable buttons to the in-game user interface. These buttons can be used to trigger commands, open menus, send messages, or execute any server-side action, offering a more interactive and user-friendly experience for players. With support for custom positioning, styling, and permissions, Buttons makes it easy to enhance gameplay and streamline interactions through intuitive UI elements. Permissions: buttons.use - Allows group/player to use the buttons. buttons.toggle - Allows group/player to toggle the buttons. Chat Commands: /buttons - Toggle the buttons (require buttons.toggle). Console Commands: buttons.open <index> - Execute the button command. Configuration: { "Settings": { "Buttons": [ { "Image Url": "https://i.ibb.co/Gv8YKB8g/info.png", "Local Image (oxide/data/Buttons/images - eg: image.png)": "", "Command": "info", "Background Color": "0.65 0.65 0.65 0.3", "Only Show Buttons In Looting": false, "Display Type (Hud/Overlay)": "Overlay", "Enable Hybrid Display Type When Display Type Is Overlay": false, "Use This Display Type While Not Looting When Hybrid Is Enabled (Hud/Under)": "Hud", "Alignment": { "Anchor Min": "0 1", "Anchor Max": "0 1", "Offset Min": "18 -60", "Offset Max": "56 -22" } }, { "Image Url": "https://i.ibb.co/VYz1NcLL/leaderboard.png", "Local Image (oxide/data/Buttons/images - eg: image.png)": "", "Command": "leaderboard", "Background Color": "0.65 0.65 0.65 0.3", "Only Show Buttons In Looting": false, "Display Type (Hud/Overlay)": "Overlay", "Enable Hybrid Display Type When Display Type Is Overlay": false, "Use This Display Type While Not Looting When Hybrid Is Enabled (Hud/Under)": "Hud", "Alignment": { "Anchor Min": "0 1", "Anchor Max": "0 1", "Offset Min": "58 -60", "Offset Max": "96 -22" } }, { "Image Url": "https://i.ibb.co/V06FLK38/shop.png", "Local Image (oxide/data/Buttons/images - eg: image.png)": "", "Command": "shop", "Background Color": "0.65 0.65 0.65 0.3", "Only Show Buttons In Looting": false, "Display Type (Hud/Overlay)": "Overlay", "Enable Hybrid Display Type When Display Type Is Overlay": false, "Use This Display Type While Not Looting When Hybrid Is Enabled (Hud/Under)": "Hud", "Alignment": { "Anchor Min": "0 1", "Anchor Max": "0 1", "Offset Min": "98 -60", "Offset Max": "136 -22" } }, { "Image Url": "https://i.ibb.co/ksjLcnx5/kits.png", "Local Image (oxide/data/Buttons/images - eg: image.png)": "", "Command": "kits", "Background Color": "0.65 0.65 0.65 0.3", "Only Show Buttons In Looting": false, "Display Type (Hud/Overlay)": "Overlay", "Enable Hybrid Display Type When Display Type Is Overlay": false, "Use This Display Type While Not Looting When Hybrid Is Enabled (Hud/Under)": "Hud", "Alignment": { "Anchor Min": "0 1", "Anchor Max": "0 1", "Offset Min": "138 -60", "Offset Max": "176 -22" } } ], "Open By Default": true } } Languages: Buttons have two languages by default (English and Romanian), but you can add more in Oxide lang folder.$4.99 -
Version 1.1.17
309 downloads
WTrading is a highly optimized and feature-packed trading system designed to make item exchanges seamless and efficient. Players can trade from anywhere on the map using Rust's built-in shopfront loot menu, providing a polished and intuitive interface. Server owners have full control with extensive configuration options, including trade restrictions, custom fees, logging, and third-party integrations to fine-tune the trading experience. The system is built for flexibility and security, ensuring safe transactions with anti-exploit measures and detailed logging. The optional Discord integration allows administrators to monitor trades in real time, review logs, and issue trade bans directly from Discord, streamlining server management without requiring in-game access. Whether you're running a roleplay economy or a survival-focused server, WTrading delivers a powerful and customisable solution for player-to-player trading. Features Easy and and simple setup. UI based player list with searching. On-screen notifications and sound effects. Fixed and dynamic trade fees based on distance via Economics or Server Rewards. Temporary and permanent trade banning system. Built-in Discord integration with external moderation functionality. Group specific trade cooldowns. Daily limits per group. Trade slot limits and visual indicators. Usage and bypass permissions. Item blacklisting. Configurable distance restrictions. Several toggleable trade restrictions. Many in-depth third party plugin integrations. Configurable UI positioning and visibility. In-depth developer interface. Full localisation support. Toggleable file or console based logging. Commands /trade {target} - Sends a trade request to the target. /trade accept [target] - Accepts the most recent trade request, or the target player's request if specified. /trade decline [target] - Declines the most recent trade request, or the target player's request if specified. /trade cancel - Cancels your ongoing trade. /trade ban {target} {time} - Trade bans the target player for the given length which can be set using the following format: 1h 30m 5s. /trade unban {target} - Removes the trade ban from the target player. Integrations WTrading includes a vast set of integrations with existing plugins that can be found for free on UMod: Server Rewards by k1lly0u - Take fees for sending trade requests which can scale based on distance. Economics by MrBlue - Take fees for sending trade requests which can scale based on distance. Clans by k1lly0u - Reduce cooldowns, fees and disable daily trade limits for trades between clan members. No Escape by Calytic - Prevent raid blocked or combat blocked players from trading. UI Notify by Mevent - Receive on-screen notifications that fit the style of your server when a trade request is received. NTeleportation by nivex - Target players in commands easier by using the same Temp ID as NTeleportation. Block Users by ViolationHandler - Prevent players from sending trade requests to people who've blocked them. Ignore by MisterPixie - Allow players to ignore inbound requests from specific people. AFK API by 2CHEVSKII - Prevent confusion from unanswered trade requests sent to AFK people. Monument Finder - Prevent players from trading within monuments. Permissions wtrading.use - Allows the player to use trade related commands wtrading.cooldown_bypass - Any player with this permission will bypass the trade cooldown. wtrading.daily_limit_bypass - Any player with this permission will bypass the daily trade limit for their group. wtrading.block_bypass - Any player with this permission will bypass user blocking restrictions. wtrading.ban - Allows the player to issue trade bans with /trade ban {player}. wtrading.ban_immune - Any player with this permission will be immune to trade bans. wtrading.unban - Allows the player to remove trade bans with /trade ban {player}. Installation Download the latest version of WTrading. Open the zip file using the archive extraction tool of your choice. Drag and Drop WTrading.cs into oxide/plugins/. (Optional) For those that wish to use the Discord integration, copy WTradingDiscord.cs into the same folder. Generate the configuration files by running the server with the plugin installed. Configure the files located in oxide/config/, refer to the Configuration section for more information on the options available. Reload the plugin using the commands oxide.reload WTrading, and oxide.reload WTradingDiscordif you are using the Discord integration. Configuration The following configuration files are available, refer to the inline comments for further explanation: WTrading.json WTradingDiscord.json This configuration file is for users of the Discord integration only. Developer Hooks WTrading features a range of hooks that developers can use to modify the behaviour of the plugin: Localisation Localising WTrading is simple, if you would like to translate the plugin into your own language follow these steps: Go to the oxide/lang/ folder of your server after installing the plugin. Copy the English translation from ./en/WTrading.json and paste it into a folder with your language code (for example fr for French). Open the file and change all of the phrases to your language of choice. Credits sky - Help with testing and the video demonstration. Plugin.Merge by dassjosh - Singlehandedly making Oxide plugin development bearable. Admin Tools by ViolationHandler.exe - Inspiration for the image generation functionality of the Discord integration.$11.99 -

Version 1.6.0
811 downloads
Open UI - /tssettings (use permission - tcauth.use) FEATURES: The maximum number of players that can authorize in a cupboard Only authorized players can open crates (on/off) Only authorized players can look inside and open Furnaces (on/off) Authorized players are automatically not attacked by turrets and SAM site (on/off) Authorized players no longer need codes and keys to open doors (on/off) Automatically if players are registered on the TC (remove building parts) (on/off) Automatically registered your teammates on the TC PERMISSIONS: "tcauth.use" - you can use UI (only for config setup) "tcauth.bypass" - you can use all the functionality "tcauth.ignore" - you ignore all the functionality "tcauth.auth.use" - you are automatically authorizing in your teammates TC (AutoTurrets + SAM optional) "tcauth.lock.use" - you can open what's under lock and key "tcauth.chest.use" - you can open chests "tcauth.turret.use" - you are automatically authorized in the turrets and SAM "tcauth.furnace.use" - you can open the ovens "tcauth.removebp.use" - you can destroy parts of the building at any time P.s - (My Discord - tofurahie#4144)$11.99 -
Version 1.0.0
21 downloads
This plugin adds a ton of functionality to the server for working with quarries. You can create charges of any type, with any resources. And the improved quarry system will allow players to extract them. Features Extraction of any default game resources/items. Placement of quarries anywhere: close to each other and other structures. Connection of quarries to industrial pipes. Interaction with popular plugins. Pleasant and user-friendly interface. Installed quarries will continue to mine the specified resources even if the plugin is unloaded. Supported plugins Backpacks - plugin can take and give items in an additional backpack. ItemRetriever - plugin can take crafting ingredients from all containers that are connected to the player (including inventory, game backpack, Backpacks plugin, and any other plugin that uses ItemRetriever as Suppliers). Friends, Clans - plugin is used to identify friendly players. Permissions The plugin has immutable and generated permissions. The immutable ones include: charges._admin – "Give yourself" button, command to give charges, ignoring permissions for crafting charges and quarries, access to turn on/off quarries for all players. charges._water – ignore the depth of the explosion of charges in water. charges._wrongplace – return the charge if it is thrown in an unsuitable place, even if the specific charge is specified in the settings => Return the charge if it is exploded in the incorrect place? = false charges._ignorecraterchance – ignores the chance of spawn crater of any charge (for the owner of this permission it is equal to 100%). charges._ignoreresourcechance – ignores the chance of finding a resource in any charge hole (it becomes equal to 100% for all resources). charges._mining – access to crafting Mining Quarry. charges._pump – access to crafting Pump Jack. The generated permissions are created by the plugin itself, here's how it works: charges.chargename - chargename is the name of the charge from the Charge permission field. Commands Only one command is present in the plugin. This command can be used both in chat (charges._admin permission is required) and in the server console. givecharge name 5 steamid/nickname name - charge name from the field Charge permission. 5 – how many charges need to be given out. steamid/nickname – steamid or nickname of your choice. All arguments of this command are required. General settings Allow panel scaling when the interface is scaled? – if this setting is enabled, the panel will be resized depending on the game interface scale (setting "user interface scale"). If the setting is disabled, the panel will always be the same size, regardless of the player interface scale. Notify friends within the charge's explosion radius of the resources being mined? – if your friends are standing close to you when the charge explodes, they will also receive a notification about the explosion and its results. Quarries settings Only friends can turn on/off quarries? – only you and your friends (from Rust Teams, Clans, Friends, etc.) will be able to turn quarry on/off. Simplified quarry installation mode (increased server load) – the game developers have severely restricted the placement of objects near quarry. Because of this, quarry must be located at a considerable distance from each other, making them more difficult to defend. This setting allows you to ignore this restriction. Therefore, even when the quarry is highlighted in red during installation, you can simply click the left mouse button and the quarry will be installed in the place you are looking at and in the same form as it was on the construction plan. Of course, with this method, there are many checks for the presence of foreign objects in the quarry installation area. Add storage adapters to quarries? - as you know, the game features an Industrial Pipes system that allows you to automatically move resources between different containers. Unfortunately, the developers did not implement the ability to connect these pipes to quarries. Therefore, this setting adds Storage Adapters to each of the quarry's storage. However, nothing can be built within the quarry's area of influence (which is quite large and invisible), and as a result, the Pipe Tool cannot be used. Therefore, a Hammer is used to lay pipes. PIPE CONNECTION. First, you need to hit the quarry Storage Adapter with the Hammer, and most importantly, hit the input/output port to which you want to connect the pipe. That is, if you want to extract resources from this quarry, you need to hit the output connector with a Hammer, and if you want to add resources, you need to hit the input connector. After you have done this, the chat will display information about how much time is left to connect the pipe to the corresponding Industrial device. Therefore, you need to approach such a device and simply tap the desired connector with a Hammer. After these actions, the pipe will be installed. You can also connect quarries in series i.e., one after the other, just like regular containers. PIPE DISCONNECTION. There are two ways to remove a pipe. If the other end of the pipe is connected to an Industrial device outside the quarry's range, you can simply disconnect the pipe in it with the Pipe Tool. If the pipe from the quarry is connected to another quarry, you need to take a Hammer and hit it on the connector of the quarry Storage Adapter, which should be disconnected. After these actions, the pipe will be disconnected. Charges settings Charge name – charge name displayed in the panel and on the crafted charge. Charge permission – a unique name for a charge, used in permissions and when giving out charges with the admin command. Charge skinId – ID of the image uploaded to the Steam workshop. Which quarry to use? [Mining, Pump] – this setting affects which quarry can be placed on the hole after the charge explodes. Crater spawning chance [0-100] – this parameter is only responsible for the chance of a hole appearing after an explosion. Maximum water depth at which the charge will work [advice <= 0.8] – you can allow players to explode charges underwater. This setting determines how deep charges can explode underwater. The default value of 0.8 is approximately knee-deep for the player. Return the charge if it is exploded in the incorrect place? – if the player explodes the charge in an unsuitable place, such as on rocks, building blocks or something similar, the charge will not explode and will remain at the site of the explosion (it can be picked up and used again). If you set the value to false, the charge will disappear after the explosion and the player will have to craft it again. Allow charge explosion if no permission? – if set to true, any player can explode this charge. If set to false, only those who have permission for this charge can explode it. Is permission required to craft a charge? – the charge craft will only be available to players who have permission for this charge. Crafting ingredients Ingredient name (empty - default) – the name is only used for display in the panel. Ingredients are selected from the player's inventory based on the combination of shortname + skinid (the item name is not taken into account). Extractable resources Resource name (empty - default) – by analogy with the setting Ingredient name (empty - default). Chance of a resource in the crater [0-100] – the chance of finding this resource in the crater when the charge explodes. Please note that before calculating this chance, the chance of the charge exploding is calculated (Crater spawning chance [0-100] setting). And if the charge explodes into nothing, then the current setting will not be used. Plugin Config Example of plugin configuration in English: Example of plugin configuration in Russian: If you need Russian config, open it (Charges.cs) before loading the plugin, and at the top set the variable "isRus = true". Then save and upload this file to your server.$35.00 -

Version 2.0.72
2,990 downloads
Create your own UI buttons for your rust server! Plugin comes with built ingame editor which makes creating proccess so much easier! • Features - Create as many buttons as you want. - Attach Images or Text to buttons. - Set chat commands to each button. - UI Editor ingame - Toggle hide function to create small gui menu. • Commands • Permissions • Config Example • Cui Data Example Special thanks to @SinKohhfor contributing and testing plugin before release.$7.50 -

Version 1.1.11
556 downloads
What is it? ZLogs is a comprehensive logging solution for Rust servers, designed to keep admins informed and in control. With a sleek GUI, extensive category coverage, and advanced customization, ZLogs ensures you never miss a crucial server event. Whether it’s player interactions, combat logs, or tool cupboard activity, ZLogs provides detailed insights to maintain transparency and order. Usage Keep your server operations smooth and well-documented with ZLogs. Monitor every key activity with categorized logs, from player connections to combat events. Stay informed with Discord notifications for critical actions like heli spawns or team changes. Effortlessly browse logs with a user-friendly interface featuring search functionality, light/dark mode, and auto-deletion options for old logs. ZLogs puts powerful server management tools right at your fingertips. Permission zlogs.use -- Gives you permission to use the command zlogs.resetall -- Gives you permission to wipe all data files zlogs.heli.spawn -- Gives player a permission to get notified in chat when heli spawns(must be set in config) zlogs.heli.down -- Gives player a permission to get notified in chat when heli gets shot down(must be set in config) Chat Command /zlogs -- Opens the GUI /zlogs.resetall -- Completely wipes all ZLogs datafile (zlogs.resetall permission required) Discord Logging: In config you can set a webhook for each category to have the important info right on your discord Data All the datas are being saved into data folders and each category has it's data file Path to data files: Your_Server\oxide\data\ZLogs Features & some info: I've decided to completely rewrite ZLogs because of some performance mistake I've made and also to add more features and generally make the plugin better. New version brings you also new features like Auto log deletion which can be set in config, more detailed logging, nicer UI, dark and light mode for the UI, search option and more.. Localization: { "Log Explosive": "{0} has used {1}!", "Log Animal": "{0} has killed a {1}", "Log Connect": "{0} has connected to the server", "Log Disconnect": "{0} has disconnected from the server", "Log Command": "{0} has used command: {1}", "Log Chat": "{0} wrote: {1}", "Log Combat": "{0} has killed {1}", "Log Vending": "{0} has bought: {1} for: {2}", "Log HeliSpawn": "Patrol heli has spawned", "Log HeliDeath": "Patrol heli has been destroyed by: {0}", "Log ItemPick": "{0} has picked up a {1}", "Log ItemDrop": "{0} has dropped a {1}", "Log TCPlace": "{0} has placed a TC", "Log TCDestroy": "{0} has destroyed a TC", "Log TCAuth": "{0} has authed a TC", "Log TCDeAuth": "{0} has deauthed from TC", "Log TCClear": "{0} has cleared a TC", "Log TeamCreate": "{0} has created a team", "Log TeamInvite": "{0} has invited {1} to team", "Log TeamReject": "{0} has rejected invite", "Log TeamPromote": "{0} has been promoted to leader", "Log TeamLeave": "{0} has left the team", "Log TeamKick": "{0} has kicked {1} from the team", "Log TeamAccept": "{0} has accepted team invite", "Log TeamDisband": "{0} has disbanded team", "Log TriggerPick": "{0} has picked up {1}+ items over {2} seconds", "Log TriggerDrop": "{0} has dropped {1}+ items over {2} seconds", "Notify HeliSpawn": "A patrol heli has spawned at: {0}", "Notify HeliDown": "A patrol heli has been shot down at: {0} by {1}", "CUI Categories": "Categories", "CUI Settings": "Settings", "CUI Animal": "Animal Logs", "CUI Chat": "Chat Logs", "CUI Combat": "Combat Logs", "CUI Command": "Command Logs", "CUI Connection": "Connection Logs", "CUI Explosive": "Explosive Logs", "CUI Heli": "Heli Logs", "CUI Item": "Item Logs", "CUI Team": "Team Logs", "CUI TC": "Tool Cupboard Logs", "CUI Trigger": "Trigger Logs", "CUI Vending": "Vending Logs", "CUI TargetPlayerInfo": "Target Player Information", "CUI PlayerName": "Player name: {0}", "CUI SteamID": "SteamID: {0}", "CUI Status": "Status: {0}", "CUI StatusAlive": "Alive", "CUI StatusDead": "Dead", "CUI StatusNull": "?", "CUI Ping": "Ping: {0}", "CUI NotConnected": "Not connected", "CUI TPto": "Teleport to", "CUI TPhere": "Teleport here", "CUI AnimalInfo": "Animal Information", "CUI AnimalName": "Animal name: {0}", "CUI AnimalDeathPos": "Animal death pos:\nx: {0}\ny: {1}\nz: {2}", "CUI LogInfo": "Log Information", "CUI LogID": "Log ID: {0}", "CUI LogDate": "Log Date: {0}", "CUI LogRemoveIn": "Log will be removed in: {0}", "CUI ChatInfo": "Chat Information", "CUI ChatType": "Channel type: {0}", "CUI Initiator": "Initiator Information", "CUI Victim": "Victim Information", "CUI Distance": "Distance: {0}m", "CUI Weapon": "Weapon: {0}", "CUI ConnectionInfo": "Connection Information", "CUI ConnectionIp": "IP: {0}", "CUI ConnectionType": "Type: {0}", "CUI ExplosiveInfo": "Explosive Information", "CUI ExplosivePos": "Explosive pos:\nx: {0}\ny: {1}\nz: {2}", "CUI ExplosiveName": "Explosive name: {0}", "CUI HeliInfo": "Heli Information", "CUI HeliPos": "Heli pos:\nx: {0}\ny: {1}\nz: {2}", "CUI HeliAttacker": "Destroyed by: {0}", "CUI ItemInfo": "Item Information", "CUI ItemName": "Item name: {0} x{1}", "CUI ItemPos": "Item pos:\nx: {0}\ny: {1}\nz: {2}", "CUI ItemType": "Type: {0}", "CUI TeamInfo": "Team Information", "CUI TeamType": "Type: {0}", "CUI TeamKicked": "Kicked player: {0}", "CUI TcInfo": "Tool Cupboard Information", "CUI TcType": "Type: {0}", "CUI TcAttacker": "Attacker: {0}", "CUI TcPos": "TC pos:\nx: {0}\ny: {1}\nz: {2}", "CUI TriggerType": "Type: {0}", "CUI DetectTime": "Detect time: {0} seconds", "CUI DetectAmount": "Detect amount: {0} items", "CUI TriggerInfo": "Trigger Information", "CUI VendingItem": "Bought item: {0} x{1}", "CUI VendingPrice": "Price: {0} x{1}", "CUI VendingPos": "Vending pos:\nx: {0}\ny: {1}\nz: {2}", "CUI VendingInfo": "Vending Information", "CUI Search": "Search:", "CUI ColorMode": "Color Mode: {0}" } Configuration: { "Combat logs?": { "WebhookURL": "", "Enabled?": true }, "Item Picks & Drops logs?": { "WebhookURL": "", "Enabled?": true }, "Connection and Disconnection logs?": { "WebhookURL": "", "Enabled?": true }, "Command logs?": { "WebhookURL": "", "Enabled?": true }, "Animal Kills logs?": { "WebhookURL": "", "Enabled?": true }, "Explosives logs?": { "WebhookURL": "", "Enabled?": true }, "Chat logs?": { "WebhookURL": "", "Enabled?": true }, "Heli Logs?": { "WebhookURL": "", "Enabled?": true, "NotifyOnHeliSpawn?": true, "NotifyOnHeliDown?": true }, "Tool Cupboard logs?": { "WebhookURL": "", "Enabled?": true }, "Vending Machine logs?": { "WebhookURL": "", "Enabled?": true }, "Item drop spam detection:": { "Enabled?": true, "WebhookURL": "", "Items needed to detect:": 15, "Time(seconds)": 8.0, "Ignored items(shortnames like: ammo.rifle etc..):": [ "item_shortname", "item_shortname" ] }, "Item pick spam detection:": { "Enabled?": true, "WebhookURL": "", "Items needed to detect:": 15, "Time(seconds)": 8.0, "Ignored items(shortnames like: ammo.rifle etc..):": [ "item_shortname", "item_shortname" ] }, "Team logs?": { "WebhookURL": "", "Enabled?": true }, "Auto-Delete logs after x amount of hours(0 will disable this feature)": 0.0 }$14.99- 39 comments
- 3 reviews
-
- 5
-
-
-
- #administration
- #logging
- (and 6 more)


.thumb.jpg.f2f378cbb4943d7036c8a674f8a23b40.jpg)