Search the Community
Showing results for tags 'server'.
-

Version 1.4.7
1,243 downloads
Introducing Total Control – The Ultimate Rust Server Administration Tool Total Control is a powerful, full-GUI admin plugin designed to give Rust server owners and admins unprecedented control. Whether you’re running hardcore survival or a casual PvE playground, Total Control puts every system at your fingertips live, in-game. Dynamic Schedule System Plan and automate your server’s evolution with ease — no more manual toggling or config edits. The Schedule System lets you: Automate server changes over time – Adjust gather rates, stack sizes, smelting speeds, rewards, raid protection, or PvE/PvP status automatically. Create up to 6 configuration sets per feature (1 default + 5 extra) – Schedule different setups for each stage of your wipe. Scale your server naturally – Increase resource rates as wipes progress or gradually tweak settings to keep gameplay fresh. Fully integrated with the GUI – Configure all schedules directly in-game with the Total Control UI — no external files required. Run your server exactly how you want, exactly when you want — automatically. Core Server Settings Skip Night / Time Freeze – Automate day/night or let players vote, including custom voting percentages and skip limits. Day & Night Length – Configure how long the day lasts and how short nights are. Custom Vote Commands – Define your own chat commands beyond /day. PvE/PvP Modes & Raid Protection – Toggle instantly or schedule on timers, with player HUD indicators. Now includes an option to use in-game or local time. Economy & Progression StackSize Control – Set multipliers per item or entire categories. Gather Rate Control – Fine-tune every item’s resource yield. Easy Item Management – Add or remove items to the GatherRate and StackSize pages directly via chat commands using item shortnames. (Shortnames list: https://www.corrosionhour.com/rust-item-list) Smelting & Cooking – Adjust speeds, outputs, and fuel use. Rewards & Incentives Reward players for kills, gathering, mining, defeating Bradley/Patrol Heli, or emptying crates to encourage active gameplay. Choose between Economics, ServerRewards, scrap payouts or reward all three simultaneously. Configure loot-splitting for Bradley and Heli: split rewards based on damage dealt or grant the full amount to the player landing the final blow. Accessible In-Game Any admin with permission can open the Total Control UI with /tc and adjust settings live no server file access required. Whether your admins are across town or across the globe, they can fine-tune all settings directly in-game. Permissions & Commands Permission: TotalControl.OpenGui (access admin UI) Chat Commands: /tc To open TotalControl /addgather <shortname> Add item to GatherRates page. /removegather <shortname> Remove item to GatherRates page. /addstack <shortname> Add item to StackSize page. /removestack <shortname> Remove item to StackSize page. Join the Community Stay up to date, promote your server, report bugs, or get support: https://discord.gg/AkwHUs8Qma$29.99 -
Version 1.0.0
22 downloads
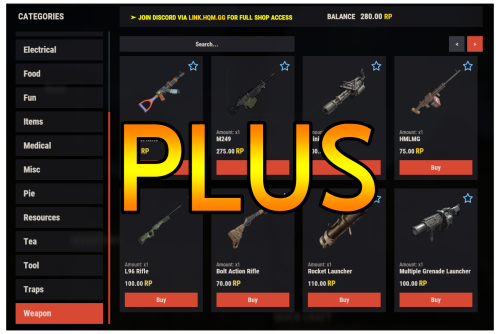
Warning: To use this config file, you need to purchase the Shop plugin developed by Mevent: https://codefling.com/plugins/shop Shop Plus is perfectly suited for modded servers with rich and plentiful loot. Here’s what’s new: - Added a Teas category featuring different types of teas. - Added a Pies category where various pies are listed. - Overpowered items such as Rocket, C4, Explosive 5.56 Bullet, and 40mm HE Grenade have been added with a high RP price. - Categories are now cleaner and more organized, with important items displayed at the top of each page. - Added items such as Turret and Test Generator, featuring bulk purchase options. - Armored doors and garage doors now include 10-piece purchase options with better prices compared to single-item purchases. - Highly used tools such as Jackhammer and Chainsaw now support 10-piece purchases with better prices compared to single-item costs. - Players can now exchange RP for scrap, for example 1,000 scrap for 50 RP or 10,000 scrap for 400 RP. - Added bulk purchase options that allow players to buy multiple quantities at a better total value. (In the Attire category, players can now choose between single or 10x quantities for items such as Facemask, Chest Plate, Kilt, Gloves, Jackets, and Boots, with reduced prices for larger purchases.) INSTALLATION RECOMMENDATION: 1- Extract the ZIP file you downloaded using WinRAR. You will find two folders: data and config. 2- Drag and drop these folders into one of the following directories, depending on which mod you use: For Oxide: /home/rustserver/serverfiles/oxide For Carbon: /home/rustserver/serverfiles/carbon 3- After that, upload the latest version of the Shop plugin to the plugins folder. If the Shop plugin is already installed, restart the server or use one of the following commands to reload it: For Oxide: o.reload Shop For Carbon: c.reload Shop This will ensure the plugin is properly restarted.$11.99- 3 comments
- 1 review
-
- 1
-

-
- #shop
- #shop plus
- (and 7 more)
-

Version 2.0.11
7,096 downloads
ServerPanel adds a player information menu to your server, where you can both share important and useful information with your players and integrate your plugins into it! Features User-Friendly Interface: Intuitive GUI for easy navigation and interaction. Economy Integration: Supports various economy plugins for seamless financial management. Dynamic Menu Categories: Organize functionalities into customizable categories for better user experience. Extensive Configuration Options: Almost every aspect of the plugin can be customized, including messages, colors, sizes, fonts, tion. Auto-Open Menu: Automatically displays the menu upon player connection, configurable per server settings. Block Settings: Control access to the menu during building, raiding, or combat situations to enhance gameplay balance. Multiple Economy Head Fields: Display various economic metrics such as balance, server rewards, and bank information. Permission Management: Fine-tune permissions for different user roles to control access to features. Localization Support: Easily translate and customize all messages for different languages. Performance Optimized: Designed to minimize server lag while providing rich functionality. Customizable Hooks: Integrate with existing economy systems using customizable hooks for adding, removing, and displaying balances. Editor Position Change: Admins can now change editor positions with a simple click, choosing between left, center, or right alignments. Command Enhancements: Commands are now processed with multiple arguments separated by "|", enabling bulk command processing. Commands /info – open menu /sp.install (or) /welcome.install – open installer menu sp.migrations – console command for updating plugin data structure when upgrading to new versions. Automatically creates backups before making changes. sp.migrations list – shows available migrations and whether they need to run sp.migrations run <version> – runs specific migration (e.g., "1.3.0") sp.migrations run <version> force – forces migration even if not detected as needed Permissions serverpanel.edit – allows players to edit the plugin settings and open the edit menu serverpanelinstaller.admin - required to access the plugin installation functions Video Showcase Templates Template V1 Template V2 Template V3 Template V5 Editor Installer TEST SERVER Join our test server to view and experience all our unique features yourself! Copy the IP Address below to start playing! connect 194.147.90.239:28015 Update Fields ServerPanel supports dynamic update fields that can be used in your templates to display real-time information. These fields are automatically updated and can be used in text components, headers, and other interface elements. Player Information {online_players} – Number of currently online players {sleeping_players} – Number of sleeping players {all_players} – Total number of players (online + sleeping) {max_players} – Maximum server capacity {player_kills} – Player's kill count (requires KillRecords, Statistics, or UltimateLeaderboard) {player_deaths} – Player's death count (requires KillRecords, Statistics, or UltimateLeaderboard) {player_username} – Player's display name {player_avatar} – Player's Steam ID for avatar display Economy {economy_economics} – Economics plugin balance {economy_server_rewards} – ServerRewards points {economy_bank_system} – BankSystem balance Note: Economy fields are fully customizable in "oxide/config/ServerPanel.json" under "Economy Header Fields". You can add support for any economy plugin by configuring the appropriate hooks (Add, Balance, Remove). Custom keys can be created and used in templates just like the default ones. Server Information {server_name} – Server hostname {server_description} – Server description {server_url} – Server website URL {server_headerimage} – Server header image URL {server_fps} – Current server FPS {server_entities} – Number of entities on server {seed} – World seed {worldsize} – World size {ip} – Server IP address {port} – Server port {server_time} – Current server time (YYYY-MM-DD HH:MM:SS) {tod_time} – Time of day (24-hour format) {realtime} – Server uptime in seconds {map_size} – Map size in meters {map_url} – Custom map URL {save_interval} – Auto-save interval {pve} – PvE mode status (true/false) Player Stats {player_health} – Current health {player_maxhealth} – Maximum health {player_calories} – Calorie level {player_hydration} – Hydration level {player_radiation} – Radiation poisoning level {player_comfort} – Comfort level {player_bleeding} – Bleeding amount {player_temperature} – Body temperature {player_wetness} – Wetness level {player_oxygen} – Oxygen level {player_poison} – Poison level {player_heartrate} – Heart rate Player Position {player_position_x} – X coordinate {player_position_y} – Y coordinate (height) {player_position_z} – Z coordinate {player_rotation} – Player rotation (degrees) Player Connection {player_ping} – Connection time in seconds {player_ip} – Player's IP address {player_auth_level} – Authorization level (0=Player, 1=Moderator, 2=Admin) {player_steam_id} – Steam ID {player_connected_time} – Connection start time {player_idle_time} – Idle time (HH:MM:SS) Player States {player_sleeping} – Is sleeping (true/false) {player_wounded} – Is wounded (true/false) {player_dead} – Is dead (true/false) {player_building_blocked} – Is building blocked (true/false) {player_safe_zone} – Is in safe zone (true/false) {player_swimming} – Is swimming (true/false) {player_on_ground} – Is on ground (true/false) {player_flying} – Is flying (true/false) {player_admin} – Is admin (true/false) {player_developer} – Is developer (true/false) Network & Performance {network_in} – Network input (currently shows 0) {network_out} – Network output (currently shows 0) {fps} – Server FPS {memory} – Memory allocations {collections} – Garbage collections count Usage Example: You can use these fields in any text component like: "Welcome {player_username}! Server has {online_players}/{max_players} players online." API Documentation for Developers ServerPanel provides an API for plugin developers to integrate their plugins into the menu system. Required Methods API_OpenPlugin(BasePlayer player) - Main integration method that returns CuiElementContainer OnServerPanelClosed(BasePlayer player) - Called when panel closes (cleanup) OnServerPanelCategoryPage(BasePlayer player, int category, int page) - Called when category changes (cleanup) OnReceiveCategoryInfo(int categoryID) - Receives your category ID Integration Example [PluginReference] private Plugin ServerPanel; private int _serverPanelCategoryID = -1; private void OnServerInitialized() { ServerPanel?.Call("API_OnServerPanelProcessCategory", Name); } private void OnReceiveCategoryInfo(int categoryID) { _serverPanelCategoryID = categoryID; } private void OnServerPanelCategoryPage(BasePlayer player, int category, int page) { // Cleanup when player switches categories } private CuiElementContainer API_OpenPlugin(BasePlayer player) { var container = new CuiElementContainer(); // Create base panels (required structure) container.Add(new CuiPanel() { RectTransform = {AnchorMin = "0 0", AnchorMax = "1 1"}, Image = {Color = "0 0 0 0"} }, "UI.Server.Panel.Content", "UI.Server.Panel.Content.Plugin", "UI.Server.Panel.Content.Plugin"); container.Add(new CuiPanel() { RectTransform = {AnchorMin = "0 0", AnchorMax = "1 1"}, Image = {Color = "0 0 0 0"} }, "UI.Server.Panel.Content.Plugin", "YourPlugin.Background", "YourPlugin.Background"); // Add your plugin's UI elements here container.Add(new CuiLabel { RectTransform = {AnchorMin = "0.1 0.8", AnchorMax = "0.9 0.9"}, Text = {Text = "Your Plugin Interface", FontSize = 16, Align = TextAnchor.MiddleCenter, Color = "1 1 1 1"} }, "YourPlugin.Background", "YourPlugin.Title"); // Add buttons, panels, etc. using "YourPlugin.Background" as parent return container; } private void OnServerPanelClosed(BasePlayer player) { // Cleanup when panel closes } Header Update Fields API_OnServerPanelAddHeaderUpdateField(Plugin plugin, string updateKey, Func<BasePlayer, string> updateFunction) - Registers a per-player string provider for a header placeholder. Returns true on success. API_OnServerPanelRemoveHeaderUpdateField(Plugin plugin, string updateKey = null) - Unregisters a specific updateKey for your plugin, or all keys for your plugin when updateKey is null. Returns true on success. Usage Example [PluginReference] private Plugin ServerPanel; private void OnServerInitialized() { // Register a dynamic header field for each player ServerPanel?.Call("API_OnServerPanelAddHeaderUpdateField", this, "{player_kdr}", (Func<BasePlayer, string>)(player => GetKdr(player))); } private string GetKdr(BasePlayer player) { // Compute and return the value to display in the header for this player return "1.23"; } Using in UI: Place your key (e.g., {player_kdr}) directly in Header Field texts. The value will be updated per player using your function. FAQ Q: Why can't I open the menu? A: Make sure that the plugin is installed and activated on your server. If the problem persists, contact the server administrator. Q: How do I enable Expert Mode? (disables automatic template updates) A: In the data file "Template.json", turn on the "Use an expert mod?" option: "Use an expert mod?": true, P.S. "Template.json” is located in the "oxide/data/ServerPanel" directory (if you use Oxide) or in the "carbon/data/ServerPanel" directory (if you use Carbon) Q: I see black images with Rust logo or get error 429 when loading images. What should I do? A: These issues occur when there are problems downloading images from the internet. To fix this, enable Offline Image Mode which will use local images instead: Enable the mode in config: Open "oxide/config/ServerPanel.json" (or "carbon/config/ServerPanel.json" for Carbon) Set "Enable Offline Image Mode": true Set up the images: Create folder "TheMevent" in "oxide/data" (or "carbon/data" for Carbon) Download PluginsStorage (click "CODE" → "Download ZIP") Extract the ZIP and copy all contents to the "TheMevent" folder Reload the plugin: Type o.reload ServerPanel (Oxide) or c.reload ServerPanel (Carbon) Note: If using a hosting service, you may need to use their file manager or FTP to upload the files. Q: Does ServerPanel work only with Mevent's plugins? A: Currently, ServerPanel integrates seamlessly with Mevent's plugins (Shop, Kits, Daily Rewards, etc.). However, other developers can use the provided API to integrate their plugins into the menu system. The plugin system is designed to be extensible for third-party integrations. Q: Why do integrated plugins (Shop, Kits) have different window sizes? A: Different plugins may use different templates for integration. Make sure all your integrated plugins use the same template version (V1, V2, etc.) that matches your ServerPanel template. Update the template in each plugin to ensure consistent sizing. Q: The panel displays differently for different players. How can I make it show the same on everyone's screen? A: This issue occurs when players have different UI scale settings. To fix this and ensure consistent display for all players: Open the "Template.json" file located in "oxide/data/ServerPanel" (or "carbon/data/ServerPanel" for Carbon) Find the "Parent (Overlay/Hud)" setting in the "Background" section Change the value from "Overlay" to "OverlayNonScaled" Save the file and restart your server or reload the plugin Q: How can I change the video displayed in the ServerPanel interface to my own custom video? A: Yes, you can replace the default video with your own! You need to find and modify the command: serverpanel_broadcastvideo [your_video_url] Replace [your_video_url] with the direct link to your video. For best compatibility, we recommend hosting your video on imgur.com. Q: My custom images are not loading or show as blank/question marks. What image hosting should I use? A: For custom images, we recommend using imgbb.com for image hosting. Avoid Imgur and services without direct access to the image. For the most reliable experience, use Offline Image Mode with local images instead. Q: How can I make plugin UIs open outside of the ServerPanel menu instead of inside categories? A: You can configure buttons to execute chat commands that open plugin UIs independently. To do this: In your button configuration, set "Chat Button": true Set the "Commands" field to "chat.say /command" (replace "command" with the actual plugin command) Example: To open the Cases plugin outside the menu: "Chat Button": true "Commands": "chat.say /cases" This will execute the command as if the player typed it in chat, opening the plugin's interface independently rather than within the ServerPanel menu. Q: Text in V4 template is shifting or sliding out of place. How can I fix this? A: This issue occurs when text width isn't properly configured. ServerPanel provides "TITLE LOCALIZATION" settings to control text width for categories and pages: Open the ServerPanel editor (click the "ADMIN MODE" button to open the edit menu) Select the category or page you want to edit (click to "EDIT CATEGORY" or "EDIT PAGE" button) In the editor, find the "TITLE LOCALIZATION" section For each language (en, ru, etc.), you'll see three columns: LANGUAGE - The language code TEXT - The localized text content WIDTH (px) - The width setting in pixels Adjust the "WIDTH (px)" value to match your text length. Longer text requires larger width values Save your changes and test in-game Tip: Start with a width value around 100-150 pixels for short text, and increase it for longer titles. You can adjust this value until the text displays correctly without shifting.$40.00- 149 comments
- 43 reviews
-
- 17
-

-

-

-
- #serverpanel
- #info
- (and 32 more)
-
.thumb.gif.931694ee6af9534dc6d23b0aec6390f5.gif)
Version 2.2.2
318 downloads
Auto Ban / Report Ban – Premium Edition AutoBan Enhanced is the ultimate plugin for Rust server administrators who want to keep their community safe, fair, and fun. This premium edition builds on the original AutoBan system with new advanced moderation tools, smarter automation, and seamless integrations with Discord. Key Features Automatic Weighted Banning Players are automatically banned once they reach a configurable number of weighted reports. Trusted players, moderators, or admins can have higher report weights for faster action. Playtime Requirement (NEW) Players must have a minimum amount of playtime (configurable, default 2h) before submitting reports, preventing abuse from fresh accounts. Mass Reporting Protection Includes cooldowns, per-hour limits, and unique report tracking to prevent abuse of the reporting system. Full F7 Integration Captures and processes in-game reports (F7), with optional keyword scanning for valid reasons. Player-Friendly Reporting System Players can submit reports via chat commands or a guided reason menu for consistency. Customizable Ban Durations Supports human-readable ban times like 30m, 4h, 7d, or permanent. Ban History & Report Logs New commands to view report history and a structured audit log of admin actions. Progressive Punishments (optional) Configure warnings, mutes, or bans at different thresholds. Discord Integration with Embeds Sends clean, embedded messages for reports and bans, including player info, reasons, timestamps, and expiration. Ignored Players & Permissions Protect admins and whitelisted users from automated bans. Export & Data Storage Export reports to JSON for external review or backups. Granular Permissions Fine-grained control over who can report, view, ban, unban, reset, or audit. Usage: Chat Commands /report <username> – start a report (shows menu if no reason given). /report <username> <reason> – report with reason directly. /reportreason <number> – pick a reason from the menu. /AB.viewreports – view all current reports (requires permission). /AB.history <userid> – view detailed history of a player’s reports. /AB.auditlog [N] – view last N admin/audit actions. /AB.showbans – view all bans. /AB.unban <userid> – unban a player. /AB.resetreports <userid> – reset reports for a player. /AB.exportreports – export reports to a JSON datastore. 🛠 Console Commands AB.getreports – list all reports in console. AB.getbans – list all bans in console. AB.resetreportsConsole <userid> – reset reports via console. AB.ban <userid> <reason> – manually ban a player. AB.unban <userid> – manually unban a player. Oxide / Carbon Permissions AutoBan.report – allow reporting via F7. AutoBan.chatreport – allow reporting via chat. AutoBan.viewreports – view all reports. AutoBan.ignore – player immune to auto-bans. AutoBan.ban – manually ban players. AutoBan.unban – manually unban players. AutoBan.viewbans – view all bans. AutoBan.resetreports – reset player reports. AutoBan.trusted – weighted reporter (e.g., counts x2). AutoBan.mod – stronger weighted reporter (e.g., counts x3). Example Config { "Max reports till user gets banned (weighted)": 5, "Reason given to banned user": "You have been reported too many times and have been banned for precautionary measures. An admin will review this suspension soon.", "Valid reasons": ["cheating", "aimbot", "hacking", "esp", "teaming", "racism", "griefing", "walling", "doorcamping", "spawn killing"], "Valid report types": ["cheat", "abusive", "name", "spam"], "Scan type of F7 reports": true, "Broadcast ban to chat": true, "Ignored Players": { "76561198000000000": "Admin" }, "Timer for broadcasting bans to admins and console": 820, "Send bans to users with the AutoBan.viewbans permission": false, "Send reports to URL": false, "URL to send reports to": "http://example.com", "Send reports to Discord": true, "Send bans to Discord": true, "Discord Reports Webhook URL": "http://example.com/reports", "Discord Bans Webhook URL": "http://example.com/bans", "Ban Duration": "72h", "Max reports a player can submit per hour": 3, "Max reports a player can receive per hour": 5, "Cooldown between reports from the same player in minutes": 10, "Weighted report permissions": { "AutoBan.trusted": 2,"AutoBan.mod": 3 }, "Use Discord embeds for webhooks": true, "Max lines per chat response to avoid spam": 8, "Minimum playtime (in minutes) required to file a report": 120 } With AutoBan Enhanced, you get automated moderation, better transparency, and flexible punishment systems, freeing up admins to focus on building community instead of fighting cheaters.$24.99 -
Version 1.0.3
15 downloads
xBannedPlayersEntityCleaner xBannedPlayersEntityCleaner is a an efficient Rust plugin designed to automatically clean up all entities owned by players when they are banned. This helps maintain server performance and prevents clutter caused by banned users’ structures, deployables, and other entities. It also includes a manual cleanup command that allows admins with proper permission to trigger entity removal for specific players when needed. Features Automatically removes entities owned by banned players. Optional manual cleanup command with permission control. Adjustable cleanup speed and batch size to minimize lag. Silent or visible destruction modes. Efficient entity queue system for large-scale cleanups. Console Command xbannedplayersentitycleaner.clean <steamid64 or playername> - Manually trigger cleanup for a specific player. Permission xbannedplayersentitycleaner.use - Allows a user to manually trigger the cleanup command. Config { "SilentMode": true, "EntitiesPerCleanupInterval": 100, "CleanupInterval": 0.2, "LogToConsole": true } SilentMode → If enabled (true), entities are destroyed quietly without gibs or visual effects. EntitiesPerCleanupInterval → Number of entities processed per cleanup cycle (CleanupInterval) CleanupInterval → Time in seconds between each cleanup batch execution. LogToConsole → Enables or disables console logging for cleanup events and summaries.$4.99 -
Version 1.0.0
191 downloads
PlayerDuel.cs Description : - This plugin allows players to duel 1v1 in a dedicated arena. After the fight, you respawn with your original inventory and stats; the arena automatically regenerates between each duel. Settings : - HUD colors - Warmup Time - Fight Time - Request Time F1 Commands (ADMIN) : - pd.spawn1 (To set spawn player 1) - pd.spawn2 (To set spawn player 2) - pd.zone <radius> (To define the zone, arena's auto-clear. - pd.kit <name> (To crate kit) - pd.kits (To see kits list) - pd.deletekit <name> (To remove kit) - pd.test (To test the duel) - pd.stop (To stop a duel) Chat Commands : - /duel <name> <kit> - /duel accept - /duel refuse - /duel (To see kits and commands) Permissions : - ownerid <steamID/user> WuyZar's Discord : https://discord.gg/NVwRcQwGwh Test video : Rust 2026-03-28 18-03-26 - Trim.mp4 Game interface :$11.50 -

Version 1.0.5
41 downloads
xPermissionManager A modern, intuitive, and powerful permission management tool for Rust servers. xPermissionManager provides a complete visual interface for managing user and group permissions directly ingame. No more console commands, guesswork, or digging through permission lists. Everything is organized, accessible, and easy to control through an straight forward UI. Whether you're adjusting a single permission, overseeing full group structures, or assigning temporary access, xPermissionManager gives server owners a fast and efficient possibility to do so. Plugin Preview (Video) Full Permission Control Grant or revoke any permission from groups or individual players. Timed Permission System Assign temporary permissions that automatically expire (e.g., 30m, 1h, 1d, 1w, custom durations). Timed Group Memberships Add players to groups for a limited time - Perfect for kits, VIP, special events or whatever. Comprehensive UI A clean and intuitive interface for browsing permissions, switching groups, managing users, and applying timed access. User & Group Browsing View all available groups, check individual player permissions, and toggle them instantly. Clear Feedback Every change is acknowledged with clear messages to help admins avoid mistakes. Permission xpermissionmanager.use // Allows a player to open and use the xPermissionManager UI Chat Commands /xpm /xpmuser <name or steamID> /xpmtimed /xpmgroups /xpm [Opens the Permission Manager UI] PERMISSION OR ADMIN REQUIRED /xpmuser <name or steamID> [Opens the UI for managing a specific player’s permissions/groups] PERMISSION OR ADMIN REQUIRED /xpmtimed [Shows all active timed permissions for a player. Includes remaining duration and whether they came from a group] /xpmgroups [Shows all active timed group memberships for a player] Console Commands </> API$11.99- 1 review
-
- 2
-
-
-
- #permission
- #manager
- (and 20 more)
-
Version 1.7.0
277 downloads
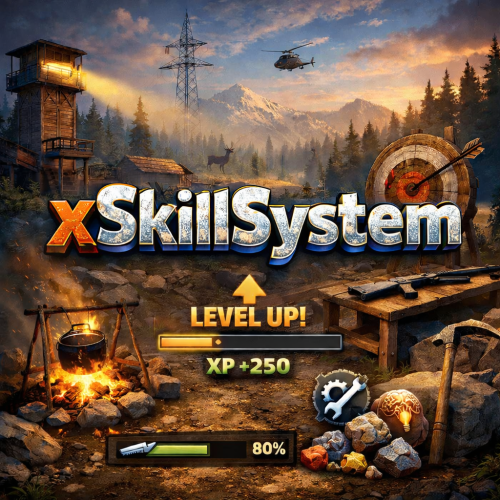
xSkillSystem xSkillSystem adds an RPG-style leveling experience to your gameplay. Whether you're chopping wood, mining for ores, or battling wildlife, every action earns you XP and helps you level up specialized skills. XP Table was testet properly and it should be fine. There are gather rates impact which are configurable and also a passive HP regen for skill "Vitality" depending on its level which is also configurable. Comes with an external config editor! » Discord « PLUG&PLAY PLUGIN, but configs are available to adjust it to your needs Built in image caching/reading (ImageLibrary is NOT needed) => Automatic skill icons download and placement. Skills: Each player starts at Level 1 in every skill and levels up through regular gameplay. Here's what you can master: Woodcutting – Chop trees. (Configurable Gather Rates depending on Level) Mining – Dig deep and extract valuable resources like stone, metal, and sulfur. (Configurable Gather Rates depending on Level) Gathering – Pick up natural items from the environment. (Configurable Gather Rates depending on Level) Slayer – Hunt animals, kill NPCs and fight players. (Configurable player speed boost 'Blood Rush' perk depending on Level) Skinning – Skin downed animals for XP. (Configurable Gather Rates depending on Level) Building - Gain XP by building, upgrading, deploying etc. Crafting – Gain XP as you build tools, weapons, and other items. (Configurable Craft Speed depening on Level) Vitality - Gain XP by using medical syringes & bandages (Configurable passive HP regen depending on Level) Looting - Gain XP by killing barrels or looting different type of crates. Cooking - Gain XP by cooking food. Custom Level Rewards Double XP Weekends Commands Plugin Preview ( *v1.2.7* ) > Clipchamp didn't allow me 60FPS export, sorry External Config Editor Config Permissions Language API$21.99- 10 comments
- 8 reviews
-
- 4
-
-
-
- #skill system
- #level system
- (and 27 more)
-
Version 1.2.0
97 downloads
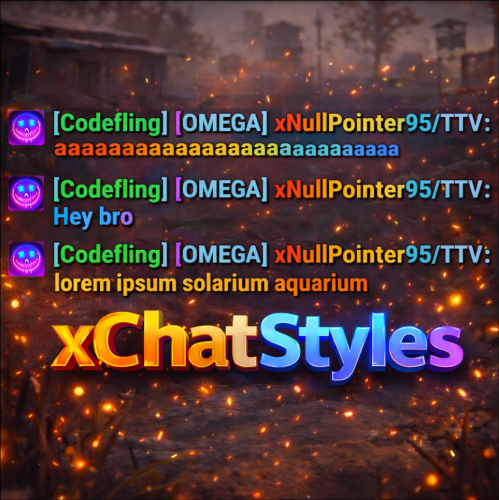
xChatStyles xChatStyles adds smooth gradient colors to player names, prefixes, and chat messages, giving your server a premium, modern look without clutter or spam. It’s clean, readable, and designed to enhance chat - not overpower it. It lets you customize how players appear in chat using animated-looking color gradients. Perfect for VIPs, staff, donators, or special roles. No flashy UI. No complicated setup. Just beautiful chat. Features Gradient Names & Messages Smooth color gradients instead of flat colors, but you can also use a solid color Player names Chat messages Prefixes (VIP, Admin, etc.) Looks great without hurting readability Styled Mentions (@PLAYERNAME) Multiple Prefix Support Players can have more than one prefix Each prefix can have its own color style Great for VIP & Donator Perks Instantly makes VIP ranks feel premium Visual reward without gameplay imbalance Easy to sell as a cosmetic perk Trade System for Prefixes (REQUIRES Economics if you want to use trade feature) Server Friendly No lag or spam Optimized to run smoothly on live servers Works quietly in the background Supports permission-based style, not just permanent chat style. xChatStyles Web Editor Plugin Preview Chat Commands (Player) /xcs - Opens the Ui /xcs <PLAYERNAME/STEMAID> - Opens the Ui with the view of the target player and you can remove owned styles from that user. Chat & Console Commands (Admin) /* Add chat styles without permission */ /addprefix <STEAMID> <PREFIXNAME> <#HEX> <#HEX> <#HEX>... /addmessagecolor <STEAMID> <#HEX> <#HEX> <#HEX>... /addusernamecolor <STEAMID> <#HEX> <#HEX> <#HEX>... /addall <STEAMID> <PREFIXNAME> <#HEX> <#HEX> <#HEX>... [This will add a prefix with provided color(s), message style with provided color(s) and username style with provided color(s) with just 1 command.] /* Add chat styles without permission */ /* Add chat styles WITH permission */ /addprefix <xchatstyles.PERMISSIONNAME> <PrefixName> <#HEX> <#HEX> <#HEX> ... /addall <xchatstyles.PERMISSIONNAME> <PrefixName> <#HEX> <#HEX> <#HEX> ... /addmessagecolor <xchatstyles.PERMISSIONNAME> <#HEX> <#HEX> <#HEX> ... /addusernamecolor <xchatstyles.PERMISSIONNAME> <#HEX> <#HEX> <#HEX> ... /* Add chat styles WITH permission */ ---> As long as the player has permission, they can select it with /xcs ---> Automatically removed when permission is revoked ---> Permission-Based ChatStyles has (Permission) indicator in /xcs ---> The permission must start with 'xchatstyles.*'. Example: /addall <xchatstyles.vip> VIP <#HEX> <#HEX> <#HEX> ... /*********************************************************************************************************/ /* Use 1 #HEX Color (Example: #fcba03) for a single color, use multiple #HEX Colors for a color gradient */ /* */ /* Example: /addprefix 76561198412496844 OMEGA #32a852 #71a67f */ /* */ /*********************************************************************************************************/ /removeprefix <steamid> <index|PrefixName> /removemessagecolor <steamid> <index> /removeusernamecolor <steamid> <index> Recommended Plugin for >TIMED< PERMISSION: Config { "MaxPrefixes": 3, "DefaultUsernameColor": "#55aaff", "DefaultMessageColor": "#ffffff", "DefaultSize": 15, "AllowSelectingDuplicatePrefixNames": true, "NotifyOnStyleReceived": true, "PrefixBrackets": "[]", "ShowPrefixBracketsWithSizeTag": true, "Trade": { "AllowTrading": false, "PlayerCanSellPermissionBasedPrefix": false, "UseCurrencySign": true, "CurrencySign": "$", "AnnounceNewPrefixSaleGlobally": true, "AnnouncePrefixPriceUpdateGlobally": true }, "PermissionStyles": {} }$24.99 -

Version 1.0.4
33 downloads
xWirelessPower xWirelessPower transforms how players interact with electrical devices (IO Entities). Instead of running back to switches, rewiring circuits, or building complex control rooms, players can directly toggle supported powered entities simply by looking at them and using a command or even with doing a clap gesture - Creating a smoother, more responsive way to manage base systems. In short: You can simply use electrical item (IO Entities) like ceiling light, sprinkler, auto turret etc. without requireing any wire or power. Features Instant Wireless Control Turn configured devices (IO Entities) ON or OFF just by looking at them with using a command or even using the clap gesture - No switches or wiring changes needed. Optional Team Access Let teammates manage shared systems for easier group gameplay. Perfect for Base Management Quickly control turrets, lights, signs, sprinklers, and more without running around your base. Faster Reaction During Raids Activate defenses or adjust systems instantly when every second counts. Fully Customizable Server owners can choose which devices are controllable and how the system behaves through config or even with chatcommadn "whoami". ShortPrefabName gets printed and saves it automatically to the confing with default value "false". Permission Support Grant access to specific groups like VIPs, admins, or trusted players. Optional Auto Power On Devices can automatically turn on when placed for smoother setup. Performance Friendly Runs efficiently with minimal impact on server performance. Plugin Preview Chat Commands /power - Toggle the IOEntity you’re looking at. /powerall - Toggles all IO entities you’re looking at. For example, when powerall is turned on and you look at an auto turret, all auto turrets will be turned off. /whoami - Prints the looked-at entity’s ShortPrefabName and adds it to your IOEntities list in config (default value = true). Permission xwirelesspower.toggle - If 'UsePermission' is true, permission is needed. Config { "ToggleCommand": "power", "PowerAllCommand": "powerall", "GetItemNameCommand": "whoami", "UsePermission": false, "PermissionName": "xwirelesspower.toggle", "AllowTeamToggle": false, "RequireToolCupboard": false, "MaxDistanceToggle": 5.0, "AutoTurnOn": true, "TurnOnOffWithClappingGesture": true, "IOEntities": { "autoturret_deployed": true, "ceilinglight.deployed": true, "neonsigntr.deployed": true, "electric.sprinkler.deployed": true }, "PermissionBasedIOEntities": { "xwirelesspower.vip": [ "fridge.deployed" ], "xwirelesspower.vip2": [ "electricfurnace.deployed", "electricfurnace.io" ] } } - You can add as many IOEntities as you want, to get the correct name of it, just spawn/place it -> Look at it -> Use ChatCommand '/whoami' and add that shortname to your IOEntities list. ToggleCommand - Chat command players use to turn IO Entity on/off. PowerAllCommand - Chat command players can toggle to turn all IO Entities from same name on/off. GetItemNameCommand - Admin command to see the IO Entity internal name (ShortPrefabName), also saves that viewed at IOEntity automatically to config with default value "false". UsePermission - If ON, only players with permission has access to this wireless power system. PermissionName - The permission name. AllowTeamToggle - Lets teammates toggle each other’s IO Entities. RequireToolCupboard - Wirless Power does only work if within a tool cupboard. MaxDistanceToggle - How close you must be to toggle (in meters). AutoTurnOn - Devices turn on automatically when placed. TurnOnOffWithClappingGesture - As the config says, use any gesture to toggle IO Entity. IOEntities - List of devices that wireless power works with (true = enabled). Localization (If you want to disable a message just use empty value "") { "NotAllowed": "You are not allowed to use this command.", "LookAtEntity": "You're not looking at an entity.", "AddedConfigEntries": "Added to config with default value true: {0}", "DetectedShortnames": "Detected shortnames: {0}", "PowerAllNoEntity": "You're not looking at a valid wireless entity, or you lack the required permission.", "PowerAllNoMatches": "No matching IOEntities could be toggled.", "PowerAllResult": "{0}: {1} entities are now {2}.", "NoEnabledEntity": "No enabled wireless IO entity was found for that deployable, or you lack the required permission.", "NotOwner": "You can only toggle your own IOEntity.", "NoEntitiesToggled": "No IOEntities could be toggled.", "ToggleAllResult": "{0}: {1} entities are now {2}.", "ToggleSingleResult": "{0} is now {1}.", "DisabledInConfig": "{0} is disabled in config.", "CupboardRequired": "A nearby tool cupboard is required to use wireless power." }$11.99 -
Version 3.3.1
145 downloads
Warning: To use this config, you need to purchase the paid Alphaloot plugin if you do not already own it: https://chaoscode.io/resources/alphaloot.13/ Thank you for choosing this professionally crafted config by fullwiped (xrust.co). Designed to minimize junk items while maintaining a balanced loot experience for 10x modded servers, it includes a substantial balance of loot, including nearly all NPC drops. Our latest configuration overhaul features extensive updates across more than 40 loot crate types. Each crate, from Roadsign and ammo crates to food crates and variants like elite, basic, and normal, has undergone meticulous fine-tuning. We've significantly cleaned up redundant items while maintaining a balance between vanilla and 10x gameplay dynamics. To enhance variety, we've customized certain items to introduce medium-tier loot and expand diversity according to player preferences. WARNING: Some items that we believe should be in the loot table might seem unnecessary to you. Please understand that we cannot build a separate loot table for each individual. Due to the core dynamics of the game, our loot tables may include many essential items that players need—such as basic clothing, weapons, and similar items. Please make your purchase with this understanding. In addition, we've introduced exclusive chances, such as a 1% or 2% drop rate for high-quality vehicle parts in crates and premium food items in food crates. Special event loot crates, like those for Halloween, Easter, or Christmas, have also been aligned to complement the 10x experience. Moreover, we've revamped and optimized NPC drops, ensuring that even the most detailed configurations are now tailored to fit seamlessly with the 10x server settings. From Gingerbread NPCs to Scarecrows, Scientist NPCs to Scientist NPC Cargos, and critical NPCs like Scientist NPC Heavies, each has been meticulously restructured. If you're seeking a professionally crafted loot table that ensures a seamless and enriched gaming experience, look no further. Installation Guide: Inside the downloaded zip file, locate the 'config' folder. Copy the 'AlphaLoot.json' file from this folder to the following directory: /home/rustserver/serverfiles/oxide/config If Rust is installed in a different directory, adjust accordingly. Next, within the downloaded zip file, find the 'data' folder. Inside, you'll find three files: 'fullwipedbradley', 'fullwipedheli', and 'fullwipedmain'. Copy these three files to the following directory: /home/rustserver/serverfiles/oxide/data/AlphaLoot/LootProfiles Adjust the path if your Rust installation differs. Final Steps: Once all files are successfully uploaded, restart your previously purchased AlphaLoot plugin. If needed, you can acquire the plugin or updates from the official vendor: https://chaoscode.io/resources/alphaloot.13/ If you've already made the purchase, proceed with file uploads and restart the plugin by typing o.reload AlphaLoot into RCON. Congratulations! Your 10x server now boasts a highly customized and well-prepared loot table. Customizing Your Config: If you need to modify the current config or adjust any settings, you can download the AlphaLoot Profile Editor from the following link: https://chaoscode.io/resources/alphaloot-profile-editor.183/ Editing the config may require some experience, but you can easily make simple adjustments. Feel free to use this tool to tailor your config to your preferences. Thank you for choosing us. Support: FULLWIPED DISCORD$12.99-
- 1
-
-
- #alphaloot
- #alpha
- (and 30 more)
-
Version 1.0.2
150 downloads
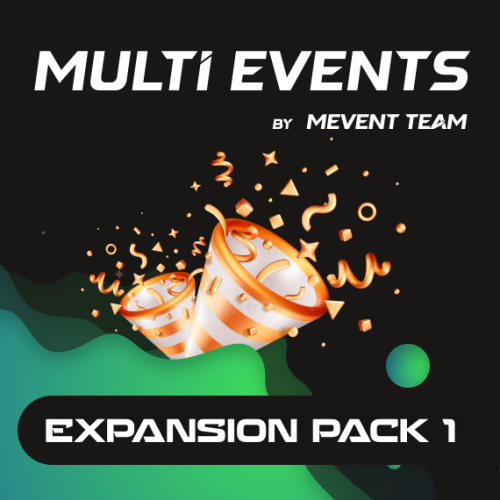
MultiEvents Expansion Pack 1 adds 5 additional events for barrel destruction, PvP combat, NPC battles, and resource gathering. Requires the base MultiEvents plugin. Included Events This expansion pack includes 5 carefully designed events that add new dimensions to your server: Barrel Event - Destroy as many barrels as you can before time runs out. Points awarded for each barrel destroyed. NPC Missile Silo - Kill as many scientists as you can inside the missile silo monument. High-stakes combat with radiation and automated defenses. Player Battle - Rack up the most PvP kills before time runs out. Points awarded for each player elimination. Pumpkin Picker - Pick as many wild pumpkins as you can before time is up. Peaceful alternative to combat events. Vehicle Hunter - Destroy cars, boats, submarines, helicopters, and Bradley APC. Each vehicle type offers different point values. Requirements Requires the base MultiEvents plugin Copy files to MultiEvents directory and reload the plugin Pre-configured and ready to use immediately FAQ Q: Do I need the base MultiEvents plugin? A: Yes, this expansion pack requires the base MultiEvents plugin. Q: Can I enable/disable individual events? A: Yes, each event can be individually configured through the visual editor. Q: Can I customize rewards? A: Yes, all events support customizable rewards through the MultiEvents system. TEST SERVER Join our test server to try these events! connect 194.147.90.239:28015$7.95-
- 2
-
-
-
- #multievents
- #expansion
- (and 10 more)
-

Version 1.0.2
161 downloads
MultiEvents Expansion Pack 2 adds 5 additional events focused on skill-based challenges, precision combat, and treasure hunting. Requires the base MultiEvents plugin. Included Events This expansion pack includes 5 skill-focused events that challenge different aspects of player expertise: Bow Master - Kill players or animals using bows before time runs out. Points awarded for bow eliminations only. Bot Purge - Kill as many scientists as you can before the timer ends. Different scientist types provide varying point values. NPC Excavator - Kill the most Excavator scientists. Specialized combat at the dangerous Excavator monument. Hemp Gather - Harvest as many hemp plants as you can. Peaceful resource gathering alternative. Scavenger Hunt - Find the hidden crate faster than anyone else. First player to reach the crate wins. Requirements Requires the base MultiEvents plugin Copy files to MultiEvents directory and reload the plugin Pre-configured and ready to use immediately FAQ Q: Do I need the base MultiEvents plugin? A: Yes, this expansion pack requires the base MultiEvents plugin. Q: How does Scavenger Hunt work? A: A crate is randomly placed on the map. First player to find and reach it wins. Q: Can I customize scoring and rewards? A: Yes, all events support customization through the visual editor. TEST SERVER Join our test server to try these events! connect 194.147.90.239:28015$7.95- 1 review
-
- 1
-
-
- #multievents
- #expansion
- (and 10 more)
-

Version 1.0.2
146 downloads
MultiEvents Expansion Pack 3 adds 5 additional events with rare item mechanics, helicopter combat, underwater lab battles, and resource gathering. Requires the base MultiEvents plugin. Included Events This expansion pack includes 5 diverse events with unique mechanics and seasonal appeal: Corn Collector - Gather as much corn as you can. Peaceful farming alternative to combat events. Gold Rush - Gather ores and trees with a chance to get rare items. Combines resource gathering with rare item discovery mechanics. Mushroom Madness - Collect as many mushrooms as you can before time runs out. Race across the map to find mushroom spawns. NPC Underwater Lab - Kill scientists in the dangerous underwater lab monument. Navigate flooded areas and eliminate NPCs. Patrol Helicopter Hit - Deal damage to the Patrol Helicopter. Points awarded based on damage dealt to the helicopter. Requirements Requires the base MultiEvents plugin Copy files to MultiEvents directory and reload the plugin Pre-configured with rare item tables and ready to use FAQ Q: Do I need the base MultiEvents plugin? A: Yes, this expansion pack requires the base MultiEvents plugin. Q: How do rare items work? A: Players have a configurable chance to receive rare items when gathering ores and wood in Gold Rush event. Q: Can I customize rare item drop rates? A: Yes, all rare item chances and types are fully configurable through the visual editor. TEST SERVER Join our test server to try these events! connect 194.147.90.239:28015$7.95- 1 comment
-
- 2
-
-

-
- #multievents
- #expansion
- (and 10 more)
-
Version 1.0.0
28 downloads
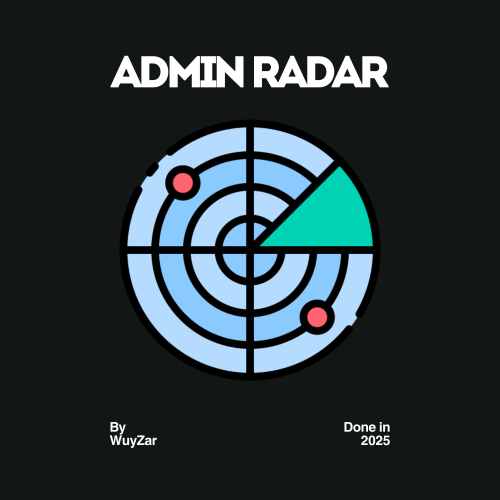
AdminRadar.cs Description : - This plugin provides a real-time radar system allowing instant tracking of Players, Cupboards, Patrol helicopters and Bradleys, with customizable display options. Display for the player : Player name - Health - Distance - Team Display for the cupboard : TC tag - Distance - List of authorized players Display for the patrol : Patrol tag - Health - Distance Display for the bradley : Bradley tag - Health - Distance Settings : - HUD colors (for the radar switch button) - Radar distance - Radar refresh - Player name color - Cupboard tag color - Patrol tag color - Bradley tag color - Distance color - Health >50hp color (for player/patrol/bradley) - Health <50hp color (for player/patrol/bradley) F1 Commands : - radar <all/player/tc/patrol/bradley> (on/off) Chat Commands : - /radar <all/player/tc/patrol/bradley> (on/off) Permissions : - oxide.grant user <steamID/user> adminradar.use WuyZar's Discord : https://discord.gg/NVwRcQwGwh Game interface :$4.50 -
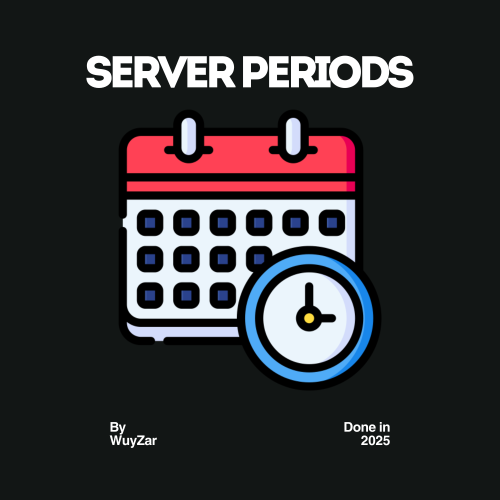
Version 1.0.0
44 downloads
ServerPeriods.cs Description : - This plugin offers a complete periodic event system for your Rust server, allowing you to create structured game phases with customizable restrictions. Each period can independently control PvP, raiding, gathering, and building permissions, providing a dynamic gameplay experience. It includes a persistent, real-time user interface displaying the current period name and remaining time, with an automatic "Next Period" indicator, and the execution of custom server commands for each period. Settings : - HUD colors - Custom periods (name/perms/time/commands) F1 Commands : - p.start (to start the periods) - p.stop (to stop the periods) - p.next (to move on to the next period) - p.prev (to move on to the previous period) Permissions : - ownerid <steamID/user> WuyZar's Discord : https://discord.gg/NVwRcQwGwh Chat messages : Game interface :$6.50- 4 comments
-
- 2
-
-
-
- #event
- #tournament
- (and 17 more)
-
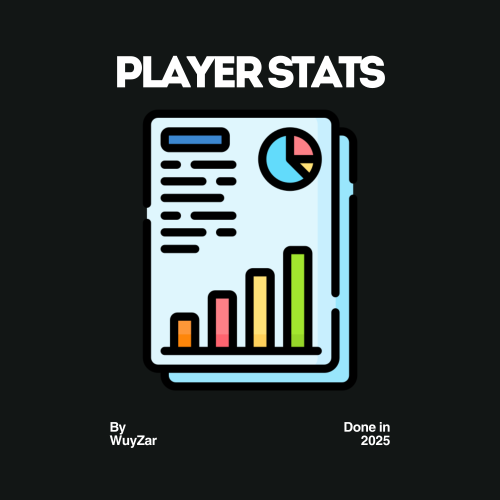
Version 1.0.0
56 downloads
PlayerStats.cs Description : - This plugin offers a complete PvP stat tracking system for your Rust server, with real-time display of kills, deaths, and K/D ratio for each player. It includes a persistent interface displaying personal stats, a floating 3D leaderboard visible in the world showcasing the top 10 players, and a detailed interactive menu for this leaderboard. All player stats are automatically tracked and updated in real time. Settings : - HUD colors - Count suicide (true/false) - Show small KDR (next to the equipment bar) - Show floating leaderboard (true/false) - Floating leaderboard position (x, y, z) - Floating leaderboard view distance Chat Commands : - /stats (to open the leaderboard) WuyZar's Discord : https://discord.gg/NVwRcQwGwh Game interface :$6.50-
- 1
-
-
- #stats
- #leaderboard
- (and 16 more)
-

Version 1.1.3
19 downloads
xStackSize xStackSize gives you full control over item stack sizes on your Rust server. Globally and permission-based. Fine-tune your economy, balance progression, or create VIP advantages with flexible and performance-friendly stack management. Whether you want larger stacksize for QoL, custom stacksizes for specific groups/permission, or complete control over your servers stacking system. INFO: xStackSize supports multiple permissions at the same time. If a player has more than one stack permission, the plugin automatically applies the highest stack size based on your configuration. The highest value always wins - whether it's global or permission-based. Example: If global is set to x3 and a permission gives x1, the player will use x3 since it’s higher. (If he has that permission) Features Global stack size control Permission-based StackSizes (VIP / ranks / groups) Custom StackSize per item Custom StackSize for CUSTOM ITEMS Force Split/Merge changed StackSize INSTANT instead of waiting for players to move items manually Blacklist items Easy to configure Performance friendly designed Additionally supports Quarries, Excavator, Furnaces and Conveyors Permission-based StackSizes: You can use any permission name in the config, as long as it starts with xstacksize. Examples: xstacksize.pro, xstacksize.vip, xstacksize.premium etc.. You can create multiple stack-size permissions. Simply copy and paste a new permission block in the config and give it a different permission name. Various Constellations (Examples, for better understanding) Console Command xstacksize.refresh (Useful if you have AutoApplyStackSizeChange set to 'false') Force-applies current stack rules to existing items immediately. It recalculates limits and retroactively normalizes/merges stacks in player inventories and storage containers without requiring item movement. Config (Use value '0' for UNLIMITED) { /* AutoApplyStackSizeChange force splits/merge items instantly instead of waiting for players to move items manually. */ "AutoApplyStackSizeChange": true, "StackSizeMultipliers": { "Weapon": 1.0, "Construction": 1.0, "Items": 1.0, "Resources": 1.0, "Attire": 1.0, "Tool": 1.0, "Medical": 1.0, "Food": 1.0, "Ammunition": 1.0, "Traps": 1.0, "Misc": 1.0, "Component": 1.0, "Electrical": 1.0, "Fun": 1.0, "CustomItems": 1.0 }, /* FixedItemStackSizes are fixed values, not multipliers (Example: 5000) */ "FixedItemStackSizes": { "wood": 0, "stones": 0 }, "PermissionStackSizeMultipliers": { "xstacksize.vip": { "Weapon": 1.0, "Construction": 1.0, "Items": 1.0, "Resources": 1.0, "Attire": 1.0, "Tool": 1.0, "Medical": 1.0, "Food": 1.0, "Ammunition": 1.0, "Traps": 1.0, "Misc": 1.0, "Component": 1.0, "Electrical": 1.0, "Fun": 1.0, "CustomItems": 1.0 } }, "BlacklistedItems": [ "pumpkin" ] }$15.99 -
Version 1.0.1
8 downloads
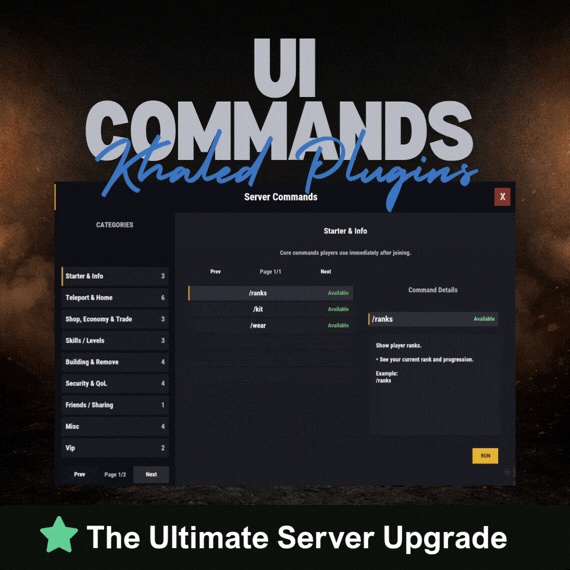
UICommands – In-Game Command Browser for Rust Servers UICommands makes it easy for players to find and use server commands without memorizing anything or spamming chat. All commands are displayed in a clean, in-game interface, neatly organized into categories with clear explanations. Players can quickly see what each command does, whether it’s available to them, and how to use it — all in one place. Features - Clean and modern in-game UI - Commands neatly organized by category - Shows whether commands are available or locked - Detailed command info panel with usage examples - RUN button for supported commands - Simple, smooth, and easy to use Why Players Like It - No need to remember commands - Quick access to everything the server offers - Easy to understand, even for new players - Less confusion, more gameplay Why Server Owners Use It - Fewer repeated questions in chat - Better presentation of server features - Helps new players get started faster - Clean and professional look Permissions UICommands is a great fit for any Rust server that wants a simple, organized, and player-friendly way to show commands in-game. Config: { "General": { "Open Commands": [ "cmds", "commands" ], "Rows Per Page": 6, "Close UI when prompting for input": true }, "Categories": [ { "Id": "starter", "Title": "Starter & Info", "Description": "Core commands players use immediately after joining.", "Sort Order": 0, "Required Permission (optional)": null, "Commands": [ { "Command": "/ranks", "Description": "Show player ranks.", "Benefit / Why Use It": "See your current rank and progression.", "Usage Example (optional)": "/ranks", "Required Permission (optional)": null, "Admin Only (optional)": false, "VIP Only (optional)": false, "Allow RUN (optional, override)": true, "Tags (optional)": [] }, { "Command": "/kit", "Description": "Starter kit.", "Benefit / Why Use It": "Get essential items to start playing.", "Usage Example (optional)": "/kit", "Required Permission (optional)": null, "Admin Only (optional)": false, "VIP Only (optional)": false, "Allow RUN (optional, override)": true, "Tags (optional)": [] }, { "Command": "/wear", "Description": "Change your underwear.", "Benefit / Why Use It": "Quickly change your character underwear.", "Usage Example (optional)": "/wear", "Required Permission (optional)": null, "Admin Only (optional)": false, "VIP Only (optional)": false, "Allow RUN (optional, override)": true, "Tags (optional)": [] } ] }, { "Id": "teleport", "Title": "Teleport & Home", "Description": "Teleport requests, homes, towns and utilities.", "Sort Order": 10, "Required Permission (optional)": null, "Commands": [ { "Command": "/sethome <name>", "Description": "Set home at your base.", "Benefit / Why Use It": "Save a home location for quick teleport.", "Usage Example (optional)": "/sethome main", "Required Permission (optional)": null, "Admin Only (optional)": false, "VIP Only (optional)": false, "Allow RUN (optional, override)": false, "Tags (optional)": [] }, { "Command": "tphelp", "Description": "Teleport help.", "Benefit / Why Use It": "View teleport commands and usage.", "Usage Example (optional)": "tphelp", "Required Permission (optional)": null, "Admin Only (optional)": false, "VIP Only (optional)": false, "Allow RUN (optional, override)": true, "Tags (optional)": [] }, { "Command": "/town", "Description": "Teleport to Bandit Town.", "Benefit / Why Use It": "Quick access to Bandit Town.", "Usage Example (optional)": "/town", "Required Permission (optional)": null, "Admin Only (optional)": false, "VIP Only (optional)": false, "Allow RUN (optional, override)": true, "Tags (optional)": [] }, { "Command": "/outpost", "Description": "Teleport to Outpost.", "Benefit / Why Use It": "Quick access to Outpost.", "Usage Example (optional)": "/outpost", "Required Permission (optional)": null, "Admin Only (optional)": false, "VIP Only (optional)": false, "Allow RUN (optional, override)": true, "Tags (optional)": [] }, { "Command": "/where", "Description": "Teleport to your death location.", "Benefit / Why Use It": "Return to your death spot quickly.", "Usage Example (optional)": "/where", "Required Permission (optional)": null, "Admin Only (optional)": false, "VIP Only (optional)": false, "Allow RUN (optional, override)": true, "Tags (optional)": [] }, { "Command": "/tpr <PlayerName>", "Description": "Request teleport to a player.", "Benefit / Why Use It": "Send a teleport request to another player.", "Usage Example (optional)": "/tpr Khaled", "Required Permission (optional)": null, "Admin Only (optional)": false, "VIP Only (optional)": false, "Allow RUN (optional, override)": false, "Tags (optional)": [] } ] }, { "Id": "shop", "Title": "Shop, Economy & Trade", "Description": "Server shop and purchases.", "Sort Order": 20, "Required Permission (optional)": null, "Commands": [ { "Command": "/s", "Description": "Shop.", "Benefit / Why Use It": "Open the server shop.", "Usage Example (optional)": "/s", "Required Permission (optional)": null, "Admin Only (optional)": false, "VIP Only (optional)": false, "Allow RUN (optional, override)": true, "Tags (optional)": [] }, { "Command": "/buy", "Description": "Transport license.", "Benefit / Why Use It": "Purchase transport license.", "Usage Example (optional)": "/buy", "Required Permission (optional)": null, "Admin Only (optional)": false, "VIP Only (optional)": false, "Allow RUN (optional, override)": true, "Tags (optional)": [] }, { "Command": "/buyraid", "Description": "Buy a Raidable Base.", "Benefit / Why Use It": "Purchase a raidable base event.", "Usage Example (optional)": "/buyraid", "Required Permission (optional)": null, "Admin Only (optional)": false, "VIP Only (optional)": false, "Allow RUN (optional, override)": true, "Tags (optional)": [] } ] }, { "Id": "skills", "Title": "Skills / Levels", "Description": "Leveling and skills commands (server dependent).", "Sort Order": 30, "Required Permission (optional)": null, "Commands": [ { "Command": "/st", "Description": "Open skill tree (shortcut).", "Benefit / Why Use It": "Quick access to the skill tree.", "Usage Example (optional)": "/st", "Required Permission (optional)": null, "Admin Only (optional)": false, "VIP Only (optional)": false, "Allow RUN (optional, override)": true, "Tags (optional)": [] }, { "Command": "/skills", "Description": "Open skills UI.", "Benefit / Why Use It": "View and manage your skills.", "Usage Example (optional)": "/skills", "Required Permission (optional)": null, "Admin Only (optional)": false, "VIP Only (optional)": false, "Allow RUN (optional, override)": true, "Tags (optional)": [] }, { "Command": "/skill", "Description": "Open crafting menu.", "Benefit / Why Use It": "Access crafting skill menu (if supported).", "Usage Example (optional)": "/skill", "Required Permission (optional)": null, "Admin Only (optional)": false, "VIP Only (optional)": false, "Allow RUN (optional, override)": true, "Tags (optional)": [] } ] }, { "Id": "building", "Title": "Building & Remove", "Description": "Upgrade, remove and building utilities.", "Sort Order": 40, "Required Permission (optional)": null, "Commands": [ { "Command": "/up <1-4>", "Description": "Upgrade building tier.", "Benefit / Why Use It": "Upgrade building parts quickly.", "Usage Example (optional)": "/up 4", "Required Permission (optional)": null, "Admin Only (optional)": false, "VIP Only (optional)": false, "Allow RUN (optional, override)": false, "Tags (optional)": [] }, { "Command": "/down <1-4>", "Description": "Downgrade building tier.", "Benefit / Why Use It": "Downgrade building parts quickly.", "Usage Example (optional)": "/down 2", "Required Permission (optional)": null, "Admin Only (optional)": false, "VIP Only (optional)": false, "Allow RUN (optional, override)": false, "Tags (optional)": [] }, { "Command": "/remove", "Description": "Remove buildings.", "Benefit / Why Use It": "Remove building parts if enabled.", "Usage Example (optional)": "/remove", "Required Permission (optional)": null, "Admin Only (optional)": false, "VIP Only (optional)": false, "Allow RUN (optional, override)": true, "Tags (optional)": [] }, { "Command": "/bskin", "Description": "Building skins.", "Benefit / Why Use It": "Change building skins (if enabled).", "Usage Example (optional)": "/bskin", "Required Permission (optional)": null, "Admin Only (optional)": false, "VIP Only (optional)": false, "Allow RUN (optional, override)": true, "Tags (optional)": [] } ] }, { "Id": "security", "Title": "Security & QoL", "Description": "Locking, turrets and helpful quality-of-life commands.", "Sort Order": 50, "Required Permission (optional)": null, "Commands": [ { "Command": "/autolock", "Description": "Auto lock boxes & doors.", "Benefit / Why Use It": "Automatically apply locks to your base items.", "Usage Example (optional)": "/autolock", "Required Permission (optional)": null, "Admin Only (optional)": false, "VIP Only (optional)": false, "Allow RUN (optional, override)": true, "Tags (optional)": [] }, { "Command": "/lockturret", "Description": "Lock turret (requires codelock).", "Benefit / Why Use It": "Protect your turret from unauthorized access.", "Usage Example (optional)": "/lockturret", "Required Permission (optional)": null, "Admin Only (optional)": false, "VIP Only (optional)": false, "Allow RUN (optional, override)": true, "Tags (optional)": [] }, { "Command": "/carturret", "Description": "Spawn your car.", "Benefit / Why Use It": "Quickly spawn your vehicle (server dependent).", "Usage Example (optional)": "/carturret", "Required Permission (optional)": null, "Admin Only (optional)": false, "VIP Only (optional)": false, "Allow RUN (optional, override)": true, "Tags (optional)": [] }, { "Command": "Quarry lock", "Description": "Locking a quarry engine.", "Benefit / Why Use It": "Protect the quarry engine with a code lock.", "Usage Example (optional)": "Craft a codelock, go to the quarry engine and press E.", "Required Permission (optional)": null, "Admin Only (optional)": false, "VIP Only (optional)": false, "Allow RUN (optional, override)": false, "Tags (optional)": [] } ] }, { "Id": "social", "Title": "Friends / Sharing", "Description": "Friends and access control.", "Sort Order": 60, "Required Permission (optional)": null, "Commands": [ { "Command": "/friend <add/remove playername>", "Description": "Add or remove a friend from your base.", "Benefit / Why Use It": "Control who can interact with your base features.", "Usage Example (optional)": "/friend add Khaled", "Required Permission (optional)": null, "Admin Only (optional)": false, "VIP Only (optional)": false, "Allow RUN (optional, override)": false, "Tags (optional)": [] } ] }, { "Id": "misc", "Title": "Misc", "Description": "Skins, signs and other utilities.", "Sort Order": 70, "Required Permission (optional)": null, "Commands": [ { "Command": "/skin", "Description": "Skins.", "Benefit / Why Use It": "Open skins menu (if enabled).", "Usage Example (optional)": "/skin", "Required Permission (optional)": null, "Admin Only (optional)": false, "VIP Only (optional)": false, "Allow RUN (optional, override)": true, "Tags (optional)": [] }, { "Command": "/sili", "Description": "Sign image URL.", "Benefit / Why Use It": "Paste an image URL into a sign (if enabled).", "Usage Example (optional)": "/sili <url>", "Required Permission (optional)": null, "Admin Only (optional)": false, "VIP Only (optional)": false, "Allow RUN (optional, override)": false, "Tags (optional)": [] }, { "Command": "/sil", "Description": "Sign image URL (shortcut).", "Benefit / Why Use It": "Paste an image URL into a sign (if enabled).", "Usage Example (optional)": "/sil <url>", "Required Permission (optional)": null, "Admin Only (optional)": false, "VIP Only (optional)": false, "Allow RUN (optional, override)": false, "Tags (optional)": [] }, { "Command": "/recycler.craft", "Description": "Craft your recycler.", "Benefit / Why Use It": "Craft and place a recycler (if enabled).", "Usage Example (optional)": "/recycler.craft", "Required Permission (optional)": null, "Admin Only (optional)": false, "VIP Only (optional)": false, "Allow RUN (optional, override)": true, "Tags (optional)": [] } ] } ], "Debug: Print Config Summary On Load": false } Need Support?$13.99 -

Version 0.1.1
436 downloads
Allows toggling silent item giving(chat notifications and ownership) via Harmony patching. P.S. By default, silent item giving is enabled. The ability to disable item ownership assignment; The ability to disable item give messages via the 'give' command; The ability to disable item give messages via the 'giveid' command; The ability to disable item give messages via the 'givearm' command; The ability to disable item give messages via the 'giveto' command; The ability to disable item give messages via the 'giveall' command; The ability to disable item blueprint give messages via the 'giveBp' command; The ability to disable messages about copying player inventory via the 'copyTo' command. silentitemsgive.admin - Grants access to the command silentgive.toggle silentgive.toggle *boolValue*(optional) - Toggle silent item giving. To access this command, you must be an administrator or have the silentitemsgive.admin permission. Example: silentgive.toggle silentgive.toggle trueFree -

Version 1.0.0
2 downloads
Description FileWatcher monitors your server’s config and lang JSON files and automatically reloads the affected plugin when changes are detected. This is aimed at faster iteration while developing or tuning plugins — edit JSON, save, and the plugin reloads itself. Features Config + Lang monitoring - Watches oxide/config/*.json - Watches oxide/lang/**.json (including subfolders) Safe reload behavior - Debounce (1s): prevents multiple reloads while a file is still being written - Reload cooldown (20s): prevents reload loops and spam - Ignore list: exclude specific plugins from being reloaded - Always ignores FileWatcher itself Stability - If the watcher throws errors, it auto-restarts itself after 5 seconds Debug mode - Optional debug output for watcher init, file changes, cooldown/debounce decisions, etc. Commands /fwstatus Shows watcher status (Config/Lang on/off) and ignored count. Admin only. Permissions No Oxide permission is used. Access is gated by player.IsAdmin. Config { "Watch config folder": true, "Watch lang folder": true, "Ignored plugins": [ "PermissionManager" // This is an example. ], "Debug mode": false } load, run, enjoy$3.55 -

Version 1.1.1
20 downloads
CodeFling Creator Bot is a Discord bot, written in Python using Discord.py. The bot monitors users specified in the config and using the CodeFling API, sends notifications to Discord for various actions: New Releases (Plugins, Maps, Tools etc) Plugin/Release Updates New Comments/Discussion Posts New Support requests and replies to threads New Reviews New Private Messages The bot is lightweight and written with efficiency and reliability in mind. It makes only the API calls it needs and stores data in an SQLite database for use later. When guild members use the bot commands, the data is pulled from the local database and doesn’t make extra calls to the API, which means you don’t need to worry about rate limiting or getting banned by the API. The bot polls the API looking for new content at set periods as set in the config, notifying about new content and then updating the database with new data. PLEASE NOTE: Requires Python 3.6 or higher. README: CodeFling Creator Bot 1.1.1 Discord Bot by ZEODE ========================================== Minimum requirements: Python 3.6 or higher Dependacies: Discord.py aiohttp Using pip: pip install -U discord.py pip install -U aiohttp The -U flag just means “upgrade to the latest version if already installed.” Using apt: apt install python3-discord apt install python3-aiohttp This file explains each configuration option in config.json *************** DEFAULT CONFIG FILE IS CREATED ON FIRST RUN *************** DISCORD SETTINGS ---------------- Make sure your Discord bot has at least "Send Messages", "Read Message History" and "Embed Links" permissions. bot: bot_token: Your Discord bot token from the Discord Developer Portal. Get it from: https://discord.com/developers/applications channels: release_channel_id: Discord channel ID where file release/update notifications will be posted. To get channel ID: Enable Developer Mode in Discord settings, right-click channel, "Copy ID" purchase_channel_id: Discord channel ID for purchase notifications (recommend private channel). Shows when someone buys one of your paid plugins. support_channel_id: Discord channel ID for support request notifications. comments_channel_id: Discord channel ID for comment/discussion notifications. Shows when users comment on your files (excludes file author replies). downloads_channel_id: Discord channel ID for file downloads notifications (recommend private channel). Shows when users download your files. reviews_channel_id: Discord channel ID for file review notifications. Shows when users review a monitored file. messages_channel_id: Discord channel ID for user message notifications (recommend private channel). Notifys when a monitored user receives a message on CodeFling. commands_channel_id: Discord channel ID for people to use bot commands. People can use bot ! commands here, all user messages can be cleaned automatically, see below. admin_commands_channel_id: Channel for users with the bot admin role to use admin commands away from public channels All normal commands also work here for bot admin role users to use here too NOTE: - Leaving any of the channel IDs blank will disable notifications for those actions - Although there are separate channels for each type in the config, this is just for anyone wanting this, if you want you can put the same channel ID in more than one channel config misc: clean_commands_channel: If true, users messages are automatically deleted shortly after they are sent to the channel. max_number_files_to_list: Number of files to return when users use the "!list plugins" command bot_admin_role_id: Users need this role to use the admin only commands ping_release_channel: If this is true, new releases or updates to files will be notified with the @everyone tag presence: enabled: true or false to enable or disable Discord presence. type: Available options: "playing" "watching" "listening" "competing" text: The text to display, e.g. www.codefling.com CODEFLING SETTINGS ------------------ monitored_users: Dictionary of Codefling user IDs and their API tokens. Format: "user_id": "api_token" How to get your User ID: - Visit your Codefling profile - Hover over or click on "See my activity" - Your user ID is in the URL: https://codefling.com/profile/USER_ID-username/content/ - Copy just the numbers, without the "-username" part How to get API Token: - Visit: https://codefling.com/settings/apps/ - Click "Add App" > "Creator API" - Select "All" under scopes - Copy the access token to paste in your config NOTE: For message_buyer_on_purchase you will require a Creator Pro API token. Example: "monitored_users": { "user_id_1": "your_api_token_here", "user_id_2": "another_api_token" } Note: Each user needs to use their own API token. poll_interval_seconds: How often (in seconds) the bot checks Codefling for new content. Default: 120 (2 minutes) Suggested values: | Type | Safe poll interval | Notes | | ----------------------- | ------------------ | ----------------------------------- | | Light use (1–2 authors) | 60 s | Feels instant, safe if few requests | | Medium (3–5 authors) | 120 s | Recommended default | | Heavy use (5+ authors) | 300 s | Low strain, good scaling | | Massive / strict API | 600–900 s | Extremely safe | Note: Too frequent polling may hit API rate limits. The more files a user has, the harder it is on the API leading to possible rate limits or IP ban, so be cautious. retention_days: How many days of historical data to track and store. Default: 7 days The bot will: - Only notify about content within this time window - Automatically clean up older data daily - On first run, load existing content from this period Recommended values: - 7 days (minimal storage) - 30 days (balanced) - 90 days (extended history) NOTE: Monitored resource/file data is kept indefinitely for users !stats !list commands etc, but the bot will only look for new actions within this period to send notifications to Discord or not. This maintains speed and performance so the bot isn't retreiving more data than is necessary with each API call. In most cases, 7 days should be more than sufficient for all use cases. message_buyer_on_purchase: If true, when a new purchase is detected, the bot will send a private message on the Codefling website with the message content taken from users/{userid}/purchase_message.txt. This can be edited to whatever you like, using html formatting and with available placeholders: {buyer_name} {resource_name} {resource_url} {support_url} NOTE: You will require a Creator Pro API token to use this feature!!! notify_support_request_replies: Limitation of the API at present means that it is not possible to know the reply comment author in support requests. Therefore we cannot filter replies by the file owner, so all replies will be announced, inclduing from the file owner. If you do not want this, you can disable announcing replies so that only new support requests are announced. If the API endpoint is updated in future this can be improved. LOGGING SETTINGS ---------------- timestamp_date_format: The format for timestamps in the console/log output. Availble: - %d - %m - %y e.g: %d-%m-%y would make something like 30-10-25 timestamp_time_format: Specify the format for the timestamp. - 12h - 24h log_file_path: Set the path to the OPTIONAL log file. If left blank, no log file will be used. API OPTIONS ----------- Note: You can usually leave this as is and it will work absolutely fine. max_attempts: How many times to try an API request if it fails before giving up on that attempt Useful for occasional CloudFare errors/timeouts timeout_seconds: How long to wait before retrying a API request due to timeout DEBUG OPTIONS ------------------ enable_verbose_debug_logging: As it says, enabled verbose loigging which can help in troubleshooting issues. Default is false. config_version: DO NOT EDIT THIS COMMANDS ------------------ NOTE: Commands by users do not query the CodeFling API every time. They only retreive data from the SQLite database, so you don't have to worry about rate limiting or banning from users abusing the commands on Discord. This also means it is much quicker with results. The database is updated with all the info every time the API is queried as per the poll rate in the config only. Non-Admin Commands: !help Lists all available commands !stats [username] Get own stats without parameter if you are monitored by the bot or get stats for the user specified !list files List all files monitored by the plugin (config option to limit results) !list authors List all file authors/devs monitored by the bot !file <FileName> / !file <file_id> Give information about that file Admin Commands: !user add <user_id> <api_token> Add the specified user ID and API token to the bot, save in the config and begin monitoring !user remove <user_id> Stops monitoring and removes the specified user ID from the bot and config !rotate Immediately rotate the log file and begin a new blank log file (rotated files saved in logs/) !cleardb Immediately clear the SQLite database and re-seed a new database (ALL DATA WILL BE CLEARED) !test <review|download|purchase|comment|support|message> Send a test notification to Discord for the most recent entry of the given type !test <purchase_msg> <user_id> <purchaser_id> Send a test purchase message by PM on CodeFling !test <file> [new|updated] Send a test notification to Discord for the most recent entry for files/releases, using the new or updated parameter accordingly/ FIRST RUN BEHAVIOR ------------------ On first run, the bot will: 1. Create a SQLite database (codefling_bot.db) 2. Load/Cache all users existing files. 3. Load/Cache all existing content from the last N days (retention_days) 4. DOES NOT send any notifications for existing content 5. Only notify about NEW content after initialization On subsequent runs: 1. Check for content created while bot was offline 2. Send notifications for missed content 3. Continue normal monitoring TROUBLESHOOTING --------------- No notifications appearing: - Verify channel IDs are correct - Check bot has "Send Messages", "Read Message History" and "Embed Links" permissions - Confirm API tokens are valid and have correct scopes Getting rate limited: - Increase poll_interval_seconds value - Default 300 seconds (5 minutes) should be safe Bot sends old notifications on startup: - This is normal if content was created while bot was offline - Bot catches up on missed content within retention period - On first run, no old notifications should appear SUPPORT ------- For issues with the bot, check console output for error messages. Get more support in my Discord: https://discord.gg/jnyg3FvDnc For Codefling API issues, see: https://codefling.com/developers$14.99- 1 review
-
- 2
-
-
- #discord
- #discordbot
- (and 8 more)
-
Version 1.0.8
77 downloads
Extra Fishing ExtraFishing is a feature-rich fishing enhancement plugin for Rust. It introduces custom fish species, dynamic UI displays, rod quality effects, economy integration, and fishing record systems—all fully configurable and optimized for performance. Features Custom Fish System Easily define new fish via JSON including size range, rarity, biome, and growth curves. You can increase the number of fish species by adding the included 60 Fish Data.json fish data to your configuration. More fish species will be added as add-ons in the future. Dynamic UI Display Uses ImageLibrary to show results, records, and fish selling screens with optional background images. Rod Quality & Bonus Fishing rods with different skins can have bonus catch chances, making equipment progression meaningful. Economy Support Fully supports Scrap or Economics or ServerRewards or CustomItem to allow players to sell fish for currency. Fishing Records & Ranking Automatically tracks each player’s biggest catch, with optional server-wide leaderboards. Multilingual Support Built-in English , Japanese , Russian localization. Permission extrafishing.records - Control use of commands "/fish" extrafishing.sell - Controls permission to sell fish Chat Commands /fish – Open your personal fishing records. If you have fish, open the fish selling UI. /rod - Get all custom fishing rods. (Admin only) ServerConsole Commands clearfishdata - Delete all fishing records fishbuff - Adds a fishing boost to players. Usage : fishbuff "SteamID" "amount" "Time(Minutes)" Example(Fish Boost 130%, 10 Minutes for 76561198100000000) fishbuff 76561198100000000 130 10 giverod- Adds a custom fishing rod to players. Usage : giverod "SteamID" "Rod skinID" Example( 3157356052 for 76561198100000000) giverod 76561198100000000 3157356052 Config You can easily add fish and change settings with the included ExtraFishing_editor (Web UI) tool. You can increase the number of fish species by adding the included 60 Fish Data.json fish data to your configuration. More fish species will be added as add-ons in the future. { "EnableUIDisplay": true, // Show fishing result UI when catching fish "EnableSoundEffects": true, // Play sound effects for fishing actions "ShowMessages": false, // Display chat messages for catches/breaks "EnableBiomeCheck": true, // Restrict fish spawning by biome "EnableUIAnimation": true, // Enable smooth UI Animation "CaloriesPerFishing": 1, // Calories consumed per fishing attempt "CaloriesPerTensionBreak": 3, // Calories consumed when line breaks "SizeInterval": 20.0, // Get items by size. "TrapFishSizeMultiplier": 0.5, // Size reduction for trap-caught fish // === UI CONFIGURATION === "UI": { "DisplayDuration": 8.0, "Result": { "AnchorMin": "0.35 0.75", "AnchorMax": "0.65 0.9", "BackgroundColor": "0.1 0.1 0.1 0.9", "TitleColor": "0.678 0.643 0.616 1.0", "FishNameColor": "0.678 0.643 0.616 1.0", "FishNameFontSize": 16, "DetailsColor": "0.447 0.427 0.404 1.0", "DetailsFontSize": 14, "BackgroundImage": "https://i.imgur.com/C30zzZ5.png", "UseBackgroundImage": true }, // Fish Records UI (opened with /fish command) "Record": { "AnchorMin": "0.25 0.15", "AnchorMax": "0.75 0.85", "BackgroundColor": "0.086 0.086 0.086 1.0", "TitleColor": "0.678 0.643 0.616 1.0", "TitleFontSize": 20, "FishButtonColor": "0.086 0.086 0.086 1.0", "FishNameColor": "0.678 0.643 0.616 1.0", "FishNameFontSize": 14, "FishDetailColor": "0.678 0.643 0.616 1.0", "FishDetailFontSize": 16, "SectionTitleColor": "0.678 0.643 0.616 1.0", "SectionTitleFontSize": 18, "DetailsColor": "0.447 0.427 0.404 1.0", "DetailsFontSize": 14, "HighlightColor": "0.447 0.427 0.404 1.0", "NavButtonColor": "0.090 0.263 0.400 1.0", "NavTextColor": "0.259 0.620 0.875 1.0", "NavFontSize": 14, "CloseButtonColor": "0.722 0.227 0.149 1.0", "CloseTextColor": "0.792 0.643 0.608 1.0", "CloseFontSize": 18, "DescriptionColor": "0.447 0.427 0.404 1.0", "DescriptionFontSize": 14, "BackgroundImage": "https://i.imgur.com/IhEjX5Q.png", "UseBackgroundImage": true }, // Fish Selling UI (opened with /fish) "Sell": { "AnchorMin": "0.25 0.15", "AnchorMax": "0.75 0.85", "BackgroundColor": "0.086 0.086 0.086 1.0", "TitleColor": "0.678 0.643 0.616 1.0", "TitleFontSize": 20, "FishButtonColor": "0.086 0.086 0.086 1.0", "FishNameColor": "0.678 0.643 0.616 1.0", "FishNameFontSize": 14, "DetailColor": "0.447 0.427 0.404 1.0", "DetailFontSize": 12, "PriceColor": "0.259 0.620 0.875 1.0", "PriceFontSize": 13, "BalanceTextColor": "0.678 0.643 0.616 1.0", "BalanceFontSize": 14, "SellButtonColor": "0.3 0.6 0.3 1", "NavButtonColor": "0.090 0.263 0.400 1.0", "NavTextColor": "0.259 0.620 0.875 1.0", "NavFontSize": 14, "CloseButtonColor": "0.722 0.227 0.149 1.0", "CloseTextColor": "0.792 0.643 0.608 1.0", "CloseFontSize": 18, "SellAllButtonColor": "0.314 0.380 0.200 1.0", "SellAllTextColor": "0.569 0.765 0.231 1.0", "SellAllFontSize": 14, "BackgroundImage": "https://i.imgur.com/IhEjX5Q.png", "UseBackgroundImage": true } }, // === TIME-BASED FISHING BONUSES === "ChanceTime": { "MorningStart": 4.0, // Morning golden hour start (4:00 AM) "MorningEnd": 8.0, // Morning golden hour end (8:00 AM) "EveningStart": 16.0, // Evening golden hour start (4:00 PM) "EveningEnd": 20.0, // Evening golden hour end (8:00 PM) "PeakTimeChanceBonus": 15 // Extra 15% chance for rare fish during golden hours }, // === FISHING ROD QUALITY SYSTEM === "FishingRods": { "0": { // Default fishing rod (no skin) "Name": "Low Quality Rod", "ChanceBonus": 0 // No bonus chance }, "3157356052": { // Workshop skin ID for mid-tier rod "Name": "Mid Quality Rod", "ChanceBonus": 5 // +5% catch chance }, "3157356205": { // Workshop skin ID for high-tier rod "Name": "High Quality Rod", "ChanceBonus": 10 // +10% catch chance } }, // === FISH RARITY CHANCES === "RarityChances": { "1": 70, // Common fish: 70% base chance "2": 15, // Uncommon fish: 15% base chance "3": 10, // Rare fish: 10% base chance "4": 5, // Epic fish: 5% base chance "5": 1 // Legendary fish: 1% base chance }, // === ECONOMY SYSTEM === "Economy": { "PreferredEconomy": "Scrap", // Currency type: "Scrap","Economics","ServerRewards","Custom" "RarityMultipliers": { // Price multipliers for each rarity level "1": 1.0, // Common: 100% base price "2": 1.2, // Uncommon: 120% base price "3": 1.3, // Rare: 130% base price "4": 1.5, // Epic: 150% base price "5": 1.8 // Legendary: 180% base price }, "BasePriceMultiplier": 1.0 // Global price adjustment (1.0 = normal, 2.0 = double) "CustomItem": { // Must be set if PreferredEconomy is Custom. "ItemShortName": "sulfur", "ItemSkinId": 0, "DisplayName": null } }, // === FISH STACKING SYSTEM === "EnableFishStackLimit": true, // If you set this to false, you can stack fish, but the size and weight of the item will not be saved. When selling, the value will be calculated as "FishBaseValuesForDisableFishStackLimit" × "RarityMultipliers". changed to this setting require a server restart. // Base scrap values when stacking is DISABLED (EnableFishStackLimit = false) "FishBaseValuesForDisableFishStackLimit": { "fish.anchovy": 2, // Anchovy worth 2 scrap each "fish.catfish": 32, // Catfish worth 32 scrap each "fish.herring": 4, // Herring worth 4 scrap each "fish.orangeroughy": 37, // Orange Roughy worth 37 scrap each "fish.salmon": 27, // Salmon worth 27 scrap each "fish.sardine": 2, // Sardine worth 2 scrap each "fish.smallshark": 45, // Small Shark worth 45 scrap each "fish.troutsmall": 6, // Small Trout worth 6 scrap each "fish.yellowperch": 10 // Yellow Perch worth 10 scrap each }, // === FISH SPECIES DEFINITIONS === "Fish": [ { "ItemShortName": "fish.anchovy", // Rust's internal item name "SkinId": 0, // Skin ID (0 = default, custom number = workshop skin) "Name": "Anchovy", // Display name in UI "MaxSize": 24.0, // Maximum size in centimeters "MinSize": 15.0, // Minimum size in centimeters "Growth_A": 0.0051, // Weight calculation parameter A "Growth_B": 3.27, // Weight calculation parameter B // Formula: Weight = Growth_A × (Size ^ Growth_B) ÷ 1000 "Biome": "All", // Where fish can be caught: "All", "Arid", "Temperate", "Tundra", "Arctic", "Jungle" "Rarity": 1, // Rarity level 1-5 (1=common, 5=legendary) "ProcessedItemShortName": "fish.raw", // Item given when fish is processed "ProcessedItemSkinId": 0, // Skin for processed item "DisplayName": null, // Custom name for processed item (null = default) "ProcessedItemAmount": 1, // How many processed items to give "Description": "Widely known for its role in the seafood industry and seasonal migrations." }, { "ItemShortName": "fish.catfish", "SkinId": 0, "Name": "Catfish", "MaxSize": 62.0, "MinSize": 30.0, "Growth_A": 0.0052, "Growth_B": 3.22, "Biome": "All", "Rarity": 1, "ProcessedItemShortName": "fish.raw", "ProcessedItemSkinId": 0, "DisplayName": null, "ProcessedItemAmount": 1, "Description": "A bottom-dwelling freshwater fish native to North America, recognizable by its long whisker-like barbels and nocturnal habits." }, { "ItemShortName": "fish.herring", "SkinId": 0, "Name": "Herring", "MaxSize": 45.0, "MinSize": 30.0, "Growth_A": 0.007, "Growth_B": 3.12, "Biome": "All", "Rarity": 1, "ProcessedItemShortName": "fish.raw", "ProcessedItemSkinId": 0, "DisplayName": null, "ProcessedItemAmount": 1, "Description": "A key commercial fish found in the North Atlantic, famous for its massive schools and historical importance in global fisheries." }, { "ItemShortName": "fish.orangeroughy", "SkinId": 0, "Name": "Orange Roughy", "MaxSize": 75.0, "MinSize": 45.0, "Growth_A": 0.00014, "Growth_B": 2.66, "Biome": "All", "Rarity": 1, "ProcessedItemShortName": "fish.raw", "ProcessedItemSkinId": 0, "DisplayName": null, "ProcessedItemAmount": 1, "Description": "A deep-sea fish known for its striking orange color, longevity, and tough scales, often caught at great ocean depths." }, { "ItemShortName": "fish.salmon", "SkinId": 0, "Name": "Salmon", "MaxSize": 70.0, "MinSize": 30.0, "Growth_A": 0.0075, "Growth_B": 3.02, "Biome": "All", "Rarity": 1, "ProcessedItemShortName": "fish.raw", "ProcessedItemSkinId": 0, "DisplayName": null, "ProcessedItemAmount": 1, "Description": "An anadromous fish that migrates between rivers and the ocean, revered for its powerful upstream spawning journeys." }, { "ItemShortName": "fish.sardine", "SkinId": 0, "Name": "Sardine", "MaxSize": 24.99, "MinSize": 20.0, "Growth_A": 0.005, "Growth_B": 3.26, "Biome": "All", "Rarity": 1, "ProcessedItemShortName": "fish.raw", "ProcessedItemSkinId": 0, "DisplayName": null, "ProcessedItemAmount": 1, "Description": "Widely known for its role in the seafood industry and seasonal migrations." }, { "ItemShortName": "fish.smallshark", "SkinId": 0, "Name": "Small Shark", "MaxSize": 60.0, "MinSize": 30.0, "Growth_A": 0.012, "Growth_B": 3.13, "Biome": "All", "Rarity": 1, "ProcessedItemShortName": "fish.raw", "ProcessedItemSkinId": 0, "DisplayName": null, "ProcessedItemAmount": 1, "Description": "A small-bodied shark species typically found in coastal or deep waters, known for their slender shape, bottom-dwelling habits, and relatively harmless nature." }, { "ItemShortName": "fish.troutsmall", "SkinId": 0, "Name": "Small Trout", "MaxSize": 40.0, "MinSize": 20.0, "Growth_A": 0.0053, "Growth_B": 3.26, "Biome": "All", "Rarity": 1, "ProcessedItemShortName": "fish.raw", "ProcessedItemSkinId": 0, "DisplayName": null, "ProcessedItemAmount": 1, "Description": "A popular freshwater fish native to North America, with some individuals developing into ocean-going steelhead trout." }, { "ItemShortName": "fish.yellowperch", "SkinId": 0, "Name": "Yellow Perch", "MaxSize": 50.0, "MinSize": 25.0, "Growth_A": 0.0135, "Growth_B": 2.97, "Biome": "All", "Rarity": 1, "ProcessedItemShortName": "fish.raw", "ProcessedItemSkinId": 0, "DisplayName": null, "ProcessedItemAmount": 1, "Description": "A widely distributed North American freshwater species, easily identified by its golden body and vertical black bars." } ] } Contact VOID / NINJA WORKS DISCORD : https://discord.gg/U8uxePjSyA MADE IN JAPAN$20.00 -
.thumb.gif.bc4c90f2bbe81c697c930552f09e0dcf.gif)
Version 1.0.9
54 downloads
Smart Kill Log Features - Global Kill Log: Server-wide kill feed displayed to all connected players - Smooth Animations: Professional slide-in and slide-out effects with easing (FPS depends on the server) - Personal Notifications: Center-screen zoom notifications when you kill or down someone - Sound Effects: Audio feedback for kills and downs - Customizable Position: Display on left or right side of screen, adjustable vertical position - Opacity Fade: Older entries gradually fade out for cleaner visuals - NPC Support: Tracks kills involving NPCs (scientists, animals, etc.) - Multi-language Support: English, Japanese, Chinese (Traditional), Russian (auto-detected) - Custom Background Images: Fully customizable UI backgrounds via ImageLibrary Kill Log Display The kill log shows detailed information for each event: - Attacker name (gold color for players, white for NPCs) - Action type: killed (red), downed (blue), died (purple) - Victim name - Weapon used - Distance in meters Personal Notifications When you kill or down another player, a centered notification appears with: - Zoom-in animation effect - The victim's name highlighted - Action type (Killed/Downed) - Sound effect feedback Dependencies ImageLibrary (for custom background images) If ImageLibrary is not installed, the plugin works without background images. Commands /killlog Toggles the display of the kill log on/off. /killlog notif Toggles the display of kill notifications on/off. - These settings persist even after restarting the server. Configuration { "Kill Log Settings": { "Enabled": true, "Max Logs": 8, "Display Duration (seconds)": 10.0, "Position (Right or Left)": "Right", "Position Y (0.0-1.0, 0.5=center)": 0.83, "Font Size": 12, "Fade Opacity": true, "Show Weapon and Distance": true, "Show Player vs NPC Kills": true, "Show NPC vs Player Kills": true, "Show NPC vs NPC Kills": true, "Show Suicide Kills": true }, "Kill Notification Settings": { "Enabled": true, "Display Duration (seconds)": 1.5, "Position Y (0.0-1.0, 0.5=center)": 0.4, "Font Size": 14 }, "Image Settings": { "Kill Log Background Image URL (Right)": "https://www.dropbox.com/scl/fi/phjuyg4zcm3f0w4maaupi/.png?rlkey=woo4to4ree1taaly5z6euahup&st=a47ypflv&dl=1", "Kill Log Background Image URL (Left)": "https://www.dropbox.com/scl/fi/27x7nr9y77eoaq40ybvgb/.png?rlkey=392e8qmzgdmadu9812y1f1psm&st=0j6yvfyv&dl=1", "Kill Notification Background Image URL (Center)": "https://www.dropbox.com/scl/fi/y0j8alca59m7eqnluwhr0/.png?rlkey=u8mk5qajmr6oqnb41dulorpz5&st=9ocyqggb&dl=1" }, "Color Settings": { "Player Name Color (hex)": "#ffd700", "NPC Name Color (hex)": "#ffffff", "Weapon/Distance Color (hex)": "#f5f5f5", "Killed Action Color (hex)": "#f08080", "Downed Action Color (hex)": "#87cefa", "Died Action Color (hex)": "#dda0dd", "Notification Player Name Color (hex)": "#ff8c00", "Notification NPC Name Color (hex)": "#ff8c00", "Notification Action Text Color (hex)": "#EAE2DA" } } Kill Log Settings: - Max Logs: Maximum number of entries displayed at once (default: - Display Duration: How long each entry stays visible (default: 10 seconds) - Position: Screen side for the kill log (Right or Left) - Position Y: Vertical position (0.0 = bottom, 1.0 = top, 0.5 = center) - Fade Opacity: Gradually fade older entries - Show Settings : Display settings for NPC and player kill events Kill Notification Settings: - Display Duration: How long the center notification shows (default: 1.5 seconds) - Position Y: Vertical position for the notification Image Settings: - Provide URLs to custom PNG images for backgrounds - Separate images for left/right positioning and center notification Contact VOID / NINJA WORKS DISCORD : https://discord.gg/U8uxePjSyA MADE IN JAPAN$15.00 -
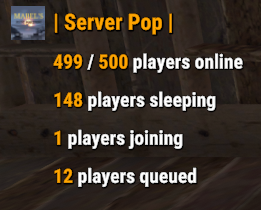
Version 1.1.5
6,911 downloads
Display server population statistics in the chat using the !pop trigger. It provides detailed information about online, sleeping, joining, and queued players. Additionally, the !wipe trigger displays the time remaining until the next server wipe. The plugin supports cooldowns for trigger usage, customizable chat messages, and game tip responses. Features Cooldown Management Prevents spam by enforcing a configurable cooldown period for the !pop trigger. Detailed Player Statistics Displays the number of online players, sleeping players, players joining, and players in the queue. Customizable Messages Configure the chat prefix and SteamID for message icons. Customize messages' appearance, including colors and formats. Multi-Response Options Option to broadcast the server population message globally or to the player who issued the trigger. Supports both chat messages and game tip notifications. Welcome Messages Displays a customizable welcome message to players when they connect. Optionally shows the server population on player connect. Wipe Timer Displays time left till wipe with !wipe trigger. Trigger Filter Auto filters the !pop, !wipe, !bp, !purge, !st & !discord triggers so it isn't displayed in the chat (Reqs BetterChat) Configuration Options: Cooldown Settings • Cooldown (seconds): The cooldown period in seconds between uses of the !pop command. Chat Settings • Chat Prefix: The prefix displayed before the server population message in chat. • Chat Icon SteamID: The SteamID of the icon used for chat messages. Message Settings • Global Response: Determines if the response should be broadcast globally or sent only to the player who triggered the command. • Use Chat Response: If true, responses will be sent in the chat. • Use Game Tip Response: If true, responses will be shown as game tips (toasts). • Value Color (HEX): The color used for values in the messages. Response Settings • Show Online Players: Show the number of online players. • Show Sleeping Players: Show the number of sleeping players. • Show Joining Players: Show the number of players currently joining. • Show Queued Players: Show the number of players in the queue. Connect Settings • Show Pop On Connect: Show the server population message when a player connects. • Show Welcome Message: Show a welcome message when a player connects. • Show Wipe On Connect: Show wipe timer when a player connects. Wipe Settings • Wipe Timer Enabled: Enable the use of !wipe trigger to display wipe timer • Wipe Timer (epoch): Set the time till wipe using Epoch Time Stamp. Blueprint Wipe Settings • Blueprint Wipe Timer Enabled: Enable the use of !bp trigger to display blueprint wipe timer • Blueprint Wipe Timer (epoch): Set the time till blueprint wipe using Epoch Time Stamp. Purge Settings • Purge Enabled: Enable the use of !purge trigger to display purge timer • Purge Timer (epoch): Set the time till the purge using Epoch Time Stamp. Skill Tree Settings • Skill Tree Timer Enabled: Enable the use of !purge trigger to display purge timer • Skill Tree Timer (epoch): Set the time till skill tree using Epoch Time Stamp. Discord Settings • Discord Enabled Enable the use of !discord trigger to display invite link • Discord Invite Link: Set the discord link to be displayed. Triggers: !pop - displays server population !wipe - displays wipe time !bp - displays blueprint wipe time !purge - displays purge time !st - displays skill tree wipe time !discord - displays discord invite link Default Configuration: { "Cooldown Settings": { "Cooldown (seconds)": 60 }, "Chat Settings": { "Chat Prefix": "<size=16><color=#FFA500>| Server Pop |</color></size>", "Chat Icon SteamID": 76561199216745239 }, "Messgae Settings": { "Global Response (true = global response, false = player response)": true, "Use Chat Response": false, "Use Game Tip Response": true, "Use Single Line Chat Pop Response": false, "Value Color (HEX)": "#FFA500" }, "Response Settings": { "Show Online Players": true, "Show Sleeping Players": true, "Show Joining Players": true, "Show Queued Players": true }, "Connect Settings": { "Show Pop On Connect": true, "Show Welcome Message": true, "Show Wipe On Connect": true }, "Wipe Response Settings": { "Wipe Timer Enabled": false, "Wipe Timer (epoch)": 0 }, "Blueprint Wipe Response Settings": { "Blueprint Wipe Timer Enabled": false, "Blueprint Wipe Timer (epoch)": 0 }, "Purge Response Settings": { "Purge Timer Enabled": false, "Purge Timer (epoch)": 0 }, "Skill Tree Wipe Response Settings": { "Skill Tree Timer Enabled": false, "Skill Tree Wipe Timer (epoch)": 0 }, "Discord Response Settings": { "Discord Enabled": false, "Discord Invite Link": "" }, "Version": { "Major": 1, "Minor": 1, "Patch": 4 } } Default Language: { "Online": "{0} / {1} players online", "Sleeping": "{0} players sleeping", "Joining": "{0} players joining", "Queued": "{0} players queued", "WelcomeMessage": "Welcome to the server {0}!", "CooldownMessage": "You must wait {0} seconds before using this command again.", "WipeMessage": "Next wipe in: {0}", "DiscordMessage": "Join Us @ {0}", "OneLine": "{0} / {1} players with {2} joining! {3} queued", "BPWipeMessage": "Next blueprint wipe in: {0}", "PurgeMessage": "Purge starts in: {0}", "SkillMessage": "Next skill tree wipe in: {0}" }Free- 32 comments
- 5 reviews
-
- 7
-
-
-
- #population
- #server
- (and 7 more)


.thumb.png.f676fcb4237b0d630285499251bcf88e.png)