Summary of Arduino Lock Bar…sorta
This project involved building a locked travel bar controlled by an Arduino and RFID system. The creator sourced parts like an Arduino Uno, RFID reader and shield, RFID tags, servo motor, wood sheets, and a suitcase. They constructed a wooden frame for compartments, integrated the servo for locking, but faced challenges with RFID coding, ultimately prioritizing servo operation. The project combined woodworking and electronics inspired by similar Instructables projects, with some components 3D printed.
Parts used in the Arduino Lock Bar Project:
- Arduino Uno
- RFID reader
- RFID shield
- RFID tags
- Servo motor
- 1/8 inch wood sheet (half sheet)
- 1/2 inch wood sheet (half sheet)
- Suitcase/trunk
- Breadboard (sacrificed for mounting components)
- 3D printed Arduino casing
This project was tough but nothing worth doing is easy and i am ver proud that i was able to accomplish what i did. To know that my skills are further than they once were is a reward on their own…….but how did i get to where i am now? unfortunately i couldn’t get it to work in its entirety and this is also my first one so have mercy jk…sorta.
Step 1: Supplys
First off i had to get supplys…
(Arduino uno)- compliments of my teacher (RFID reader)- Spark fun (RFID sheild)- Spark fun (RFID tags)- Spark fun (Servo motor)- Spark fun ( 1 half sheet of 1/8 inch) – lowes ( 1 half sheet of 1/2 inch) – lowes (suitcase/ trunk)
I ordered my tech parts from Spark fun.com (awesome site) with regular shipping it should take a week to arrive at your house.
Step 2:
while those parts were on the way i went out and bought my 1/8 and 1/2 inch board along with the case im going to put it all in. For the wood dont worry about getting alot, half sheets should be enough for 3 projects, luckliy we are only doing one. as for my suit case i lucked out hard and found one on sale at walmart.
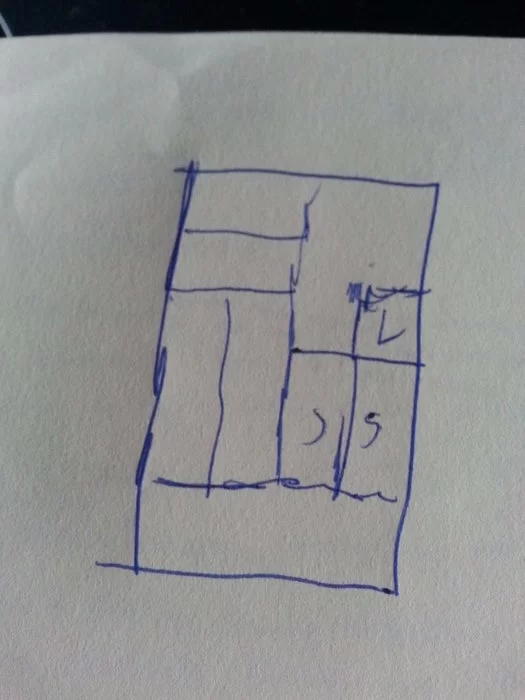
With half my supplys gathered i drew up plans.
Step 3:
i went on to instructables and got inspiration from a project on travel bars. i thought yeah i want to make a bar then put a lock i can only get into.
i based my rfid part of the project of another instructables project that had code and a file for a 3d print casing for the arduino. i down loaded that and had them printed while i waited for the other peices.
1 week goes by and my spark fun peices came….time to build.
i desided to work on the body( the bar) first then the brain( rfid)… (probably will reverse that next time)
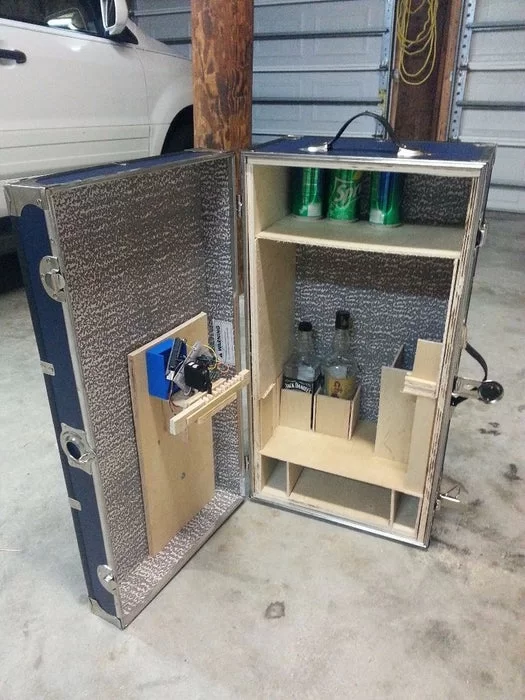
Step 4: Lets Build a Frame

i used the 1/2 inch to make wall frames to brace the 1/8 peices that run across
after i made the walls i worked my way up, making the cubby for ice and then the place holder for the bottles and cups…this will also make the base for the lock
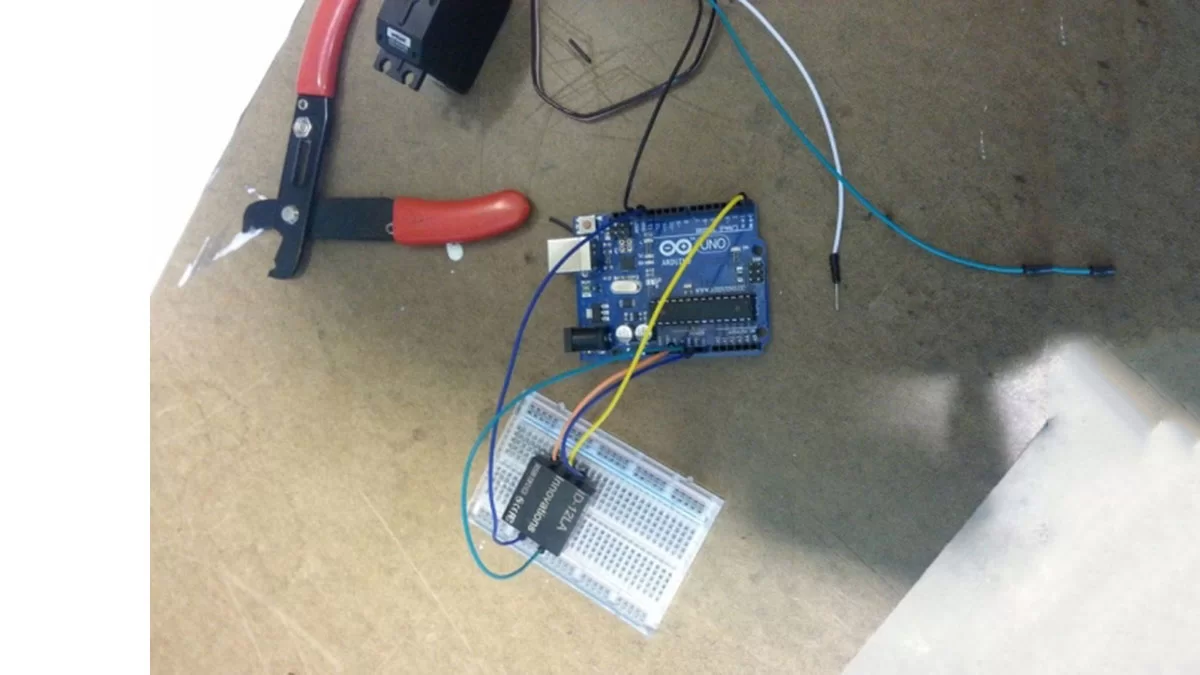
Step 5: Rfid
after that was put down i made a small cubbie for sodas at the top. enough for about 15.
with that done lets work on the rfid.
i decided to sacrifice my bread board and placed everything on it for easy access and movement
unfortunaly for 3 days tried to make the code register my rfid as well as move the servo but with time running thin i had to choose one or the other so i chose servo movement (otherwise the whole point is null)
time to mount the servo, rfid, and final touches.
Step 6:
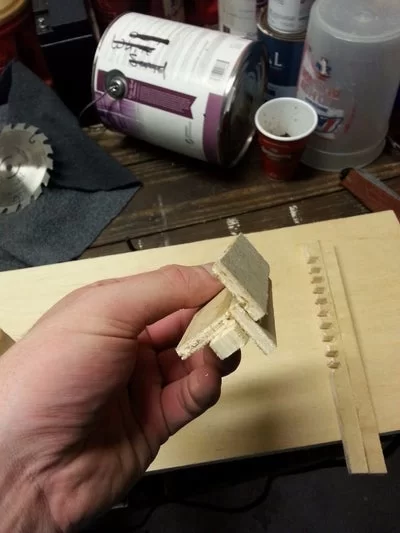
i had to use various peices to make my own gear that fit the servo and worked to fit it right so that it would work.
Step 7: Final

Source: Arduino Lock Bar…sorta