Summary of How to interface Keypad 4×4 with Arduino
This article guides on interfacing a 4x4 keypad with an Arduino. It describes the keypad's specifications, including its 8-pin matrix interface, operating temperature, and dimensions. Instructions include pin definitions, hardware installation, and downloading sample source code for Arduino integration. Two methods to install the Arduino keypad library are provided: manual installation via a downloaded zip file or automatic installation through the Arduino IDE's library manager, enabling easy use of keypad functions in microcontroller projects.
Parts used in the 4x4 Keypad with Arduino Interface:
- 4x4 Matrix Keypad
- Arduino Board
- Connecting Cables
- Adhesive backing (for mounting)
Step 1: Introduction
Description:
This keypad consists of 4 rows x 4 columns of buttons. It is ultra-thin that it provides an useful human interface component for microcontroller projects. Convenient adhesive backing provides a simple way to mount the keypad in a variety of applications, such as menu selection, security systems, data entry for embedded systems and so on.
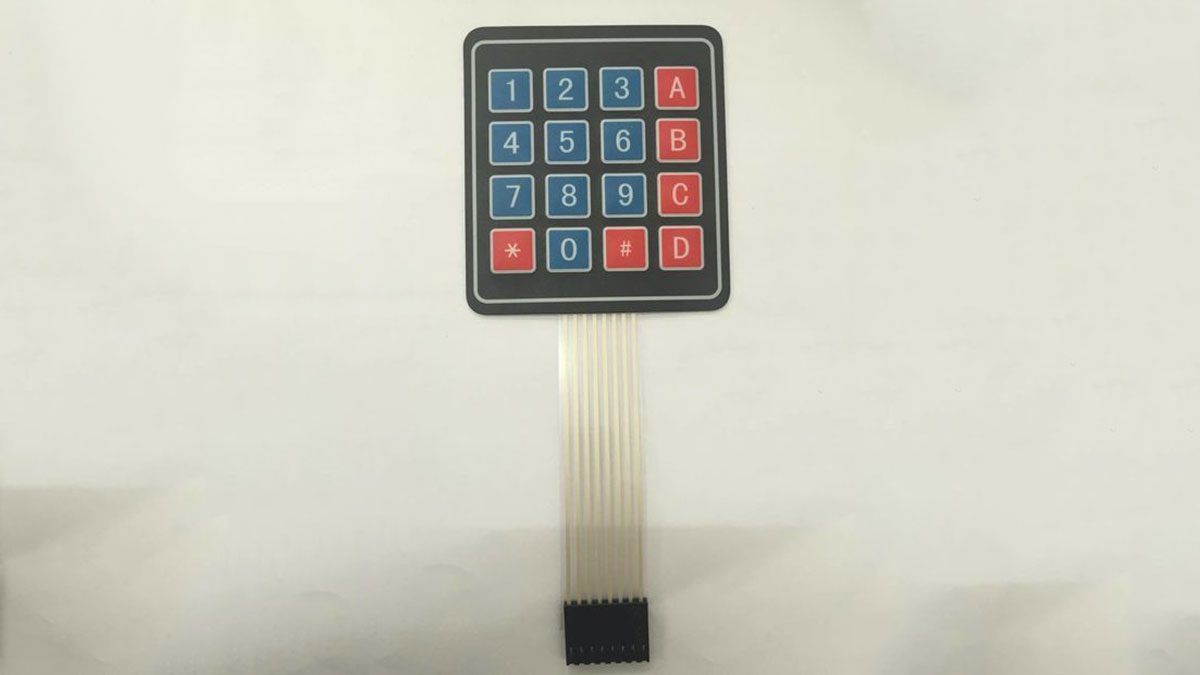
Specifications:
- Maximum rating: 24VDC, 30mA
- Interface: 8-pin access to 4×4 matrix
- Operating temperature: 32ᵒF to 122ᵒF (0ᵒC to 50ᵒC)
- Dimension: Keypad (69mm x 76mm), Cable (20mm x 87mm)
Step 2: Pin Definition
Step 3: Sample Hardware Installation
Step 4: Sample Source Code
To get the results, please download the sample source code attached below and upload it into Arduino.
Step 5: How to Install the Keypad Library
Method One:
1. Download the library from this link: http://playground.arduino.cc/uploads/Code/keypad.z… or you can directly download the zip file attached below.
2. Go to the location of the downloaded file and unzip it.
3. Next, move the unzipped file to the library folder of your Arduino software.
4. Quit your currently-opened Arduino software (if you are running it at the moment)
5. Open your Arduino software once again. Now you should be able to use your keypad library.
Method Two (Only applicable to Arduino IDE 1.6.2 or above):
1. Go to the menu of your Arduino software, then Sketch>Include Library>Manage Libraries…
2. Next, search for Keypad.
3. For a short while, the relevant result is displayed. Select the “Keypad” library and choose Install.
4. Quit your currently-opened Arduino software (if you are running it at the moment).
5. Open your Arduino software once again. Now you should be able to use your keypad library.
*Note that to understand the programming language used in keypad library and to know better their functions, you may kindly refer to this website: http://playground.arduino.cc/code/keypad
Read more: How to interface Keypad 4×4 with Arduino