You can access the full course here: CREATE A COMPLETE 2D ACTION RPG IN GAMEMAKER
Table of contents
Introduction
Are you ready to create an exciting 2D adventure? In this GameMaker action RPG tutorial, we’re diving into the essential steps of building a functional player character and setting up smooth camera controls to enhance the gameplay experience. Through these steps, we’ll bring to life a dynamic player model that can attack and is ready to engage in 2D action-oriented combat.
You can also explore our full course, Create a Complete 2D Action RPG in GameMaker, which covers RPG in GameMaker in-depth.
In order to follow along, it’s recommended you have experience with:
- GameMaker Studio basics
- Understanding sprites and objects
- Basic scripting and movement logic in GameMaker
Project Files
To help you on this journey, we’ve included downloadable assets files used in this GameMaker action RPG tutorial. These resources will streamline the setup, allowing you to focus on core concepts.
Download project files here: GameMaker Action RPG Assets

Player – Part 1
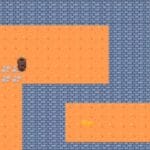
Welcome to the first part of our GameMaker action RPG tutorial! Today, we’ll focus on creating the player and implementing camera movement to begin visualizing our game within the window.
Creating the Player Sprite
Start by designing the sprite named spr_player and subsequently create an object called obj_player. This will form the visual representation of the player in the game.
Importing the Player Sprite
Once the player sprite is imported, center its anchors. Central anchoring simplifies positioning additional elements, like a health bar, relative to the player. With the central reference point established, adjustments like moving a health bar above the player become intuitive, requiring straightforward Y-axis alterations.
After loading the sprite, drag and drop obj_player onto the instances layer, then double-click the player to modify its scale. Adjust the scale to approximately 3.5 on both axes for better visibility during gameplay.
Coding the Player Movement
Let’s move onto coding the player movement for our GameMaker action RPG.
Begin by setting up movement logic in the Create event. Define current_velocity to control speed, assigning it a value of 4.
current_velocity = 4;
Use the Step event, executed every frame, to manage player movement. Start by capturing keyboard inputs with variables to detect arrow key presses, which will influence movement directions.
var left = keyboard_check(vk_left);
var up = keyboard_check(vk_up);
var down = keyboard_check(vk_down);
These variables accurately track key presses, returning 1 when active. Observe these changes using debug messages to ensure inputs are correctly registered:
show_debug_message(right);
show_debug_message(left);
By monitoring these inputs, we establish the foundation for moving the player. Derive movement direction by calculating differences in input states. For the X-direction, subtract left from right:
var _x_direction = _right - _left;
For Y-direction, subtract up from down, moving accordingly along the game’s axes:
var _y_direction = _down - _up;
This approach ensures proper movement direction based on current key presses, aligning with GameMaker’s coordinate system, where increasing the Y-axis moves down and decreasing it moves up.
Verify the correctness of x_direction by observing debug messages:
show_debug_message(x_direction);
This step confirms directional logic is functioning, though player movement remains unimplemented. We’ve laid the groundwork for input detection and direction calculation.
Player – Part 2
In this next session of our GameMaker action RPG tutorial, we will learn how to move the player and the camera in our game. So far, we have set up the calculations needed to move the player, but we haven’t actually implemented the movement. To achieve this, we will use the move_and_collide method. This method is quite straightforward to use, but let’s break down its implementation step by step.
Understanding move_and_collide
The move_and_collide method is used to move an object and handle collisions with other objects. It takes several parameters, but the most important ones are the X and Y directions, which determine the direction of movement. Additionally, we need to provide the object with which we want to check for collisions.
Implementing Player Movement
To move the player, we will call the move_and_collide method and provide the necessary parameters. Here’s how you can do it:
move_and_collide(_x_direction * current_velocity, _y_direction * current_velocity, obj_wall);
In this code snippet:
_x_directionand_y_directionare the calculated directions based on the player’s input.current_velocityis the player’s speed, which we multiply by the direction to determine the actual movement distance.obj_wallis the object with which we want to check for collisions.
Limiting Movement Speed
You may notice that moving diagonally results in faster movement. To limit the maximum speed, we need to set the maxXMovement and maxYMovement parameters. These parameters ensure that the player’s movement speed does not exceed the specified values.
move_and_collide(_x_direction * current_velocity, _y_direction * current_velocity, obj_wall, 4, 0, 0, current_velocity, current_velocity);
In this code snippet:
4is the number of iterations for collision checking.0is the default value for the offset parameters.current_velocityis used to limit the maximum movement speed in both X and Y directions.
Updating the Camera Position
Now that the player can move, we need to update the camera position to follow the player. To do this, we will use the camera_set_view_pos method. This method sets the position of the camera based on the player’s position.
camera_set_view_pos(view_camera[0], x - global.viewport_width / 2, y - global.viewport_height / 2);
In this code snippet:
view_camera[0]is the camera we want to update.xandyare the player’s current position.global.viewport_widthandglobal.viewport_heightare the dimensions of the viewport, which we use to center the camera on the player.
To ensure the camera is centered on the player, we need to subtract half of the viewport width and height from the player’s position. This calculation ensures that the player is always in the center of the screen.
With these steps, we have successfully implemented player movement and updated the camera position to follow the player. This completes the basic setup for player movements and camera settings.
Need some additional assistance with making a GameMaker action RPG? Check out our GameMaker Academy to learn how to make RPGs, casual games, strategy games, and more with GameMaker!
Rotating Dagger
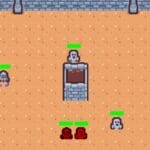
In this final section of our GameMaker action RPG tutorial, we are going to be creating the dagger.
Creating the Dagger Sprite
First, we will create the sprites for the dagger. Let’s call it spr_dagger. We will also create the corresponding object, obj_dagger.
Next, we will import the sprites of the dagger. The sprite we need is called melee. We will load this sprite into our dagger object.
Setting Up the Frame Rate
To handle alarms effectively, we need to set up a global variable for the frame rate. This will help us use real seconds when setting alarms. Open up your init script and add the following code:
global.framerate = game_get_speed(gamespeed_fps);
This sets the frame rate to the game’s speed in frames per second (FPS).
Creating the Dagger Object
Now, let’s create the dagger object. Drag and drop the dagger sprite into the room. You will notice that the dagger is quite small. We will adjust its size in the create event of the dagger object.
image_xscale = 3.5;
image_yscale = 3.5;
This will make the dagger much bigger.
Making the Dagger Follow the Mouse
Next, we want the dagger to follow the mouse direction. In the step event of the dagger object, add the following code:
image_angle = point_direction(x, y, mouse_x, mouse_y) - 90;
This will make the dagger rotate towards the mouse position. However, you might notice that the rotation isn’t as smooth as it should be. To fix this, we need to adjust the anchor position of the dagger.
Adjusting the Anchor Position
The anchor position is the point from which the object’s rotation is calculated. By default, it is set to the top-left corner. We need to change it to a more suitable position. For example, you can set it to the bottom center of the dagger. This will create some separation between the player and the dagger, making the rotation smoother.
You can adjust the anchor position manually or by code. For now, let’s do it manually. Disable the grid, position the dagger correctly, and then enable the grid again. This should give you a better result.
That’s it for this part of our GameMaker action RPG tutorial! We have created the dagger, imported the sprite, set up the frame rate, adjusted the size of the dagger, made it follow the mouse, and adjusted the anchor position.
GameMaker Action RPG Wrap-Up
And with that, we’ve completed the foundational steps for our player character and camera setup! Now, you should have a player object that responds to movement inputs and a camera that dynamically follows along, setting up an interactive scene for gameplay. You should also have a dagger that can follow the mouse – perfectly set up and ready to go for a GameMaker action RPG.
Feel free to expand upon this project by customizing the player’s abilities or adding additional mechanics like health, scoring, or even enemy interactions. Don’t forget as well you can get more in-depth training with our Create a Complete 2D Action RPG in GameMaker course – which covers many of the mentioned items and more.
As you grow your skills, these core mechanics will serve as a strong foundation for more complex games. Happy game-making, and best of luck on your development journey!
Did you come across any errors in this tutorial? Please let us know by completing this form and we’ll look into it! FINAL DAYS: Unlock coding courses in Unity, Godot, Unreal, Python and more.
Transcript – Player – Part 1
Hello there, and welcome to a new GameMaker action RPG lesson.
In this one, we are going to be creating the player. The goal is to add the player and the camera movement so that we can start seeing something inside the game window.
I’ll begin by creating the sprite for the player. This sprite will be called “SPR player,” and the object will be named “OBJ player.” Now, let’s import the player sprite. Here it is. Inside the sprite, I’m going to center the anchors by setting them to the middle center. This is important because when you want to move a sprite on the screen or create a health bar, for example, it’s easier to position these elements when the center point of the player is set as zero-zero.
Having the central point as zero-zero means that when we want to place something like a health bar around the player’s head, it’s straightforward. We can just refer to the player’s zero-zero point, and from there, move up or down as needed, without complex calculations. This setup will make more sense later when we start drawing health bars. Let’s also load the sprite and position it in the window. I’ll drag and drop the OBJ player into the instances layer, then double-click to increase its scale to something like 3.5 in both axes since it’s quite small right now. This makes it more visible on the screen.
Next, we’ll code the movement. In the “create” event, I’ll make a variable called “current velocity” and set it to 4. Then, in the “step” event, which is called at every frame, we’ll handle the actual player movement.
To start, I need to capture the input keys. I want to know when I’m pressing the arrow keys so we can determine the direction the player should move. I’ll create variables for this: right, left, up, and down. The “right” variable will check for the right arrow key. I’ll copy and paste this line for the other directions, setting each to the appropriate arrow key. Now we’re getting all the inputs we need.
Depending on which arrow key is pressed, each variable will have different values. For example, if I press the right arrow, the “right” variable will return 1. If I stop pressing it, it returns 0. This will help us determine the player’s X and Y direction. If the direction is zero, no keys are pressed, so the player shouldn’t move. If the X direction is -1, the player should move left; if it’s 1, the player should move right.
To implement this, I’ll create a variable called “x direction” equal to the difference between “right” and “left.” When pressing the right arrow, “right” will be 1 and “left” 0, resulting in an X direction of 1, meaning the player moves right. Similarly, if only “left” is pressed, “right” will be 0 and “left” 1, making X direction -1, meaning left.
I’ll do something similar for the Y direction, setting it to “down” minus “up.” If I press down, we get 1, and if I don’t press up, we get 0. So 1 – 0 = 1, and increasing Y moves the player down. If I press up, it returns -1, which moves the player up.
Let’s test this out by printing the X direction. Initially, it shows zero since no keys are pressed. When pressing left, it shows -1, and right shows 1. So the direction is working correctly.
With this, we can detect inputs and calculate directions. Although we’ve set up most of the elements needed for movement, the player isn’t moving yet. In the next GameMaker action RPG lesson, we’ll cover how to implement the actual movement.
See you in the next GameMaker action RPG lesson!
Transcript – Player – Part 2
Hi there and welcome to a new GameMaker action RPG lesson. In this one, we will be able to actually move the player and also move the camera, okay? Because we are doing all the calculations that we need to move the player, but we aren’t yet moving it. So in order to move it, we’re going to be using the move and collide method. It is quite simple to use; the implementation isn’t that complicated.
I wanted to refer you to this post because it explains interesting things and provides another example if you want to check it out to understand even better how move and collide works. As you can see, in most cases, it is doing something quite similar to what we are doing. It’s calculating the difference between the right and left, then the difference between down and up. So, it’s quite similar to what we are doing here.
So, we will actually get to moving our player. I’m going to call move and collide. This function takes lots of parameters that we have to carefully understand. The first two are the most simple ones. We just have to provide the X direction and the Y direction. Also, we are going to be multiplying this by our current velocity. If we didn’t, we would be moving at a velocity of something like minus one or one, which is super slow. So, by multiplying for example minus one by this variable, say four, we would be moving at minus four speed—four times faster than minus one.
We’ll do the same for the Y direction. I’m going to multiply this by the current velocity.
The third argument is an object. In this case, it’s going to be the OBJ wall. Here you can provide any kind of object that you want to check for collisions while moving, which will allow you to, let’s say, glide over the object. In the player, maybe this isn’t super obvious, but for the enemy, once we create the AI to follow the player, using move and collide with the wall will let them glide over walls a little bit, avoiding them from getting stuck.
Now, when we play, we see our player moving. Of course, right now the camera isn’t following us, but you can see that I can now collide with walls and can’t pass through them. Something you may notice is that if you move diagonally, it’s faster. For example, moving right and then upright is quicker. We need to limit the player’s maximum speed to fix this, which is explained well in the post.
After providing the object for collision, we also have three other parameters, which aren’t changed and basically follow the manual’s default values. This avoids complexity. You can check for maxXMovement and maxYMovement using your speed or velocity variable to limit movement so it doesn’t exceed your set speed.
Clicking here takes you to the manual, where scrolling down reveals default values for distance X and Y, the object, and three other values. We’re mainly interested in maxXMove and maxYMove. The first two values remain default because, on colliding with the wall, we just want to stop moving.
The last value, “iterations,” determines how fast we check for collisions depending on the player’s steps. We’ll stick with default values to keep things simple and use our velocity. We’ll set the number of iterations to four, both offsets to zero, and then use velocity to limit movement. Now, moving diagonally will always maintain a constant speed, and you won’t be able to move through walls.
Now it’s time to update the camera position. Here at the top, we’ll change the camera position using the camera set view position. First, we provide the camera we want to modify, in this case, view camera zero, and then the X and Y positions. If we want the camera to move with our player, you might think to set it to the current X and Y positions. But if we do this, we’re not centered in the view.
To center the camera view on our player, the viewport size becomes useful. If we decrease our current X by half the global.viewport width, this makes our camera’s X position equal to the player’s, then subtracts half of the viewport width. This adjustment positions the viewport perfectly. If you imagine moving the left half of the viewport to align with the player, you see why this calculation works.
For the Y-axis, it’s similar. We subtract global.viewport height divided by 2, moving the camera up to center it on the player. Now, our camera is centered on our player, allowing us to move with it.
With this, we’ve successfully set up the player’s basic movements and camera settings.
Transcript – Rotating Dagger
Hello there and welcome to a new GameMaker action RPG lesson.
In this one, we are going to be creating the dagger. To actually create this attack, we will have to go through several GameMaker action RPG lessons, and we will even come back to it with more GameMaker action RPG lessons in between. First, we’ll create the basic setup for the dagger to enable it to attack, and later we’ll add more complex attack mechanics. For example, we might come back to add the damage calculation to the enemy. This approach is necessary because implementing all the mechanics and features for just one type of attack requires multiple steps.
Now, let’s create the sprites for the dagger. I’m going to call it “SPR dagger,” and I’ll also create the corresponding object, which we’ll name “obj dagger.” Next, we’ll import the sprite. This sprite falls under melee, so we’ll load it into our dagger object.
After that, I’ll open up the initialization script. For this type of attack and other attacks we’ll be creating, we’ll use alarms to handle different actions. A good practice when working with alarms is to have a global variable that holds the frame rate. This way, we can reference it with real seconds in mind. For example, if the frame rate is global.frameRate, we’ll set it using game_get_speed with the parameter set to game speed FPS. Now, when we call an alarm, we can use real seconds rather than just steps.
I’ll go ahead and drag and drop the dagger into the game. Right now, it’s quite small, so in the create event, I’ll scale it up by modifying image X scale to 3.5, and I’ll apply the same value to the Y scale. As you can see, this makes the dagger larger.
The dagger isn’t following our player yet, so to fix this, we’ll make it follow the mouse direction, allowing it to rotate around the player. In the step event, I’ll set the current image angle to point direction. This function returns the direction to a target position, which in our case will be the mouse. By specifying the initial X and Y as the dagger’s current position and the target as mouse X and mouse Y, we’ll make the dagger rotate towards the mouse. The point direction function will calculate this rotation for us.
When we test it, we see a similar effect, but the rotation isn’t quite smooth. A quick fix is to subtract 90 from the angle, which aligns the sword to point toward the mouse more accurately.
Now, I’ll manually position the sword close to the player’s position. With the grid disabled, I can place it precisely. As it stands, the rotation isn’t as smooth as it should be because the default anchor is on the top left. By adjusting the anchor to a position like 823, we can make the rotation more natural. Placing the anchor toward the bottom creates a separation between the player and the sword, achieving the effect of the dagger orbiting around the player.
If you’re unsure about this adjustment, let’s visualize it. When the anchor is set at the bottom center of the sword, it allows for a cleaner rotation with some offset, creating a circular path. If the anchor were in the exact middle, it would rotate too tightly around the sword without any offset. Adjusting the anchor’s Y position slightly downward leaves space for smoother movement around the player.
This approach provides a much better result. We’ll refine this even further by adjusting the sword’s position with code to align it more closely with the player. For example, there is currently more space between the dagger and the player sprite when pointing in one direction compared to another. This happens because we haven’t centered the sword fully after adjusting the anchor position.
After some fine-tuning and disabling the grid, the result is significantly improved. However, because we’re scaling the object by code, the alignment isn’t perfect yet. We’ll further refine the sword’s positioning in the following GameMaker action RPG lessons to ensure it’s exactly right.
Interested in continuing? Check out our all-access plan which includes 300+ courses, guided learning pathways, new courses monthly, and more!