How To Use ‘apt’: The Complete Linux Command Guide
Most people know the basics of APT: install, remove, update. But there’s a lot more under the hood that can save time and fix common issues. If you’ve ever encountered a weird error or broken package, these tips might be exactly what you need.
APT (Advanced Package Tool) is the command-line package manager used on Debian-based Linux distributions such as Ubuntu. It provides tools for installing, upgrading, removing, and managing software packages in a consistent and automated way.
In this guide, you’ll learn how to use APT, with real-life examples, cover useful command options, fix common errors, and even explore some advanced tips to take your Linux skills to the next level
If you need help with Linux, I’ve got something that can help you right away!
Download my free Linux commands cheat sheet – it’s a quick reference guide with all the essential commands you’ll need to get things done on your system. Click here to get it for free!
Command Syntax
APT commands have a simple structure, making them easy to learn and remember. The typical format looks like this:apt <option> <package-name>

The option defines the action (install, update, remove, etc.), while the package-name tells APT which software you want to manage. Most options should be run with the sudo command to give the required admin permissions.
Usage Examples
The APT syntax is straightforward and clear by itself, but it will be easier to understand once you see some of the most common ways to use it. From updating the package list to installing or removing software, here’s how APT works in everyday use:
Update Your Package List
Update is the process of synchronizing your system’s local package database with the latest available package information from the repositories.
It doesn’t install or upgrade anything; it checks what’s new or changed, so your system knows about the latest versions of software.
The very first thing you should do before installing or upgrading is to refresh your package list. Think of it as checking what’s in stock at the store before shopping:sudo apt update

This doesn’t upgrade anything yet; it just tells your system what’s available.
To see which packages could be upgraded, run:sudo apt list --upgradable
This way, you will know which packages have new updates. You can choose to upgrade a specific package or all available packages. I often use this method to check for new versions of critical packages, such as OpenSSH or the kernel, before upgrading everything.
If you’re new to the Linux command line, this article will give you the most important Linux commands to know, plus a free downloadable cheat sheet to keep handy.
Upgrade All Installed Packages
Upgrade means downloading and installing the newest versions of the software packages already installed on your system. It uses the updated package list to check what can be upgraded. This process keeps your system up to date with bug fixes, improvements and security patches.
Once the list is refreshed, you can actually upgrade your software. This keeps your system secure and up-to-date with the latest bug fixes:sudo apt upgrade
Grab This Cheat Sheet!
I've compiled the must-know commands in a simple PDF for quick reference.
Download now

It is necessary to update your local package information using apt update before any upgrades; otherwise, it will not show any packages available for upgrading.
Install a New Package
Install is the action of adding new software to your system. When you install a package, APT downloads the required files and also takes care of any needed dependencies.
It’s one of the most common tasks you’ll use apt for, and it works for almost any program available in the repositories.
Installing software is probably the most common use of APT. It downloads the program and any dependencies it needs, all in one go:sudo apt install <package-name>
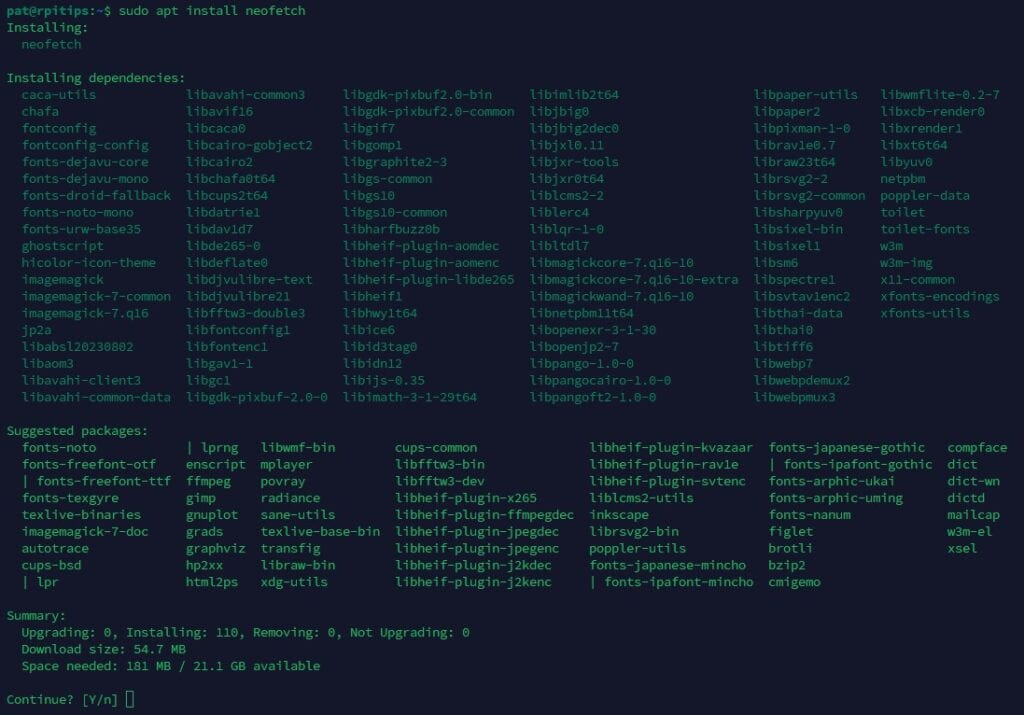
APT shows which extra packages will be installed alongside it. This is one of the best features of APT, it automatically takes care of dependencies, so you don’t have to.
On the other hand, keep in mind that APT is not the only package management tool you can use in Linux. There are other options worth checking out in every case and situation.
Remove or Purge a Package
Did you know there are two methods to uninstall a package from your system? You can either use “remove” or “purge”.
- Remove will uninstall a software from your system.
It deletes the main files of a package, but usually leaves configuration files behind. - Purge will not only uninstall the application, but also all the configuration files.
Now, if after installing a package you want to remove it, you can do it using:sudo apt remove <installed-package-name>

After removing a package, keep in mind that only the package and its dependencies will be deleted; all folders and configurations will remain intact.
However, to completely uninstall the package and all related files, you can use:sudo apt purge <installed-package-name>

I usually start with remove, but if I know I’ll never use the program again, purge keeps the system cleaner. Just remember: purge is a final shot for your data; you’ll lose custom settings too.
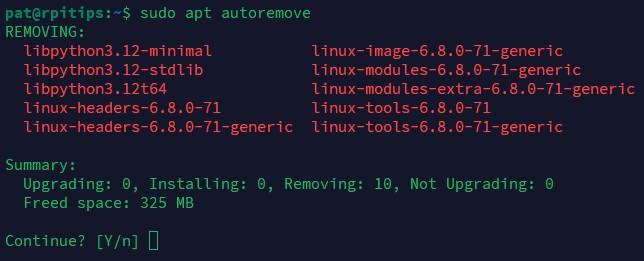
Clean Up Unused Packages
Clean is used to delete unnecessary files that APT keeps in its cache, like downloaded installers and outdated packages.
Grab This Cheat Sheet!
I've compiled the must-know commands in a simple PDF for quick reference.
Download now
It helps save disk space but doesn’t affect any installed software. It is used for keeping the system tidy and freeing up space.
Over time, your system fills up with leftover files, cached downloads, and dependencies that are no longer needed. APT has built-in cleanup tools:sudo apt autoremove
sudo apt clean
sudo apt autoclean
You might also like: I tried to replace my main PC with a Pi 5, here's what happened.
Each one of these tools has a different action for cleaning your system:
- autoremove: deletes dependency packages installed automatically that are no longer used.
- clean: removes all .db package files saved in APT’s cache when you install any package.
- autoclean: only removes outdated package files that are not needed by your system.
While not mandatory, using them all is good for maintaining an optimized, junk-free system.
Main Options
So far, we’ve covered the basic actions. However, APT also includes additional options that provide even more control. Here are some of the most useful ones you might want to explore next:
Options
| install | Install one or more packages. |
| remove | Remove packages but keep config files. |
| purge | Remove packages and their config files. |
| update | Refresh the package list. |
| upgrade | Update all installed packages. |
| full-upgrade | Update + manage complex dependencies. |
| autoremove | Clean up unused dependencies. |
| search | Find packages in the repositories. |
| show | Show details about a specific package. |
| list –installed | View all installed packages. |
| changelog | Display recent changes to a package. |
| policy | Show installed and available package versions, and which one APT will use. |
Useful Extra Arguments
| -y | Automatically confirm prompts |
| –no-install-recommends | Skip suggested packages |
| –fix-broken | Fix broken installations |
| –reinstall | Reinstall a package |
| –simulate | Preview changes without applying them |
Troubleshooting
Even with APT, errors happen, especially if you’re a beginner managing packages in Linux. In that case, here are some of the most common errors I’ve seen:
Could Not Get Lock /var/lib/dpkg/lock
APT creates a lock file to prevent multiple installations or updates from running at the same time, or even to prevent unauthorized users from making actions. If you see this error, it usually means that another APT process is running, or you don’t have the right permissions to run apt.

So, wait a few minutes, or try the same command with sudo at the beginning. But if the error persists, you can remove the lock file and reconfigure:sudo rm /var/lib/dpkg/lock-frontend
sudo dpkg --configure -a
Use this carefully, removing lock files while an installation is still running can corrupt your system.
Read next: 7 Surprising Uses for a Raspberry Pi
Error: Unable to Locate Package
This error happens when APT can’t find the package you asked for. Common reasons include misspelling the package name, using an outdated package list, or trying to install a package that doesn’t exist in your current repositories.

Always start by refreshing your list:sudo apt update
But, if the problem persists, you can double-check the package name using apt search:

Grab This Cheat Sheet!
I've compiled the must-know commands in a simple PDF for quick reference.
Download now
But if it continues with the same issue, you may need to enable additional repositories in /etc/apt/source.list (for example, Brave Browser requires adding its official repo).
Fix Broken Installs or Unmet Dependencies
Sometimes, installations break or leave your system in a “half-installed” state. This usually happens when an installation is interrupted or a .deb file is installed manually without all its dependencies.
You can repair broken installations using:sudo apt --fix-broken install
And if that’s not enough you can also try:sudo dpkg --configure - a
These commands tell APT to repair itself, resolving missing or incomplete dependencies. I’ve used them countless times after interrupted installations.
Tips
Once you’re comfortable using APT daily, it’s worth learning a few extra tricks to make your life easier. Here are some bonus tips that I use all the time:
Save a List of Installed Packages
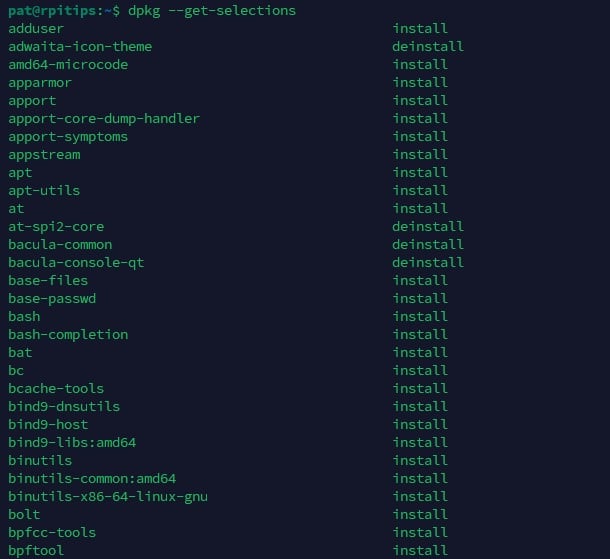
Backing up your installed packages is useful when setting up a new system or reinstalling Linux. You can save all currently installed package names to a file:dpkg --get-selections > packages.txt
To restore them on another system, copy the file and run:dpkg --set-selections < packages.txt
sudo apt-get dselect-upgrade
Just make sure the other system uses the same repositories to avoid missing packages, or you will face some issues.
Enable Automatic Updates
If you want your system to install security updates automatically (especially useful for servers), install the unattended upgrades package:sudo apt install unattended-upgrades
You can configure it in /etc/apt/apt.conf.d/ to control what gets updated, how often, and whether to reboot automatically if needed. You will need to take a look into the documentation before, but after, you will keep your system secure with a minimal effort.
Alternatively, you can also make your own script and execute it on different intervals of day with a schedule, or maybe just run it on the boot startup.
Grab This Cheat Sheet!
I've compiled the must-know commands in a simple PDF for quick reference.
Download now
Related: How to Set Up Automatic Updates on Linux (Keep Your System Safe)
Hold a Package to Prevent Auto-Upgrades
Sometimes, an update might break something or introduce unwanted changes. In those cases, you can freeze a package to prevent it from being upgraded:sudo apt-mark hold <package-name>
This is useful for things like kernel packages or system tools that you want to keep at a known stable version.
Then, to unfreeze it later:sudo apt-mark unhold <package-name>
APT is one of those essential Linux commands that you’ll use all the time, just like journalctl, history or systemctl. So it’s always great to take time to to dig into how it works. Mastering APT gives you full control and confidence at the command line.
If you prefer watching videos instead of reading tutorials, you’ll love the RaspberryTips Community. I post a new lesson every month (only for members), and you can unlock them all with a 7-day trial for $1.
Related Questions
How do I install the newest version of APT?
You don’t need to install it! APT is usually updated automatically along with your system. So, if you already have Debian 13 or Ubuntu 24.04, APT3 is included by default. You can check your version with:apt --version
You might also like: Turn your Raspberry Pi into a money-making machine

If you’re using an older system, and you want to try the new version, the safest option is to upgrade your distribution to get the latest version.
What’s the difference between apt and apt-get?
Well, they’re both package managers, but APT is the newer, friendlier version. It combines the common features of apt-get and apt-cache into one command with better output.
This doesn’t mean that you can’t use apt-get; it has the same functionality as apt. However, keep in mind that apt-get is older and has the limitation of being an individual tool rather than a complete package manager.
Is it safe to run an APT upgrade daily?
Yes! Running apt update alongside with apt upgrade daily is safe. Actually is a recommended practice if you’re installing stable repositories because it will include latest security patches and bug fixes.
You can automate the process as you can see in previous sections, but don’t forget to check the change-log of important packages, so you can know if it comes with any undesired change in the new version.
Can I downgrade a package with APT?
APT doesn’t support downgrading out of the box. If you need to roll back to an earlier version, you’ll have to download the specific .deb file manually and install it with dpkg.
You can also configure APT pinning using the /etc/apt/preferences file to lock or prioritize specific versions, but this is more advanced and should be done with caution.
You might also like: I tried to replace my main PC with a Pi 5, here's what happened.
Whenever you're ready, here are other ways I can help you:
Master Linux Commands: Overwhelmed with Linux commands? This book is your essential guide to mastering the terminal. It includes practical tips, real-world examples, and a bonus cheat sheet to keep by your side.
The RaspberryTips Community: Need help with Linux or want to chat with people who actually get it? Join the RaspberryTips Community and get access to private forums, exclusive lessons, and direct support (try it for just $1).
You can also find all my recommendations for tools and hardware on this page.