How to Control Your Raspberry Pi from Android (SSH & Monitor)
Using a Raspberry Pi requires many accessories (keyboard, monitor, etc.), which you might not always have on hand, or you won’t want to spend time plugging them in for a quick change in your setup. I generally use my laptop for this, but you can also use any Android device (smartphone, tablet, etc.). I’ll show you how in this tutorial.
After enabling SSH and VNC on the Raspberry Pi, any Android device can be used to take control of it, even remotely. Great apps are available for free in the Google Play Store to do this easily.
I will start with two options (terminal or remote monitor), and give you other tips to help you get further in more complex situations.
If you’re feeling lost in all the Raspberry Pi jargon, I’ve got something to help you out. I’ve created a free glossary that explains all the essential terms and abbreviations in a way that’s easy to understand. It’s a great resource to have by your side. Get your free copy here.
Access the Raspberry Pi terminal from your Android phone
Most maintenance tasks on Raspberry Pi can be done with a simple command line. If you know them, this is often the most convenient option.
If you don’t have a tablet, using a remote access method is not very comfortable on the small screen of your smartphone, but command lines are fine.
Are you a bit lost in the Linux command line? Check this article first for the most important commands to remember and a free downloadable cheat sheet so you can have the commands at your fingertips.
The first thing to do to access the terminal of your Raspberry Pi from your phone, is to enable the SSH protocol on the Raspberry Pi, which is disabled by default. There are several ways to do this:
If you are lost in all these new words and abbreviations, request my free Raspberry Pi glossary here (PDF format)!
Download now
- If you can use a monitor for the initial setup, then the easiest way is to open the Raspberry Pi configuration tool, in the main menu, under Preferences.
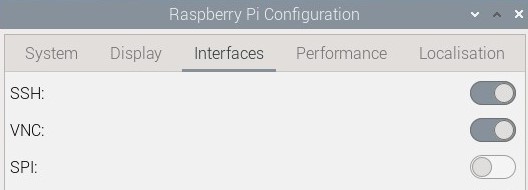
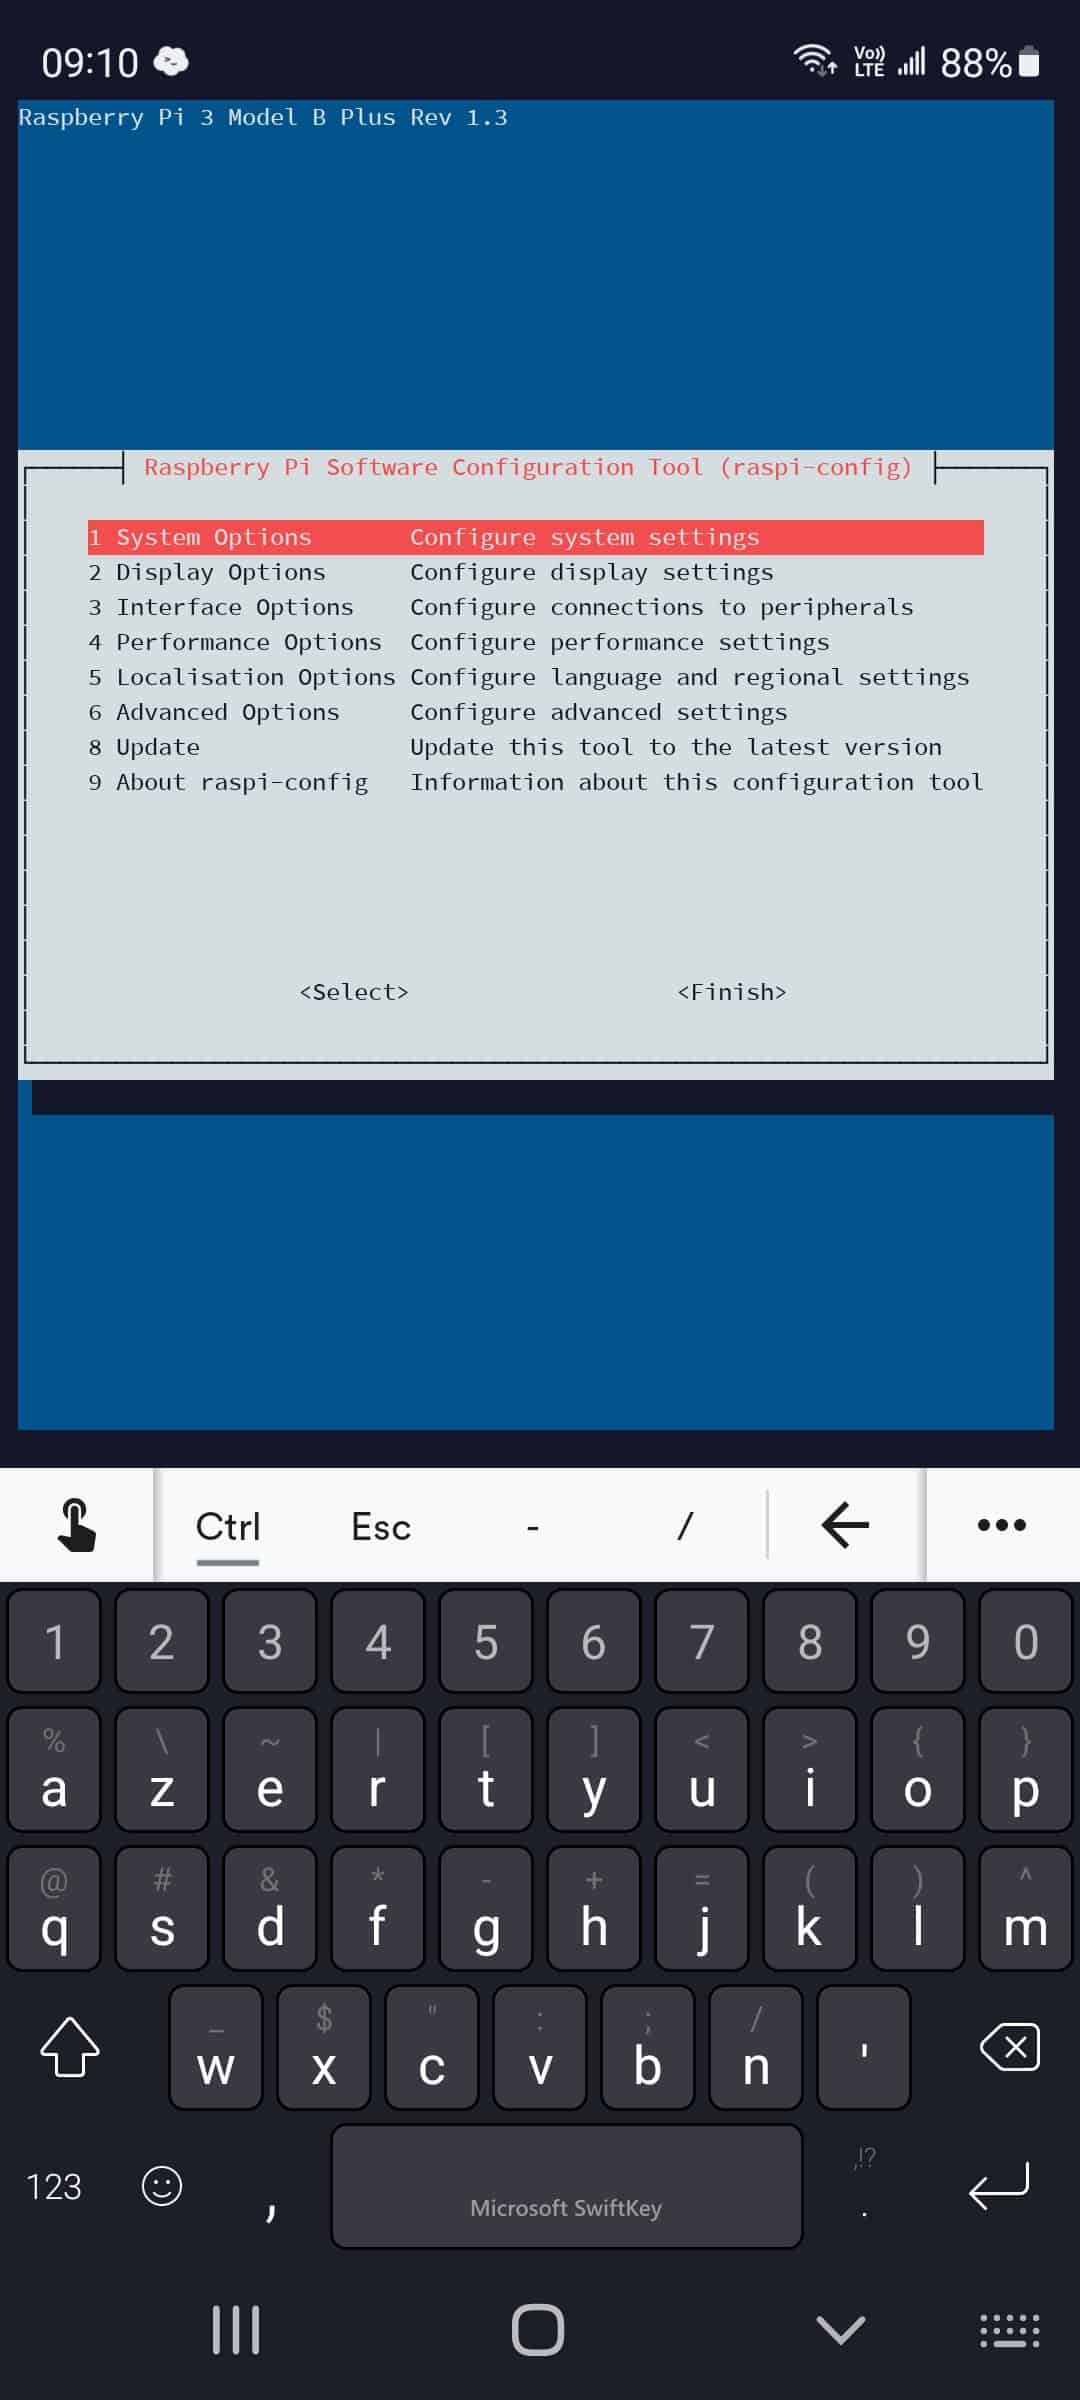
Go to the “Interfaces” tab and enable SSH from there. - If you are using a minimal version of Raspberry Pi OS, you can do the same thing in a terminal, with raspi-config:
sudo raspi-config
Go to “Interface options” and enable SSH. - If you don’t have a screen, it’s possible to edit the system configuration on the SD card directly from another computer. I explain everything in another article, we call this a headless Raspberry Pi installation.
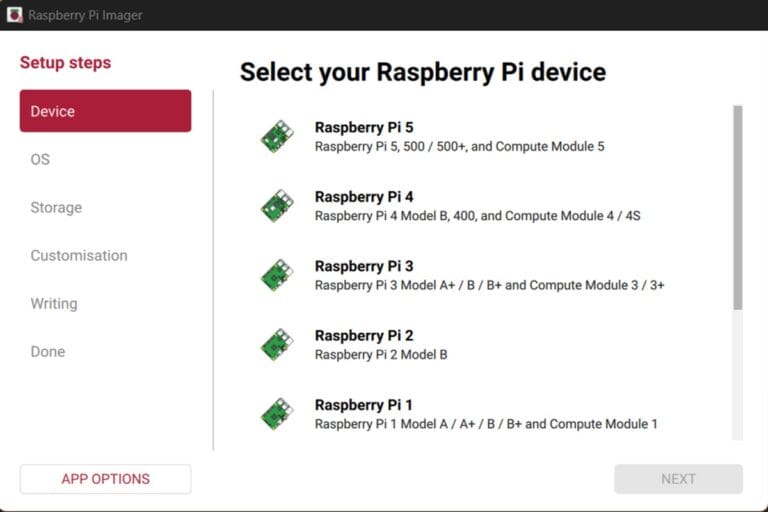
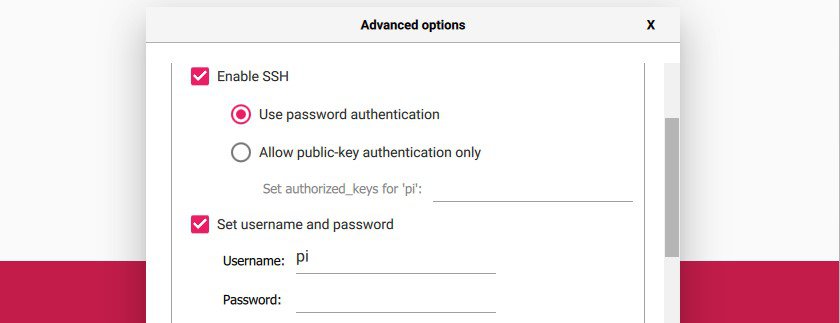
- Another solution, is to use the OS customization options in Raspberry Pi Imager when you flash your SD card. You can choose to enable SSH directly and set your default password in this tool.
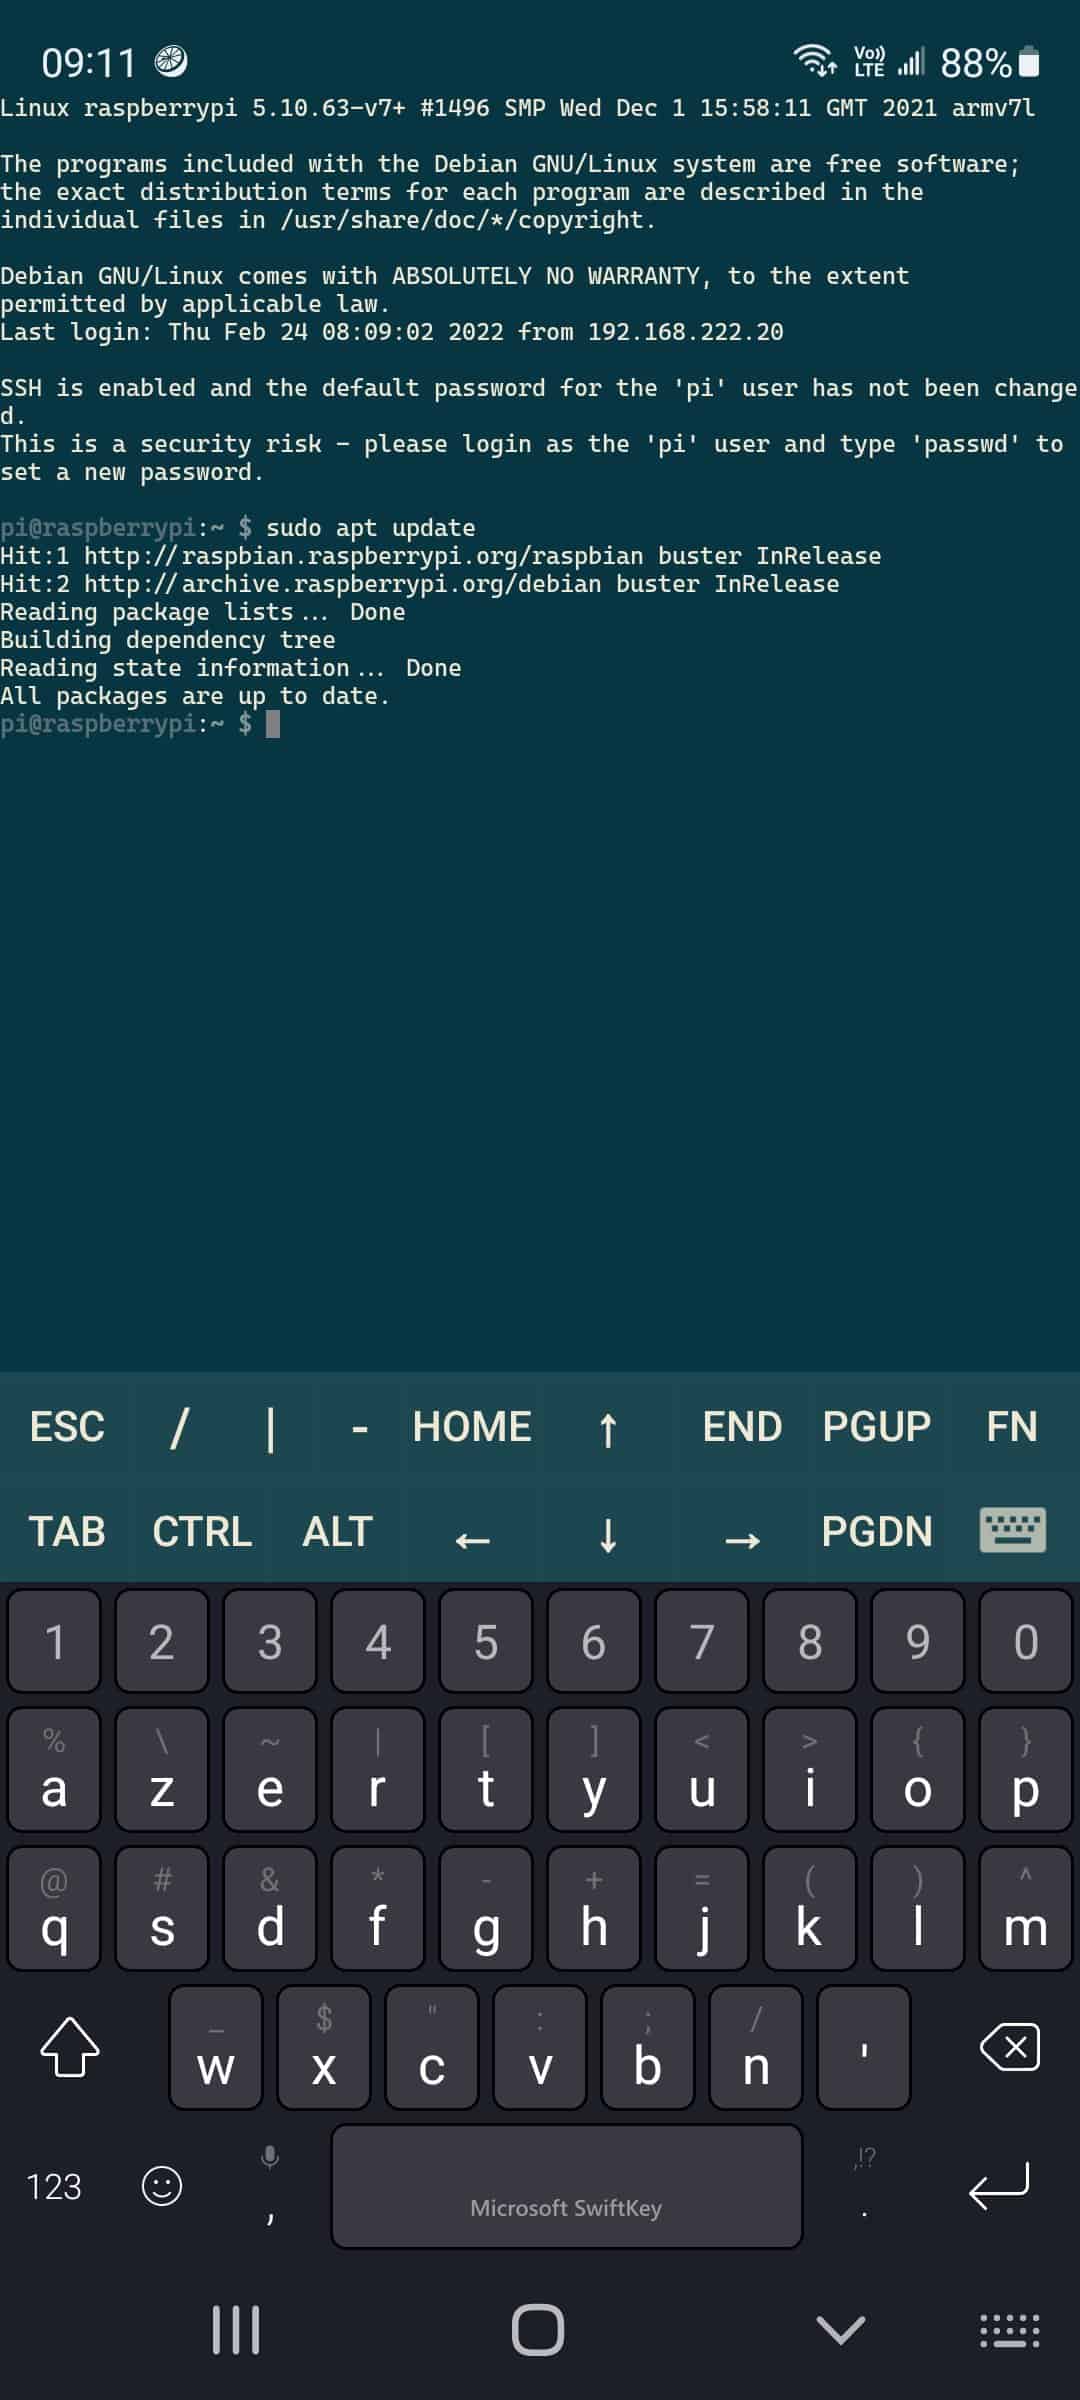
Once SSH is enabled, you can connect to your Raspberry Pi with any SSH client, with some apps you’ll find on your Android device.
Here are a few examples I like:
- Termius: it’s the one I’m using now on PC, and there is an Android app too. It works well and remembers all of your connection settings, so you can quickly connect to your Raspberry Pi.
- JuiceSSH: I used this one a lot before switching to Termius. It has a lot of good options, and I particularly like the shortcut for the keyboard keys on top of the classic keyboard (TAB, CTRL, ESC, etc.). Using TAB is really convenient on a smartphone, so having a shortcut for it is really neat.
- Feel free to look for “ssh client” in the Android app store. Some of them can be easily synchronized with your computer, which might be great, especially if you need to control a lot of Raspberry Pi (and other servers).
To connect to your Raspberry Pi, you need its IP address.
If you don’t know how to find it, you can read this article that will explain everything.
Or if you prefer an easier way with your phone, install the RaspberryTips Android App, and it will automatically find the IP address for you!
The login and password are the same as on the Raspberry Pi (you set them up during the installation or first boot).
Aside from that, you can do everything with these apps, you can even use the commands you find on RaspberryTips and paste them in your SSH client :-).
If you are new to SSH, I recommend reading this guide first.
Use an Android device as a Raspberry Pi monitor
The next level is to access the entire desktop environment from your Android tablet or smartphone. It will be easier to use from a tablet, but it works in both cases.
I will give you other options in the next part, but for now, the easiest way is to use a protocol named VNC. This solution is installed by default on Raspberry Pi OS with desktop, and like SSH, you just need to enable it before using it.
Note: Want to see how to remote control your Pi with VNC, TeamViewer, or other options? I have a video lesson on this topic just for community members. Join here to watch, and get access to 30+ other lessons for Raspberry Pi!
If you are lost in all these new words and abbreviations, request my free Raspberry Pi glossary here (PDF format)!
Download now
By the way, the configuration can be done in the same places:
- In the Raspberry Pi configuration tool, go to the Interfaces tab and enable VNC.
- Via SSH (follow the previous part), you can use raspi-config to enable VNC from a terminal:
sudo raspi-configVNC can be enabled from the “Interface options” submenu.
Once enabled, you’ll need a client on your phone or tablet to connect to your Raspberry Pi.
I highly recommend using VNC Viewer, as it’s the official client, created by Real VNC. It’s free, and you’ll find it easily when searching for “vnc client”.
Once VNC Viewer installed on Android, here is how to use it:
- Add a new connection:

You need your IP address (check this article to know how to find it), and you can give a name to your connection. This is particularly useful if you have several connections. - Accept the identity check:

You’ll only see this the first time, or if you reinstall the Raspberry Pi. Click on continue to move to the next step. - Enter your login and password:

The login and password are the ones you set up during installation (first boot or via Raspberry Pi Imager). - And that’s it, you are now connected to your Raspberry Pi from your Android device:

Using VNC from a touch screen is not the most intuitive experience, but you’ll quickly get it, especially if you just need to change a few things.
Moving the cursor with your finger is what counts when you tap or double-tap, not where you tap. Also, as you can see in the screenshot, I can’t see the whole screen, which is one of the reasons it’s better on a tablet.
Anyway, this was the easiest option to control a Raspberry Pi from an Android device, but if you need to do this often, I recommend reading the next section, where I give more advanced tips for a better experience.
Download the free PDF, keep it open, and stop wasting time on Google.
Download now
I have a full guide about VNC on Raspberry Pi on this website if you need additional information.
If this project doesn’t work as expected on your setup, don’t worry. You can get help directly from me and other Pi users inside the RaspberryTips Community. Try it for $1 and fix it together.
Other options to control a Raspberry Pi from an Android device
SSH and VNC are the easiest solutions to remote control a Raspberry Pi, especially on the same network because they are preinstalled on Raspberry Pi OS and easy to use. But in some cases, you might be interested in a better solution, maybe because you want to access your Raspberry Pi from a remote network, or you have other needs.
VNC is not the only option
Firstly, VNC is one solution, but there are many other applications you can install on your Raspberry Pi and the Android device that will control it. In fact, I have a detailed guide on this website, where I give 5 methods to remote access a Raspberry Pi.
This guide is not dedicated to Android devices, but most of them work the same way from an Android tablet or smartphone. For example, Teamviewer is great for remote control from another network. Unlike VNC, there is a third-party server, that helps to connect your Android device and the Raspberry Pi, without having to configure IP forwarding on your router.
NoMachine is another option I like, with a better interface than VNC. I made a video explaining how to use it on an iPad, it would be very similar for Android, so you can watch this video to see an example:
You can also read this article on the same topic: Can you Use an iPad as a Raspberry Pi Monitor?
IP Forwarding and dynamic DNS
I didn’t give you many details on how to access your Raspberry Pi from another network. This is because it depends a lot on your Internet provider and router.
If you have a static IP and can configure port forwarding on your router, it should be pretty straightforward, but it’s not always the case. With a dynamic IP address, you need a dynamic DNS service like No-IP, to link your current IP address to a domain name you can use on your Android device.
Download the free PDF, keep it open, and stop wasting time on Google.
Download now
I have a complete tutorial on how to set up No-IP with a dynamic IP address (that’s what I’m using), so consider reading it if you are in this case.
Using a VPN for remote access
Another option I use more and more, is to configure a VPN between your Android device (tablet or smartphone, it doesn’t matter), and your home network. This way, it’s like you are always on the same network, even if you are on the other side of the world.
Personally, I have a Raspberry Pi Zero always plugged at home with WireGuard installed on it. I have the WireGuard app on my phone, and can easily connect to it when needed. This gives me SSH access to it, but also to anything on the home network (smart lights, cameras, NAS, etc.).
WireGuard and OpenVPN are the most popular solutions that do the same thing, check the link to view my comparison and instruction to install them. There is a tool named PiVPN that can help you to get it set up in a few seconds (more details in this article).
A web interface to remote control the Raspberry Pi
Finally, if you need to monitor and manage different services on your remote Raspberry Pi, the command line is not always the easiest way. Typing long and complicated commands on your smartphone (and remember them!) is not the most convenient option.
Read next: 7 Surprising Uses for a Raspberry Pi
There are tools like Cockpit or Webmin that you can install on Raspberry Pi to monitor, configure, and manage most services from a simple web page. Need to restart Apache or MySQL? Just open the corresponding page and click a button. If you need help, click on the links to see how to install them on your Raspberry Pi.
I hope this guide answered your questions about remote control from an Android device. This website has a ton of content about Raspberry Pi, so if you need additional guidance on a specific point, feel free to use the search engine. For a step-by-step approach, you can find my e-books and beginner course linked below.
Whenever you’re ready, here are other ways I can help you:
Test Your Raspberry Pi Level (Free): Not sure why everything takes so long on your Raspberry Pi? Take this free 3-minute assessment and see what’s causing the problems.
The RaspberryTips Community: Need help or want to discuss your Raspberry Pi projects with others who actually get it? Join the RaspberryTips Community and get access to private forums, exclusive lessons, and direct help (try it for just $1).
Master your Raspberry Pi in 30 days: If you are looking for the best tips to become an expert on Raspberry Pi, this book is for you. Learn useful Linux skills and practice multiple projects with step-by-step guides.
Master Python on Raspberry Pi: Create, understand, and improve any Python script for your Raspberry Pi. Learn the essentials step-by-step without losing time understanding useless concepts.
You can also find all my recommendations for tools and hardware on this page.