11 Docker Projects Every Raspberry Pi Owner Should Try
I kept hearing about Docker for Raspberry Pi, but didn’t really understand the hype until I saw what it could actually do. It turns out you can run all kinds of apps in isolated containers, without messing up your system. If you’re not sure where to start, don’t worry. These projects are all easy to set up and super useful.
For context, Docker is used on Raspberry Pi to run isolated applications and services, avoiding conflicts with the system or other software. It simplifies installation and management across multiple environments.
In this article, I’ll show you some awesome Docker projects that are useful and easy to set up. We will get straight to business and into real-world ideas. If you’re new to Docker, don’t worry, the first project will walk you through the basics.
If you’re looking for inspiration for your next Raspberry Pi project, I’ve put together a list of 75+ ideas with full descriptions, difficulty ratings, and links to tutorials. Whether you’re a beginner or more advanced, there’s something here for you. Grab the list for free here!
What You’ll Need for These Projects:
- Raspberry Pi: preferably a Pi 4 or Pi 5.
- Micro SD card: 32 GB or more recommended (I tested different ones here).
- Stable internet connection.
- Operating System: Raspberry Pi OS installed.
- Software: Docker & Docker Compose installed.
- Knowledge of Docker and Docker Compose.
Manage Containers Easily with Portainer
If you’re new to Docker, this is where you should start. Portainer gives you a beautiful web interface to manage containers, volumes, networks, and images, all without memorizing long commands.

Portainer is built for Docker. Running it as a container means you’re managing Docker… with another Docker, weird but effective. It’s fast, isolated and makes the perfect intro project.
Requirements:
None beyond the basics, it runs great on any Pi 4 or Pi 5.
How to Run It:
After installing Docker, you can run:docker run -d -p 9000:9000 --name portainer \
-v /var/run/docker.sock:/var/run/docker.sock \
-v portainer_data:/data portainer/portainer-ce
Then visit http://<Your-Pi-IP> and create your admin account.
If you’d like a more complete walkthrough (including tips on volumes and important duties), check out our full guide on how to install and use Portainer on Raspberry Pi. It’s a great first step into container management.
Are you a bit lost in the Linux command line? Check this article first for the most important commands to remember and a free downloadable cheat sheet so you can have the commands at your fingertips.
Block Ads Network-Wide with Pi-Hole
Tired of ads on your TV, phone, and laptop? Pi Hole acts as a local DNS server that blocks unwanted content before it even loads. Once set up, everything connected to your Wi-Fi gets ad-free browsing.
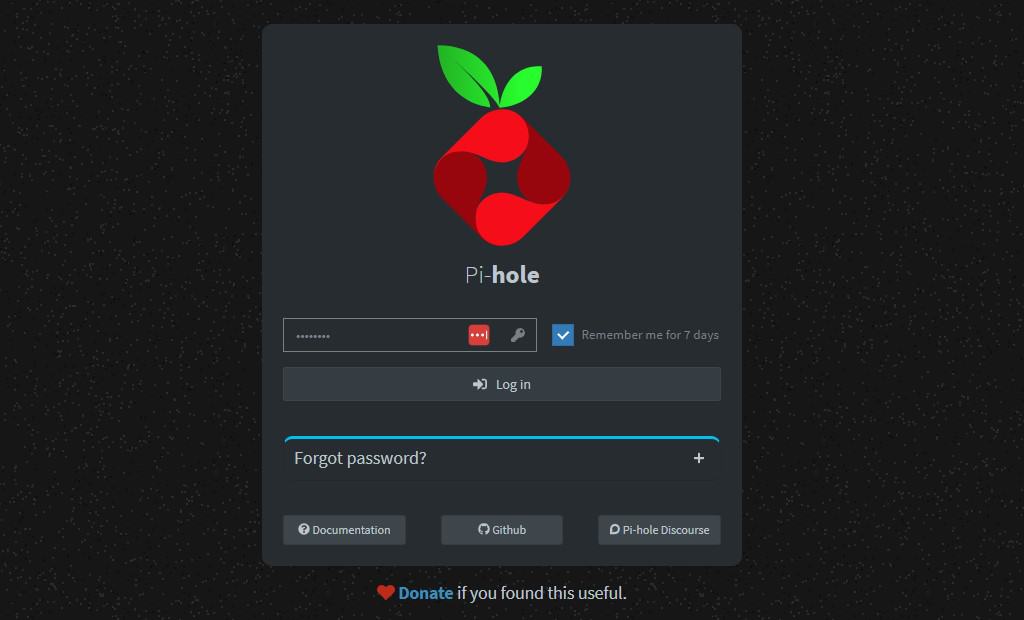
Using a Pi-Hole in a container makes it isolated and easy to upgrade, without affecting other services on your Pi. Also, installing Pi-Hole manually requires system-level changes. With Docker, it’s clean, fast, and easy to upgrade or remove later.
Also: 7 Surprising Uses for a Raspberry Pi
Need some inspiration for your next Raspberry Pi project? Get access to my personal list here!
Download now
Requirements:
- Ethernet connection to your same local network in your home.
- Setting your router’s DNS to point to the Pi.
How to Run It:
The best way to run Pi-Hole without much hassle is by starting a container through Docker Compose. You’ll only need to make a YAML file with this content:
services:
  pihole:
    image: pihole/pihole:latest
    container_name: pihole
    environment:
      - FTLCONF_webserver_api_password=yourpassword
    ports:
      - "53:53/tcp"
      - "53:53/udp"
      - "80:80"
    volumes:
      - ./etc-pihole/:/etc/pihole/
    restart: unless-stopped
And then start it using Docker Compose:sudo docker compose up -d
This will make it run the container in the background, but if you ever need to stop it, you can also use:sudo docker compose down
If you are curious, you can also install and run Pi-Hole outside a container on Linux, but it depends entirely on your needs.
Want even more ideas? I put together a free resource with over 75 Raspberry Pi project ideas, each with a quick description, tutorial link, and hardware requirements. Whether you’re just starting out or looking for something to do this weekend, this list will keep you busy for a while. Just click here to get instant access.
Automate Your Home with Home Assistant
Home Assistant helps you control smart lights, thermostats, sensors, and more — all from one dashboard. It supports hundreds of devices and is incredibly customizable.

Using Docker and Containers is the perfect option for running Home Assistant, because it updates often. Using Docker makes it safer to update without breaking other parts of your system.
Extra Requirements:
- Raspberry Pi 4 or better.
- Optional: Zigbee/Z-Wave dongles for smart home devices.
How to Run It:
Using Docker Compose:
services:
  homeassistant:
    container_name: homeassistant
    image: "ghcr.io/home-assistant/home-assistant:stable"
    volumes:
      - /opt/homeassistant:/config
      - /etc/localtime:/etc/localtime:ro
      - /run/dbus:/run/dbus:ro
    restart: unless-stopped
    privileged: true
    network_mode: host
If Docker is not your thing, it is worth giving it a shot in the usual method without it, using only Linux.
Run a Media Server (JellyFin / Plex)
Turn your Raspberry Pi into your own personal Netflix. Whether you’re watching from your living room TV or your phone, Jellyfin and Plex let you stream videos, music, and photos from your Pi.

Media servers often have tons of dependencies. Docker keeps everything in its own container, making it easier to manage and update, and as a plus, it makes it safer for you, avoiding breaking anything.
Requirements:
- External storage or a large SD card (for your media files).
- Raspberry Pi 4 or 5 recommended, Jellyfin benefits from hardware decoding.
How to Run It:
For installation, you can simply use the official images in Docker Hub, which will let you run it with the right options:
docker run -d \
  --name jellyfin \
  -v /path/to/config:/config \
  -v /path/to/media:/media \
  -p 8096:8096 \
  jellyfin/jellyfin
Access it at http://<Your-Pi-IP>:8096 to set up your library.
If you’re not sure which media server to choose, you can try them without Docker. We’ve covered both options in detail: Jellyfin on Raspberry Pi and Plex Media Server setup. Pick the one that fits your needs and get started.
Need some inspiration for your next Raspberry Pi project? Get access to my personal list here!
Download now
You might also like: Don't buy a new SD card until your read this.
Monitor Everything with Grafana & Prometheus
Track your Pi’s performance, network stats, or even multiple devices in your home. Grafana gives you charts and dashboards, while Prometheus handles data collection and time-series storage. You can even add other exporters (like Node Exporter) to track CPU, memory, or disk usage on different systems.
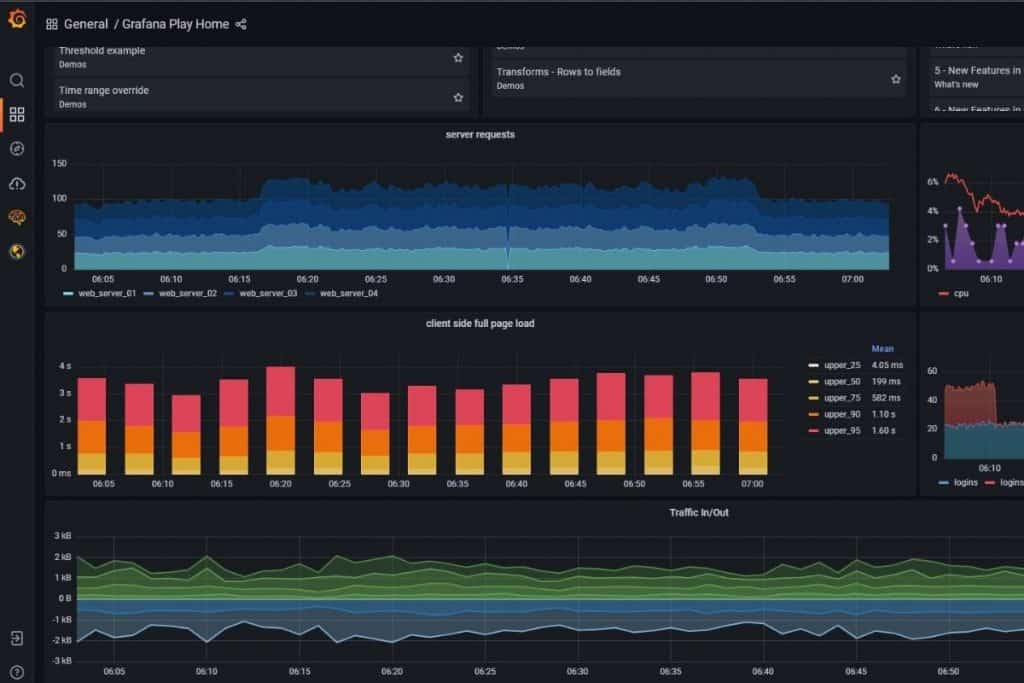
With Docker, you can deploy Prometheus, Node Exporter, and Grafana all at once, keeping services separated and easy to upgrade.
Requirements
- None, but optional external data sources like Node Exporter help.
How To Install:
Using Docker Compose, you can include both Prometheus and Grafana in a single Docker Compose file to deploy both of them at once:
services:
  grafana:
    image: grafana/grafana
    ports:
      - "3000:3000"
    volumes:
      - grafana-storage:/var/lib/grafana

  prometheus:
    image: prom/prometheus
    ports:
      - "9090:9090"
    volumes:
      - ./prometheus.yml:/etc/prometheus/prometheus.yml

volumes:
  grafana-storage:
It is required to create a prometheus.yml file before starting the Docker Compose. You can test it using a minimal config inside:
global:
  scrape_interval: 15s

scrape_configs:
  - job_name: "prometheus"
    static_configs:
      - targets: ["localhost:9090"]
To dive deeper into dashboards and real-time stats, check out this full guide on installing it on Raspberry Pi with extra tips on using exporters and persistent storage.
Secure Your Passwords with Vaultwarden (Bitwarden Alt)
Vaultwarden is a lightweight clone of Bitwander that you can host yourself. It’s perfect for keeping all your login credentials secure and syncing across devices.

Running it in Docker is actually the most recommended way. It’s much easier than setting up Nginx, databases, configs and any other required packages for running it.
Requirements:
- Strong admin password.
- Enable HTTPS for better security.
How to Run It
docker run -d \
  --name vaultwarden \
  -v /vw-data:/data \
  -p 8080:80 \
  vaultwarden/server
Visit http://<Your-Pi-IP>:8080 to use the web vault.
If using VaultWarder is not something catchy for you, then you can also use the original version (Bitwarder) and play around with your Raspberry Pi.
Set Up a Virtual Private Network (VPN) Server with WireGuard
WireGuard lets you access your home network securely from anywhere. You can browse safely on public Wi-Fi or access your NAS and Pi tools while on the go, and on the other hand, it gives you privacy and encryption for your navigation.

While using a container, you can avoid editing the system file directly, and you can spin it up on any device as many times you want and at any time. No need to mess with iptables or system networking by hand.
Requirements:
- Raspberry Pi 4 or 5.
- Port forwarding on your router.
- Static IP or DDNS.
How to Run It:
Download the free PDF, keep it open, and stop wasting time on Google.
Download now
You can use this Docker Compose configuration, the most recommended option for running WireGuard:
services:
  wireguard:
    image: lscr.io/linuxserver/wireguard
    container_name: wireguard
    cap_add:
      - NET_ADMIN
      - SYS_MODULE
    environment:
      - PUID=1000
      - PGID=1000
      - TZ=Your/Timezone
      - SERVERURL=your.ddns.net
      - SERVERPORT=51820
      - PEERS=1
      - PEERDNS=auto
      - INTERNAL_SUBNET=10.13.13.0
    volumes:
      - ./config:/config
      - /lib/modules:/lib/modules
    ports:
      - 51820:51820/udp
    sysctls:
      - net.ipv4.conf.all.src_valid_mark=1
    restart: unless-stopped
Once it’s up, connect to the container to view the generated configuration:docker exec -it wireguard /app/show-peer 1
Do you still need help with networking or port forwarding? We have a full guide on installing WireGuard on Raspberry Pi, along with a general Linux install version for advanced setups.
Run AI Models Locally in a Container (LLM & Whisper)
It’s now possible to run small AI models on a Raspberry Pi! With tools like Whisper (speech-to-text) and LLMs like x, you can experiment with local voice transcription or chatbots without needing cloud access.

Docker is perfect for this because it isolates Python environments, dependencies like PyTorch, and makes setup much easier. No need to pollute your system with broken packages.
Requirements:
- Raspberry Pi 5 is strongly recommended.
- Passive cooling or heatsink.
- USB SSD or large storage if running models locally.
How to Run It:
You can run models like Whisper (for speech-to-text) or lightweight LLMs (such as llama.cpp) using prebuilt Docker images. Whisper requires a model file (for example, the tiny model) that tells it how to process audio.
First, download the mode. You can directly download it from their website and save it in your current directory.
Then run Whisper on your audio file:docker run --rm \
-v "$PWD/models:/models" \
-v "$PWD:/data" \
ghcr.io/ggerganov/whisper.cpp:main \
./main -m /models/ggml-tiny.bin -f /data/yourfile.wav -otxt
Replace yourfile.wav with the name of your recording. The output transcript will be saved in the same folder. You can also use other models like base, small, or medium by downloading the corresponding file.
Want more ideas for AI on the Pi? Don’t miss our list of easy Raspberry Pi AI projects or learn how to use the ChatGPT API in Python to build your own chatbot.
You might also like: The 5 fastest web browsers for Raspberry Pi — tested and ranked!
Host Your Own Game Server (Minecraft, etc.)
Let your friends join your own Minecraft server hosted entirely on a Raspberry Pi. It also works for other light game servers like Minetest. You can deploy game servers without modifying your Pi OS or manually managing Java installs.

With Docker, you can isolate the game server from your OS, and make it easy to restart or tweak settings without breaking your Pi. No need to manage Java versions or deal with long install scripts.
Requirements:
- Raspberry Pi 4 or 5.
- Cooling recommended.
- Wired Ethernet for better latency.
How to Run It (Minecraft):
A popular image for Minecraft is itzg/minecraft-server. It handles everything from world creation to version management.
Download the free PDF, keep it open, and stop wasting time on Google.
Download now
Here’s how to run it on your Pi:
docker run -d -it \
-p 25565:25565 \
-v minecraft-data:/data \
-e EULA=TRUE \
--name mc-server \
itzg/minecraft-server
This will spin up a vanilla Minecraft Java Edition server. Players can join via your Pi’s IP if you’re on the same network, or you can port forward for online access.
You can customize it using environment variables (RAM, version, game mode) for your own needs.
You can find everything you need — from world backups to server tweaks — in this dedicated guide on how to run a Minecraft server on Raspberry Pi.
Host a Simple Web Server or API Backend
If you’re learning web development or building your own tools, using tools like Node.js, Flask, or PHP servers on your Pi is the best way to deploy them. It can be used for hobby apps, dashboards or even self-hosted APIs.

Docker is the best way to run those tools. Instead of installing dev tools globally, Docker lets you run each app in isolation with just a Dockerfile or a Compose file.
Requirements:
- None. Any Pi with Docker will do. Add resources only if your app requires them.
How to Run It:
It really depends on the tools that you will be using for your web or app deployment. But, for example, for Node.js you can use:
docker run -d -p 3000:3000 \
  --name nodeapp node:18 node index.js
If you need more help getting your web tools online, check out our tutorials for setting up a web server, installing Nginx, or using Webmin to manage your server.
If you prefer watching videos instead of reading tutorials, you’ll love the RaspberryTips Community. I post a new lesson every month (only for members), and you can unlock them all with a 7-day trial for $1.
Create a Private Document Server
Paperless-ngx lets you scan, store, search, and organize documents in a sleek web interface. It’s perfect for managing receipts or home paperwork. The app relies on PostgreSQL, Redis, and OCR tools.

Since this requires running multiple services, Docker is the easiest and cleanest way to run them all together.
Requirements:
- Pi 4 or Pi 5.
- SSD or large USB drive.
- External scanner (or phone).
How to Run It
The easiest way to deploy Paperless-ngx is with Docker Compose, which handles PostgreSQL, Redis, and the main app in a single config. Here’s a basic docker-compose.yml to get started:
services:
  broker:
    image: docker.io/library/redis:8
    restart: unless-stopped
    volumes:
      - redisdata:/data
  db:
    image: docker.io/library/postgres:17
    restart: unless-stopped
    volumes:
      - pgdata:/var/lib/postgresql/data
    environment:
      POSTGRES_DB: paperless
      POSTGRES_USER: paperless
      POSTGRES_PASSWORD: paperless
  webserver:
    image: ghcr.io/paperless-ngx/paperless-ngx:latest
    restart: unless-stopped
    depends_on:
      - db
      - broker
    ports:
      - "8000:8000"
    volumes:
      - data:/usr/src/paperless/data
      - media:/usr/src/paperless/media
      - ./export:/usr/src/paperless/export
      - ./consume:/usr/src/paperless/consume
    env_file: docker-compose.env
    environment:
      PAPERLESS_REDIS: redis://broker:6379
      PAPERLESS_DBHOST: db
volumes:
  data:
  media:
  pgdata:
  redisdata:
Then open your browser and visit:
http://<Your-Pi-IP>:8000
Login with the admin credentials you defined above.
Additionally to this, it is necessary to have a docker-compose.env in your current directory for running this container. You can also explore other backend options like mariadb or sqlite on their github repository.
As you’ve seen, Docker opens the door to powerful and creative Raspberry Pi projects, from home automation to personal cloud services, all while keeping your system clean and easy to manage. Once you’re comfortable with containers, the possibilities are endless.
Whenever you’re ready, here are other ways I can help you:
Test Your Raspberry Pi Level (Free): Not sure why everything takes so long on your Raspberry Pi? Take this free 3-minute assessment and see what’s causing the problems.
The RaspberryTips Community: Need help or want to discuss your Raspberry Pi projects with others who actually get it? Join the RaspberryTips Community and get access to private forums, exclusive lessons, and direct help (try it for just $1).
Master your Raspberry Pi in 30 days: If you are looking for the best tips to become an expert on Raspberry Pi, this book is for you. Learn useful Linux skills and practice multiple projects with step-by-step guides.
Master Python on Raspberry Pi: Create, understand, and improve any Python script for your Raspberry Pi. Learn the essentials step-by-step without losing time understanding useless concepts.
You can also find all my recommendations for tools and hardware on this page.