
How to Install Android on Raspberry Pi in 2025 (+Play Store)
Installing Android on Raspberry Pi has always been a challenge. But thanks to the work of several developers, this task has become easier over the years. In this article, I share with you the latest method to get it running on your Pi (including the Play Store to install any app you like).
To install Android on a Raspberry Pi, a custom image is required, since Google doesn’t have any version available for the Raspberry Pi. Additionally, accessing the Play Store requires a custom Google Apps build.
This process is very different from what you might be used to when installing new operating systems on your Pi. But don’t worry, I’ll explain all the steps in detail, with illustrations to make sure you can follow along.
If you’re new to Raspberry Pi or Linux, I’ve got something that can help you right away!
Download my free Linux commands cheat sheet – it’s a quick reference guide with all the essential commands you’ll need to get things done on your Raspberry Pi. Click here to get it for free!
Key Challenges to Running Android on Raspberry Pi
I don’t want to start off with something boring, but there are some few important things to know before the technical steps to installing Android.
Proprietary vs. Open-Source
The core of the Android system is open-source, but the Play Store and other Google apps are proprietary applications.
Android is a Google product created for smartphones and tablets. Only partners (manufacturers) can get the full version and install it on their products—after being approved by Google. Support for Raspberry Pi is clearly not Google’s priority.
You might also like: 7 Hidden Raspberry Pi Features You Should Be Using
It’s not only a problem for the Raspberry Pi, but also for many other devices. Some people are also interested in an open-source version of Android. That’s why projects like Emteria and LineageOS have been created.
LineageOS is a free and open-source version of Android created for tablets and smartphones. It comes with a few basic applications (browser, calendar, calculator, etc.), but it doesn’t come with any Google applications or any useless preinstalled bloatware.
Does LineageOS Work on Raspberry Pi?
There is a way to make LineageOS work on your Pi, but it’s not with the official release.
As you can see on the download page here, LineageOS is available for many devices (Samsung, Huawei, Sony, etc.), but not for anything other than smartphones and tablets.
However, there is an unofficial version available on this website, built especially for Raspberry Pi devices. That’s what we’ll be using for this tutorial.
I hope this introduction made the process clearer. We’re not installing the official Android from Google (proprietary) nor the one from LineageOS (unsupported), but rather a custom image forked from LineageOS for the Raspberry Pi.
Download the free PDF, keep it open, and stop wasting time on Google.
Download now
Installing Android on Raspberry Pi
Here’s an overview of the steps to install Android on Raspberry Pi:
- Download the LineageOS version for Raspberry Pi from Konstakang.
- Download Google Apps and save it onto a USB drive.
- Flash LineageOS onto an SD card and start the Raspberry Pi.
- Reboot in recovery mode to install the Google Apps store via USB.
I will now cover each step in detail.
Note: If you want to see these steps in action, I have a video on this topic just for community members. Join here to watch, and get access to 30+ other lessons for Raspberry Pi along with many other benefits!
Hardware Requirements

Here’s the recommended hardware to follow this guide and get the most out of your system:
- Raspberry Pi 5 or Raspberry Pi 4: Smartphones are pretty powerful these days, and if you want to get similar performance as on your phone or tablet, a Raspberry Pi with enough RAM is recommended.
If you don’t have one, you can try with a Raspberry Pi 3B+ and download the corresponding image, but it’s better if you can use a newer model. - Quality SD card: Try to get a good one with enough space for your goals (32 GB minimum). The link goes to the best one available currently, and you can read my benchmarks here if you want to know why.
Alternatively, you can use an SSD drive or NVMe drive for better performance, reliability, or space, but it’s not required. - USB drive: You need USB to install Google Apps; a USB stick will be perfect for this.
Any model is fine, the file is pretty small. Here’s the one I use. - Monitor: If the goal is to build a compact table, a product like the RasPad 3 I tested here would be perfect. For a media center, you can plug your Pi to your TV, or simply use a Raspberry Pi monitor like the one I use.
Update: I recently tested Android with this touchscreen from SunFounder, and it works very well. Android is designed for touch devices, so it makes sense :).
Download Images
You’ll need to download several things before starting the installation process. It’s not always easy to download it directly to Raspberry Pi, so I recommend downloading it to your PC. I will explain what to do with each file later.
So, download all these files on your computer:
- Raspberry Pi Imager or Balena Etcher.
We’ll be using this software to flash the SD card.
Pick the one you prefer. They’re available on any operating system. - LineageOS for Raspberry Pi 5 or LineageOS for Pi 4 or LineageOS for Pi 3.
Download the Konstakang build, and select the latest version for your device.
Don’t forget to unzip the archive to your PC to get the .img file.
(Important: If you’re interested in Android TV instead, the procedure is not exactly the same.
Read this article instead.) - NikGapps.
This software adds Google Apps after installing the OS.
(It looks like OpenGapps is no longer updating their packages—or at least they’re often very late—so I now recommend using NikGapps instead.)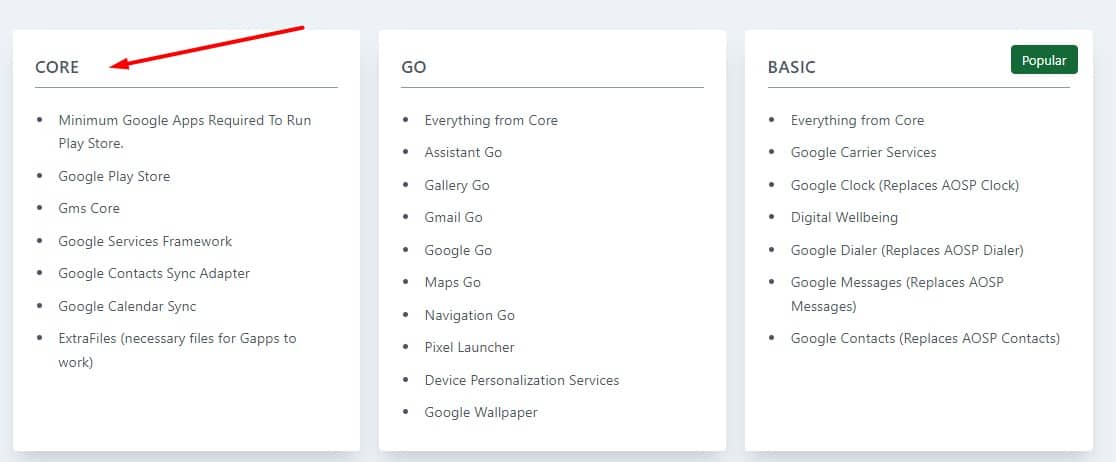
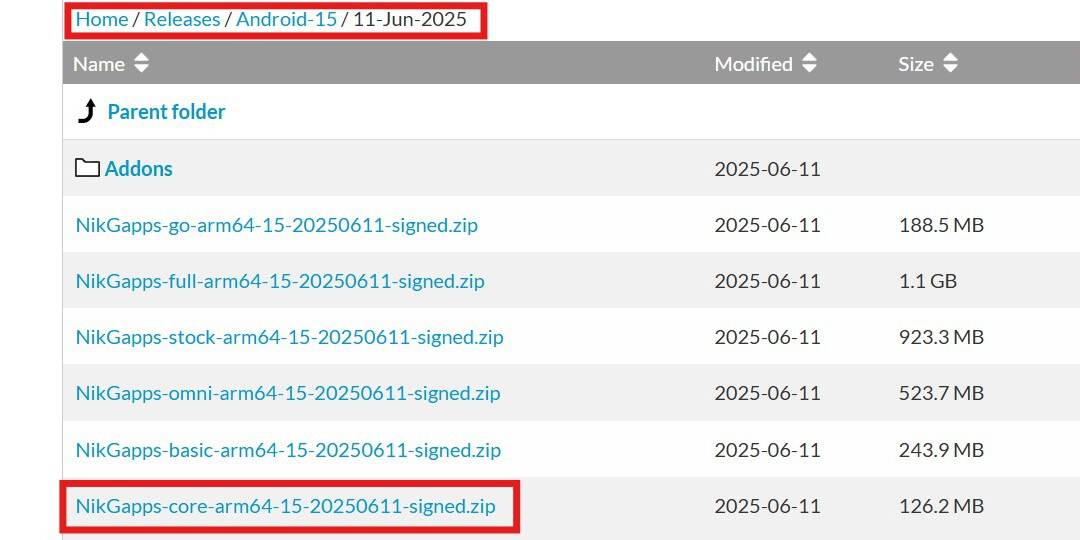
Click the link above; then scroll down and click the “Download Now” button.- On SourceForge, go to “Releases”
- Next go to the folder that matches the Android version you downloaded in the first step above. My example uses the “Android-15” folder.
- Then go to a version date you prefer. I just chose the most recent date.
- Finally, download the file with “Core” in the name.
(The “Core” package is enough for a Raspberry Pi. The important part is Google Play Store, so anything else can be added later.)
I recommend copying the “NikGapps” or “OpenGapps” zip file to your USB drive right away.
It’s easier than downloading it from inside Android. I’ll show you how to install them later.
You might also like: Tired of Raspberry Pi OS? Level up with these top-rated systems.
Warning: Make sure your USB drive is formatted as a FAT32 file system.
It won’t work as other types.
Flash the SD Card With LineageOS
Next, we need to prepare the SD card as usual. You can use either Raspberry Pi Imager or Balena Etcher for this, it doesn’t matter which one.
Download the free PDF, keep it open, and stop wasting time on Google.
Download now
Here are the steps with Raspberry Pi Imager:
- Launch Raspberry Pi Imager. The interface looks like this:
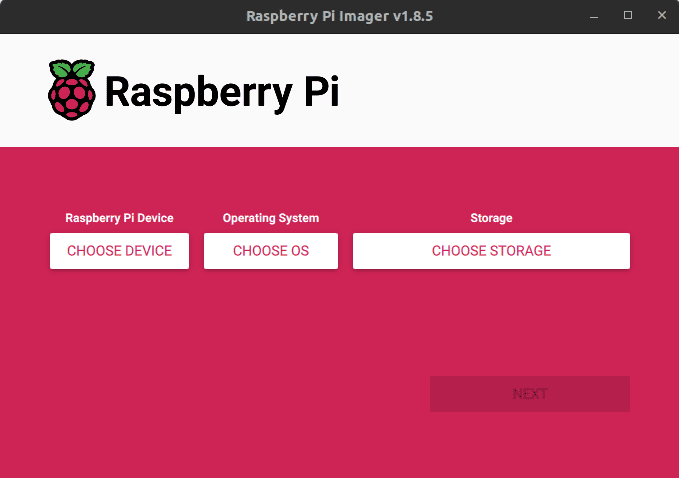
- Click Choose OS, scroll down to “Use custom” and then select the LineageOS image file from your Downloads directory.
- Insert your SD card into your computer, and select it under Storage.
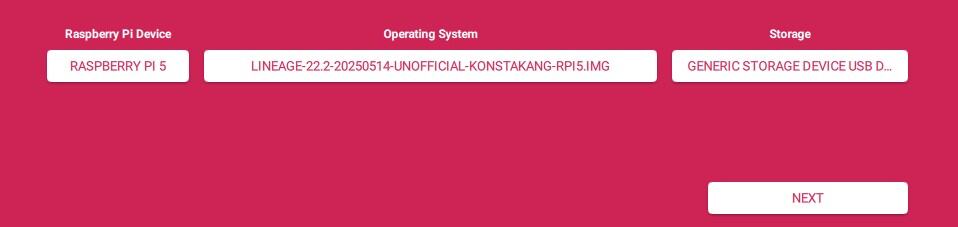
- Click the NEXT button to start.
When asked if you want to apply “OS customisation” settings, hit “NO,” then “YES” to confirm.
Imager will now start writing the image to your media.
A few minutes later, your SD is ready, and you can insert it into your Raspberry Pi.
I’m moving through these steps quickly because they’re similar to what you do when testing other systems. But if you’re new to the Raspberry Pi environment, you may want to try a more detailed approach. I highly recommend reading Master Raspberry Pi in 30 Days. It will teach you everything you need to feel more confident with this kind of project.
Optional: Booting LineageOS From a USB Drive or NVMe Drive
Note: If you’ve written the image to a USB drive or NVMe drive, you’ll need to modify config.txt before booting with your Pi.
Here’s how to make the change:
You might also like: 15 Easy Projects for Raspberry Pi Beginners
- View the files on the drive you just flashed the image onto.
- Open config.txt with a text editor.
- Change this section:

- You only want to uncomment one line.
- In the example above, I wanted to boot from USB. So I uncommented the 2nd line by removing the “#” at the front and adding “#” to the others.
(For NVMe, you would uncomment the 3rd line and comment out the top 2.)
Boot to LineageOS
Start your Raspberry Pi. The first boot will take a bit longer, as the system needs to initialize the configuration in the background.
On newer versions, you should get a welcome wizard to configure settings. It’ll let you connect to Wi-Fi, set your time zone, and other things.
Note: If your display is not adjusted correctly, use the keyboard arrows to reach the start button on the first screen. Almost all the following steps were working fine, just have to do the same thing once or twice after that.
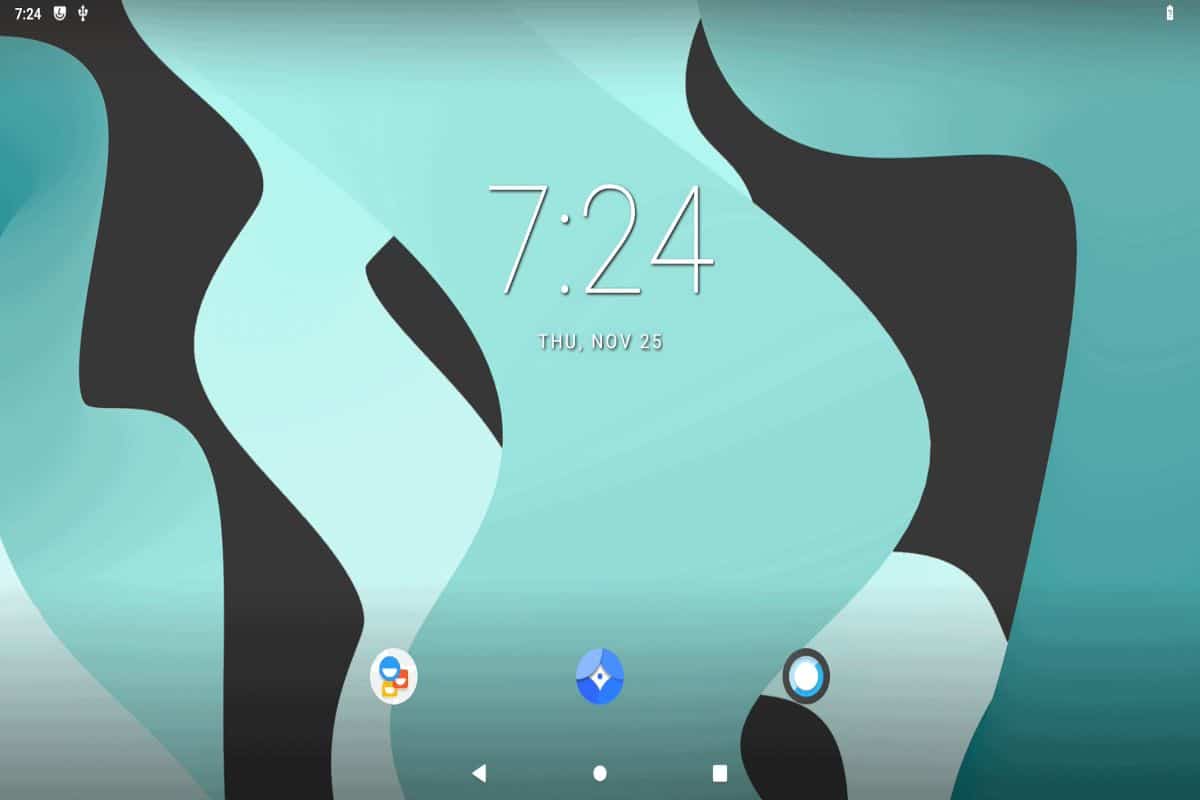
Then, you’ll access the Android desktop directly.
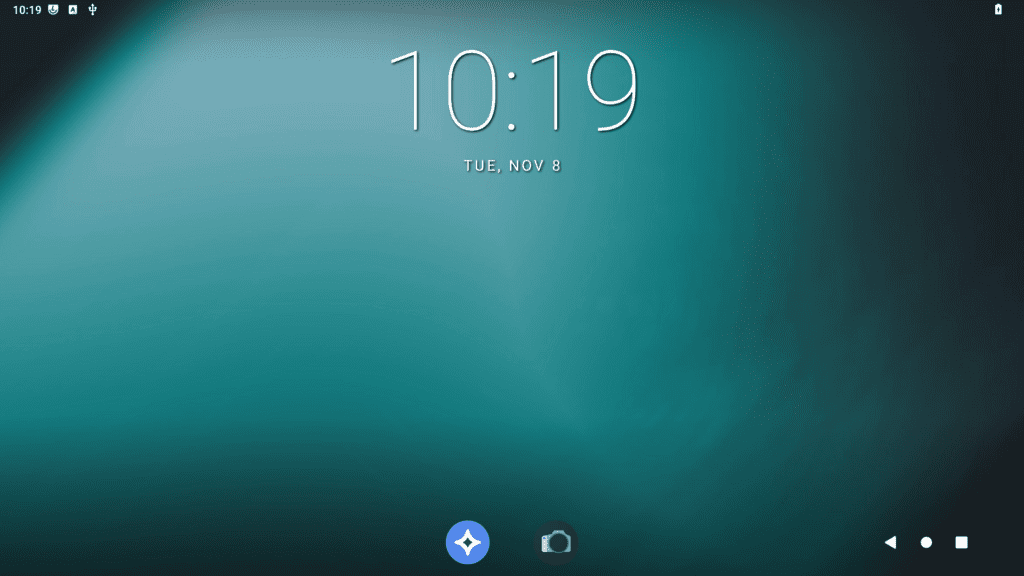
But you’re probably not here to use the basic email and browser apps; there’s not much you can do with only the default apps. That’s why we’ll install the Google Play Store next.
Configure Android Settings
Download the free PDF, keep it open, and stop wasting time on Google.
Download now
If you haven’t done it with the welcome wizard already, now is a good time to adjust the default settings. Go to the Settings app to configure your Internet connection, language, date/time, etc.
You might also like: Tired of Raspberry Pi OS? Level up with these top-rated systems.
I’m using my Raspberry Pi 5 with the Ethernet cable plugged in, but it won’t connect to my network. If you’re in the same situation, start by configuring the Wi-Fi network. It will then synchronize with the time server and fix the date/time for you.
Installing Google Play Store on Android
Now that the Android system is installed and configured, we need to install NikGapps to allow us to use the Play Store and install all the usual applications.
You’ll feel like a hacker doing this, as it’s not a common process. But don’t worry, I explain all the steps in detail.
Reboot in Recovery Mode
First, we need to boot LineageOS in recovery mode to install Google Apps.
To do this, we need to unlock access to this mode by enabling the advanced restart.
Here’s how:
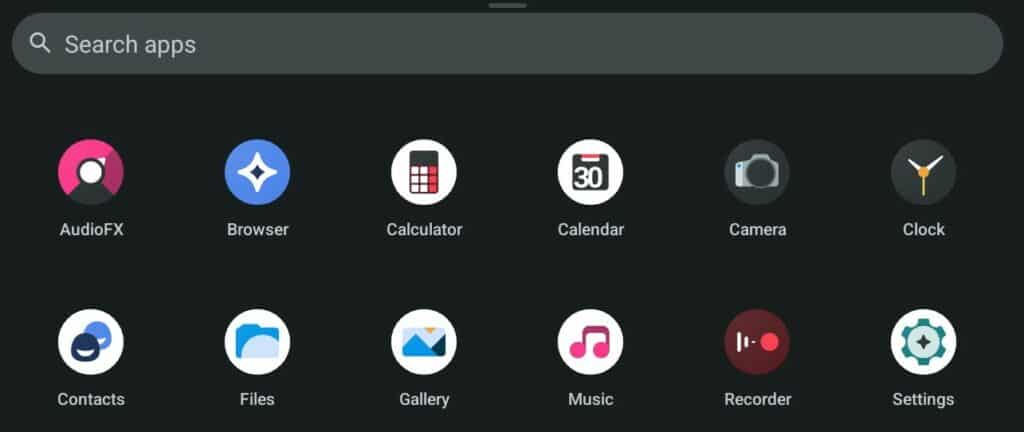
- Open the Settings app.
- In the search bar, type “recovery” and select the first result.

- Scroll down and enable the option “Advanced restart”:
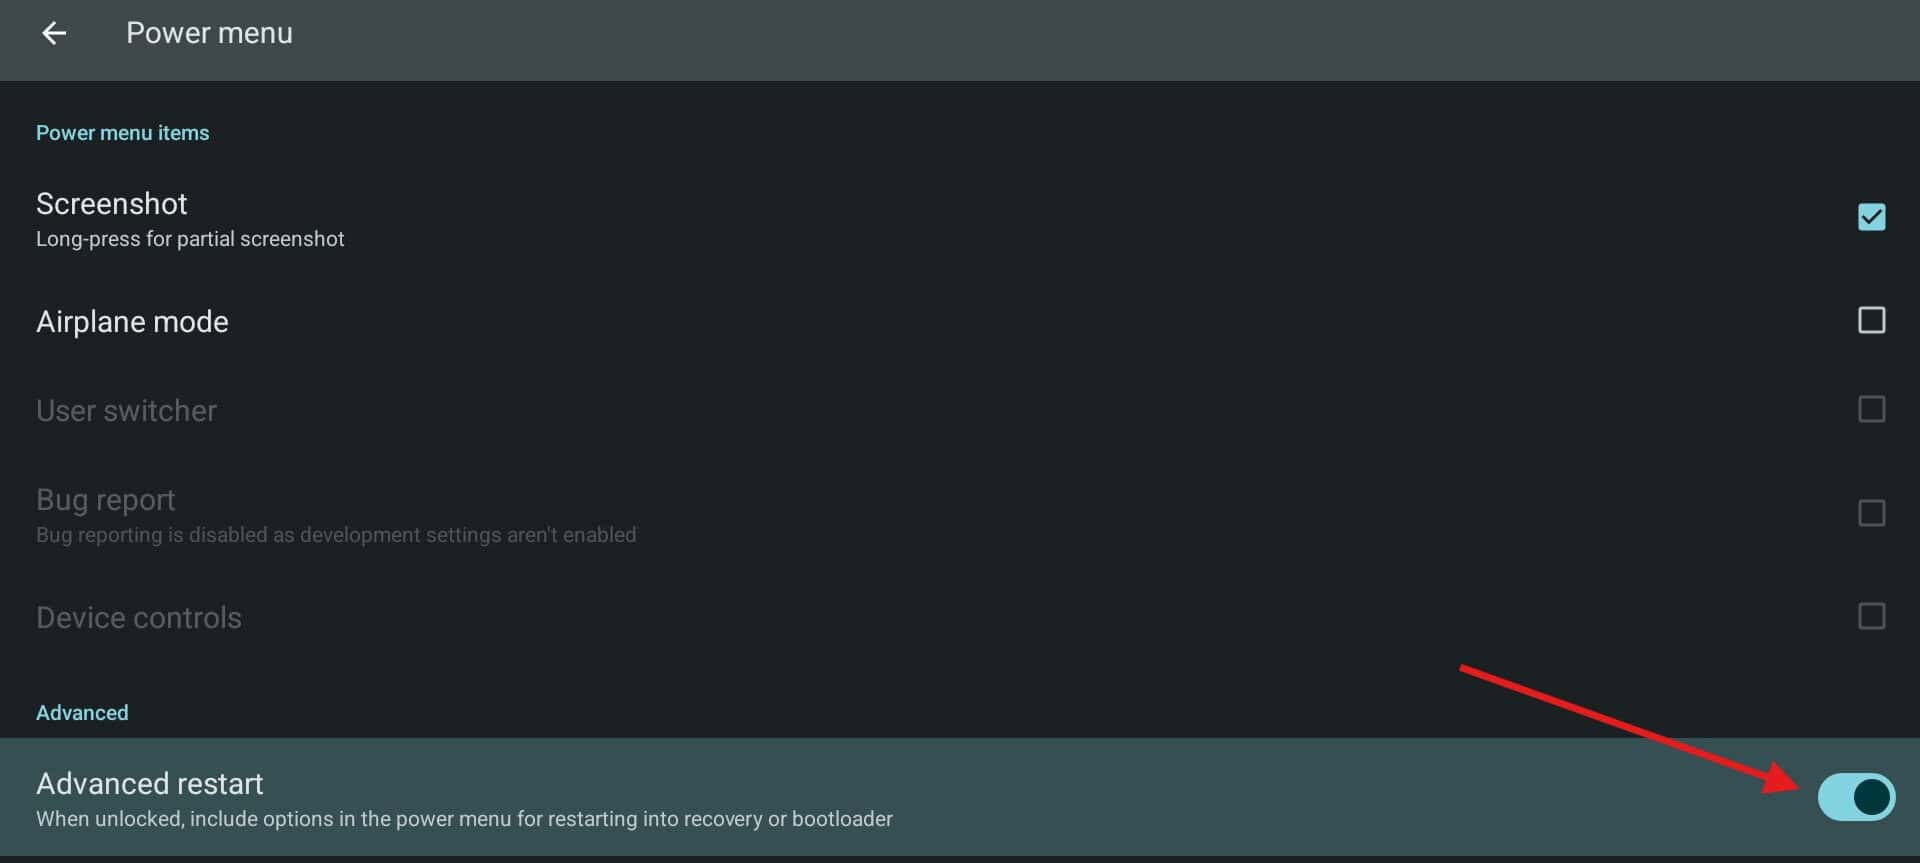
- Hold down the F5 key to bring up the power options.
Then click Restart > Recovery: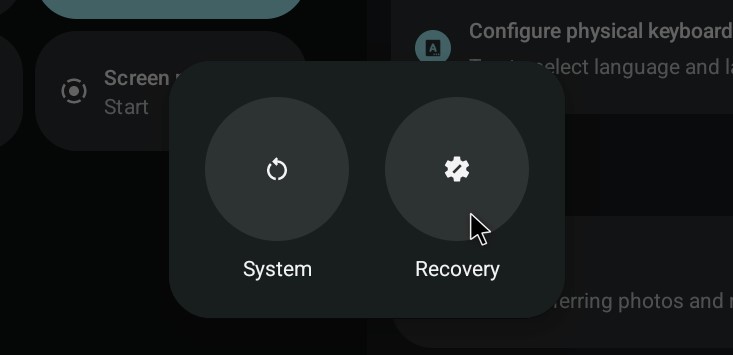
Wait a few seconds for the recovery mode to start.
The system will now reboot in recovery mode.
The main interface looks like this:
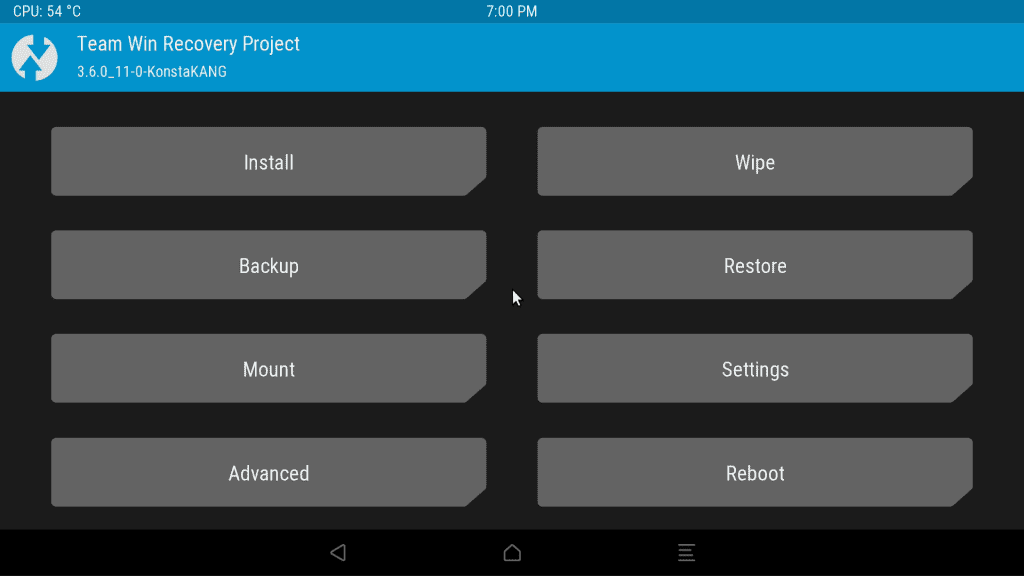
We can now begin installing the Google Apps store.
You might also like: Are you sure your Pi is secure? Here are 17 simple tips to protect it.
Install Google Apps
- Plug in your USB drive with the Google Apps zip file on it.
- Click “Mount”.
This is where you choose which partition to mount (= making the USB drive accessible).
We need to mount the USB, so checkmark the USB item from the list. - Then, go back to the main menu, and click Install.
- Click Select Storage, and when the popup appears, choose your USB drive from the list.
- Finally, your files should appear.
Click on the NikGapps zip file to install it:
Swipe to confirm, there is nothing else to change.
Installation will proceed.
(Don’t choose the Reboot button that appears, as it’ll take you back to recovery mode.) - Use the home button to go back to the main menu. Choose Reboot > System to restart in normal mode.
You’re done! Your Raspberry Pi will now restart in normal mode.
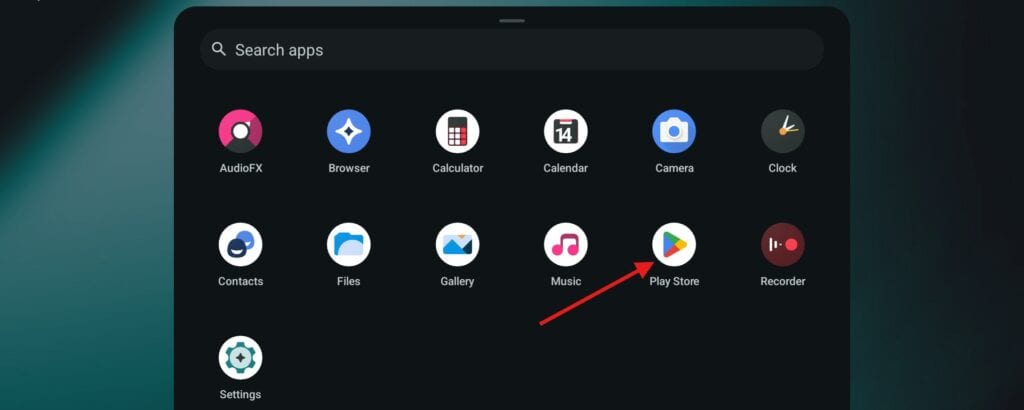
Once on the Android desktop, you’ll now see that the Play Store is available in your apps list.
Sign In to the Play Store
Download the free PDF, keep it open, and stop wasting time on Google.
Download now
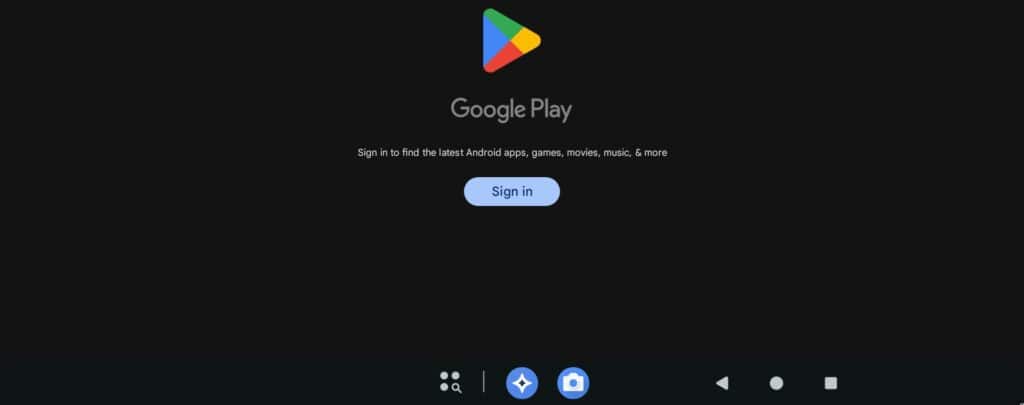
The last step is to sign in on Google Play, as you would for any Android device.
Open the Play Store app and try to sign in with your Google account:
You may get some error messages during this process, asking if you want to close or wait: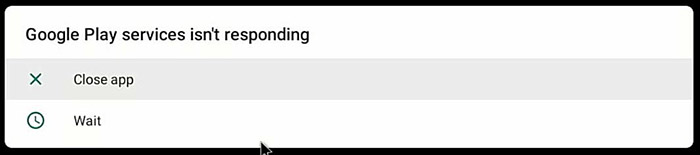
Keep choosing “Wait” until you manage to log in.
Once logged in, you can close the app and reboot the device.
After the reboot, everything should be fine.
You can now install any app or game you want on your Raspberry Pi :).
Video Demonstration
I have a video on my YouTube channel guiding you through the installation of Android 12. You can watch it here for an example of the whole process:
Check this: Need a clear GPIO pinout diagram? Here's mine.
Subscribe to the RaspberryTips YouTube channel to receive new videos directly in your feed:
If this project doesn’t work as expected on your setup, don’t worry. You can get help directly from me and other Pi users inside the RaspberryTips Community. Try it for $1 and fix it together.
Related Questions
Can you run AndroidTV on Raspberry Pi?
Yes, but Android TV only works on more recent Raspberry Pi models, with a custom image of LineageOS from Konstakang. It can’t run on Raspberry Pi 3B+ and lower with this method.
If you have a Raspberry Pi 5, Pi 4, or Pi 400, you can follow the same steps and pick AndroidTV instead of Android while downloading the image. The other steps are very similar (the interface is slightly different, but you’ll find your way thanks to the developer website).
I have a full-tutorial about Android TV I recommend reading if you are interested. And you can also watch this other video I did a while ago:
That’s it! We finally found a way to have Android working better than ever on Raspberry Pi, and it’s not very difficult to install. We don’t need any account (except Google), and it’s free.
Whenever you’re ready, here are other ways I can help you:
Test Your Raspberry Pi Level (Free): Not sure why everything takes so long on your Raspberry Pi? Take this free 3-minute assessment and see what’s causing the problems.
The RaspberryTips Community: Need help or want to discuss your Raspberry Pi projects with others who actually get it? Join the RaspberryTips Community and get access to private forums, exclusive lessons, and direct help (try it for just $1).
Master your Raspberry Pi in 30 days: If you are looking for the best tips to become an expert on Raspberry Pi, this book is for you. Learn useful Linux skills and practice multiple projects with step-by-step guides.
Master Python on Raspberry Pi: Create, understand, and improve any Python script for your Raspberry Pi. Learn the essentials step-by-step without losing time understanding useless concepts.
You can also find all my recommendations for tools and hardware on this page.


Cool. Why didn’t you go for the 64 bit variant, though?
Noob here. Wondering the same thing.
I really like how well you laid out the instructions. I was going along just fine until I hit one of those “you can’t fix stupid” situations. Stupid, of course meaning me. I cannot determine how to configure the “USB key with Google Apps on it”. I feel that it needs a boot partition. Oh heck, rather rambling along, please detail if time avails. I’m really liking the install.
Thanks for any assistance.
Mr. Lost-In-The-Dark
No, just copy the OpenGapps archive on a USB Key (FAT32 for example)
Nothing complicated 🙂
can i run this version of LineageOS in Pi 4B, on two different monitors showing two different apps? dual monitor supports exists in Pi 4B, will Lineage OS support that also?
Thank you very much for your detailed tutorial,
I was able to setup a raspberry pi 4B (4GByte RAM) with an industrial touchscreen monitor,
used as HMI in kioskmode (showing a webinterface)!
Thank you very very much for your nice work!
One usecase works on my solution based on “Raspbian Buster Desktop”, chromium in kioskmode and chromium-extension “Virtual Keyboard”. But this didn’t work with our second usecase (also a webinterface), where the on-screeen-keyboard didn’t show up…
Some details I had to handle:
-edit “config.txt” with SD-card-reader on bootpartition for getting screen output on my PC-HDMI-monitor, as close as possible to our used screen resolution of 1920×1080:
hdmi_group=2
hdmi_mode=85 (it’s only 1280×720, also 16:9, so scaling our webinterface works well)
-reboot of Android / LineageOS: long press on “F5”
-showing all installed apps: gesture from down into screen over Android-circle
-“Reboot in normal mode”
in “Mount” I had to select “Boot” AND “System”,
otherwise “rpi4-recovery.sh” wasn’t found
-additional apps via Playstore:
-TeamViewer Host (only screen sharing is possible, there’s no addon for remote control…)
-Fully Kiosk Browser
(autostart with Android/LineageOS works well)
=>background image had a weird problem, setting fullscreen picture in LineageOS doesn’t work, it seems that it has problems with screen width/height. App “Image 2 Wallpaper” helped to scale and setup the image, but I couldn’t manage to center it… But that’s peanuts. 😉
Hi Stef,
Thanks for the information!
Some tests further showed three showstoppers (ordered by priority):
1) configuration of static IP address on ethernet port
It’s not available on Android user interface, and it seems that it’s a widespread problem…
Has anyone found a simple and persistent solution?
2) screen resolution
Website-scaling in “Fully Kiosk Browser” works well, but after userinputs with on-screen-keyboard the user has to manually zoom out (nativ resolution of our webinterface is 1920×1080). It would be very cool, if Android on Raspberry Pi 4B could provide full-HD resolution…
3) remote access to Android
TeamViewer Host is accessible as on other Android-based tablets, but only screen mirroring works. There’s no TeamViewer-Addon for sending mouse or keyboard events.
Well, perhaps one day there will be a solution. 🙂
@Patrick: Thank you for your good documentation.
is there a support for the original raspberry pi 7″ touch?
Hi,
I think it should work directly
There is a comment on the YouTube channel about this, maybe you can ask the author if you have any problem:
https://www.youtube.com/watch?v=bcE3hL4-Pk8
Dam its works in the beginning but is really slow when i tried to fix it it never loaded do u think u could do another tutorial on how to run it faster
Youtube crashes
Hi,
I just updated this post as many people on YouTube told me that they were unable to reboot in normal mode after the Gapps installation.
If you are trying this tutorial with Android 10, there is a small change at the end:
Note: From Android 10 and over, the rpi4-recovery.sh script is no longer available in the terminal, you need to download this file from Konstagang.
Put it on the same USB key with Gapps, and install it just after Gapps.
It will reboot in normal mode.
Hello,
After installing the script from https://www.androidfilehost.com/?fid=8889791610682901035, I can’t find the new script. The rpi-recovery.sh command is still the original one.
If I unzip and run directly the script, the raspberry stay on a black screen at next startup.
lineage-17.1-20210122-UNOFFICIAL-KonstaKANG-rpi4-atv.zip and
open_gapps-arm-10.0-tvstock-20210131.zip
Thx for this article.
I have a question: if you install LineageOS on the Raspi 4 is it then a normal Android (smarthpone) without a touch-screen?
Or can it work 100% as a Android TV, where no touch screen is working?
I just bought a chinese Android TV Box (xgody T95) – and it says it’s a phone.
So all the app are thinking, they are on a smartphone and not on a TV .
I want to avoid the same with the raspberry pi.
can you tell me, how it reacts (without a touch screen?)
Sorry, I don’t really know the difference
You can ask on the LineageOS website, or maybe the fastest is to test 🙂
Superb, thank you for that. I’ve just installed it on my Raspberry Pi 3 Model B (not +).
The whole process was very glitchy, I’d even say super slow. I assume it’s because I’m using Model B and not Model B+, so and it has only 1GB Ram :\
Bottom line – it works, thank you very much!
How to connect through SSH
got to installing opengapps and I’m getting insufficient disk space. I’ve verified the file download, open_gapps-arm-9.0-pico-20201031. I’m using a 64g sd card. I’ve expanded the data partition but no luck. any ideas?
Solved: had to expand the system partition
Hi Tim,
I’m running into the same issue, but I’m not quite sure how to expand the system partition. Any tips/info??
How did you expand the system partition? I have not found a suitable way to do that yet.
Tim can you exlain how you did it?
The main question — how about at least 1080p video playback, Is there any hardware acceleration?
Thanks, great tutorial!
I’m using a Pi3 with a touchscreen.
I tried using android V10 and Gapps V10, the Gapps zip file installed but on reboot everything became really slow, with several “wait for reply” errors, and finally the apps application never showed up.
Nice thing was, setting the “Advanced restart” option worked nicely, and allowed rebooting into recovery mode without having recourse to the rpi3_recovery.sh script.
So went down to V9 versions, but I can’t get the terminal app to show up on the desktop. I’ve enabled root access “Apps and ADB” and “Local Terminal”, but the application icon doesn’t show up on the desktop.
Any ideas?
Cheers, RobR
Hi,
Thanks for your feedback.
System slowness with Google Apps is “normal”.
For the terminal, try to check the video, you probably miss one step in the procedure.
Also, it’s not on the desktop, but in the apps list.
Great, got it, wasn’t looking in the right place for the terminal app. Got it all working now, thanks a lot for these instructions.
Please … with the version of lineageOS 18.1 (android 11) of konstagang, in the developer settings there is no longer the root access entry but only the one to enable the terminal, so I can’t give the command to access the recovery … some idea please? thank you !
I kept rebooting into a black screen also. What finally worked for me was to not install the kong recovery file but to instead go to reboot and choose power off then power cycle voila.
I use Pi4 with android 11 installed on a USB disk, but I don’t know what to do to make android see the real disk memory because it sees 8gb and the disk is 1tb will someone help me? thanksm