Install Hyperion On Raspberry Pi (Step-by-step Guide)
I have Philips Hue smart lights at home and am amazed by the number of projects you can do with them. I already wrote on how to control these lights in Python, Home Assistant, etc. Hyperion is another tool you can use, with the primary goal of enhancing your TV experience by linking light colors to the movie you are watching. Let’s learn how to install it on a Raspberry Pi.
Hyperion has packages and repositories available for most operating systems and architectures, and it’s fully supported on Raspberry Pi. After adding the official repository to Raspberry Pi OS, you can install it with APT.
If you are used to installing new apps and services on your Raspberry Pi, it should be pretty straightforward, so let’s get to the point.
If you’re new to Raspberry Pi or Linux, I’ve got something that can help you right away!
Download my free Linux commands cheat sheet – it’s a quick reference guide with all the essential commands you’ll need to get things done on your Raspberry Pi. Click here to get it for free!
Install Hyperion on Raspberry Pi
Get a supported distribution on your Raspberry Pi
Hyperion is supported on many distributions (Debian, Ubuntu, Fedora, etc.), and is a lightweight application, so you can probably keep your current installation. But, make sure to have your system ready before going further:
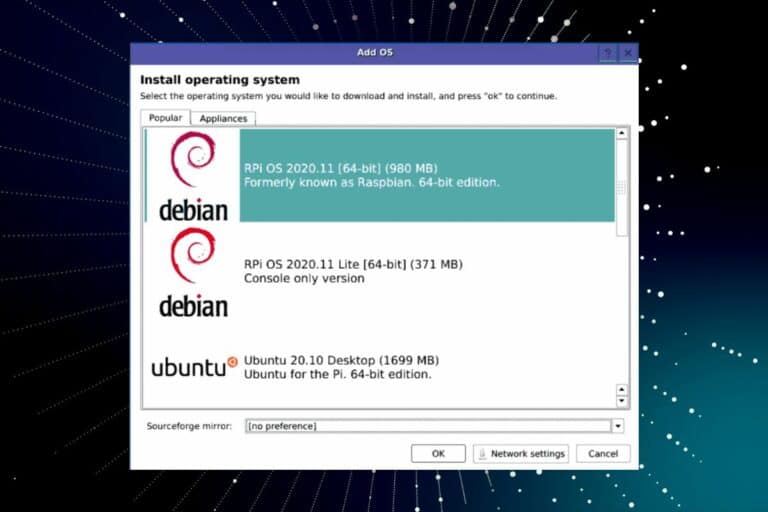
- Install Raspberry Pi OS or another distribution if needed (Ubuntu, DietPi, etc).
- Connect it to your network and Internet (via Ethernet or Wi-Fi).
You’ll also need to get its current IP address (check this article if you need help with this). - Do the system updates:
sudo apt update && sudo apt upgrade -y - Optional: use SSH to control your Raspberry Pi from your computer.
I generally do this, so I can copy/paste the commands from the documentation or tutorial I follow.
I’m testing this for you with a Raspberry Pi 4, running Raspberry Pi OS Bullseye (64-bit). You might notice some slight changes depending on your setup, but overall the installation process would be the same.
Download the free PDF, keep it open, and stop wasting time on Google.
Download now
Note: If you want to try it, Hyperion also has a custom distribution, named HyperBian. It’s a custom Raspberry Pi OS release with Hyperion pre-installed. It looks up-to-date, so it might be something to consider.
Install Hyperion
Here are the steps to install Hyperion on a Debian-based system:
- Open a terminal or connect via SSH.
- The first thing to do is to add the key for the Hyperion repository:
wget -qO- https://apt.hyperion-project.org/hyperion.pub.key | sudo gpg --dearmor -o /usr/share/keyrings/hyperion.pub.gpg - Then, you can add the repository to your sources list:
echo "deb [signed-by=/usr/share/keyrings/hyperion.pub.gpg] https://apt.hyperion-project.org/ $(lsb_release -cs) main" | sudo tee /etc/apt/sources.list.d/hyperion.list - Update the package list:
sudo apt update - Install Hyperion:
sudo apt install hyperion

If everything is going well, it will install all the required packages (including Hyperion) and give you some information once complete:

Take note of the URL shown there, as you’ll need it for the next step. In theory, it should be your Raspberry Pi IP address, accessed via the 8090 port (or 8091 if you already have a service running on the default port).
Download the free PDF, keep it open, and stop wasting time on Google.
Download now
You may also need to reboot your Raspberry Pi to complete the installation. Hyperion will enable SPI for you, just in case you need it with some of your lights later.
You can restart it with one command line:sudo reboot
Are you a bit lost in the Linux command line? Check this article first for the most important commands to remember and a free downloadable cheat sheet so you can have the commands at your fingertips.
Make sure it’s working properly
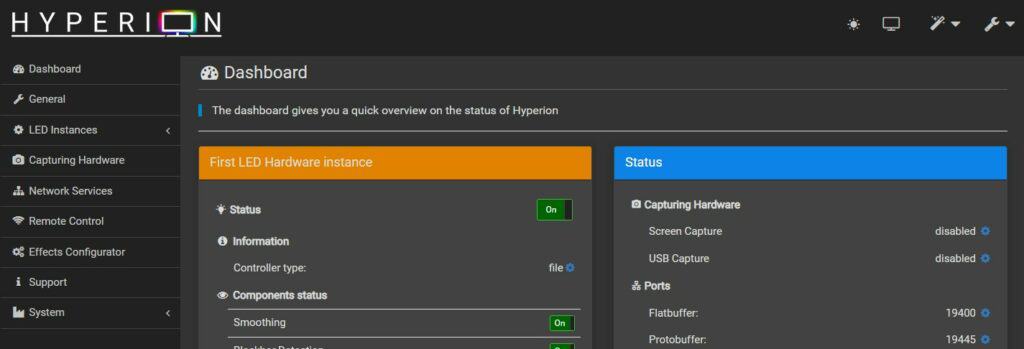
After the installation of Hyperion on your Raspberry Pi, you should be able to access the web interface at:http://<IP_ADDRESS>:8090You’ll now configure everything from here, so just make sure it’s working.
Download the free PDF, keep it open, and stop wasting time on Google.
Download now
You’re almost done. You can now browse the menu and configuration options, and then tweak anything you want. For example, you can switch to your native language by clicking on the wrench icon in the top-right corner.
If you enjoy learning about Raspberry Pi, you’ll feel right at home in the RaspberryTips Community. It’s a friendly group of makers helping each other grow. Join us today for $1 and see what it’s like inside.
Add your smart lights to Hyperion
Hyperion supports a large array of smart lights, so you should be able to connect to yours easily.
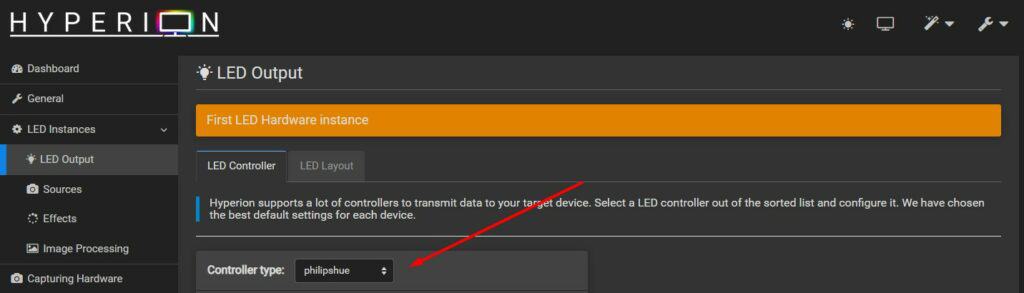
To add your LED to the interface, go to LED Instances > LED Output via the left menu, and select the type of controller you have.
Personally, I’m using Philips Hue smart lights, so I’ll share my experience with them. But the procedure with other brands should be similar. Obviously, if your lights are connected to the GPIO pins, there are a few additional steps, and each setup will be different.
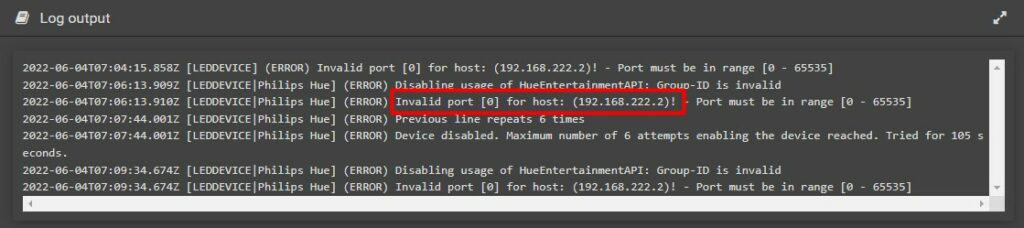
I first tested filling the form manually, but it didn’t work. I had an “Invalid port” error in the logs (by the way, you can check the logs under System in the left menu, it will be very useful to understand any issue you might have).
Download the free PDF, keep it open, and stop wasting time on Google.
Download now
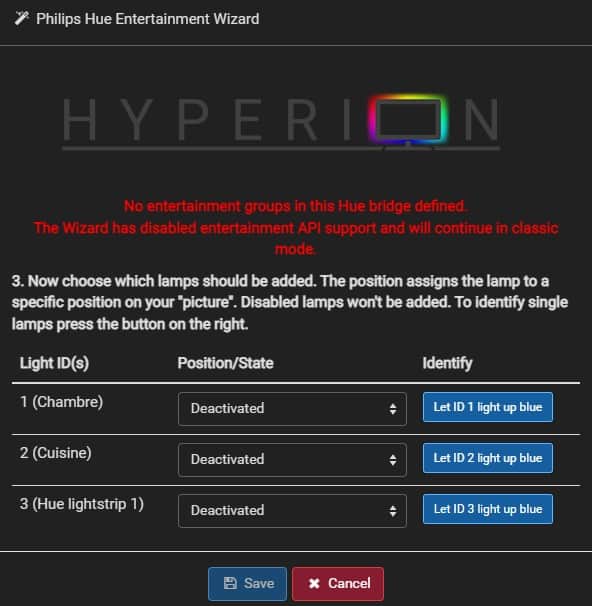
Then, I noticed that there was a wizard to connect Hyperion to my Philips Hue bridge.
This was way easier, it detected my controller automatically, I just had to press the button to allow the connection.
Once connected, my Light were available in the interface, and I just had to set their position to match my screen display colors.
The ideal setup is to have how light strip on each side of your monitor or TV.
You then have several choices to capture the media stream, depending on the hardware you use. Each setup is different, but basically, you need to configure it under “Capturing hardware” in the left main. It can be simple screen capture, or external devices, like a video capture device or even a camera.
You’ll find all the information to configure it your way on their official documentation. They also have a pretty active forum, so feel free to ask there if you are lost somewhere.
You can also watch the end of this video for a concrete example:
Whenever you’re ready, here are other ways I can help you:
Test Your Raspberry Pi Level (Free): Not sure why everything takes so long on your Raspberry Pi? Take this free 3-minute assessment and see what’s causing the problems.
The RaspberryTips Community: Need help or want to discuss your Raspberry Pi projects with others who actually get it? Join the RaspberryTips Community and get access to private forums, exclusive lessons, and direct help (try it for just $1).
Master your Raspberry Pi in 30 days: If you are looking for the best tips to become an expert on Raspberry Pi, this book is for you. Learn useful Linux skills and practice multiple projects with step-by-step guides.
Master Python on Raspberry Pi: Create, understand, and improve any Python script for your Raspberry Pi. Learn the essentials step-by-step without losing time understanding useless concepts.
You can also find all my recommendations for tools and hardware on this page.