Get Started With Matplotlib On Raspberry Pi (Easy install)
Python is preinstalled on Raspberry Pi OS, allowing us to build a lot of awesome projects with the Raspberry Pi. But the real power of Python on Raspberry Pi lies in the thousands of libraries available to extend its possibilities. Matplotlib is one that you can install to create visual representations. Let’s learn how.
Matplotlib can be installed on Raspberry Pi, as it’s available in the official repository. It’s a free Python library that allows us to turn mathematical series and equations into visual graphics.
I’ll start by introducing this powerful package to you, then show you how to install it and how to create your first graph in a few minutes. Don’t worry, if you have a minimal level with Python, it’s not that complicated, and you’ll like it.
If you’re like me and sometimes mix up syntax between programming languages, I’ve got just the thing for you. I’ve put together a Python cheat sheet with all the essential syntax in one place, so you can keep it handy and avoid any confusion. Download it here for free!
Introducing Matplotlib on Raspberry Pi
What is Matplotlib?
Matplotlib is a plotting library for the Python programming language. The goal is to turn a series of values into a visual representation that can then be displayed in a GUI (graphic user interface).
For example, you could monitor the temperature of the CPU on the Raspberry Pi, and display the last minutes’ evolution with a line plot instead of a list of values.
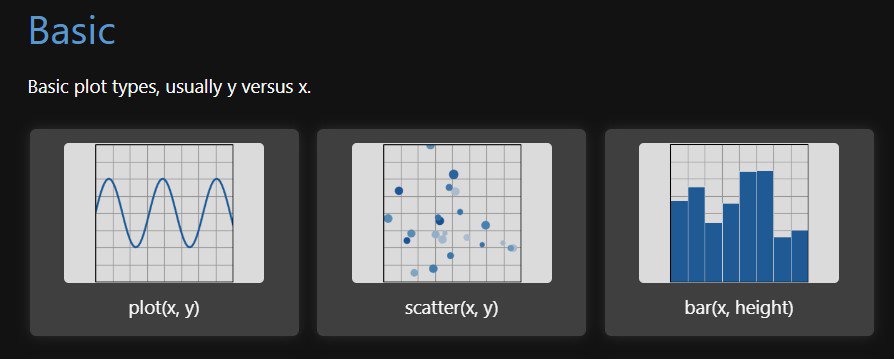
Matplotlib can be used to create different types of plots like:
- Line plots,
- Scatter plots,
- Bar charts and histograms,
- Etc.
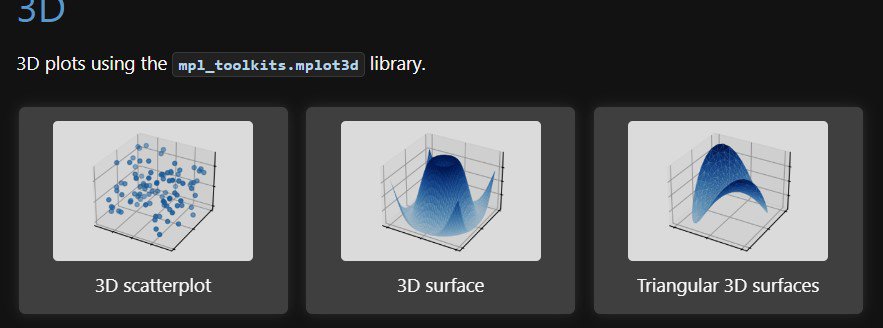
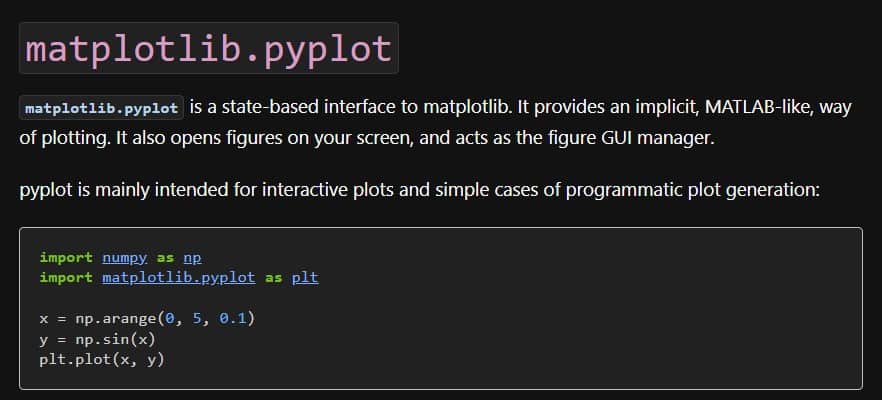
But you can also use it for more advanced representations, including 3D plots:
Check this: Don't buy a new SD card until your read this.
I won’t go into much more detail here, as it’s not the goal of this article. Just know that Matplotlib has excellent documentation available on their website (here) with a lot of examples. The Matplotlib community is big and active, so you should be able to quickly find a resource or someone to help you if needed.
Is Matplotlib preinstalled on Raspberry Pi OS?
Matplotlib is not preinstalled on Raspberry Pi OS. You can use Python directly, with many libraries already built-in, but Matplotlib is not one of them.
If you try to import the matplotlib library in your script on a brand-new installation, you’ll get an error:"ModuleNotFoundError : No module named 'matplotlib'"

So, before going any further, you’ll need to install the library on your system.
Can you install Matplotlib for Python on Raspberry Pi?
Matplotlib can be installed on a Raspberry Pi, either via APT (the operating system package manager) or via PIP (the Python package manager).
If like me, you always mix the languages syntax, download my cheat sheet for Python here!
Download now
I’ll explain how to install it in the next section. But for your information:
- Using APT is generally an easier solution for installation and maintenance, as it will automatically update with your system updates, and the package is built for your operating system and version.
- Using PIP will generally install a more recent version (often the latest release). So, with some projects, you’ll need to use it instead of APT.
For example, at the time of writing, Matplotlib 3.6.2 is available on their website and via PIP. But in the Raspberry Pi OS package manager, the latest version is Matplotlib 3.3.4, which was released almost 2 years ago.
Check this: 15 Easy Projects for Raspberry Pi Beginners
For simple projects, it doesn’t really matter, but keep this in mind if you find code samples that don’t work on your system.
How to install Matplotlib on Raspberry Pi
Here are the required steps to get started with Matplotlib on a Raspberry Pi:
- Install an operating system on the Raspberry Pi (Raspberry Pi OS is recommended).
- Install the Matplotlib library with APT or PIP.
- Create your first script with Matplotlib.
Let’s see how to do this.
Get Raspberry Pi OS
Raspberry Pi OS is almost built to use with Python, including all the applications and packages you need to get started quickly. This is why I recommend using it for this project.
It should work with other operating systems, but the commands might be slightly different, with more packages and dependencies to install first. If you are still new to Raspberry Pi or Python, just use Raspberry Pi OS with a Desktop.
I tested on the 64-bit edition of Raspberry Pi OS, and it worked fine, so it should be ok with any version.
If you need more guidance to install the operating system, you can read my tutorial on how to install Raspberry Pi OS here.
Before going any further, make sure:
You might also like: Yes, you can access your Pi from anywhere. Here's how.
If like me, you always mix the languages syntax, download my cheat sheet for Python here!
Download now
- Your system configuration (keyboard layout, Internet access, etc.) is completed.
- System updates are completed: you can either use the desktop notification or do them via the command line:
sudo apt update
sudo apt upgrade -y
sudo reboot - Depending on your setup, enabling SSH and following this tutorial from your computer can be easier, so feel free to do this now.
Once done, we are ready to start the installation of Matplotlib.
Are you a bit lost in the Linux command line? Check this article first for the most important commands to remember and a free downloadable cheat sheet so you can have the commands at your fingertips.
Install Matplotlib on Raspberry Pi OS
As mentioned earlier, the easiest way to install Matplotlib on Raspberry Pi OS is to use the system package manager: APT.
The package name is “python3-matplotlib” and can be installed via:sudo apt install python3-matplotlib
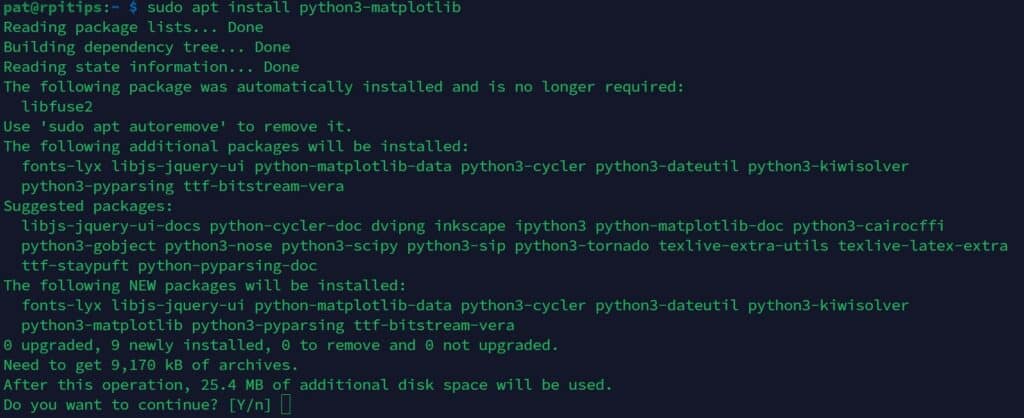
All missing dependencies will be installed automatically by APT, so you can just confirm the installation with “Y”.
Once done, the script I showed you previously, where I imported the matplotlib library, should work without producing an error anymore:
This is a quick test you can do to make sure the installation is complete.
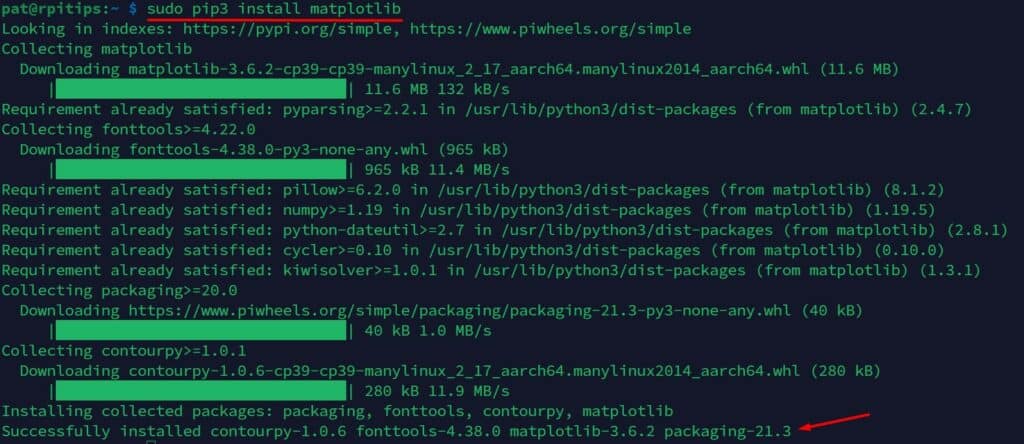
Note: if you prefer, you can use PIP to install matplotlib on your system, by simply using this command:pip install matplotlib
This way, you should get the latest version available. PIP will also install all the dependencies automatically.
Warning: If you have several Python versions installed on your system (like on old Raspberry Pi OS versions), you might need to specify for which version you want to install or use Matplotlib.
For example, “python script.py” and “python3 script.py” won’t necessarily produce the same result, as well as “pip install matplotlib” and “pip3 install matplotlib” won’t necessarily do the same thing.
Read these articles for more details about this issue (especially if you are using Buster):
– How To Install the Latest Python Version on Raspberry Pi?
– How To Check Which PIP Version Is Installed On Your System
– How to Install and Use Python Packages on Raspberry Pi?
Your first script with Matplotlib on Raspberry Pi
Now that Matplotlib is installed properly on your Raspberry Pi, let’s do a basic test to make sure it’s working as expected.
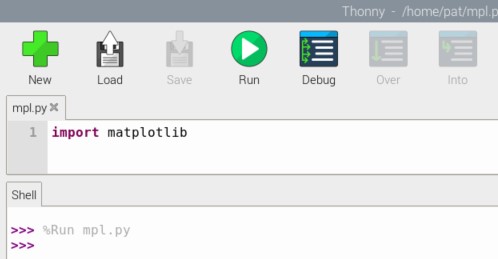
- Create a new file in your favorite Python editor (I’m using Thonny here, but you can use Nano, Geany or any of the good text editors available on Raspberry Pi OS).
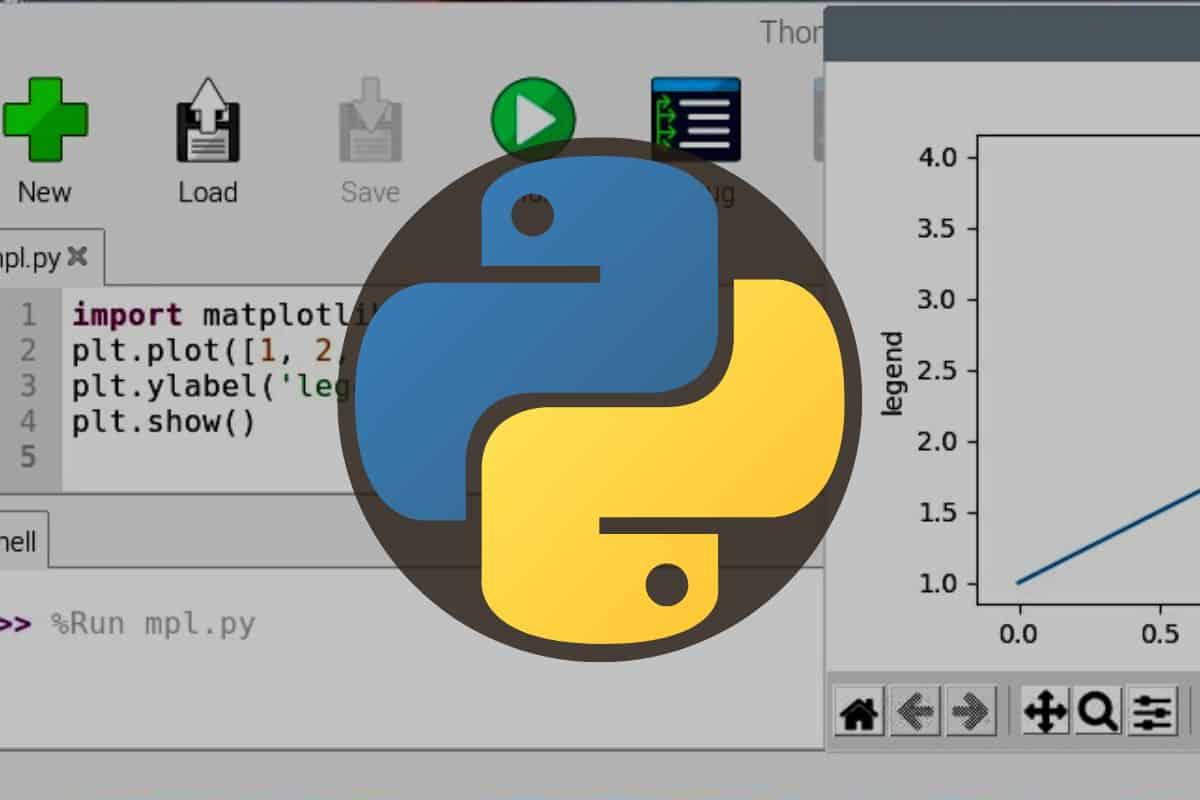
- Paste the following lines in this new script:
import matplotlib.pyplot as plt
plt.plot([1, 2, 3, 4])
plt.ylabel('legend')
plt.show() - Save the file.
- Run your script, either from Thonny directly (click on “Run”) or via the command line:
python3 myscript.py
Download the free PDF, keep it open, and stop wasting time on Google.
Download now
If everything works as expected, you should get something like the image below on your screen:
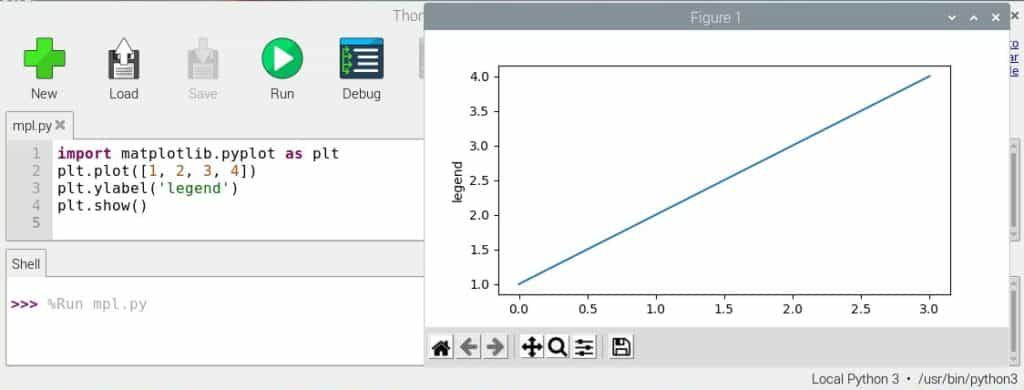
It’s probably the simplest thing you can do with Matplotlib, but you can see that with only 4 lines of code we can generate a decent visual representation of a series of values.
If you are still new to Python, I would start with basic things, as even in this simple example, there are already a few “advanced” concepts you need to understand in order to read the code I give you.
You can start with my tutorial for beginners here, but the most effective way to learn Python from scratch would be to read my e-book “Master Python on Raspberry Pi“, which will quickly teach you all the essentials (and only them), in a step-by-step process with many practice examples.
How to use Matplotlib on Raspberry Pi
Once Matplotlib is installed on the Raspberry Pi, you can use the same features as with any computer running Matplotlib, so you don’t really need specific guidance for Raspberry Pi.
As mentioned earlier, the official documentation is excellent. It has a lot of examples and detail on how to build each type of visualization, such as using a simple series like in the previous example, or relying on other popular libraries for more advanced data analysis (NumPy, etc.).

Here are the links I recommend to learn more about Matplotlib and to experiment with more advanced features:
- Start with the introductory tutorials, listed on this page.
You’ll learn how to improve the previous script and customize the output. - Switch to the examples tab once you have a good overview of the library.
Try a few different graphs, play with all the options and try to apply them to your needs. - Then there is the reference documentation that you can check to know all the details and possibilities of each function available in Matplotlib.
Getting started with Matplotlib can be challenging at first, but if you already have a decent understanding of Python, you’ll quickly get used to it. Don’t get overwhelmed by all the possibilities. It’s highly customizable, so there are a ton of options available, but start with simple things and improve from there.
It’ll definitely take some time to get used to it, but you’ll be proud of your results after that. Use the official website and the large community to your advantage.
If you prefer watching videos instead of reading tutorials, you’ll love the RaspberryTips Community. I post a new lesson every month (only for members), and you can unlock them all with a 7-day trial for $1.
Related questions
Can you use PIP to install Matplotlib on Raspberry Pi?
Matplotlib can be installed via PIP (Python package manager) on a Raspberry Pi with the command:pip install matplotlib
Download the free PDF, keep it open, and stop wasting time on Google.
Download now
Using PIP instead of APT will generally install a more recent version of the Matplotlib library.
Read next: 7 Surprising Uses for a Raspberry Pi
How to install NumPy on Raspberry Pi?
NumPy is a Python library (required for mathematical operations manipulating arrays) that is preinstalled by default on Raspberry Pi OS.
So, if you use the official operating system on your Raspberry Pi, it’s already installed for you. With other distributions, you can probably install it with your package manager or PIP.
On Debian-based distributions, it would be:sudo apt install python3-numpyOr:pip install numpy
If you installed Matplotlib, it’s likely already installed, as PIP and APT will do it automatically when you install Matplotlib.
How to install SciPy on Raspberry Pi?
SciPy is another library that is installed automatically with Matplotlib. So, if you followed this tutorial you already have it on your system.
If you want SciPy, you can install it the same way, with:sudo apt install python3-scipy
SciPy is a Python library for scientific computing and technical computing. It provides a collection of mathematical algorithms and functions for working with arrays, numerical optimization, signal and image processing, etc. It’s often used with Matplotlib.
You might also like: 7 Surprising Uses for a Raspberry Pi
How to install pandas on Raspberry Pi?
Pandas is a more advanced library for data science, data analysis and machine learning projects. It can be installed on a Raspberry Pi via:sudo apt install pyhton3-pandas
I hope this article answered your questions, and if you want to do more with Python on Raspberry Pi, here are a few articles I recommend reading next:
- How to Use Anaconda on your Raspberry Pi (Miniforge)
- 15 Fun Raspberry Pi Projects to Experiment with Python
- Get Started The Right Way With OpenCV On Raspberry Pi
- Should You Learn Linux or Python first?
Whenever you’re ready, here are other ways I can help you:
Test Your Raspberry Pi Level (Free): Not sure why everything takes so long on your Raspberry Pi? Take this free 3-minute assessment and see what’s causing the problems.
The RaspberryTips Community: Need help or want to discuss your Raspberry Pi projects with others who actually get it? Join the RaspberryTips Community and get access to private forums, exclusive lessons, and direct help (try it for just $1).
Master your Raspberry Pi in 30 days: If you are looking for the best tips to become an expert on Raspberry Pi, this book is for you. Learn useful Linux skills and practice multiple projects with step-by-step guides.
Master Python on Raspberry Pi: Create, understand, and improve any Python script for your Raspberry Pi. Learn the essentials step-by-step without losing time understanding useless concepts.
You can also find all my recommendations for tools and hardware on this page.