Install OpenCV on Raspberry Pi: The Only Guide You Need
OpenCV is often used to promote Raspberry Pi capabilities. Even if the Pi is an inexpensive piece of hardware, showing it with a camera, using artificial intelligence and electronics is pretty impressive. But before doing all of this, you have to set it up correctly, and it isn’t straightforward for beginners. That’s why I wrote this tutorial, to help you to get started with OpenCV.
The easiest way to install OpenCV on a Raspberry Pi is to use the package manager. But to get a recent version, using PIP is recommended, as the version available with APT is generally outdated.
Let’s start with a brief introduction to OpenCV and its main features, and then I’ll show you how to install it on your Raspberry Pi and create your first scripts with it.
If you’re like me and sometimes mix up syntax between programming languages, I’ve got just the thing for you. I’ve put together a Python cheat sheet with all the essential syntax in one place, so you can keep it handy and avoid any confusion. Download it here for free!
What is OpenCV?
OpenCV is an open-source library, compatible with languages like Python or C++, which allows you to build computer vision and machine learning projects.
By the way, CV stands for “Computer Vision”. In short, it’ll provide you with interesting functions to manipulate images and videos. If you are reading this, you have probably already seen some cool projects using it.
Typical examples of OpenCV use are image manipulation (I’ll give you some basic code to do this later), object detection (recognizing a specific type of object, like a face or pet), or object tracking (a robot can follow you, for example).
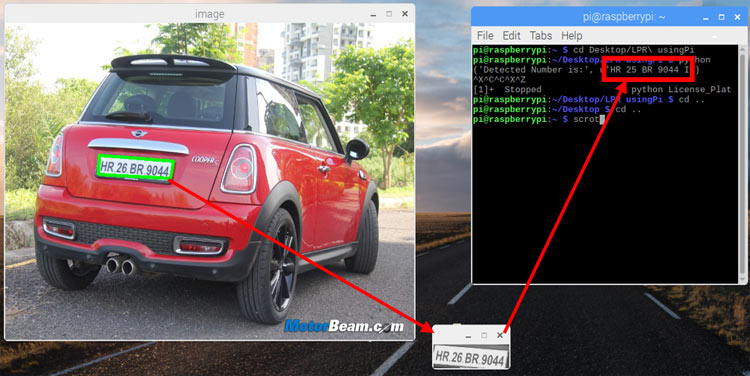
A classic OpenCV project will use other features from the Raspberry Pi, like the camera module and the GPIO pins. You can for example have the camera detect when your car shows up in front of the garage (object detection), find the license plate, and read the number on it (text recognition). If it matches, you can send a signal to the GPIO pins (or a smart device) to open the garage door.
Well, this is not exactly the easiest project to get started with OpenCV, but it gives you an idea.
Install OpenCV on Raspberry Pi
In this section, I’ll show you two different ways you can install OpenCV on Raspberry Pi OS.
Get Raspberry Pi OS
The easiest way to use OpenCV on Raspberry Pi is to use the official operating system: Raspberry Pi OS. It comes with Python preinstalled, so you’ll just need to add the OpenCV library before creating your first script.
If you need some help installing Raspberry Pi OS, you can click on the link to read my tutorial where I explain everything step-by-step. A desktop version is probably better, as we’ll test it with images and the camera module, but pick whatever version makes sense for you.
Whether you are installing it from scratch, make sure you do the following steps before going further:
- Connect to the Internet (via Ethernet or Wi-Fi).
- Do the system updates:
sudo apt update
sudo apt upgrade - Enabling SSH and/or VNC is probably a good idea if you want to follow this tutorial from your PC directly.
Once ready, you can move to the OpenCV installation.
Read next: The 5 fastest web browsers for Raspberry Pi — tested and ranked!
If like me, you always mix the languages syntax, download my cheat sheet for Python here!
Download now
Method 1 – Install OpenCV via APT
Installing OpenCV on Raspberry Pi OS can be done with apt directly. Open a terminal and type this command:sudo apt install python3-opencv
I’ve seen many tutorials where they do the installation from the source code, but it’s pretty complicated, and you don’t need to install it that way anymore. This command will install all the dependencies, and it will work directly after that.

I’m going to use Python for this tutorial, as it’s the easiest way to start (everything is ready for Python on Raspberry Pi OS), but OpenCV can also be used with other languages. For example, install libopencv-dev instead to use it with C++.
Once OpenCV is installed on your Raspberry Pi, let’s do a quick test to make sure it’s working as expected. Create a new file and copy the following lines into it:import cv2
print(cv2.__version__)
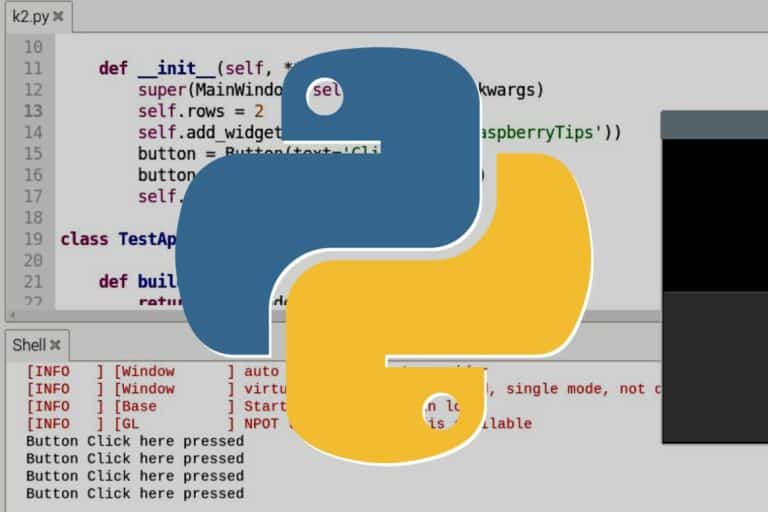
When you run this script, it should display the current OpenCV version installed on your system:
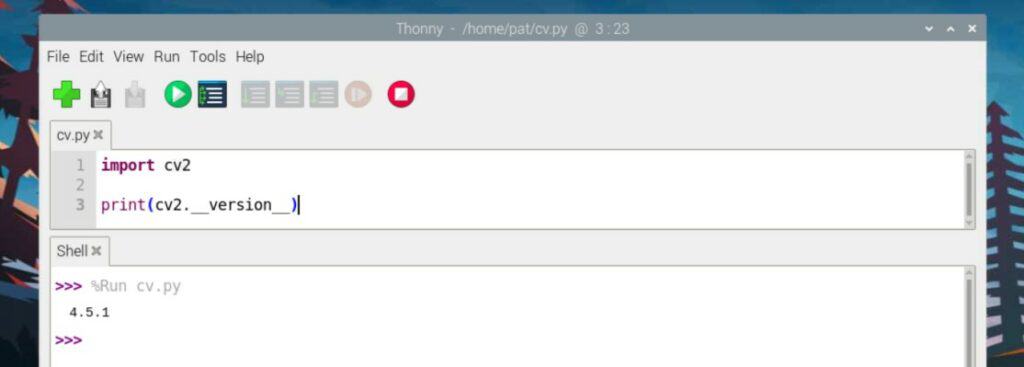
I’m using Thonny as it’s preinstalled on Raspberry Pi OS, but you can do the same test in a terminal, via SSH, or on Raspberry Pi OS Lite if you like. Create the file with nano and run it with:python3 <yourscript.py>

If you get the version number on your screen, you are ready to start using OpenCV.
The issue with this method, however, is that you’ll most likely get an outdated version of OpenCV. Check out the next method to learn how to install something more recent.
Are you a bit lost in the Linux command line? Check this article first for the most important commands to remember and a free downloadable cheat sheet so you can have the commands at your fingertips.
Method 2 – Use PIP to Install OpenCV
Note: Before we get the latest version, it’s best practice to avoid mixing when we can. So if you already installed OpenCV by following the previous method, remove it with APT before anything else:sudo apt remove python3-opencv
As of this update, the version of OpenCV available via APT is 4.10.0 (released in 2024), while the latest version available on the official website is 4.12 (released in summer 2025).
If you use APT to install OpenCV, you won’t get the latest version with bug fixes and improvements. You may also find incompatibilities with other libraries you’ll be using with OpenCV.
That’s why creating virtual environments, especially when working in Python, is now the recommended way to install libraries like OpenCV. Virtual environments prevent conflicts by maintaining isolated and independent sets of libraries and dependencies for each project.
To get the latest version of OpenCV, we’re going to install it inside a Python virtual environment. Here’s how:
If like me, you always mix the languages syntax, download my cheat sheet for Python here!
Download now
- Install venv if you don’t already have it:
sudo apt install python3-venv - Make a directory to store your Python projects:
mkdir python_projects - Create a virtual environment inside this directory:
cd python_projects
python3 -m venv myproject1 - Activate your virtual environment:
source myproject1/bin/activate
Notice the new prefix on your terminal prompt. It means all Python commands you run from there will only apply to that virtual environment.
- From inside this environment, install the latest version of OpenCV using pip:
pip install opencv-python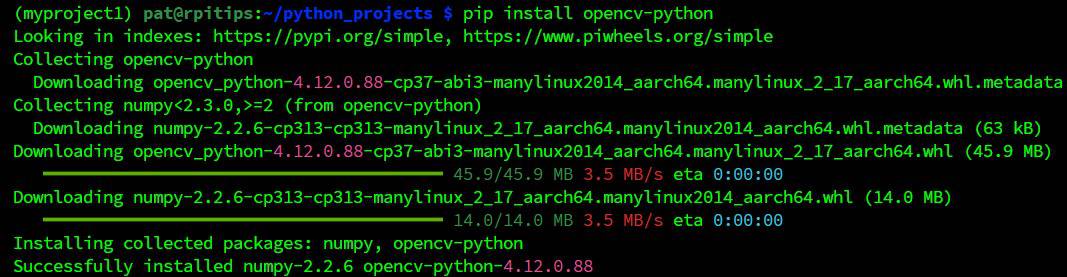
It might take a while depending on your hardware and system version, so be patient. It took a few seconds on my Pironman setup (RPI OS 64), but it took 10+ minutes on my fresh installation with Raspberry Pi OS 32-bit.
If you get an error, you might need to run this command to upgrade pip and wheel:pip install --upgrade pip setuptools wheel
Then run the installation again:pip install opencv-python
And if you still get an error after that, it’s probably because you tried to install a version that is too recent and not yet compatible with your system. In this case, you can try to specify an older version with something like:pip install opencv-python==4.11.0.86
A list of versions you can install with pip is available here.
Now how do you run OpenCV code from inside this virtual environment? You can do it either from the command line or a graphical IDE like Thonny.
To test if the latest OpenCV version is working from the command line:
- Create a file in your new virtual environment directory:
nano test.py - Paste these lines in:
import cv2
print (cv2.__version__) - Run the code:
python3 test.py
To test if the latest OpenCV version is working from Thonny:
- Load your virtual environment by changing the interpreter with the bottom-right menu.
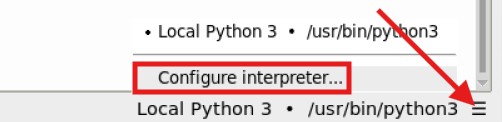
- Navigate to the directory with your virtual environment, go into its “bin” folder, and select the “python3” file. Hit OK.

- Now you can write your code in Thonny. Paste these lines in:
import cv2
print(cv2.__version__) - Press the Run button.

Whichever method you choose above, if you see an output showing you the newest version of OpenCV, success!
3 Examples to Get Started with OpenCV on Raspberry Pi
The main goal of this tutorial was to get OpenCV working with Python, but as a bonus, I’ll also show you three examples next to go a bit further.
First Script: Manipulate Images with OpenCV
Most projects using OpenCV are based on image manipulation. It could either be pictures stored on your computer or a live stream from a camera. OpenCV is pretty useful to load them in a script, change something and display or analyze them after that.
If you are entirely new to Python, I highly recommend reading this article first, where I explain the basics of Python on Raspberry Pi. I also think reading my book “Master Python on Raspberry Pi” is almost mandatory before trying any project with OpenCV if you don’t want to get lost quickly.
But anyway, if you have a minimal amount of experience with Python, here are a few methods you can try to get a sense of what OpenCV can do.
Download the free PDF, keep it open, and stop wasting time on Google.
Download now
The first test you can do is to load a picture saved on your Raspberry Pi (it works with JPG and PNG files).
You can do this with:cv2.imread(<filename>)
Once the picture is loaded, you can use various functions included in the OpenCV library to get more data about the file, like its dimensions for example:
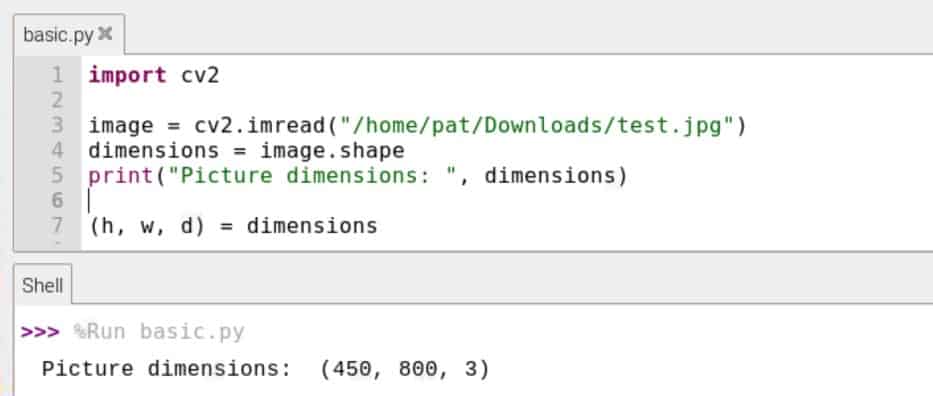
You can show the picture on the screen, by using:cv2.imshow(<window title>,<image>)Something like:
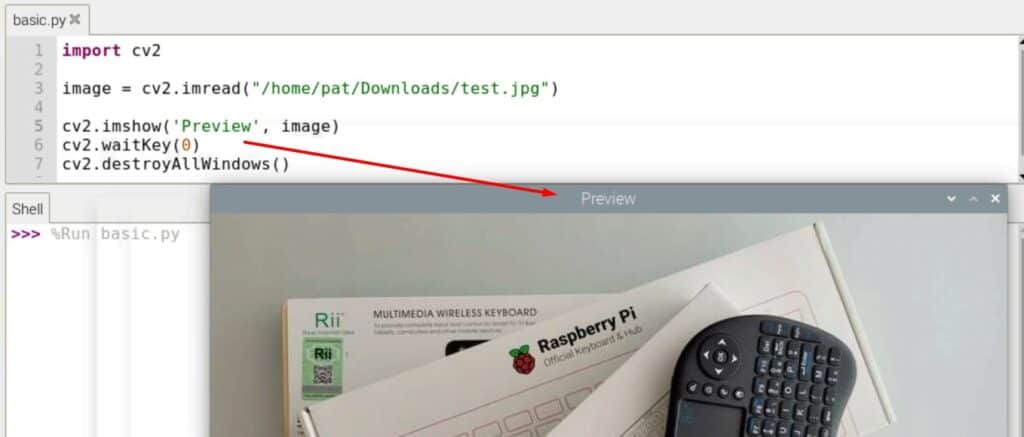
The two lines after that are used to keep the window open until you press a key. If you press “Space” for example, it will close the picture and the script will continue.cv2.waitKey(0)
cv2.destroyAllWindows()
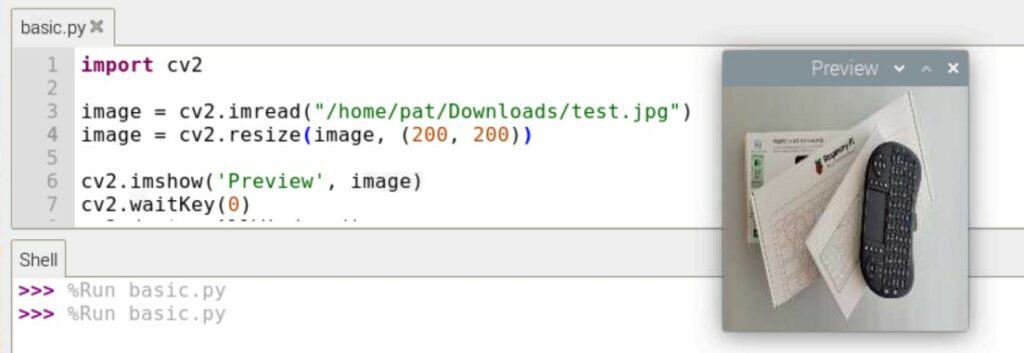
Another useful function is the “resize” method.
You can either resize the picture to a specific size (like 200x200px in this example):cv2.resize(image, (x, y))
Or use a coefficient, like 50% of the original size in this example:cv2.resize(image, (0, 0), fx=X, fy=Y)
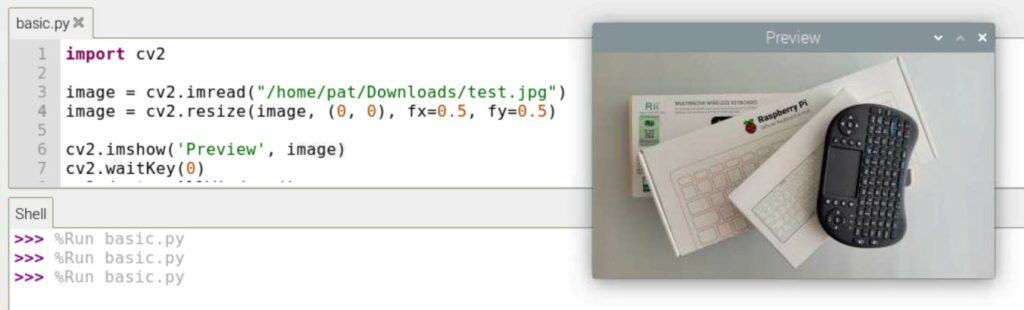
Using 0.5 means the new image will be 50% of the original size. You can use a different coefficient for width (X) and height (Y).
Finally, you can store the modified image somewhere on your Raspberry Pi, by using the “imwrite” function, like this:cv2.imwrite(<filename>, image)

Just make sure to use the same file extension and that you have access to the specified location.
These functions are a good introduction to make sure OpenCV is working properly on your system, and get used to the features you’ll use in most projects. But OpenCV can then be used with artificial intelligence (machine learning especially), the camera module, and GPIO pins to build impressive Python projects. Let’s introduce two of them.
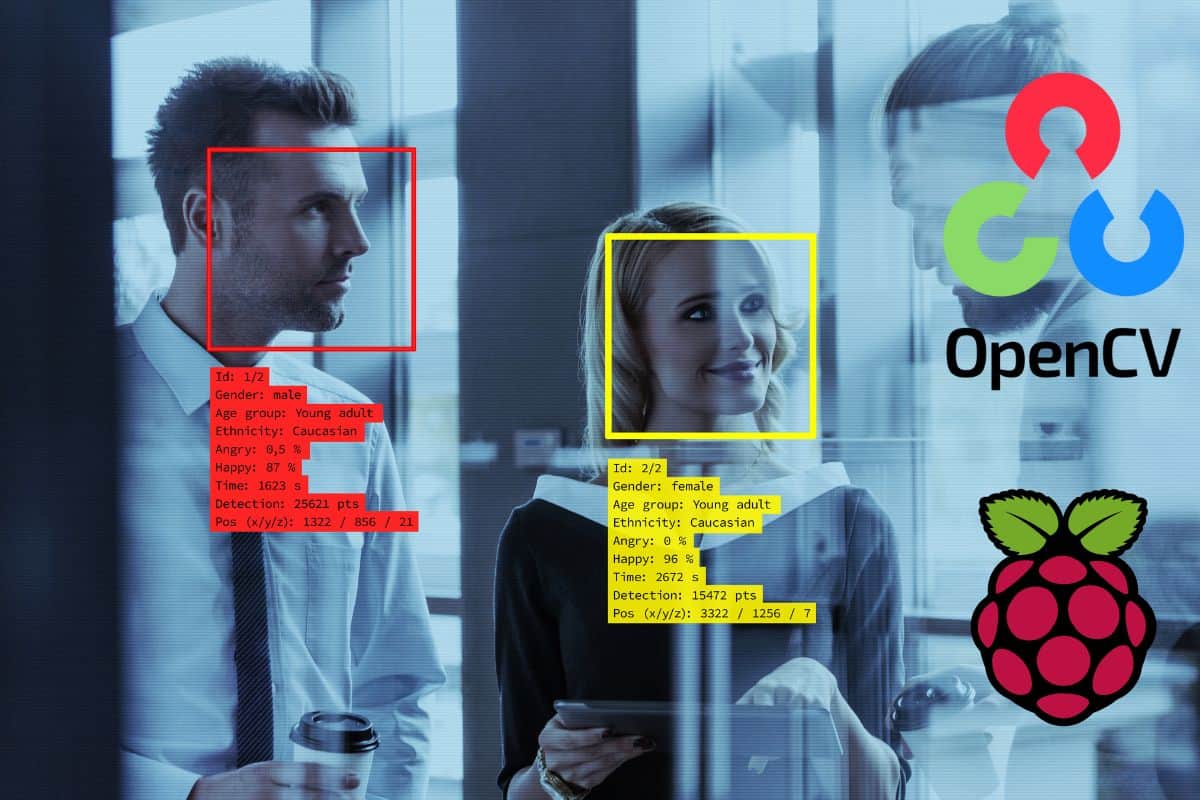
Face Recognition: Use the Raspberry Pi Camera
If you don’t have a camera installed on your Raspberry Pi yet, check out my guide here.
In short, the idea for this kind of project is to constantly check the camera module stream on the Raspberry Pi, and do something when a face is detected. Once trained correctly, OpenCV can not only detect a face on the camera but also recognize who it is.
Basically, you take 10 to 20 pictures of your face with the camera from various angles and then train OpenCV, so it can recognize you in a live stream. This makes many interesting projects possible, where you can code your Raspberry Pi to do something when you show up.
That was one of the examples given with the PiCar-X robot kit I tested recently. You can find the script they use to do this on the SunFounder documentation. It will draw a rectangle around the detected face, but you can do anything from there.

Download the free PDF, keep it open, and stop wasting time on Google.
Download now
The best tutorial I have found to go a bit further on a Raspberry Pi is this one from Tim on Core Electronics. You can follow the steps or download the code for the full project directly (so you can test even if not everything is clear for you).
The idea of this simple project is to start a servo motor when his face is detected, but it can be anything (playing music? Turning the lights on in your house? There is no limit).
Object Detection/Identification
Another fun project you can try is object detection or tracking. It’s basically the same idea, but instead of detecting a face, you’ll try to identify the objects on a picture (or camera stream).
If your Raspberry Pi is mounted on a robot kit, you can even program it to follow this object (that is possible with the Robot Dog kit I also tested on this website). You have a red ball that you can throw, and the robot will follow it.
Read next: 7 Surprising Uses for a Raspberry Pi
To get started, I find that this tutorial is pretty good to give you a sense of the possibilities. As with the previous project, you can either follow it step-by-step to try to understand everything or just run the full script to see it in action.
I have many other Python projects listed here if you want to experiment fun things with your Raspberry Pi. And let me know if you need more help with OpenCV, I can write step-by-step tutorials if you are interested.
If this project doesn’t work as expected on your setup, don’t worry. You can get help directly from me and other Pi users inside the RaspberryTips Community. Try it for $1 and fix it together.
FAQ: OpenCV on Raspberry Pi
How to Check if OpenCV is Already Installed on Raspberry Pi?
To check if OpenCV is installed, go to Add/Remove software and search for “OpenCV”. If some packages are installed, there will be a checkbox checked on the left. This command can also be used to list the OpenCV packages installed:sudo dpkg -l | grep "python-opencv\|python3-opencv"

Can I Use OpenCV with C++?
OpenCV developers are building it with C++, so OpenCV can be used with most languages, including C++, Java, and Python. On a Raspberry Pi (with any Debian-like distribution), OpenCV can be installed for C++ with:sudo apt install libopencv-dev
You can then start your script with:#include <opencv2/opencv.hpp>to use OpenCV in a C++ script.
Read my article about C++ on Raspberry Pi if you need help getting started.
How Much Memory Does OpenCV Need?
1 GB memory should be enough for most projects using OpenCV on a Raspberry Pi.
You might also like: Do this to keep a full backup of your Raspberry Pi
Obviously, the amount of memory you need will depend on what your program does (analyzing a high-quality video stream in real-time doesn’t need the same amount as resizing a small picture), but any Raspberry Pi model should be sufficient for most projects.
It may also vary depending on the distribution you use, and other applications
Whenever you’re ready, here are other ways I can help you:
Test Your Raspberry Pi Level (Free): Not sure why everything takes so long on your Raspberry Pi? Take this free 3-minute assessment and see what’s causing the problems.
The RaspberryTips Community: Need help or want to discuss your Raspberry Pi projects with others who actually get it? Join the RaspberryTips Community and get access to private forums, exclusive lessons, and direct help (try it for just $1).
Master your Raspberry Pi in 30 days: If you are looking for the best tips to become an expert on Raspberry Pi, this book is for you. Learn useful Linux skills and practice multiple projects with step-by-step guides.
Master Python on Raspberry Pi: Create, understand, and improve any Python script for your Raspberry Pi. Learn the essentials step-by-step without losing time understanding useless concepts.
You can also find all my recommendations for tools and hardware on this page.