
RPI OS: How to add a printer on your Raspberry Pi? (CUPS)
Adding additional drivers on Linux has always been difficult, particularly installing printers.
As our Raspberry Pi runs on Raspberry Pi OS (a Debian-like distribution), it’s almost the same.
You’re lucky if you plug your printer in, and it works immediately. I’ll explain how to do it correctly in this step-by-step tutorial.
The easiest way to install a printer on Raspberry Pi OS is to turn it into a print server. CUPS is a service that can be used to install printers and share them on the network. This works for almost all printers.
I’ll show you how to install CUPS and your printer model in this post.
Note: if you have a 3D printer, you should also read this tutorial about the applications you can use on Raspberry Pi.
If you’re feeling lost in all the Raspberry Pi jargon, I’ve got something to help you out. I’ve created a free glossary that explains all the essential terms and abbreviations in a way that’s easy to understand. It’s a great resource to have by your side. Get your free copy here.
Prerequisites to Install a Printer on Raspberry Pi
Turning your Raspberry Pi into a network printer is a lesser-known project that you can actually build quite easily. In this section, let’s make sure you have everything ready before we start.
Prepare the Raspberry Pi
You’ll need a Raspberry Pi to follow this tutorial, but the procedure is almost the same on any Debian-like distribution.
Try to prepare it with the following steps:
- Install Raspberry Pi OS on your Raspberry Pi.
Choose the version you prefer. You can follow this tutorial with both versions.
The full version allows you to access CUPS in local, so it may be faster. - Update your system: Open a terminal and type those commands:
sudo apt update
sudo apt upgrade
On a desktop version, you can check the notification icon or use the Add/Remove Software tool to update all repositories and packages. - Enable SSH or VNC to follow this tutorial from your computer.
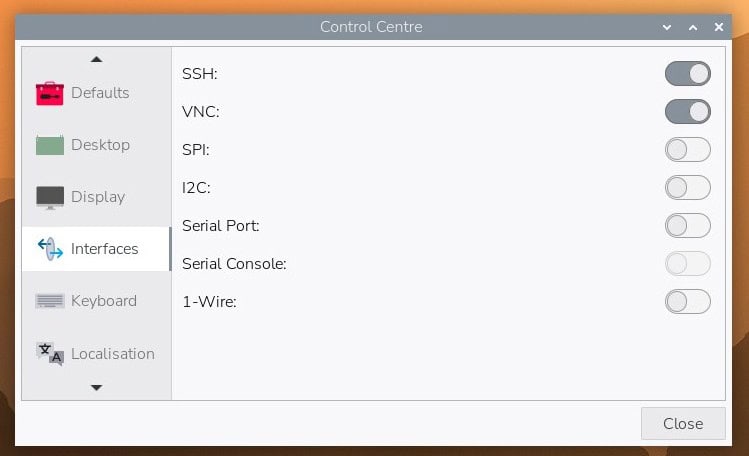
SSH is the protocol allowing access to the command lines remotely, while VNC gives you full access to the desktop interface.
You can click on the links to get more details about each option.
That should be enough for the Raspberry Pi preparation.
Check this: Pi5 vs. Pi4: I tested them, here's the result
Are you a bit lost in the Linux command line? Check this article first for the most important commands to remember and a free downloadable cheat sheet so you can have the commands at your fingertips.
Get the Printer Ready for Installation
We’ll install your printer on your Raspberry Pi. Before anything else, you have to collect all the needed information and prepare it for the installation:
- For a USB Printer:
- Turn the printer ON.
- Plug it into your Raspberry Pi.
- For a Network Printer:
- Turn the printer ON.
- Make sure the printer is available on the network.
- You can check this on your computer.
- In any case, take note of the manufacturer and the exact model, to install the driver later.
Install CUPS on Raspberry Pi
Here are the required steps to install a printer with CUPS on a Raspberry Pi:
If you are lost in all these new words and abbreviations, request my free Raspberry Pi glossary here (PDF format)!
Download now
- Install the “cups” application with the package manager.
- Allow remote access to the CUPS web interface.
- Use the web interface to install the new printer.
We’ll now see how to do this in detail, but first, let’s start with a brief introduction to this tool.
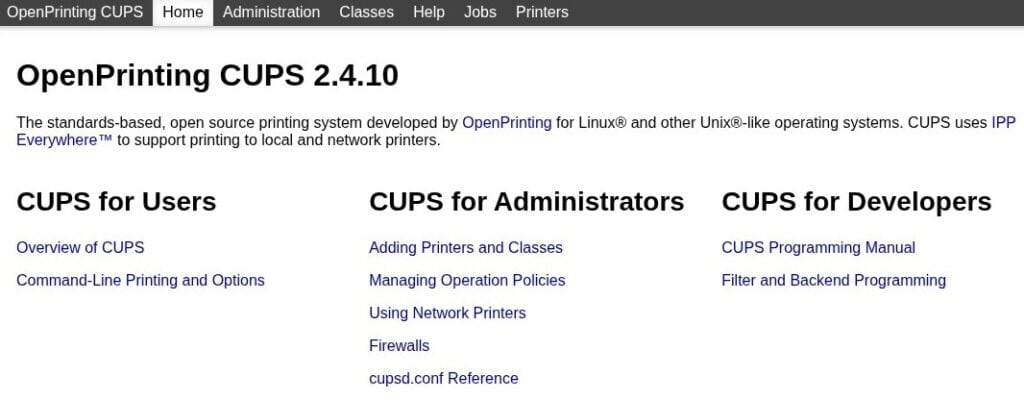
What is CUPS?
CUPS stands for Common Unix Printing Standard.
Developed by Apple for macOS, it brings support for printers in the Linux world.
CUPS uses IPP (Internet Printing Protocol) to manage local and network printers.
It’s the main way, maybe the only one, to install a printer on Linux systems.
So we want to install it on the Raspberry Pi to help us to configure our printer.
CUPS Installation
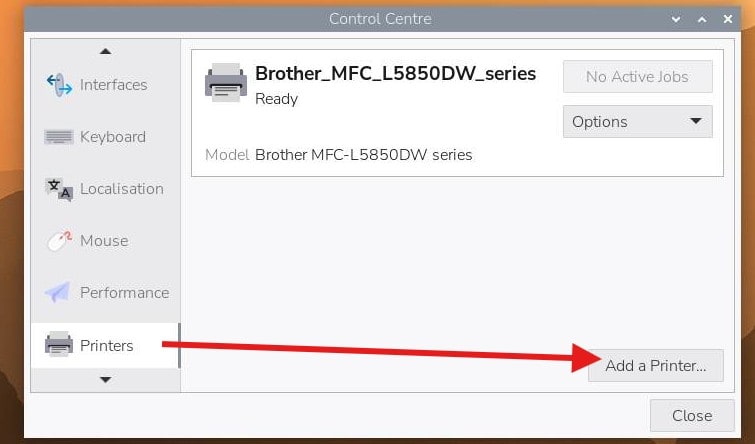
On recent releases of Raspberry Pi OS with Desktop, CUPS is now preinstalled. So if you just installed the desktop version, you shouldn’t need to follow this installation step. If you have the “Printers” tab under the Control Centre tool, you are fine.

You can even try to use this tool directly instead of following the complete tutorial. The most recent Raspberry Pi OS update has even added a new printer management app that should make this even easier.
I’m writing this tutorial so anyone with any system version can follow it. But for a desktop user, it might be a bit tricky and the “Print Settings” tool is probably more intuitive.
Anyway, if you use the Lite version or want to make sure CUPS is installed, the installation process is straightforward as the package is available in the Raspberry Pi OS repository:sudo apt install cups
Type Y when asked to continue the installation process.
There are many dependencies, so it can take a few minutes on the Raspberry Pi.
If you are lost in all these new words and abbreviations, request my free Raspberry Pi glossary here (PDF format)!
Download now
At this step, with the Raspberry Pi OS Desktop version, you should already have access to the CUPS web interface at http://localhost:631.
But for remote access, we need to edit the configuration file.
CUPS Configuration
This step only required if you use the Lite version or another distribution.
The main configuration file is available at /etc/cups/cupsd.conf.
Follow these steps to adjust the configuration:
- Open the configuration file:
sudo nano /etc/cups/cupsd.conf - Find this line:
Listen localhost:631 - Replace with this one:
Port 631
CUPS will now listen on the port 631 no matter which IP address is used in the web browser.
The goal being to be able to access it from your computer. But it’s not enough, as there are other security measures in place. - We need to allow access from any computer on the network.
To do this, find these groups and add the Allow @local directive inside all of them: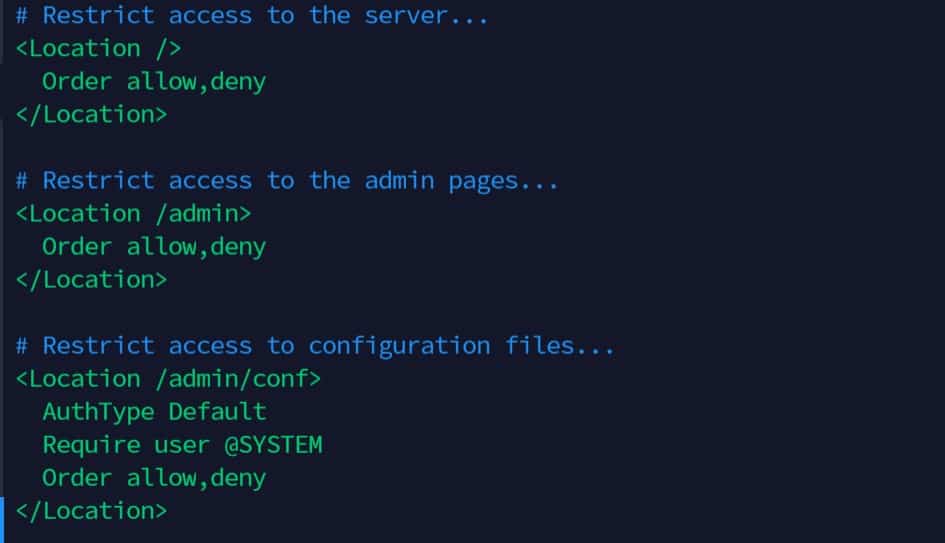
<Location />
  Order allow,deny
  Allow @local
</Location>

# Restrict access to the admin pages...
<Location /admin>
  Order allow,deny
  Allow @local
</Location>

# Restrict access to configuration files...
<Location /admin/conf>
  AuthType Default
  Require user @SYSTEM
  Order allow,deny
  Allow @local
</Location>
- Save and exit (CTRL+O, CTRL+X).
- The last step is to restart the CUPS service to apply changes:
sudo systemctl restart cups
You can now access the web interface from any computer on the network:http://<IP>:631
If you have a firewall on your Raspberry Pi (iptables or ufw for example), you also need to allow access on port 631.
Add Your Printer
Allow the Default User to Add a Printer
To install a printer, we need administrative rights on CUPS.
To do this, we need to log in with a user listed in the lpadmin group.
As CUPS is now preinstalled on Raspberry Pi OS, this step is not necessary on a desktop release. You just need to do it when using a Lite version.
Here is the command to make sure the default user is allowed to install a new printer with CUPS:sudo usermod -a -G lpadmin <user>For example:sudo usermod -a -G lpadmin pat
That’s all we need, our current user is now in the lpadmin group, and so can use CUPS.
Download the free PDF, keep it open, and stop wasting time on Google.
Download now
Check this: Do this to keep a full backup of your Raspberry Pi
Use HTTPS
To add a printer, CUPS may ask you to use HTTPS instead of HTTP (as there is an authentication step). So now switch on the HTTPS URL: https://<IP>:631.
You’ll get a security warning from your browser.
We don’t have a certificate, so accept this warning and continue to the CUPS web interface.
Add the Printer
We can now add the printer using the CUPS interface.
- Open the CUPS web interface: https://<IP>:631
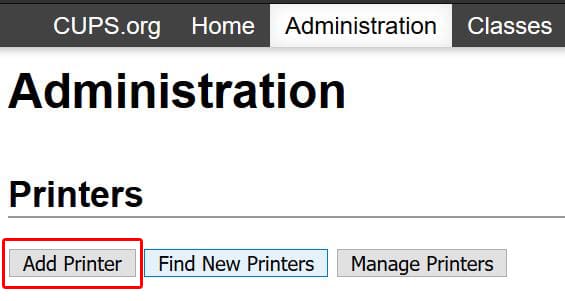
- In the top bar menu, click on the “Administration” menu.
- Then click on Add printer:
- CUPS will ask you for a login and password.
Use the credentials for your system, the same as on Raspberry Pi OS (“pat” in my case).- Once logged, you see a list of printers like this:
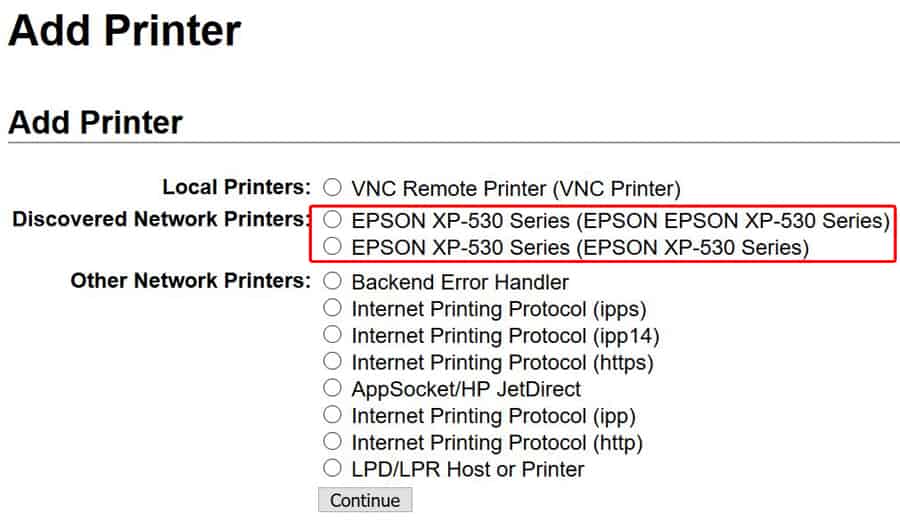
CUPS should have already found your printer on the network, or if plugged in.
Select the printer you want to install and click “Continue”.
- Once logged, you see a list of printers like this:
- In the next step, CUPS asks you to set the printer properties, like name and description:
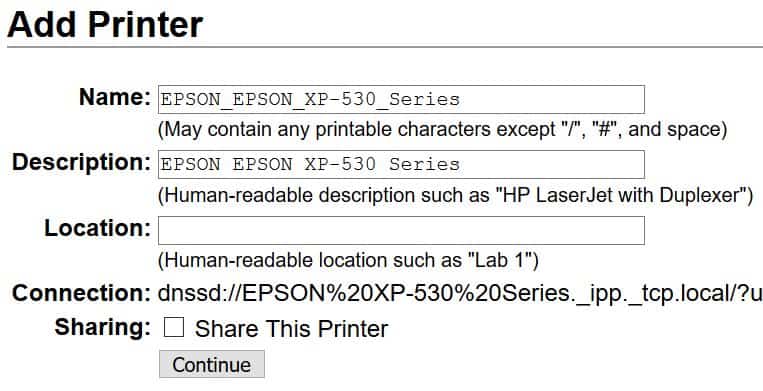
Don’t forget to check the “Sharing” box to share this printer on the network for others computers. - Then you need to select the corresponding driver for your printer:
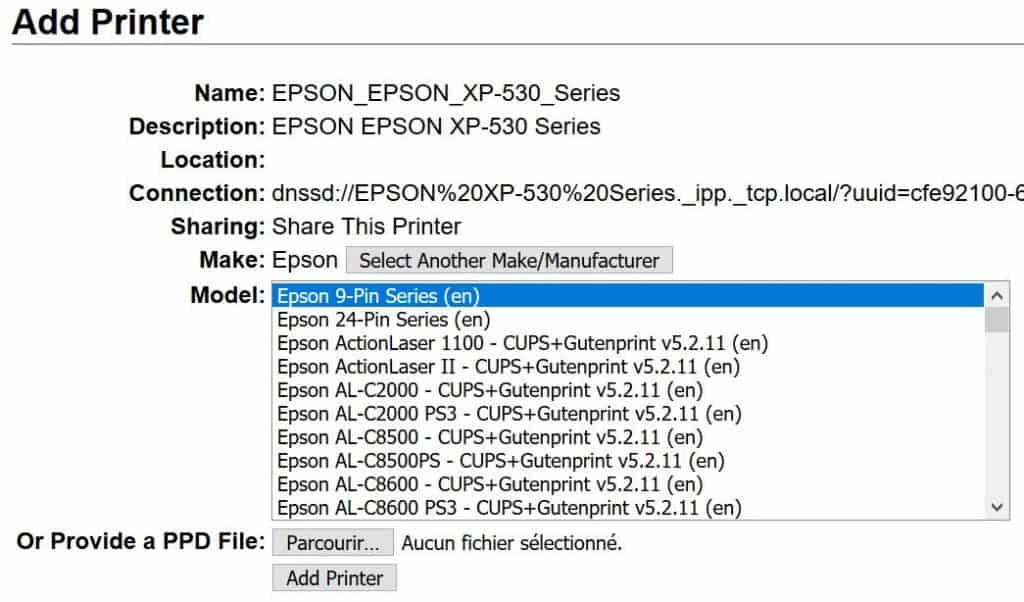
If the specific driver is not available, take a similar one, or upload a PPD file from the manufacturer if you have one.
Finally, click on “Add Printer”. - In the last steps, it asks you to configure the printers settings.
You may have several tabs to fill: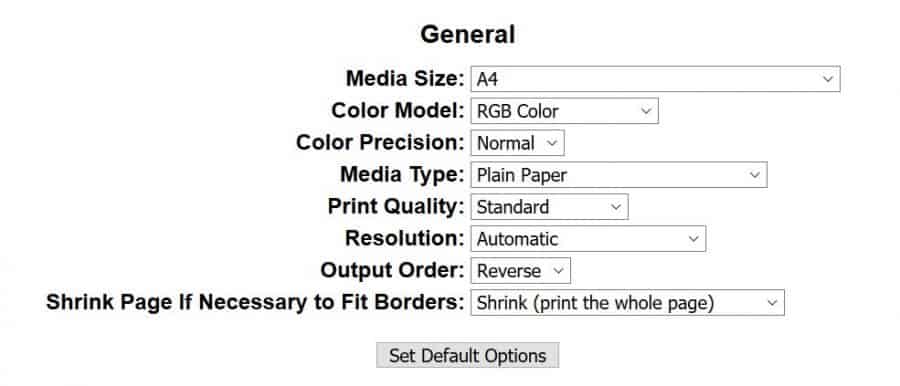
Leave this all by default and come back later if you need to make some changes.
Click on “Set Default Options” and that’s it, the printer is installed in CUPS.
Test Page
From CUPS
Directly in CUPS, in the printer page (you should be there), you can print a test page and see if everything works well.
In the “Maintenance” drop down, choose “Print Test Page”.
You printer will print the CUPS test page, so you can check that everything seems OK.
From Another App
Now that you installed the printer in the CUPS interface, you can use it from any application on your Raspberry Pi.
For example, in the LibreOffice Writer application, I now have my printer in the Print menu: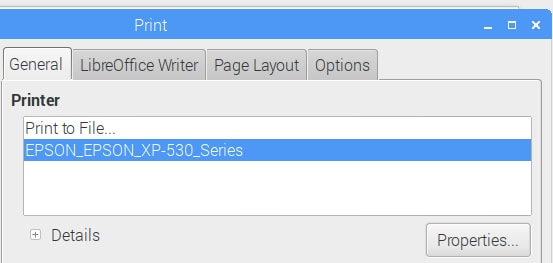
Download the free PDF, keep it open, and stop wasting time on Google.
Download now
So I can select it, and print a test page from here too.
Print from Another Computer
CUPS is not only a way to install printers easily but it’s also a print server to share printers on the network. If you check the box “Share this printer” during the installation, you can print from another computer, using CUPS.
To do this, you need to install samba.
Follow these steps:
- Install the samba package:
sudo apt install samba
Samba is a service to share files on Linux, and it’s also useful to share printers. - Access the default share on your Raspberry Pi.
For Windows users, type this address in your file explorer:
\\<IP>\ - You should see your printer in this folder:
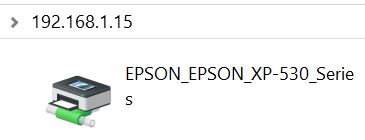
- Double-click on it to install it on your computer.
While there is no point in doing that on a Windows computer for a network printer, it can be useful to turn your old USB printer into a network printer.
Once configured in CUPS, you can use it from any device on the network, even if it’s not a network printer.
It can also be faster with several Linux/Mac on the same network.
Install CUPS and the printer on the first, and just link the shared printer to the others.
If you enjoy learning about Raspberry Pi, you’ll feel right at home in the RaspberryTips Community. It’s a friendly group of makers helping each other grow. Join us today for $1 and see what it’s like inside.
Video
You now know how to install any printer on your Raspberry Pi.
The trick is often to find a Linux version of the driver for your specific version. The best way to find them is to use Google and search for something like “MODEL linux driver“. Even if they try to push the full suite for Windows users by default, they generally have the Linux driver hidden somewhere on their website. For EPSON, you can also use this page for example.
There are some funny projects where you’ll need a printer so this guide might be handy.
I remember a cool photo booth for example. You take a photo and the Raspberry Pi prints it automatically.
I think it’s in my list of 20 projects for your kids if you want to check it.
Whenever you’re ready, here are other ways I can help you:
Test Your Raspberry Pi Level (Free): Not sure why everything takes so long on your Raspberry Pi? Take this free 3-minute assessment and see what’s causing the problems.
The RaspberryTips Community: Need help or want to discuss your Raspberry Pi projects with others who actually get it? Join the RaspberryTips Community and get access to private forums, exclusive lessons, and direct help (try it for just $1).
Master your Raspberry Pi in 30 days: If you are looking for the best tips to become an expert on Raspberry Pi, this book is for you. Learn useful Linux skills and practice multiple projects with step-by-step guides.
Master Python on Raspberry Pi: Create, understand, and improve any Python script for your Raspberry Pi. Learn the essentials step-by-step without losing time understanding useless concepts.
You can also find all my recommendations for tools and hardware on this page.


All fine, but i don’t see the printer in Libreoffice (i tried to reboot but nothing changed)
Have the same issue – the test page inside CUPS works perfectly but the printer is not visible inside the print dialogues on leafpad/geany/libre*.
Hi Jeremy and Antonello,
Sorry for the late answer, but I needed to check this as you both have the same issue
And after a new test I got the same result
There is nothing to do after the add printer success message
I tested LibreOffice 30s after (no reboot, no reload, nothing), and the printer is here
Double check the tutorial to see if you didn’t forget something
Maybe the “usermod” command to allow pi to access CUPS
Good luck
Same sort of thing here. I installed a network printer using VNC. This is listed and works perfectly with Leaf and Firefox, but is not listed in L.office. Your set up text was most helpful and works fine. I suspect a ‘funny’ with L.O. but have not yet found a solution!
CUPS will not even install in Raspbian Buster. I get the “You have held broken packages” error…
Works for me on Buster. As for other programs not seeing the device, i had a similar issue. I chose “LPD/LPR Host or Printer” to add mine. After hitting next I changed the connection method to socket://:9100. Test page worked but nothing else was able to see the device. I did a reboot. Made some modifications but still no luck.
Later I thought maybe i should configure it using “AppSocket/HP JetDirect” instead. After doing that it showed up in my applications.
My mistake was assuming it didn’t matter which one I chose as long as i put in the appropriate connection information, but it seems there is more going on under the hood based on that initial selection. Hopefully this helps someone else.
Hello,
Thanks for this message
Hi everything is working but one thing I don’t know how to name the Computer that wan to print.when ever I print! on the print job monitor it shows unknown!.can anyone help me pls .
Everything seems to work fine for me up to the point where I should be seeing it in my browser at http://:631. When I enter this into my browser as “http://192.168.2.106:631” I get the “Site can’t be reached” error page. I tried restarting the service several times with no luck. Any ideas what I’ve done wrong? Should I have added the “Allow @local” code to other areas? Here is a copy of my cupsd.conf file after the changes. Not included, but i also did complete the Port 631 change.
# Web interface setting…
WebInterface Yes
# Restrict access to the server…
Order allow,deny
Allow @local
# Restrict access to the admin pages…
Order allow,deny
Allow @local
# Restrict access to configuration files…
AuthType Default
Require user @SYSTEM
Order allow,deny
Allow @local
# Restrict access to log files…
AuthType Default
Require user @SYSTEM
Order allow,deny
Any help would be greatly appreciated.
i feel foolish but i seem to have a gap 9in my instructions. Everything was fine up to “Use HTTPS”. I feel like I dropped off the boat in the middle of the ocean. Am i still in the terminal or in a browser? Am I on the Pi or another computer in Windows? Can someone throw me a life preserver?
Thanks for your help
Hi Bill 🙂
In the first part, I give you the web interface address like this: http://:631 (is this working for you?)
But when you want to add a printer, you need to switch to HTTPS (so https://:631)
Both from your computer
Patrick
I can’t find any ppd file for my Brother MFC-7320.
I tried the similar printers mentioned in the manual and a few MFC types directly in cups.
I also searched in the deb file for my printer for some ppd files, but didn’t find any.
Everytime I try to print the testpage, the printer goes from receiving data directly to energy saving mode.
Is there some hope left or is my printer just not compatibly?
Hi,
Did you try this one : https://github.com/illwieckz/debian_copyist_brother/blob/master/material/abstract/printers/generated_content/ppd/MFC7320.ppd ?
Patrick
As soon as I go to the administration tab in CUPS in the browser it says forbidden. No reason. No clue as to why. I have UWF installed and have allowed access to port 631. I have SSH enabled. What is the deal?
Hi Anthony,
You probably miss the Apache configuration step
You need to allow your computer to access this tab
Patrick
I followed this tutorial and everything worked perfectly but I have a doubt. If I want to print from another raspberry pi to the network printer configured with CUPS, do I have to install CUPS on the new raspberry PI and install the printer drivers or being on the network I can do it directly without installing or configuring anything?
Hi Sergio,
If you shared the printer on the first Raspberry Pi, you should be able to access it from the other
Check the last paragraph, it’s explained for Windows, but it’s the same principle (use smb://IP instead of \\IP)
All worked fine for me (thankfully as I am a code dummy). Thanks for the tutorial.
in add printer, my printer name not show up. I use EPSON L3110. is there any suggestion?
Try a model similar in the list, or try to find the ppd file for this model online (Epson website > Drivers > Linux for example) and import it
Thanks for the detailed manual.
i have an issue I went over all the steps and did what you showed and I was able to set it up but when i sent a print or a print test page from cups itself it takes a few seconds and then the print moves to jobs completed but the printer didn’t print anything the only way i can print is via windows by the URL in the printer setup.
i want to be able to print from my raspberry pi and from my phone but i can’t at the moment.
my printer is a brother mfc j430w if that helps
do you have any suggestions?