How To Easily Install Ubuntu Desktop 25.10 on Raspberry Pi
Ubuntu Desktop is probably the best alternative to Raspberry Pi OS for desktop use on a Raspberry Pi. It’s not as optimized as the official distribution, but it works really well and has a nicer interface. Let’s learn how to install it on your device, and get familiar with some of the differences.
Ubuntu is available in Raspberry Pi Imager, under “Other general-purpose OS,” and can be installed on an SD card from there. A Raspberry Pi 5, 500, 4, or 400 is recommended to use the Desktop version.
If you want to give it a try, let me guide you through the installation process, and I’ll also provide tips so you get the most out of it once it’s installed on your Raspberry Pi.
If you’re new to Raspberry Pi or Linux, I’ve got something that can help you right away!
Download my free Linux commands cheat sheet – it’s a quick reference guide with all the essential commands you’ll need to get things done on your Raspberry Pi. Click here to get it for free!
Prerequisites for Ubuntu Desktop
Before going any further, let’s make sure you have everything you need to follow this tutorial.
As mentioned in the introduction, Ubuntu Desktop is a bit heavier than Raspberry Pi OS and less optimized for the Raspberry Pi, so a recent Raspberry Pi model will work best. You also need a few other things:
- A recent Raspberry Pi is mandatory.
A Raspberry Pi 5 is recommended, but a Raspberry Pi 4 or a Raspberry Pi 400 should be fine too. 4 GB of RAM is required because Ubuntu needs more RAM than Raspberry Pi OS.
If you have less RAM or only a Raspberry Pi 3B+, I would recommend starting with Ubuntu Server or Ubuntu Core and upgrading from there by installing only what you need.
I have a tutorial on how to install a desktop environment on Raspberry Pi OS Lite, you can follow the same steps. - A good SD card, with at least 16 GB, but 32 GB is recommended.
The SanDisk Extreme Pro is the best according to my micro SD card benchmarks, and it’s a decent price. You can also use a SSD or USB stick, but make sure you have an excellent power supply for this (or a powered USB hub is even better). - The official power supply for the corresponding Raspberry Pi.
Or at least something that delivers the same power input (don’t use a random phone charger, as explained here, especially for Ubuntu). - Keyboard AND mouse.
I like to do the headless installation or use a mini keyboard with a touchpad, but as the goal here is to use Ubuntu with a desktop environment, a comfortable setup is recommended.
I have tested many keyboards for Raspberry Pi here if you have nothing decent, any PC keyboard and mouse should be fine.
That’s it. Obviously, it’s better to have another computer to follow the instructions to flash the SD card. But if you don’t have one, you can always use another Raspberry Pi and get Raspberry Pi Imager on it, or even use the new network boot feature to do it from the same device.
Check this: 7 Surprising Uses for a Raspberry Pi
Flashing the Ubuntu Image onto the SD Card
The easiest way to install Ubuntu with Desktop on a Raspberry Pi is to use Raspberry Pi Imager and find the latest image available from the OS list. It can then be flashed on any storage media (a micro SD card in general).
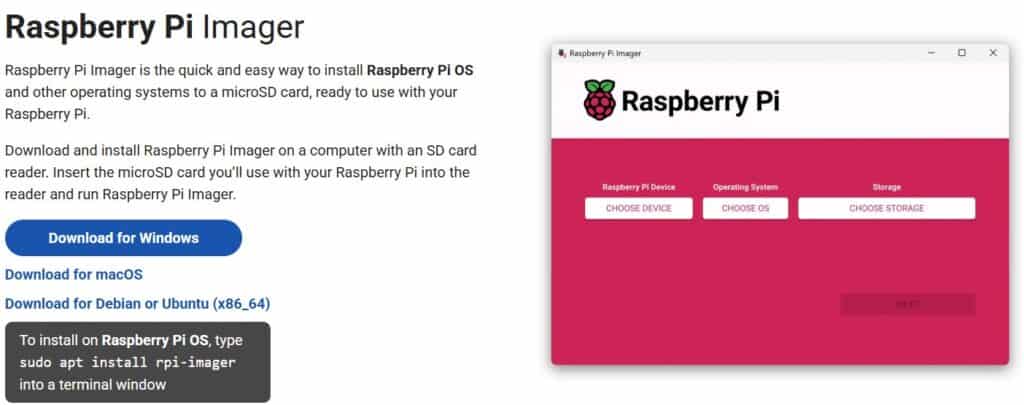
Install Raspberry Pi Imager
If you don’t have Raspberry Pi Imager installed on your computer yet, visit the official website to download it.
It’s available on most operating systems, you can even install it on a Raspberry Pi.
I wrote an entire guide about Raspberry Pi Imager, if you are not used to it, I recommend starting there and coming back here after that.
Download the installation program and install it on your computer like any other program.
Once ready, move to the next step to install Ubuntu Desktop.
Note: If you don’t have a computer, you can follow the same steps directly from the Raspberry Pi, using the network boot feature instead (click on the link for more details).
Flash Ubuntu Desktop on an SD card
Once Raspberry Pi Imager is installed and running, the first step is to choose Ubuntu Desktop in the OS list:
Download the free PDF, keep it open, and stop wasting time on Google.
Download now
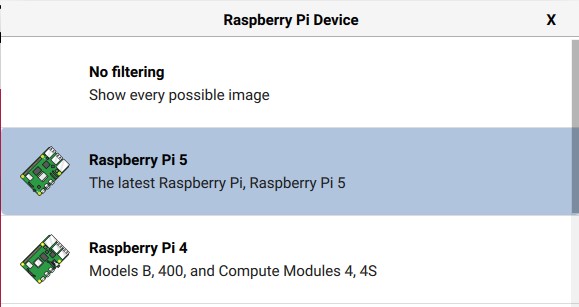
- Click on “Choose Device” and pick the model you’ll be using.
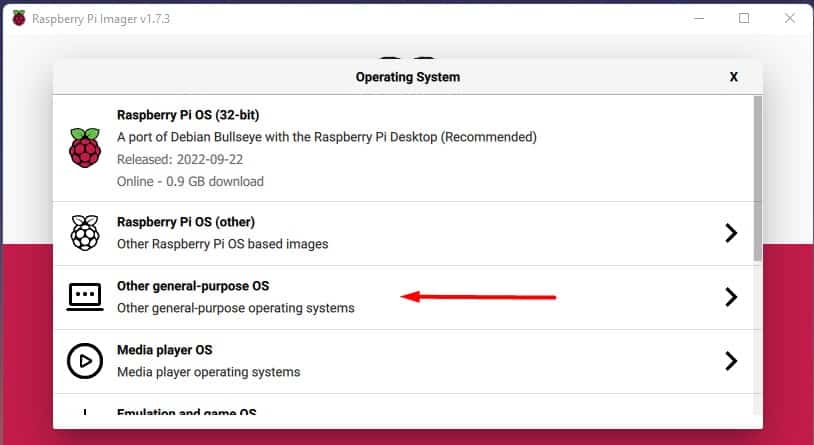
- Then click on “Choose OS”:

Raspberry Pi Imager includes dozens of operating systems and image versions compatible with most Raspberry Pi models. - Click on “Other general-purpose OS” to find the Ubuntu category.
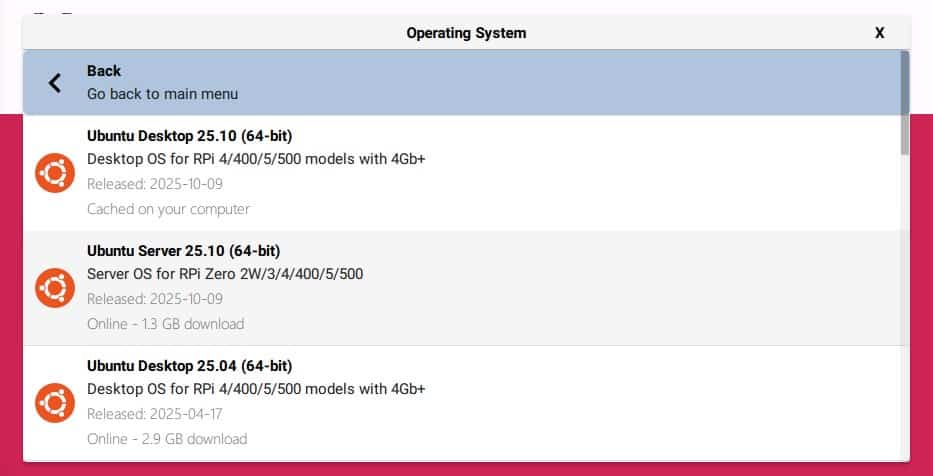
- Click on “Ubuntu” to get access to all versions.
- Then select “Ubuntu Desktop” in the list:
Under each version, you can see the recommended hardware. Try to follow the recommendations and only pick Ubuntu Desktop 64-bit if you have the Pi 5/500/4/400.
Once the Ubuntu image has been selected, we can now move on and select the storage drive (an SD card in general, but USB drives also work):
- Click on “Choose storage”:
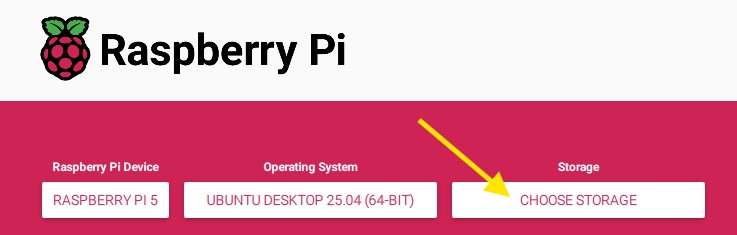
- Select the target destination from the list:

Make sure you are selecting the correct drive. If you have several hard drives, or USB disks plugged in, you may have several choices in this list.
Picking the wrong media storage can result in an irreversible loss of data.
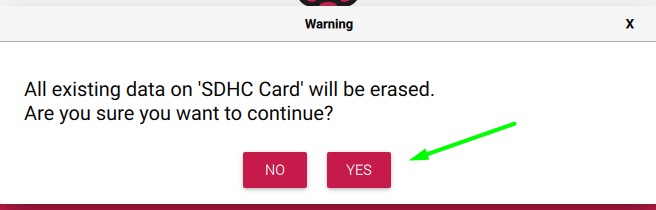
Finally, start the installation by clicking on “Next”.
Confirm that you really want to erase the SD card:
Raspberry Pi Imager will start downloading the image and writing to the SD card.
It will take more or less time depending on the image, your Internet connection and the storage drive (expect something between 15 and 30 minutes for Ubuntu Desktop, it’s a big image).
Once the file copy is completed, Raspberry Pi Imager will verify the files on the SD card, and you’ll get a success message confirming the SD card is ready to use.
You can then eject the SD card from your computer, and insert it into the Raspberry Pi.
First Boot of Ubuntu Desktop on Raspberry Pi
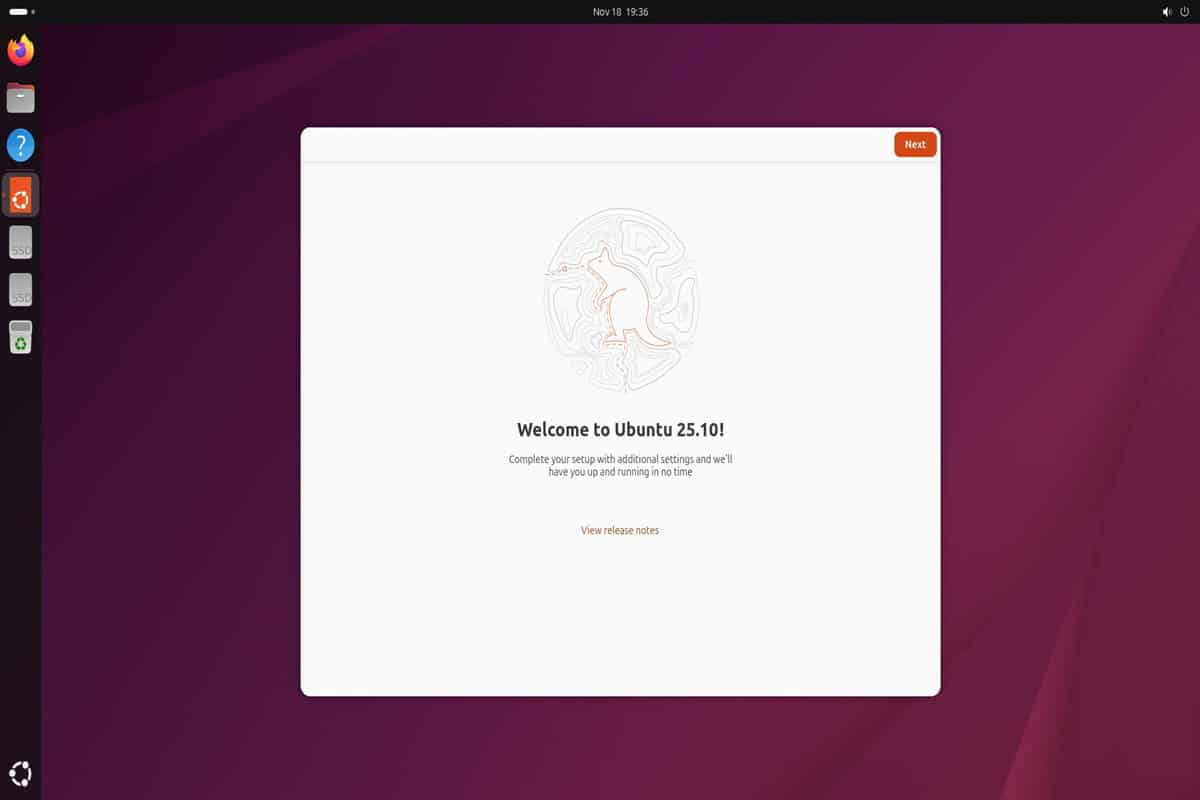
Unlike other distributions, Ubuntu is not fully installed and ready to use once it’s flashed on the SD card. There is an extra step with a system configuration wizard on the first boot. And only after that step is the installation will be completed.
Power on the Raspberry Pi (with the new SD card inserted), and follow the following steps during the first boot:
- After a few seconds, you should get the latest Ubuntu wallpaper, and the welcome wizard opens quickly after that:
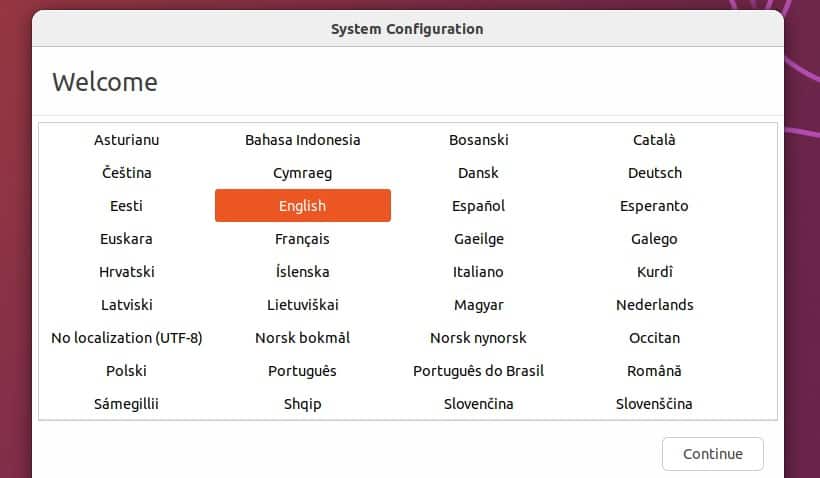
- Select your language and click on “Continue”.
- Then adjust the keyboard layout if needed:
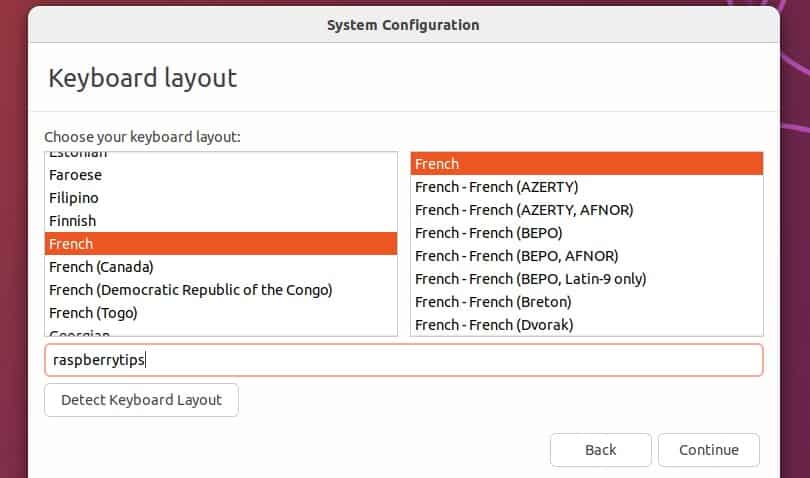
Try to type a few characters to make sure it works with your keyboard.
Click on “Continue”. - If you don’t have an Ethernet cable plugged in, you may be prompted to configure your Wi-Fi network. I recommend doing this right away, so you can get the updates during installation and install new applications right after.
- Adjust the timezone if needed:
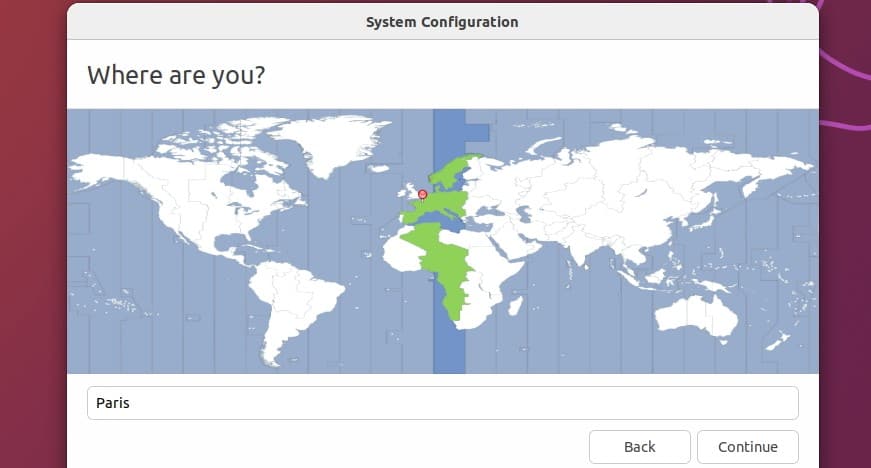
It should automatically find the one for you, but you can change it easily if needed.
Click on “Continue”. - Finally, create your account by choosing the username, password and computer name:

Click on “Continue” to start the configuration.
Ubuntu will then do a few actions in the background, so you’ll have to wait a few more minutes before you can use it.
A popup appears asking you to connect to your online accounts to sync your calendar and documents and to help improve Ubuntu. You can just skip everything in this menu for now. You can always configure it later if needed, it’s not required at all.
Congrats! Ubuntu Desktop is now installed on your Raspberry Pi.
Enjoy your new desktop environment:
Download the free PDF, keep it open, and stop wasting time on Google.
Download now

In the next two sections of this tutorial, I’ll give you more guidance to get started the right way with this new operating system for your Raspberry Pi.
Introduction to Ubuntu Desktop on Raspberry Pi
Overall, Ubuntu includes a better interface than Raspberry Pi OS for desktop use, but it can be a bit overwhelming if you’ve never used it before. Let’s take a few minutes to introduce the important elements of this new environment.
Updates
As soon as the session opens, you may get a popup asking you to do system updates if you’re connected to the Internet. If not, you can search for Software Update from the main menu.
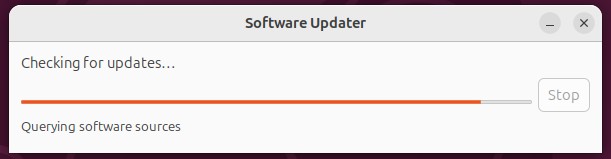
Ubuntu will automatically check for new updates regularly, so you’ll get the same popup from time to time. It’s a good habit to do them when possible (at least once a month, I would say, more often if you can).
You might also like: Do this to keep a full backup of your Raspberry Pi
Just click on “Install now” and enter your password to confirm the installation.
Wait a few more minutes and it’s done.
It doesn’t take that long, and you’re safe after that.
Interface
Then the interface might not be what you are used to, so let’s see what we get by default:
- On the left of the screen, there is a dock with all the shortcuts to the most important applications.
On Windows and macOS, we have something similar at the bottom of the screen. With Ubuntu, it’s on the left, but it’s the same idea.
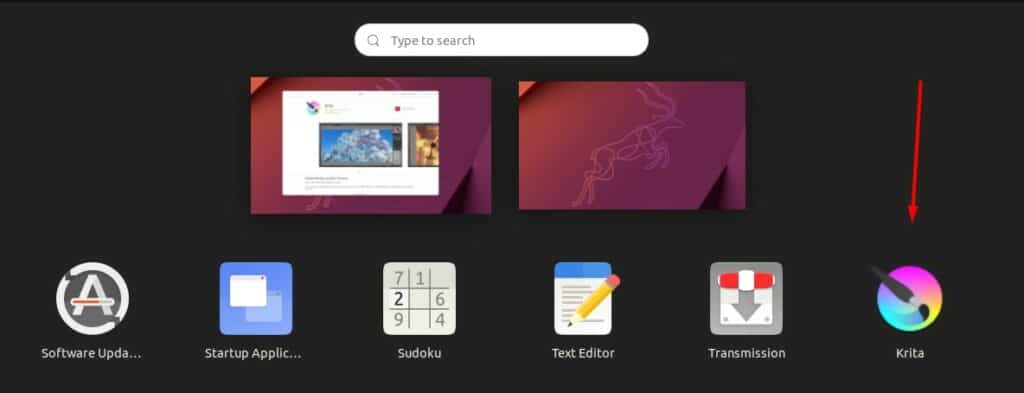
You can easily remove shortcuts you don’t need and add new ones if you like. - At the bottom of this left panel, there is a special icon, it looks like a grid.
When you click on it, it opens a menu looking like this:
Basically, it’s the equivalent of the main menu in Raspberry Pi OS, in a more modern interface.
You get access to all the applications, it’s often the most used that will show up first, and you can browse the different pages or use the search engine to find something quickly: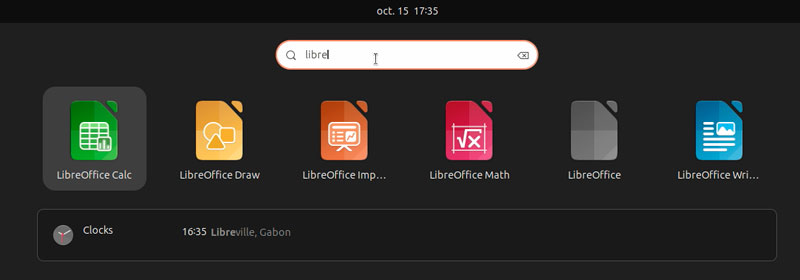
By the way, the search engine also works for files and the system configuration, so feel free to use it as soon as you need something and don’t know where it is: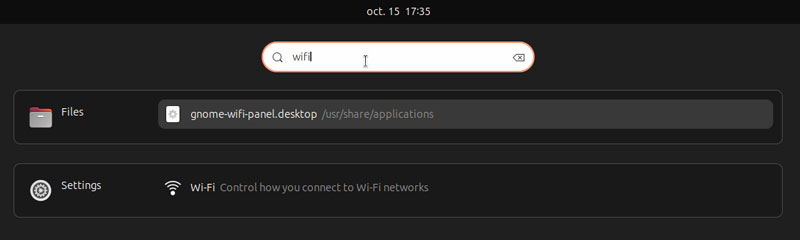
- At the top of your screen, there is another panel, with the date and time in the middle.
Clicking on it will give you access to a calendar and the latest notifications.
It’s empty by default unless you linked your online accounts (e.g., Google Calendar).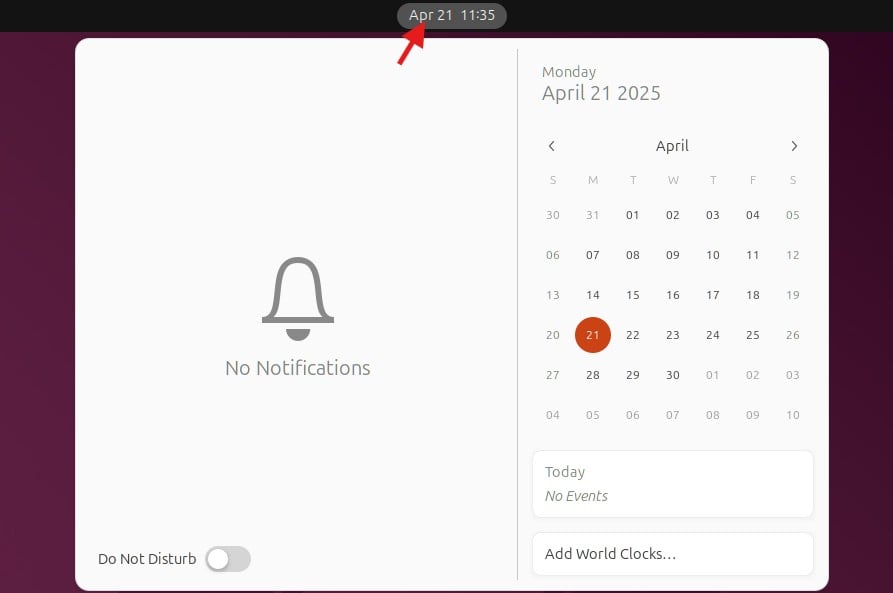
- In the same panel, near the top-right corner of your screen, you have shortcuts to access the most important elements of the system configuration.
You can adjust the master volume, sign off or reboot the computer, and manage your network connections.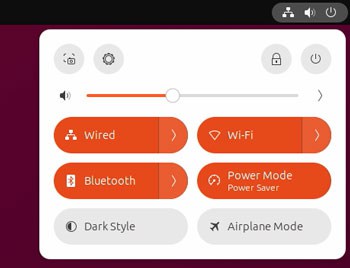
The interface is intuitive enough that you shouldn’t be completely lost.
It may take a few hours to get used to it if it’s your first time, but you’ll get it.
It’s really comfortable once you know how to access everything quickly.
And if you don’t like this interface, you can always install another desktop environment. Here are my 5 favorites for Ubuntu.
Settings
Like most modern distributions, Ubuntu has one app with all the system configurations on it. So, as soon as you need to change anything in your settings, that’s the app you should open.
Click on the wheel icon in the previous screenshot (top-right corner), or open the apps list and find the settings in it.
You’ll get access to everything in a single place:

Browse the different categories in the left menu to see everything that can be configured from there, or use the search engine if you are looking for something specific.
Applications
Download the free PDF, keep it open, and stop wasting time on Google.
Download now
In terms of applications installed by default, Ubuntu comes with a few essentials:
- Firefox: The popular web browser.
It’s generally not the fastest option on Raspberry Pi, so if you find that it is too slow, you can always install Chromium instead. - Thunderbird: A mail client (for those who don’t use webmail).
- LibreOffice: The Microsoft Office alternative for documents, spreadsheets, etc.
- Rythmbox: To play music files.
- Shotwell: Basically it’s an image organizer, you’ll use it to open photos.
- Remmina: If you need to remote access another computer (via VNC or XRDP), it’s preinstalled on Ubuntu Desktop.
- Transmission: A free client for the torrent protocol.
Ubuntu also comes with various system tools (terminal, disk usage analyzer, backup, text editor, etc.) and mini-games (sudoku, mines, solitaire, etc.).
Basically, you should have enough to get started, but you can always go further and install new applications or replace some of them if you know better alternatives.
You can find a list of my favorite apps for Raspberry Pi here. It’s for Raspberry Pi OS, but you’ll find most of them on Ubuntu. And for Ubuntu specifically, you can read these recommendations:
- Best PDF Viewers for Ubuntu: Top Picks for Every Need
- Top 5 Ubuntu Browsers (Speed, features & more)
- Top 5 Desktop Environments for Ubuntu (Illustrated)
And if you need help installing them, read through the next section.
If this project doesn’t work as expected on your setup, don’t worry. You can get help directly from me and other Pi users inside the RaspberryTips Community. Try it for $1 and fix it together.
Going Further With Ubuntu Desktop
Once you get used to the interface and the default applications, you can really start to enjoy your new system. One last thing, you may need is some guidance to install new applications on Ubuntu, it’s a bit different from Raspberry Pi OS.
Install New Applications
Installing new applications on Raspberry Pi is a major issue. There is no intuitive way to do it for beginners (except for the recommended apps). You can use the “Add/Remove software” tool, but it’s pretty messy, or use the command line, but it’s not really for “beginners”.
On Ubuntu, you have a real app store, so it’s easier to use for most things.
Ubuntu Software
The first solution to install new applications on Ubuntu is to start the “Ubuntu Software” program, available in the left panel. The home page looks like this:
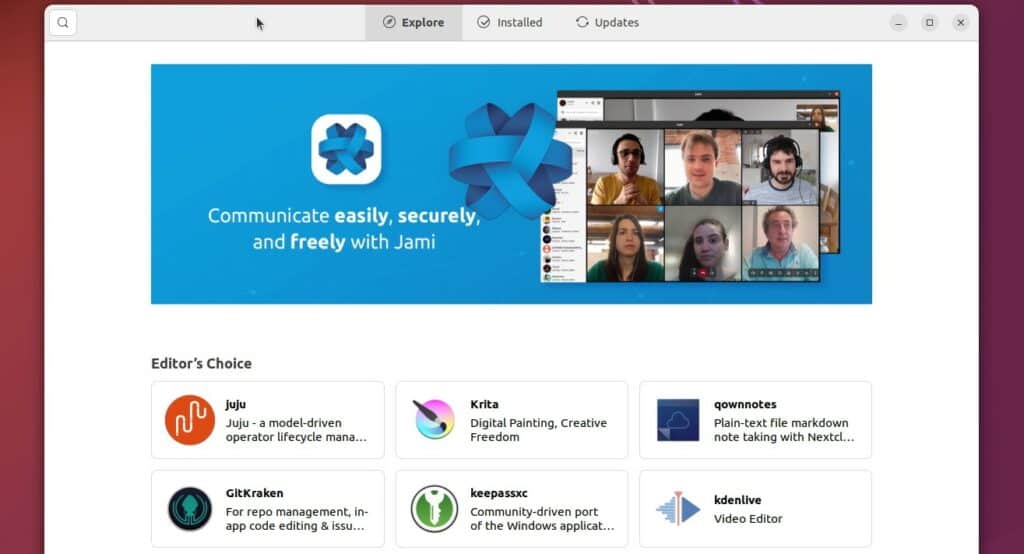
So basically, it’s an app store, like on your phone or the Windows Store if some people are using that thing on Windows 11.
You can either check the suggestions, explore the categories, or use the search engine to find an application. What’s nice is that you don’t need to know the application name (unlike with Raspberry Pi OS). You can look for “image editor” for example, and it will show you a bunch of applications.
Each application comes with a description, and often screenshots, so you can have a good idea of what the program does.
Then click on “Install” to add the application to your system.
Download the free PDF, keep it open, and stop wasting time on Google.
Download now
After typing your password to confirm the installation, it should be added to the apps list.
That’s it. You can start to use your application as if it was already installed by default.
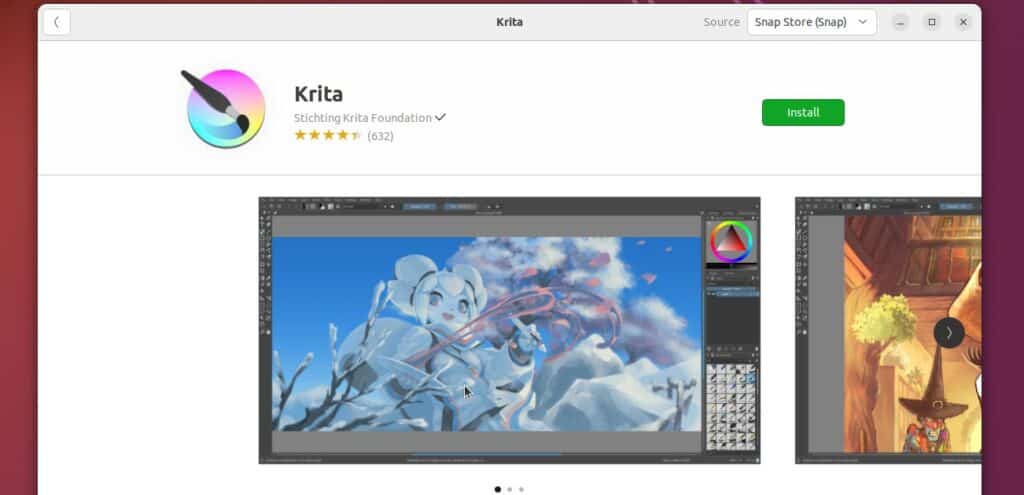
By the way, Krita is a great image editor available on Ubuntu that I used all the time when my main computer was on Ubuntu. It looks like Photoshop:
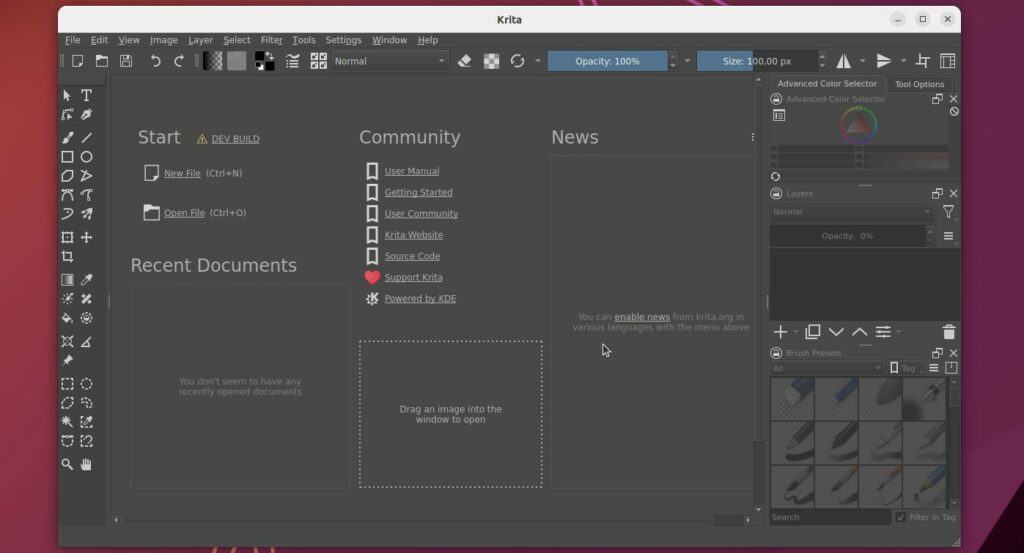
Not all apps will work well. Remember that you are on a Raspberry Pi, with limited power. This one started after a bunch of “wait or quit?” popups, but it works. Some won’t install or won’t start because the Raspberry Pi architecture is not supported. You’ve to try to know whether you can use it or not.
I think that the Raspberry Pi Foundation should work on adding a similar process to Raspberry Pi OS, it will help a lot of new users to get started.
APT
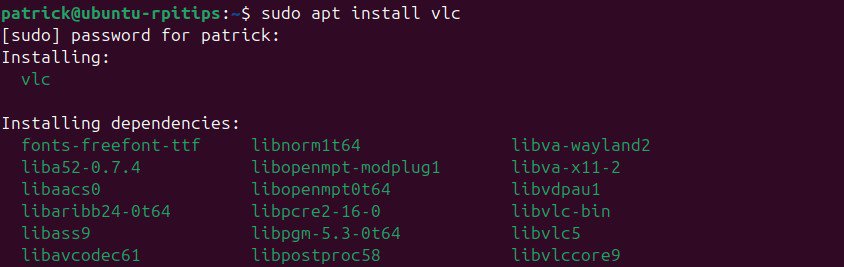
For something more specific, or if you are used to the command line, you can always do the same thing on Ubuntu. Ubuntu is based on Debian, so it uses the same package manager as on Raspberry Pi OS: APT.
So you can sync the packages available with:sudo apt update
And install anything with:sudo apt install <package>For example, VLC is not included by default, you can install it simply with:sudo apt install vlc
It goes a bit further than the traditional “desktop usage” goal of this article, but it’s often the most efficient when you know the command and the package name.
Are you a bit lost in the Linux command line? Check this article first for the most important commands to remember and a free downloadable cheat sheet so you can have the commands at your fingertips.
Do More with Ubuntu Desktop
RaspberryTips is all about Raspberry Pi and Linux/Ubuntu in general, so you’ll find a lot of tutorials to go further with your new Ubuntu system.
Here are a few suggestions, but feel free to explore even more (you can use the home page or the search engine):
- How To Install RetroPie On Ubuntu (play classic games on it)
- How To Safely Extend a Partition on Ubuntu (GUI & Commands)
- Raspberry Pi OS vs Ubuntu: What’s the Best for Desktop Usage?
Whenever you’re ready, here are other ways I can help you:
Test Your Raspberry Pi Level (Free): Not sure why everything takes so long on your Raspberry Pi? Take this free 3-minute assessment and see what’s causing the problems.
The RaspberryTips Community: Need help or want to discuss your Raspberry Pi projects with others who actually get it? Join the RaspberryTips Community and get access to private forums, exclusive lessons, and direct help (try it for just $1).
Master your Raspberry Pi in 30 days: If you are looking for the best tips to become an expert on Raspberry Pi, this book is for you. Learn useful Linux skills and practice multiple projects with step-by-step guides.
Master Python on Raspberry Pi: Create, understand, and improve any Python script for your Raspberry Pi. Learn the essentials step-by-step without losing time understanding useless concepts.
You can also find all my recommendations for tools and hardware on this page.