
How to Install ZoneMinder on Raspberry Pi? (Surveillance Monitor)
If you want to build a home security system with a Raspberry Pi, you’ll want to install the right software to control the cameras. As I know some of you are interested in this kind of project, I looked for a solution, and have found that ZoneMinder is a pretty good tool for this. Installation is not so straightforward, however, so I’ll explain everything here.
The ZoneMinder package is available in the Raspberry Pi OS default repositories, so it can be installed with apt. It requires many dependencies, so you also need to install and configure Apache, MySQL, and your cameras separately.
After a short presentation of the project, I will show you how to install the server part on your Raspberry Pi, and how to configure a camera (and more) in the web interface.
If you’re new to Raspberry Pi or Linux, I’ve got something that can help you right away!
Download my free Linux commands cheat sheet – it’s a quick reference guide with all the essential commands you’ll need to get things done on your Raspberry Pi. Click here to get it for free!
What Is ZoneMinder?
As I mentioned earlier, ZoneMinder is an open-source CCTV solution.
So typically, you can use it for home security, baby monitoring, or many other tasks with cameras.
It’s a totally free solution that you install on your system. So you keep control of your data and save money. That’s the main difference with other solutions, that usually require cloud-based subscriptions.
Main features
- Web interface: easy to access from any device (compatible with mobile), and you can access it from outside your network with port forwarding or a VPN server.
- Smartphone apps: smartphone apps are also available (I think they are not free, I didn’t test).
- Compatible with any USB or IP camera: I will speak about the Raspberry Pi camera module later, but any IP camera from the market will work with ZoneMinder.
- Third-Party integrations: many add-ons are available to interact with ZoneMinder. A detailed list in available on the official Wiki.
Compatibility with Raspberry Pi
ZoneMinder is not officially developed for the Raspberry Pi, but the source code is available and a package is present in the default repository, so there’s no problem in terms of compatibility.
You might also like: 7 Surprising Uses for a Raspberry Pi
As I explain at the end of this post, you can probably use the camera module directly in ZoneMinder, but I didn’t find the solution quickly, so I have a workaround detailed in this post.
Also, any old webcam you have with a USB port can be easily recycled as a network camera with a Raspberry Pi.
Install ZoneMinder on Raspberry Pi
ZoneMinder is available in the Raspberry Pi repository, so we can expect an easy installation, right?
Not really 🙂
ZoneMinder requires a web server and a database server that you need to install and configure before using it. The package comes with the client, but the server has to be done separately.
Let’s see how to install everything!
Prerequisites
You don’t need many things to start this project, but here’s the stuff I used to experiment (with links to Amazon if needed):
- A Raspberry Pi 4 and a Raspberry Pi 3B+: I will use two cameras plugged on a Raspberry Pi. The Raspberry Pi 4 hosts the ZoneMinder service.
- Two cameras module: I have an official camera module and a night-vision one:
- Raspberry Pi Camera Module (I bought it for this installation)
- Raspberry Pi Camera Day & Night Vision
- Raspberry Pi OS: I’m using Raspberry Pi OS Desktop, but the Lite version is OK as I’m doing everything from SSH & Web.
Check my tutorial on how to install Raspberry Pi OS if needed.
Also, I think a touch screen monitor could be a good add-on to this project if you want to keep it running all time. The official touch screen display and a screen case should be perfect on your desktop or bookshelf for example 🙂
Download the free PDF, keep it open, and stop wasting time on Google.
Download now
Install Apache and MariaDB
We’ll start by installing the servers.
For the web server, you can install Apache or Nginx. I chose to go with Apache, that I know better, so I’ll show you how to do this.
As for the MySQL server, it’s now known as MariaDB on Debian and Raspberry Pi OS.
Install the following packages:sudo apt update
sudo apt upgrade
sudo apt install apache2 mariadb-server apt-transport-https
Confirm the installation by pressing “Y” when prompted.
That’s it, now we need to configure them.
MySQL Configuration
In this section, we’ll configure the database. In the past, this was MySQL, but now it has been renamed to MariaDB. Although all the old commands still work the same way.
Create a MariaDB User
By default, on MariaDB the root user can connect without any password.
But to do this correctly, we’ll create a new specific username for ZoneMinder:
- Connect with root:
sudo mysql - Create a new database for ZoneMinder. I recommend naming it “zm” as the script we’ll run later also use this name
CREATE DATABASE zm; - Then, create a new user for ZoneMinder:
CREATE USER 'zoneminder'@'localhost' IDENTIFIED BY 'password';Don’t forget to change the password in this command. - Add all privileges to this user for the ZoneMinder database:
GRANT ALL PRIVILEGES ON zm.* TO 'zoneminder'@'localhost';I don’t think all privileges are required, but it’ll help make installation go smoother. - Finally, just reload the permissions with the command:
FLUSH PRIVILEGES; - Quit out:
exit
That’s it, your database user has been created and the database is ready to use.
If you want, you can test the connection with:sudo mysql -uzoneminder -p

Edit ZoneMinder Configuration
We can now add this user in the ZoneMinder configuration:
You might also like: Yes, you can access your Pi from anywhere. Here's how.
- Install ZoneMinder using APT:
sudo apt install zoneminderIt will automatically add all the required dependencies. - Open the ZoneMinder configuration file with Nano:
sudo nano /etc/zm/zm.conf - Find and edit the following lines:
#ZoneMinder database type: so far only mysql is supported
ZM_DB_TYPE=mysql

#ZoneMinder database hostname or ip address and optionally port or unix socket
#Acceptable formats include hostname[:port], ip_address[:port], or localhost:unix_socket
ZM_DB_HOST=localhost

#ZoneMinder database name
ZM_DB_NAME=zm

#ZoneMinder database user
ZM_DB_USER=zoneminder

#ZoneMinder database password
ZM_DB_PASS=<yourpassword>
In theory, you probably only need to change the database user and database password to match what you set in the previous section.
Also, you need to fix the permissions on the configuration file to give access to the web server:sudo chgrp -c www-data /etc/zm/zm.conf
Initialize the ZoneMinder Database
The last step for the database is to create ZoneMinder’s tables:sudo mysql -uzoneminder -p<yourpassword> zm < /usr/share/zoneminder/db/zm_create.sql
You should be done with the MySQL part now.
Apache Configuration
Next up is the Apache configuration, which is much more straightforward 🙂
Download the free PDF, keep it open, and stop wasting time on Google.
Download now
- Enable the ZoneMinder configuration for Apache
sudo a2enconf zoneminder - Enable the CGI module
sudo a2enmod cgi - Reload Apache
sudo systemctl restart apache2
We’re almost done. There’s a quick fix I’ll give you later, but Apache is ready!
ZoneMinder Service
You should now be able to start the service for ZoneMinder:
You might also like: Are you sure your Pi is secure? Here are 17 simple tips to protect it.
- Enable the service to load on boot:
sudo systemctl enable zoneminder - Start it now:
sudo systemctl start zoneminder - Restart ZoneMinder to reload any remaining configuration:
sudo systemctl restart zoneminder - Check the current status:
sudo systemctl status zoneminder
If everything is properly configured, it should be enabled.
If not, errors are displayed here.

Are you a bit lost in the Linux command line? Check this article first for the most important commands to remember and a free downloadable cheat sheet so you can have the commands at your fingertips.
Timezone Configuration
You’ll not be able to access the ZoneMinder interface if you didn’t set the time zone correctly on your Raspberry Pi and PHP configurations.
I got this error the first time I tried:ZoneMinder is not installed properly: php's date.timezone is not set to a valid timezone
Here’s how fixed it:
- Run raspi-config to fix the system time zone if needed:
sudo raspi-config - Then go into Localisation Options > Timezone
- Select the correct time zone and remember it for the next steps
- Exit raspi-config
Then, you can add it in your PHP configuration:
- Open the PHP configuration for Apache:
sudo nano /etc/php/8.2/apache2/php.iniYour path may be different depending on the PHP version you have. - Find this line:
;date.timezone = - And uncomment it to match your timezone, for example:
date.timezone = Europe/Paris
Use the same wording as you found in raspi-config earlier.
Don’t forget to remove the “;” at the beginning. - Restart Apache to apply changes:
sudo systemctl restart apache2
It should be OK now. In any case, it fixed this for me.
Check HTTP Access
ZoneMinder access should finally be available through its web interface.
The URL should be something like this:http://<PI-IP-ADDRESS>/zm/
The first thing you should see is the ZoneMinder Privacy Policy, which you can decline if you wish, to continue.
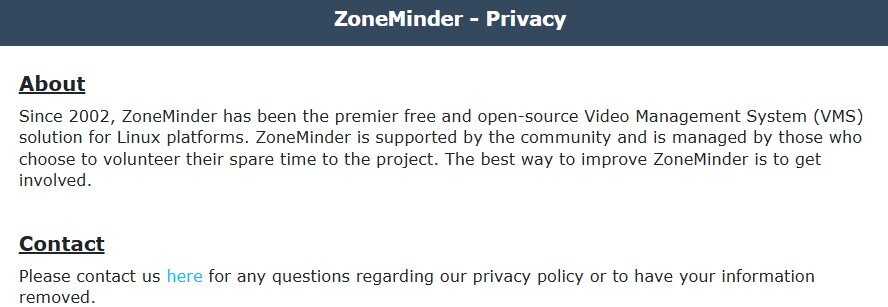
Great! Now we can move to the next part and add your cameras in the interface.
For More Details
Before going further, I want to give you a few extra information about the installation part.
ZoneMinder has pretty good documentation that you can find here. There’s nothing specific for Raspberry Pi OS, but the Debian tutorial is close to the same.
They also have a forum and a Slack support channel if you need any help about this part.
Download the free PDF, keep it open, and stop wasting time on Google.
Download now
Also, there are Docker images available in this documentation if you’re interested.
I didn’t try it myself, but here’s a link to the installation guide using Docker.
Add Cameras to ZoneMinder
Ok, so ZoneMinder is installed, cool. But we don’t have any camera yet in the interface 🙂
Let’s see how it works, and we’ll add some in the next part.

Presentation
ZoneMinder doesn’t seem to handle the Raspberry Pi Camera locally (or at least I didn’t manage to make it work, there is probably a workaround).
So, you have at least two options to add new cameras:
- Create a network stream with your Raspberry Pi Camera Module (available on Amazon) and use it in the configuration
- Use an IP Camera from the market. I know that Nest has pretty good products for example (check this one on Amazon for example), but you can really use any IP camera (basic cameras are way cheaper).
In my example, I’ll show you how to do this with Raspberry Pi cameras, but it’s even easier with classic IP cameras.
In the ZoneMinder Console
Just before installing the camera, here is how the interface works.
For now, when you access the web interface, there is nothing in it.
You will need to add at least one camera.
You can click on the ADD button to do this, and a form will show up with all the options you can configure for this camera.

ZoneMinder calls a camera a monitor, and you can configure many things as:
- General: Monitor name, server, storage group, source type, etc.
- Source: Depending on the source type, the path or URL, the image size and orientation, etc.
- Storage: In which format you want to save the files.
- Timestamp: the timestamp format and position on the picture.
- Buffers: stream customization.
- Misc: what to do when there is an event recorded.
If this project doesn’t work as expected on your setup, don’t worry. You can get help directly from me and other Pi users inside the RaspberryTips Community. Try it for $1 and fix it together.
Configure the Raspberry Pi Camera Module for ZoneMinder
I’ll now show you how to install a Raspberry Pi Camera Module, and add it in ZoneMinder.
If you have an IP camera, you can jump directly to the last step.
Install a Camera
Start by connecting your camera to the Raspberry Pi if not already done, the connector is near the HDMI or Micro-HDMI port:
Then you need to enable the interface in raspi-config:sudo raspi-config
Go to “Interfacing options” > “Camera” and enable it.
Exit raspi-config and reboot the Raspberry Pi.
After the reboot, you can check that the camera is working with:libcamera-still -o image.jpg
A file is created in your current folder that you can open to check that everything is good (on the Desktop version, the image shows up on your screen).
Download the free PDF, keep it open, and stop wasting time on Google.
Download now
If you have any issue with this, please check my tutorial on how to install a camera on Raspberry Pi, this is not the point of this post.
Install Motion
The next step is to install Motion. Motion is a service you can run on Raspberry Pi to create a network stream with your Raspberry Pi camera module.
That’s exactly what we need for ZoneMinder, and it’s not so complicated, so it was my strategy to have two network streams for my cameras:
- Install Motion:
sudo apt -y install motion libcamera-v4l2 libavcodec-dev libavformat-dev libavutil-dev libjpeg-dev libjpeg62-turbo-dev libpq-dev libswresample-dev - Enable the camera driver:
sudo modprobe bcm2835-v4l2 - Get the camera information:
v4l2-ctl -V
This might be useful to configure ZoneMinder. - Edit the default Motion configuration:
sudo nano /etc/motion/motion.confFind the line:stream_localhost onAnd change it to:stream_localhost off(so you can access the stream from your computer)
Feel free to change other parameters like width and height to fit your hardware capabilities.
Save and exit (CTRL+X) - Start motion:
sudo libcamerify motion
You can start it in a screen or on boot if you want it to run all the time.
Screen is explained here, and this tutorial shows you how to start a program on boot.
Check the Video Stream
Once Motion is running, just check that the camera is accessible directly in your web browser.
By default, it should be something like:http://<RASPBERRYPI_IP>:8081
If everything is good, move to the next step.
If not, you can stop motion (use CTRL+C) and edit the configuration to fix what is wrong.
Add the Camera on ZoneMinder
Now that the video stream is available, you can go back in ZoneMinder and add your monitor:
- Open the web interface:
http://<PI-IP-ADDRESS>/zm/ - Click on the “Add” button
- The only thing you need to change is the source tab.
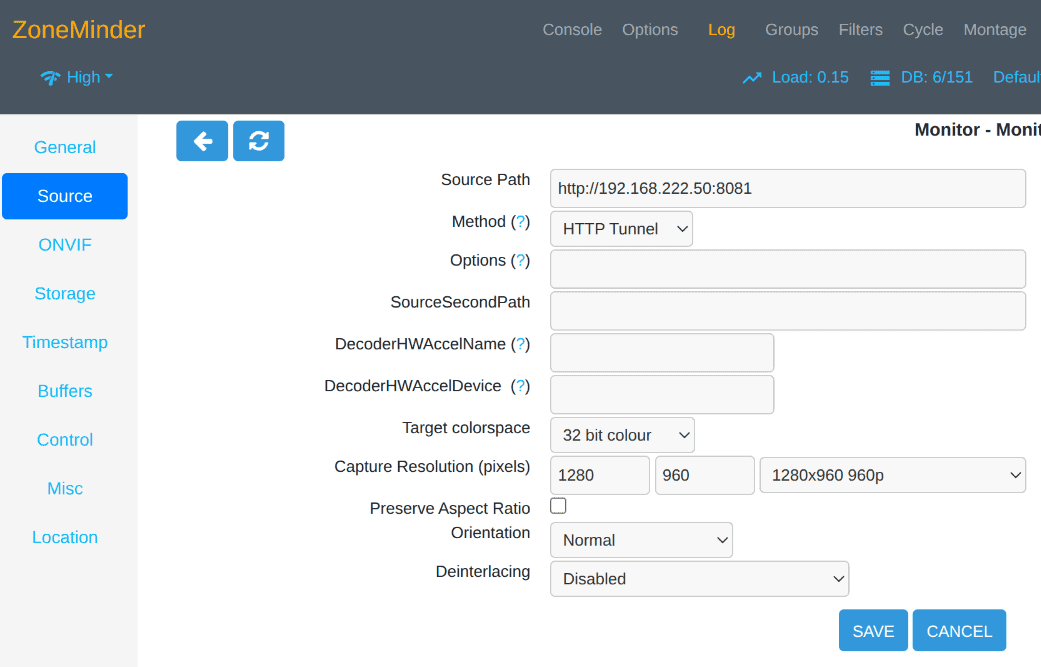
Select HTTP Tunnel as the source type and fill the URL with the video stream address. - Change anything you want in the configuration and save.
For example, one of my cameras was flipped, so I chose “Inverted” in the Source tab for Orientation.
That’s it, a few seconds later your camera should appear in the list in “Capturing” mode.
You might also like: Don’t waste money — read this guide before picking your Raspberry Pi.

If you click on “Montage” in the main menu, you can get a full overview of your camera images, like in a security control room in a movie :-).
Too Many Connections
After staying on the screen maybe 10-15 minutes, I got an error like this one:Unable to connect to ZM db.SQLSTATE[HY000] [1040] Too many connections
I don’t know exactly why, maybe there is a problem with my configuration (100 simultaneous connections is high for two cameras!).
But I fixed it by increasing the maximum connections in MySQL:
- Open the configuration file for MariaDB server:
sudo nano /etc/mysql/mariadb.conf.d/50-server.cnf - Find this line:
max_connections = 100 - Replace with:
max_connections = 1000
If there is a # at the beginning of the line, remove it - Save and exit (CTRL+O, CTRL+X)
- Restart MariaDB:
sudo service mariadb restart
Refresh the page with ZoneMinder, should be ok now.
Well done, it was a not so simple tutorial to follow I think but if you are here, it’s a success 🙂
You made the good choice, keeping control of your data and know how the system works is essential nowadays.
This installation mix a few notions I already explored on the website, so feel free to check this related posts if you need more information:
- How to install a Camera on Raspberry Pi
- How to install a Web server on Raspberry Pi
- MariaDB’s installation on Raspberry Pi
- How to use a Pi Camera Module as a Skype Webcam (almost everything is ready to use now ^^)
- 21 projects idea you can try with your cameras
Whenever you’re ready, here are other ways I can help you:
Test Your Raspberry Pi Level (Free): Not sure why everything takes so long on your Raspberry Pi? Take this free 3-minute assessment and see what’s causing the problems.
The RaspberryTips Community: Need help or want to discuss your Raspberry Pi projects with others who actually get it? Join the RaspberryTips Community and get access to private forums, exclusive lessons, and direct help (try it for just $1).
Master your Raspberry Pi in 30 days: If you are looking for the best tips to become an expert on Raspberry Pi, this book is for you. Learn useful Linux skills and practice multiple projects with step-by-step guides.
Master Python on Raspberry Pi: Create, understand, and improve any Python script for your Raspberry Pi. Learn the essentials step-by-step without losing time understanding useless concepts.
You can also find all my recommendations for tools and hardware on this page.


great tutorial, thanks
i don’t know if it will be for everybody but i had to had my www-data user to the video group, otherwise I kept getting vchiq error’s.
took me a while to figer this out…