How to Code in Java on Raspberry Pi (Easy Guide)
Java is one of the world’s most widely used programming languages because of its versatility across platforms. But is it possible to code with Java on the Raspberry Pi? Yes, it works perfectly, and I’ll show you how!
To code in Java on a Raspberry Pi, the system must be prepared by installing the required packages, libraries, and development tools. Once the environment is ready, writing and running Java applications becomes straightforward.
Combining both opens up a powerful and flexible platform for creative projects. In this guide, I’ll walk you through all the essentials, including getting Java up and running, writing your first program and interacting with GPIO components.
If you’re like me and sometimes mix up syntax between programming languages, I’ve got just the thing for you. I’ve put together a Python cheat sheet with all the essential syntax in one place, so you can keep it handy and avoid any confusion. Download it here for free!
Basic Setup to Code in Java on Raspberry Pi
Before you start programming, it’s important that Java is properly installed and your Raspberry Pi is ready for development. With the right tools and setup, writing and running Java code is straightforward.
Setting Up Java
Your first step will be installing Java, and the good news is, that it’s already available in the Raspberry Pi OS repository, which makes the process quick and easy. Just open a terminal and run the following commands:sudo apt update
sudo apt install default-jdk

To confirm that Java was installed successfully, use:java -version

This will return the version of OpenJDK currently installed on your Raspberry Pi. It’s also a helpful way to check if Java is already installed.
If you need a step-by-step walkthrough or want to install a specific version of Java, check out our dedicated guide to installing Java on Raspberry Pi, perfect for this occasion.
Are you a bit lost in the Linux command line? Check this article first for the most important commands to remember and a free downloadable cheat sheet so you can have the commands at your fingertips.
If like me, you always mix the languages syntax, download my cheat sheet for Python here!
Download now
Choosing a Text Editor or IDE
Just between us, technically, any text editor can be used to write Java code, but some tools are just better suited for the job. Certain editors come packed with features that make Java development much smoother and more efficient. Here are a few I recommend:

- Visual Studio Code: A popular and beginner-friendly option, especially if you’ve used it before. With the right Java extensions, it becomes a powerful development environment.
- Geany: Don’t want to install anything? No problem. Geany is lightweight and comes preinstalled on Raspberry Pi OS. It’s a great choice if you’re looking for something quick and easy.
- Intellij IDEA: The most professional option for Java developers, since it contains tools and integrations to develop large projects, but be aware, it’s more resource-intensive than the others.
- Nano/Vim: Do you prefer to stay in your terminal? Well, these terminal-based editors are a hardcore option for coders, but they are ultra-lightweight and always available on any distribution, though they come with a learning curve.
So, you are still curious? We’ve got a full article on the best text editors for Raspberry Pi to help you explore more options.
Writing & Running Java Code
Once your environment is ready, it’s time to write and run your first Java program on the Raspberry Pi. Don’t worry, it’s a simple process. Start by creating a file named Hello.java with the following content:
public class Hello {
    public static void main(String[] args) {
        System.out.println("Hello, Raspberry Pi!");
    }
}
Now that we have the code ready, you might think you can run it, but you need to compile it, and to do that you can use the following command:javac Hello.java
You might also like: 7 Hidden Raspberry Pi Features You Should Be Using
If there are no errors, this will generate a Hello.class file. You can now run the program with:java Hello

Note: If you’re using an IDE like IntelliJ IDEA or VS Code, you can often compile and run Java code with a single click—no need to use the terminal.
Using a Build Tool (like Maven or Gradle)
If your Java project starts to grow, you’ll want to manage dependencies and project structure more efficiently. That’s where build tools like Maven and Gradle come in.
Both tools help automate common tasks like compiling code, managing external libraries, and packaging applications. They also allow you to define project dependencies in a single file, so you don’t have to manually download and configure everything.
Installing Maven is just as easy as with Java:sudo apt update
sudo apt install maven
If like me, you always mix the languages syntax, download my cheat sheet for Python here!
Download now

Gradle is a bit of a different and longer process, but not impossible. You can follow the official documentation that includes all the steps.
Using Java to Control GPIO on Raspberry Pi
Java isn’t just for web apps and desktop software—you can also interact with physical hardware! On a Raspberry Pi, Java becomes a powerful tool for automating devices, reading sensors, or building full-scale IoT projects, with endless possibilities.
Requirements & Libraries
To control the GPIO pins on a Raspberry Pi with Java, the go-to library is Pi4J. It’s a Java-friendly wrapper around the native Pi hardware interfaces and makes GPIO control as simple as writing regular Java code.
Pi4J allows you to:
- Handle event-based programming with listeners.
- Read from input pins (e.g., buttons, sensors).
- Write to output pins (e.g., LEDs, buzzers).
- Access I2C, SPI, and Serial communication.
To install it, it is easy, just run this command on your terminal:curl -sSL https://pi4j.com/install | sudo bash
This script will install everything needed and prepare your environment for Pi4J development.
Note: If you’re using Maven or Gradle, you can include Pi4J in your pom.xml or build.gradle file directly instead of running the script.
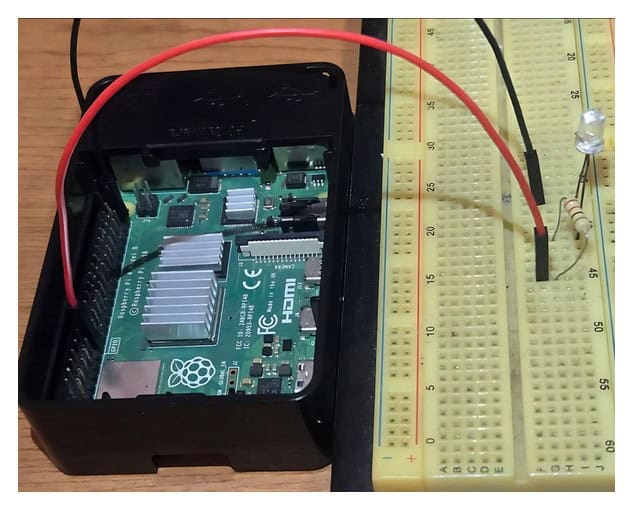
Example: Blink an LED With Java on Raspberry Pi
Since this is a simple tutorial, we cannot cover how to use the libraries and the programming language, but we can show how it can work on your Raspberry Pi. For this case, we have a simple example of turning on an LED with a fairly simple code.
Download the free PDF, keep it open, and stop wasting time on Google.
Download now
For this little project, we will only need:
You might also like: Pi5 vs. Pi4: I tested them, here's the result
- A resistor from 200 ohm to 300 ohm;
- An LED diode;
- Cables; and,
- A breadboard.
Wire your LED with a resistor in series, connected to GPIO17 (pin 11) on the Raspberry Pi, and close the circuit with any GND pinout. (For more info, check out our article on the GPIO pinout).
import com.pi4j.io.gpio.digital.*;
import com.pi4j.context.Context;
import com.pi4j.Pi4J;

public class BlinkLED {
    public static void main(String[] args) throws Exception {
        Context pi4j = Pi4J.newAutoContext();

        DigitalOutput led = pi4j.dout().create(DigitalOutput.newConfigBuilder(pi4j)
            .id("led")
            .name("Blinking LED")
            .address(17)
            .shutdown(DigitalState.LOW)
            .initial(DigitalState.LOW)
            .build());

        for (int i = 0; i < 10; i++) {
            led.toggle();
            Thread.sleep(500);
        }

        led.low();
        pi4j.shutdown();
    }
}
Note: GPIO 17 refers to the BCM pin number (not the physical pin), which corresponds to physical pin 11.
Just like we did before, we need to compile our code, but in this case, we need to point the pi4j library into the command:javac -cp .:pi4j-core.jar BlinkLED.java
In the same way, we need to run the code pointing to the Pi4J library: sudo java -cp .:pi4j-core.jar BlinkLED
Note: You must use the sudo command when running the program because controlling GPIO requires root privileges.
If you prefer watching videos instead of reading tutorials, you’ll love the RaspberryTips Community. I post a new lesson every month (only for members), and you can unlock them all with a 7-day trial for $1.
Tips & Best Practices for Java Projects on Raspberry Pi
You have already seen how to install, where to write your Java code and how to run it, what else do you need? Here are some tips and best practices for your Java projects on your Raspberry Pi.
Track and Manage Your Project Development Using Git
As your project grows, you will use more files, libraries and packages, and when that happens the difficulty of maintaining changes to your project will increase exponentially. One of the most common solutions for this is to use a version control like git.

With Git, you can track every change made to your code, collaborate with others, and revert to previous versions if something goes wrong. Hosting platforms like GitHub make it even easier to store and share your code online.
If you’re new to Git or need help getting started, check out our step-by-step guide on how to use Git on Raspberry Pi.
Continue Developing Your Project Remotely
Download the free PDF, keep it open, and stop wasting time on Google.
Download now
Once you’ve started coding in Java on your Raspberry Pi, you might not want to be tied to the device itself. The good news? You can easily continue your development work from anywhere, without direct access to the Pi.
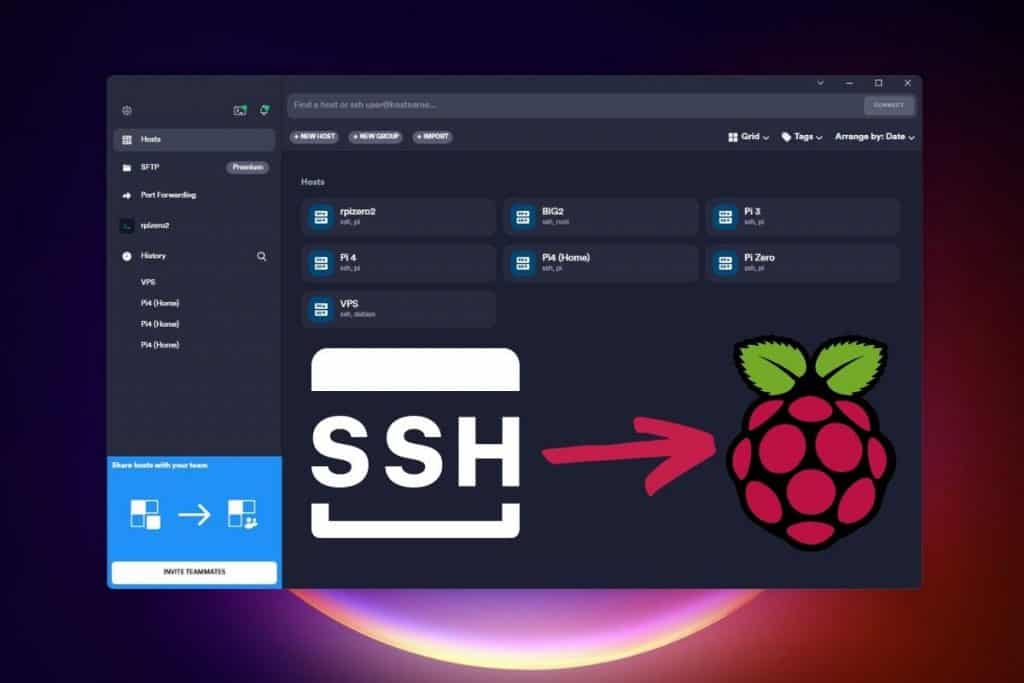
Here are some common ways to work remotely on your project:
- SSH – Securely connect to your Raspberry Pi’s terminal from another computer and run commands or edit files.
- VNC – Access the full desktop environment of your Raspberry Pi remotely, just like you were sitting in front of it.
- Git + Sync – Develop your code locally, push changes to a remote Git repository, and then pull them on your Raspberry Pi.
Aside from these options, you can find even more alternatives that you can use, like XRDP for example. For more info, read about the best remote access methods here.
When to Use Java vs. Python?
Java and Python are both excellent languages, and they can each be used effectively on Raspberry Pi. But depending on your goals, one might be better suited. Here’s a quick guide to help you choose the right tool for the job:
Use Java if:
- You’re already experienced with it and prefer its workflow.
- You need better performance, especially for multithreaded applications.
- You’re building larger, object-oriented systems or long-term projects.
Use Python if:
- You want a simpler, more readable syntax.
- You’re following Raspberry Pi tutorials (most are written in Python).
- You need to prototype quickly or work with a variety of GPIO libraries.
So, in a nutshell, use the language that best matches your project complexity and your comfort level. For many Raspberry Pi users, Python is more accessible, but if you’re already familiar with Java, it can be just as powerful.
Troubleshooting Common Issues
Even with everything set up correctly, you might run into a few common issues when coding in Java on your Raspberry Pi. Here’s how to handle them:
- Missing packages: If your build tool (like Maven or Gradle) fails to resolve dependencies, ensure your internet connection is working and that the repository links in your pom.xml or build.gradle file are correct.
- Java not found: If java or javac returns a “command not found” error, make sure the JDK is properly installed using sudo apt install default-jdk, and verify with java -version.
- Pi4J problems: If your code throws errors related to Pi4J, double-check that the library is correctly added to your project and compatible with your Raspberry Pi model. You can refer to the official Pi4J documentation for configuration help.
- Permission issues: Accessing GPIO pins or other system-level features requires root permissions. Always run your compiled program with sudo.
- UnsupportedClassVersionError:
java.lang.UnsupportedClassVersionError: BlinkLED has been compiled by a more recent version of the Java Runtime (class file version 65.0), this version of the Java Runtime only recognizes class file versions up to 61.0
If you encounter an error like this, it means your code was compiled with a newer version of Java than the runtime installed on your Raspberry Pi. An easy solution is to either recompile your code with an older Java version (matching your runtime) or upgrade the JDK on your Raspberry Pi (recommended).
Once you’ve got everything running, you’re ready to start building with Java on your Raspberry Pi! While this article covered the essentials, there’s still a world of advanced tools and techniques waiting for you to explore, so keep experimenting, stay curious, and keep learning!
Whenever you’re ready, here are other ways I can help you:
Test Your Raspberry Pi Level (Free): Not sure why everything takes so long on your Raspberry Pi? Take this free 3-minute assessment and see what’s causing the problems.
The RaspberryTips Community: Need help or want to discuss your Raspberry Pi projects with others who actually get it? Join the RaspberryTips Community and get access to private forums, exclusive lessons, and direct help (try it for just $1).
Master your Raspberry Pi in 30 days: If you are looking for the best tips to become an expert on Raspberry Pi, this book is for you. Learn useful Linux skills and practice multiple projects with step-by-step guides.
Master Python on Raspberry Pi: Create, understand, and improve any Python script for your Raspberry Pi. Learn the essentials step-by-step without losing time understanding useless concepts.
You can also find all my recommendations for tools and hardware on this page.