Python: Use the ChatGPT API for any Raspberry Pi Project
After experimenting with home automation, sensors, and custom scripts to make my Raspberry Pi more useful, I began to wonder: “Could I plug in something smarter?”. ChatGPT turned out to be the missing piece. It’s surprisingly easy to connect the API to your Pi and start building cool, intelligent tools. In this guide, I’ll walk you through the exact steps I followed to make it work.
The ChatGPT API can be called from any Python script to send prompts and receive smart, natural language responses. Adding AI to a Raspberry Pi can make it more interactive, helpful, and fun to use.
From writing your first script to building actual projects like a voice assistant or Telegram bot, I’ll show you what’s possible and how to do it yourself. Let’s dive in.
If you’re like me and sometimes mix up syntax between programming languages, I’ve got just the thing for you. I’ve put together a Python cheat sheet with all the essential syntax in one place, so you can keep it handy and avoid any confusion. Download it here for free!
Preparing the Raspberry Pi for ChatGPT
OpenAI is a Python library that enables communication with ChatGPT.
However, before getting started, we need to ensure that our Raspberry Pi OS is up to date and running the latest version of Python.
To set up your Raspberry Pi for using ChatGPT, follow these steps:
- Update your system:
sudo apt update && sudo apt upgrade -y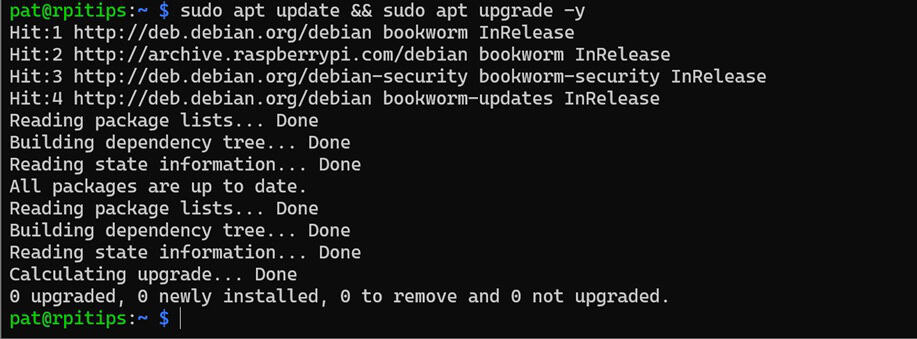
- Install Python and pip:
sudo apt install python3 python3-pip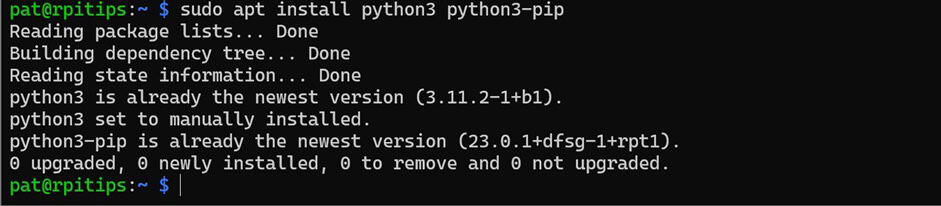
- Make a folder to store your project:
mkdir ~/Projects/ChatGPTAPI - Create a virtual environment:
python -m venv ~/Projects/ChatGPTAPI/venv
- Change to the virtual environment:
source ~/Projects/ChatGPTAPI/venv/bin/activate
- Install the OpenAI library:
pip install openai
That’s it; our Raspberry Pi is now set up to use the ChatGPT API through a Python program.
Check this: 15 Easy Projects for Raspberry Pi Beginners
Are you a bit lost in the Linux command line? Check this article first for the most important commands to remember and a free downloadable cheat sheet so you can have the commands at your fingertips.
Requesting an OpenAI API Key
Before writing your first Python script, you first need to get an OpenAI API Key. The API Key allows secure communication between your ChatGPT models and the client (Raspberry Pi). It will be used for authentication in our Python script.
To generate your OpenAI API Key, follow these steps:
- Create an OpenAI Account.
- Visit this link https://platform.openai.com/account/api-keys.

- Click on “Create new secret key.”
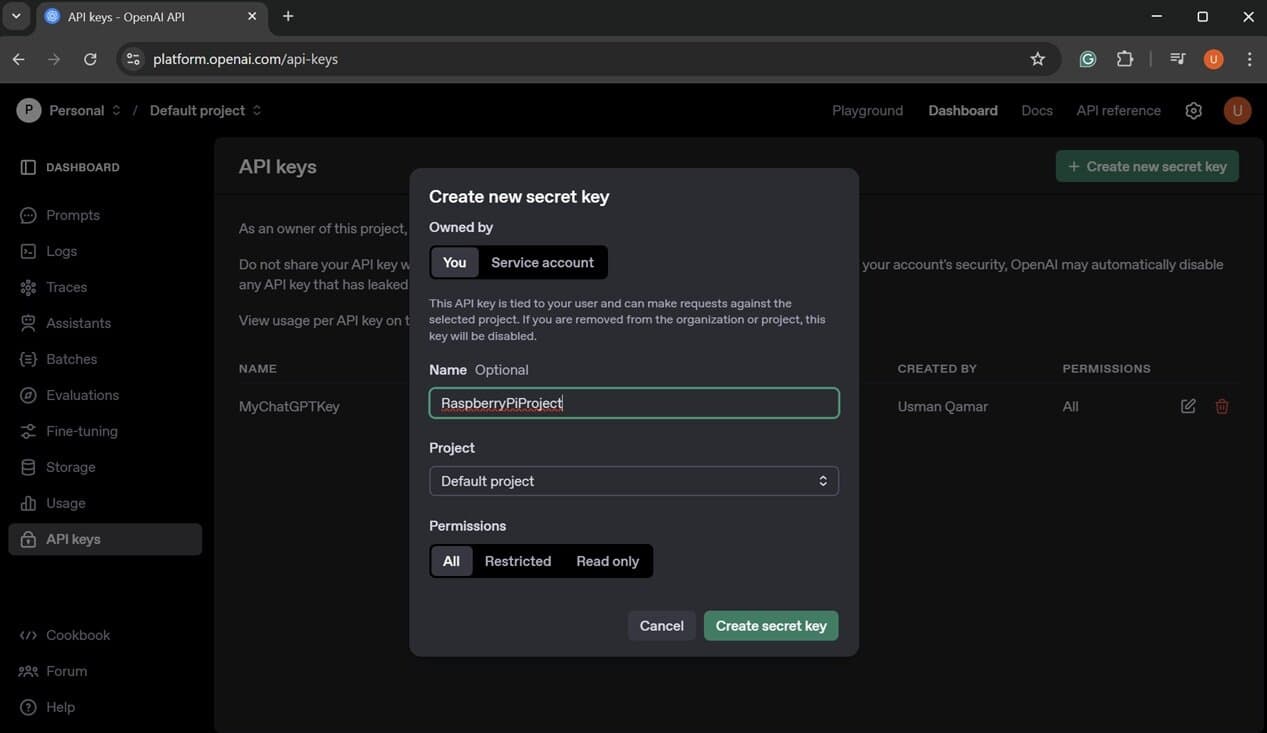
- Enter a name and click on “Create secret key”.
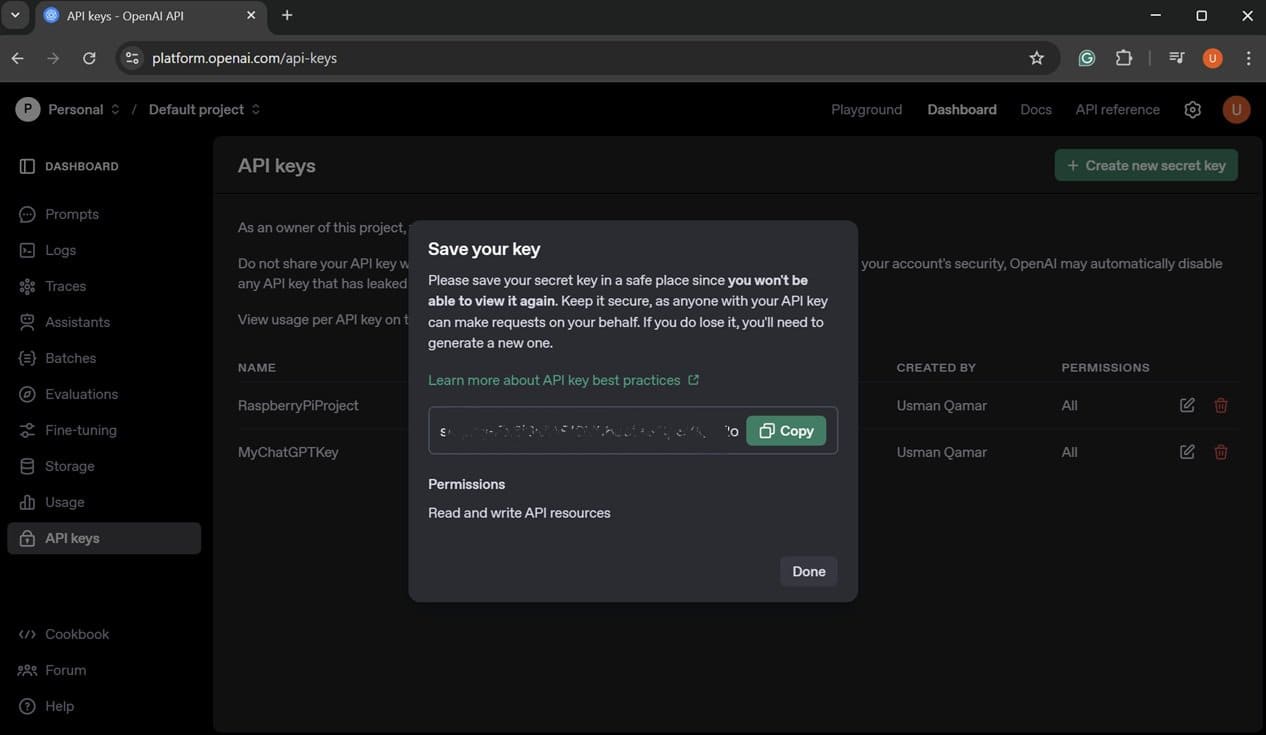
- Copy the key shown in the dialogue box (you only get to view it once, so you should record it somewhere).
- In a terminal on your Raspberry Pi, install the python-dotenv library:
pip install python-dotenv
- Create a .env file in your project directory using any text editor:
nano ~/Projects/ChatGPTAPI/.env
- Paste your key in the .env file as shown below:
OPENAI_API_KEY=sk-XXXXXXXXXXXXXXXXXXXXXXXXXXXX - If you’re using git, make sure to exclude the .env file by adding it to .gitignore.
Note: To use the OpenAI API, you will need a paid account.
With the OpenAI API key saved in the .env file, we’re ready to write our own Python script that can communicate with ChatGPT.
Writing a Python Script With ChatGPT
OpenAI API is relatively straightforward to use. However, we will only cover the basic functionality of the OpenAI API that is primarily related to ChatGPT models. To learn more about the OpenAI API, you can visit their official documentation.
Your First Working Script
The most straightforward way of using the OpenAI API in a Python program is to make a simple chat completion request based on an input prompt.
If like me, you always mix the languages syntax, download my cheat sheet for Python here!
Download now
You might also like: Tired of Raspberry Pi OS? Level up with these top-rated systems.
The following is an example Python script that you can use to test the API:
from openai import OpenAI
import os
from dotenv import load_dotenv

# Load API Key from ENV file
load_dotenv()
client = OpenAI(api_key=os.getenv("OPENAI_API_KEY"))

# Make a Chat Completion Request
response = client.responses.create(
    model="gpt-3.5-turbo",
    input="Tell me a joke about Raspberry Pi."
)

# Print the Output
print(response.output_text)
Create a new Python file using any text editor:nano ~/Projects/ChatGPTAPI/helloworld.py

Copy the above code into the helloworld.py file and then execute the file:python ~/Projects/ChatGPTAPI/helloworld.py

You can change the input prompt to anything and see how ChatGPT responds to that.
How to Change ChatGPT Behaviour With System Instructions
By default, ChatGPT responds as a helpful assistant. However, you can provide ChatGPT-specific instructions to give it more personality and context. For example, you can ask it to act like a pirate, a coach, or a formal tech support agent.
This can be done simply by passing an instructions field in your request. e.g., you can change the function in the above code as shown below:
response = client.responses.create(
    model="gpt-3.5-turbo",
    instructions="Talk like a pirate.",
    input="Is Raspberry Pi a good platform to run OpenAI API?"
)

print(response.output_text)
Now, when you run the program, the output will be generated based on the instructions you provided to ChatGPT.

How to Add a User Input Prompt
If you want to add a human input layer to your project and create a more interactive chat-like experience, you can make minor tweaks to the code above and use input prompts instead of passing static data.
To enable user prompting, replace the input field with a variable, rather than a static value.
For example, you can replace the response function in your code with something like:
user_input = input("Ask ChatGPT something: ")

response = client.responses.create(
    model="gpt-3.5-turbo",
    instructions="You are a dad who likes to make dad jokes.",
    input=user_input
)

print("-----------------------------")
print("ChatGPT:", response.output_text)
Now, when you run this program, a prompt will ask for input.
After pressing Enter, you will receive a response.

Handling Longer Conversations (Context-Based Chat)
By default, whenever you send a chat completion request, ChatGPT treats each request as an independent interaction and does not remember previous conversations.
However, if you want to create a similar experience to the ChatGPT web interface, we can modify the code to enable context-based conversations.
This can be done by replacing the function with this code:
If like me, you always mix the languages syntax, download my cheat sheet for Python here!
Download now
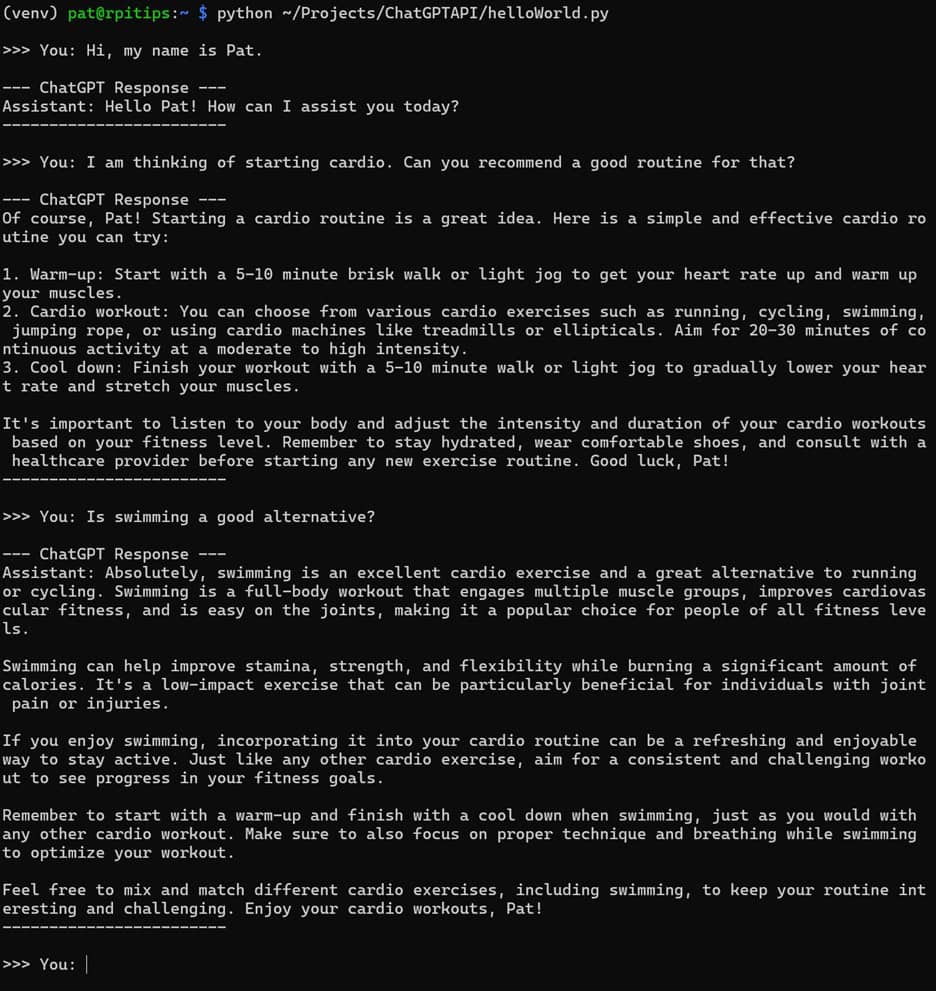
history = "You are a helpful assistant.\n"

while True:
    user_input = input("\n>>> You: ")
    history += f"User: {user_input}\n"

    response = client.responses.create(
        model="gpt-3.5-turbo",
        input=history
    )

    reply = response.output_text.strip()
    print("\n--- ChatGPT Response ---")
    print(reply)
    print("------------------------")

    history += f"Assistant: {reply}\n"
In this code, we maintain a history of the conversation in a variable, and on every response.create() call, we provide it with the complete history to make its response more context-aware.
Now, when you run the program, it will be more akin to the experience you have with the web interface of ChatGPT.
Note: Providing such lengthy context-based input prompts to the OpenAI API will significantly increase the token count, resulting in higher costs per prompt. Furthermore, there is a context window limit for each model as well (e.g., ~16,000 tokens for GPT-3.5, 128,000 for GPT-4).
How to Adjust Model Parameters
Another thing that you can do with the OpenAI API is change the model parameters. We can adjust parameters such as temperature and maximum tokens to tailor its responses.
You can specify the model parameters within the client.response.create() function declaration.
For example:
response = client.responses.create(
    model="gpt-3.5-turbo",
    temperature=0.7,
    max_tokens=60,
    input="Write a haiku about programming in Python."
)
Temperature measures the level of creativity the model employs when generating responses.
A model with a lower temperature will give direct answers, while increasing the temperature will result in more creative and random responses.
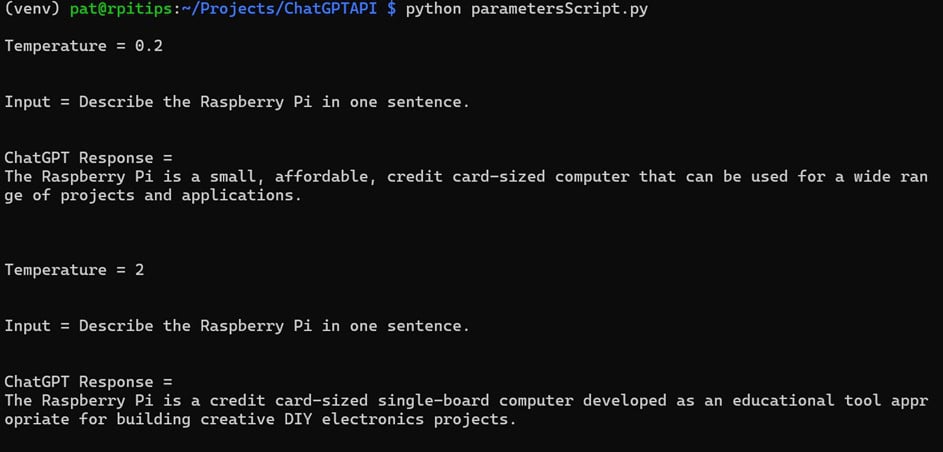
Similarly, max_tokens can be used to limit the maximum number of tokens in a response.
This can be useful if you are concerned about the cost of running each prompt and want to minimize or limit the tokens that each prompt consumes.
How to Switch Between Models (3.5, 4, 4o)
There are various ChatGPT models, each with its strengths and limitations. For instance:
Check this: Need a clear GPIO pinout diagram? Here's mine.
- GPT-3.5 is fast and cost-effective, making it ideal for testing purposes.
- GPT-4o is more intelligent but comes at a higher price.
Several different models are available.
You can check all the models available with your OpenAI account using this script:
from openai import OpenAI
import os
from dotenv import load_dotenv

load_dotenv()
client = OpenAI(api_key=os.getenv("OPENAI_API_KEY"))

models = client.models.list()

# Print the model IDs
for model in models.data:
    print(model.id)
Once you execute this program, it will output a list of all the available models.

Once you know the name of the model that you want to use, you can change the model variable in your client.response.create() function.
response = client.responses.create(
    model="gpt-3.5-turbo",
    input="Write a haiku about programming in Python."
)Download the free PDF, keep it open, and stop wasting time on Google.
Download now
You can read more about the different models available on their official documentation.
If you enjoy learning about Raspberry Pi, you’ll feel right at home in the RaspberryTips Community. It’s a friendly group of makers helping each other grow. Join us today for $1 and see what it’s like inside.
Practical Ideas for ChatGPT Projects
After learning to create your own basic ChatGPT scripts, you can enhance your Raspberry Pi projects by enabling them to communicate with users through ChatGPT’s human-like text outputs.
I have enlisted some ideas that can get you inspired:
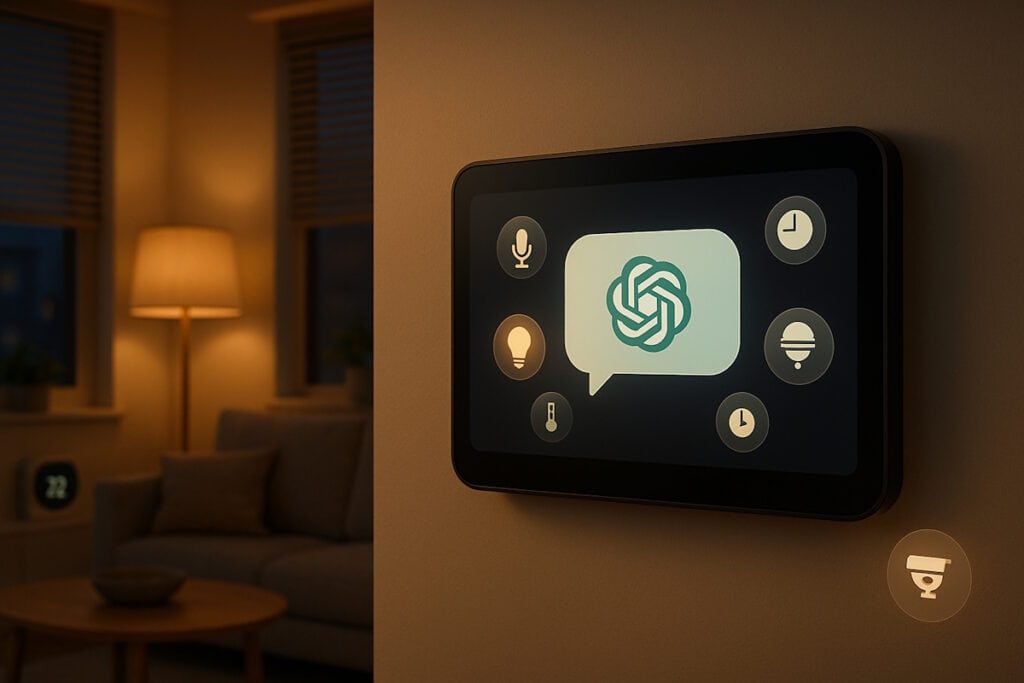
Voice Assistant
We previously developed a purely text-based AI assistant while learning the OpenAI API. We can further enhance it by integrating text-to-speech and speech-to-text engines, such as Mozilla DeepSpeech and Piper, to transform it into an AI-powered voice assistant.
The basic concept is straightforward: instead of providing input and output in text format as before, we can incorporate an additional input and output layer. A sample flowchart for this model is illustrated below.

You can read more about this and other similar project ideas in this article that we have already covered: 5 Easy AI Projects on Raspberry Pi for Beginners.
Related: How to Make a Voice Assistant Using Raspberry Pi (Full Guide)
Daily Briefing Terminal
It would be helpful to receive an AI-generated morning brief that includes information on scheduled activities for the day, the current weather conditions, and any upcoming events.
These input feeds can be pulled from various web services, such as Google Calendar and weather information.
These inputs can be provided to ChatGPT along with a descriptive prompt and specific instructions to tailor the output as a daily briefing, helping you start your day.

You can enhance this concept by integrating it with the previous voice assistant idea to deliver a daily briefing in audio format. This way, you can listen to it while getting ready or commuting to work.
Once completed, we can schedule this program to run every morning at a fixed time using the crontab utility.
Smart Home Control Panel With Natural Language Input
If you’re currently using a smart home control panel, you can enhance its functionality by integrating ChatGPT. By using ChatGPT as the main controller for your smart home, you can issue commands in natural language instead of relying solely on button inputs.
Download the free PDF, keep it open, and stop wasting time on Google.
Download now
ChatGPT will convert your spoken or written commands into the appropriate format to control your devices.
You can even provide it with inputs such as the time of day, along with any sensors you have installed in your home, and allow it to manage things automatically by scheduling your ChatGPT script at a fixed interval.
Once you have all this set up, your smart home will truly be smart and autonomous.
If you don’t already have a smart home control panel set up, you can read this tutorial for some ideas and inspiration: Top Tools for Building a Raspberry Pi Smart Home.
Error Log Analyzer for Linux Services
Another key capability of ChatGPT is that you can input data into it with a proper prompt, allowing it to summarize the data and provide a human-readable description. This can be a powerful tool to use in conjunction with logs from any of your scripts or even the system logs of the Raspberry Pi.
You can combine it with any of the tools you are using to monitor your Raspberry Pi to get smart, human-readable summaries of your system’s behavior over a long period of time.

If you are looking for tools that you can use to monitor the performance of your Raspberry Pi, you can read this article: 9 Best Tools to Monitor Raspberry Pi’s Performance.
Sensor-Based Insight Generator
Besides reading system or script logs, you can use ChatGPT to decode and summarize inputs from multiple sensors that you have connected with your Raspberry Pi as well. This can be particularly useful if you have timestamped input from different sensors.
To gain valuable insights from ChatGPT, it’s important to craft your input prompt carefully. By clearly explaining the structure of your project and detailing the location and purpose of each sensor, ChatGPT can generate human-readable conclusions based on the inputs received from those sensors.

Many sensors can easily be integrated with your Raspberry Pi. You can read this article to get an idea regarding some beginner-friendly sensors: 7 Beginner-Friendly Raspberry Pi Sensors for Your Projects.
Bonus Projects:
- How to Run ChatGPT Locally on Raspberry Pi with Ollama
- How to Summarize YouTube Videos Using AI and Python
Integrating the ChatGPT API with your Raspberry Pi opens up endless possibilities, transforming simple scripts into powerful, intelligent tools. With these steps, you’re now ready to create more innovative and interactive Raspberry Pi projects than ever before.
You might also like: Looking for a fun challenge? Start building your first Raspberry Pi robot!
Whenever you’re ready, here are other ways I can help you:
Test Your Raspberry Pi Level (Free): Not sure why everything takes so long on your Raspberry Pi? Take this free 3-minute assessment and see what’s causing the problems.
The RaspberryTips Community: Need help or want to discuss your Raspberry Pi projects with others who actually get it? Join the RaspberryTips Community and get access to private forums, exclusive lessons, and direct help (try it for just $1).
Master your Raspberry Pi in 30 days: If you are looking for the best tips to become an expert on Raspberry Pi, this book is for you. Learn useful Linux skills and practice multiple projects with step-by-step guides.
Master Python on Raspberry Pi: Create, understand, and improve any Python script for your Raspberry Pi. Learn the essentials step-by-step without losing time understanding useless concepts.
You can also find all my recommendations for tools and hardware on this page.