Getting Started with Rust Programming on Raspberry Pi
If we ran a poll today, Python, C, and C++ would probably top the list of Raspberry Pi languages. But I recently came across another one. Although it’s not as well-known, it has serious potential, especially if you want speed and performance in your projects.
Rust combines the speed of C/C++, the safety of modern languages, and growing IoT support, making it a powerful choice for Raspberry Pi projects.
In this tutorial, we will look at how to get started with Rust, all the way from installation to writing our first Hello World program. To take things even further, we will also write a small program to blink an LED on the Raspberry Pi.
If you’re like me and sometimes mix up syntax between programming languages, I’ve got just the thing for you. I’ve put together a Python cheat sheet with all the essential syntax in one place, so you can keep it handy and avoid any confusion. Download it here for free!
Why Use Rust on Raspberry Pi?
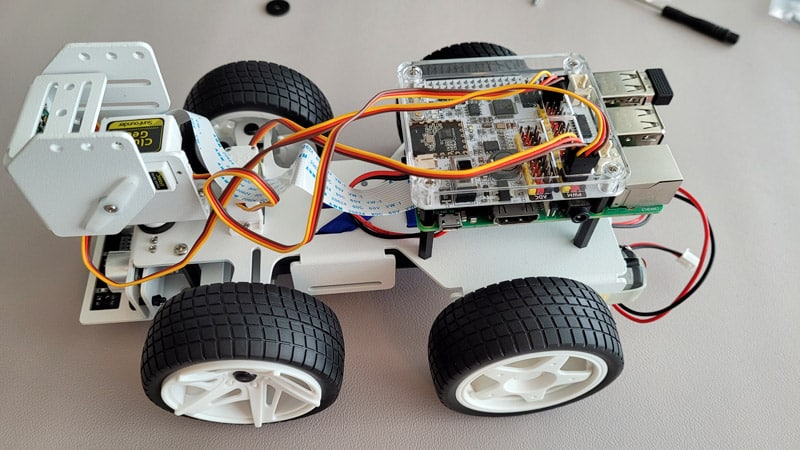
When I first started using the Raspberry Pi, the first language I started with (funny bit) was C++. Nearly every person starts with Python, but by then, the project that I was carrying out had its foundation in C++. It was a line-following Robot.
Once we were done with the project, I switched to Python. It actually turned out to be my favorite because of the many available resources, libraries, and its easy-to-use syntax and readability. You can check out our article on Python vs C++ for Raspberry Pi and learn which is the best for your projects.
Some years down the line, I accidentally landed on Rust. I am saying “accidentally” because, although I have a good background in software development, I had never used or written a single line of Rust code before.
I decided to work with it on a small project that I had previously done with Python related to cybersecurity, and one thing I noticed is that Rust gives us the speed of C and C++.
You see, Python is an interpreted language, which means an interpreter is required to interpret each line at runtime, making it slower in execution. Rust, on the other hand, is a compiled language that is translated directly into machine code before execution. So Rust runs much faster once built.
Comparison with Other Raspberry Pi Languages
| Language | Strengths | Weakness | Best For |
| Python | Easy to learn, huge community, tons of Raspberry Pi tutorials. | Beginner-friendly, quick prototyping, automation scripts | Beginner-friendly, quick prototyping, automation scripts. |
| C/C++ | High performance, direct hardware access, widely used in embedded systems. | Manual memory management, steeper learning curve. | Beginner-friendly, quick prototyping, and automation scripts. |
| Rust | Performance close to C/C++, memory safety, modern tooling (cargo). | Longer compile times, smaller ecosystem than Python. | Reliable IoT apps, safe and efficient Raspberry Pi projects. |
Setting Up Rust on Raspberry Pi
Now that you have a good understanding of Rust, I will take you through installing and setting it up on your Raspberry Pi. It’s a straightforward process that will only take a few minutes.
If like me, you always mix the languages syntax, download my cheat sheet for Python here!
Download now
But first, let me review some of the things you will need for this tutorial.
Requirements
To follow along, make sure you have:
- An updated Raspberry Pi OS: It is always a good idea to run the commands below in your terminal to keep your packages up-to-date:
sudo apt update
sudo apt upgrade
In any case, if you haven’t installed an OS yet, then you can go through our post on how to install (or Reinstall) Raspberry Pi OS on your Pi. - A stable internet connection: Since we will be installing several packages, you will require a good and active internet connection, either via WiFi or Ethernet.
- Access to the terminal: This can be directly on the Raspberry Pi terminal or via SSH.
- cURL (Client URL): You will need this tool to download the Rust installation script. You can check whether it’s already installed using the command below:
curl --versionIf it’s not installed, install it using the command below:sudo apt install curl
Installing Rust on Raspberry Pi
The easiest way to install Rust is with rustup. It is the official and recommended tool to install and manage the Rust programming language.
Open your terminal and run the command below:curl --proto '=https' --tlsv1.2 -sSf https://sh.rustup.rs | sh

This will download and install Rust along with Cargo (Rust’s package manager and build tool). During the installation, you will come across a prompt to select the “installation options” you want. They include:
- (1) Proceed with standard installation (default – just press enter).
- (2) Customize installation.
- (3) Cancel installation.
Just type “1” and hit Enter to proceed.

The installation will only take a few minutes if your internet is good. Once done, the first thing we need to do is make sure that the terminal knows where to find Rust. Usually, rustup takes care of this, but just to be sure, run the command below: source $HOME/.cargo/env
Verify Rust Installation
After installing Rust, the next step is to verify the installation before proceeding with writing code. You can easily do that using the command below:rustc --version
Writing Your First Rust Program on Raspberry Pi
Up to this point, we have everything up and running. Rust is already installed on the Raspberry Pi, and we can now dive into the juicy part – writing our first Rust program.
Creating a New Project with Cargo
I will use Cargo, Rust’s built-in package manager and build system, which makes project setup and management super easy.
If like me, you always mix the languages syntax, download my cheat sheet for Python here!
Download now
Launch your terminal and run the commands below:cargo new hello_rust
cd hello_rust
These two commands do two simple things. The first one creates a brand-new Rust project called hello_rust. Cargo sets up everything we need right away, eliminating the need to hunt for files or build tools.
The second command helps you navigate into the newly created hello_rust directory.
If you get an error like “Command ‘cargo’ not found,” it means Crago was not successfully installed with rustup. However, you can proceed to install it using the command below:sudo apt install cargo

Understanding the Project Structure
When you look at the project structure (hello_rust folder), you’ll find two main things:
- Cargo.toml: This is the project’s configuration file. It’s like the “recipe card” where we list the project name, version, and any dependencies (extra libraries) we want to use.
If you have ever worked with JavaScript frameworks before, like ReactJS, it is slightly similar to the “package.json” file. - src/main.rs: This is the actual Rust source code file. By default, Cargo puts a simple “Hello, world!” program here for us.
Here is a screenshot of how the folder looks on my end:

Now, if you go inside the src folder and open the main.rs file, you will see some default code like the one shown below.
fn main() {
    println!("Hello, world!");
}
Printing “Hello, Raspberry Pi!”
That is just a simple line of code. To experience some thrill of the Rust programming language, let’s do something a little more, which will need a few lines of code.
Download the free PDF, keep it open, and stop wasting time on Google.
Download now
Read next: No screen? No problem! Here's how to setup a Pi without one.
We will create a Rust program that prompts users to enter their names (say Joe) and then prints a message like “Welcome Joe – this is Raspberrytips.com.”
use std::io;

fn main() {
    println!("What is your name?");

    // Create a new mutable String to store input
    let mut name = String::new();

    // Read input from the terminal
    // This prompts users to enter their name in the terminal
    io::stdin()
        .read_line(&mut name)
        .expect("Failed to read line");

    // Trim whitespace (like newline) from the input
    let name = name.trim();

    // Print the personalized message
    println!("Welcome {} - this is Raspberrytips.com", name);
}
Now, let me give you a quick overview of what this program does:
- We import std::io: This will enable you to implement a read Input or Output (I/O) functionality in our program. That enables us to read the user’s name from the terminal.
- Next, we prompt users to enter their name using the line: println!(“What is your name?”);.
- We use read_line() to grab what users type.
- After users type their names, they will press Enter. Unfortunately, that will introduce a newline (\n) into our code that we don’t need. We use .trim() to remove this new line.
- Finally, we print the welcome message using {} to insert their name.
Running the Program
Now, let’s run this program and see what results we have. To run a Rust program, all you need to do is navigate to your project folder and type the command below:cargo run
Cargo will compile the code and run it. If everything worked, you would see a prompt requesting you to enter your name.
Type your name and press enter. The program will then display the welcome message with your name included.

That was actually fun. It reminds me of when I was learning C some years ago. It was my first programming language, and we could write some fun programs like these which require user input.
Using Rust with Raspberry Pi GPIO
Up to that point, I believe we now have a good grasp of Rust. We have learned how to install it on our Raspberry Pi and even wrote a simple program that prompted for user input.
You might also like: The 5 fastest web browsers for Raspberry Pi — tested and ranked!
In this section, we will write a Rust program that will blink an LED connected to one of the GPIO pins on the Raspberry Pi.
Requirements
This is a hands-on project that requires a few things. Below are some of the items you need for the project:
- An LED: The one I used is rated (8mm, 3.5V, 30mA).
- Resistor: This will be dependent on the LED you are using. But something to take note of is that “the higher the resistor value, the dimmer the LED will be.”
- Breadboard: This is optional if you are good at soldering and can solder the LED and resistor perfectly to the GPIO pins (but I wouldn’t recommend it).
- Jumper wires.
Code to Blink LED
Download the free PDF, keep it open, and stop wasting time on Google.
Download now
To write the code, we need to blink the LED. First, we need to create a new Rust project using Cargo. You remember how we did in the previous section:cargo new blink_led
Then navigate into this blink_led folder and edit the main.rs file.

Next, open the main.rs file using your favorite code editor and paste the code below. In my case, I am using the nano editor.
use std::error::Error;
use std::thread;
use std::time::Duration;

use rppal::gpio::Gpio;
use rppal::system::DeviceInfo;

// Gpio uses BCM pin numbering. BCM GPIO 23 is tied to physical pin 16.
const GPIO_LED: u8 = 23;

fn main() -> Result<(), Box<dyn Error>> {
    println!("Blinking an LED on a {}.", DeviceInfo::new()?.model());

    let mut pin = Gpio::new()?.get(GPIO_LED)?.into_output();

    loop {
        // Turn LED on
        pin.set_high();
        thread::sleep(Duration::from_millis(1000));

        // Turn LED off
        pin.set_low();
        thread::sleep(Duration::from_millis(1000));
    }
}
Run Program
To run the program, we will use cargo as we did in the previous section:cargo run
Below are the results I got on my end.
You might also like: Yes, you can access your Pi from anywhere. Here's how.
From the video above, you can see that we were able to successfully blink an LED with Rust. That is a clear indication that Rust can also be used to handle complex hardware projects.
I hope I’ve given you a clear guide on how to get started with Rust on Raspberry Pi. If you’re a beginner, you can first work on projects that don’t need a lot of hardware tinkering. Once you have gotten a good grasp of the language, you can next jump into the GPIO pins.
If you enjoy learning about Raspberry Pi, you’ll feel right at home in the RaspberryTips Community. It’s a friendly group of makers helping each other grow. Join us today for $1 and see what it’s like inside.
Frequently Asked Questions
What is cross-compiling in Rust?
Cross-compiling means building your Rust program on one machine but targeting a different machine or architecture.
For example, instead of compiling directly on your Raspberry Pi – which can be slow, especially for large projects – you compile the code on your more powerful PC or laptop, then copy the finished binary over to the Pi.
Are there many resources for Rust on Raspberry Pi?
Unfortunately, unlike Python, the availability of Rust on Raspberry Pi resources is not really extensive or mature. However, as Rust continues to gain popularity in the Raspberry Pi community, that story might be totally different a few years from now.
Whenever you’re ready, here are other ways I can help you:
Test Your Raspberry Pi Level (Free): Not sure why everything takes so long on your Raspberry Pi? Take this free 3-minute assessment and see what’s causing the problems.
The RaspberryTips Community: Need help or want to discuss your Raspberry Pi projects with others who actually get it? Join the RaspberryTips Community and get access to private forums, exclusive lessons, and direct help (try it for just $1).
Master your Raspberry Pi in 30 days: If you are looking for the best tips to become an expert on Raspberry Pi, this book is for you. Learn useful Linux skills and practice multiple projects with step-by-step guides.
Master Python on Raspberry Pi: Create, understand, and improve any Python script for your Raspberry Pi. Learn the essentials step-by-step without losing time understanding useless concepts.
You can also find all my recommendations for tools and hardware on this page.