Python Invoice Generator – Say Goodbye to Manual Invoicing
In this project, we will learn how to create a python invoice generator using Tkinter library and the invoice generator library. This project will take input from the user and generate an invoice in the form of a PDF file.
Python Invoice Generator
The objective of this project is to provide a step-by-step guide for creating an invoice generator using Python’s Tkinter library and the Invoice Generator library.
Prerequisites for Invoice Generator using Python
- Basic knowledge of Python programming
- Tkinter library installed
- InvoiceGenerator library installed
Tkinter and Invoice Generator can be installed by running the following commands into the terminal
pip install tk
pip install InvoiceGenerator
Download Python Invoice Generator Project
Please download the source code of python invoice generator project from the following link: Python Invoice Generator Code
Steps to Create Invoice Generator using Python
Following are the steps for developing the python invoice generator project:
Step 1: Importing Libraries
The first step towards creating a python invoice generator is importing the required Modules. We will be using the Tkinter library for creating the GUI, the os library for working with the file system, the decimal library for working with decimal numbers, and the Invoice Generator library for generating the invoice.
# Importing the required modules
import os
from decimal import Decimal
import tkinter as tk
from tkinter import messagebox
from tkinter import filedialog
from datetime import datetime

from InvoiceGenerator.api import Invoice, Item, Client, Provider, Creator
from InvoiceGenerator.pdf import SimpleInvoice
Step 2: Creating the main
In this step, we will create the GUI for our app using Tkinter. We will create a root window, set its title, size, and background color. We will also create various labels, entries, and buttons for taking input from the user.
# Creating root window and setting its title, size and background color
root = tk.Tk()


root.title("TechVidvan - Invoice Generator")
root.geometry("550x760")
root.resizable(width=False, height=False)
root.configure(background="#DB9BF6")
Step 3: Create a function to generate the invoice
In this step, we will create a function that will be called when the user clicks the “generate” button. This function will take the input from the user, create an invoice object, and generate the invoice in the form of a PDF file.
- In the first line of the function, we check if any of the form fields are empty. If any of the fields are empty, we display an error message to the user and return from the function.
- Then we set the invoice language to English using the os.environ[“INVOICE_LANG”] = “en” line of code.
- Then we create the client, provider, and creator objects using the input provided by the user in the form fields.
- After that, we set the currency locale, currency, invoice number, and invoice date using the invoice object.
- Then we set the use_tax attribute of the invoice object to True.
- Then we add an item to the invoice using the input provided by the user in the form fields.
- Then we ask the user to select the location where they want to save the invoice file using the filedialog.asksaveasfilename() function.
- If the user does not select any location, we return from the function, else we create the invoice object and generate the invoice using the SimpleInvoice(invoice) function.
- Then we display a success message to the user.
# Creating a function to generate invoice when generate button is clicked
def generate_invoice():
# Checking if all the fields are filled or not
if invoice_num_entry.get() == "" or invoice_date_entry.get() == "" or customer_name_entry.get() == "" or email_entry.get() == "" or phone_entry.get() == "" or address_entry.get("1.0", 'end-1c') == "" or product_name_entry.get() == "" or description_entry.get("1.0", 'end-1c') == "" or price_entry.get() == "" or tax_entry.get() == "":
# If any field is empty, then show an error message
messagebox.showerror("Error", "Please fill all the fields")
return
# If all the fields are filled, then generate the invoice
# Setting the language of the invoice to English
os.environ["INVOICE_LANG"] = "en"
# Creating an Client object with the customer details
client = Client(summary=customer_name_entry.get(), address=address_entry.get("1.0", 'end-1c'), zip_code='45XXXX', city='Indore', country='India', phone=phone_entry.get(), email=email_entry.get())
# Creating an Provider object with the provider details
provider = Provider(summary='TechVidvan', address='Indore', zip_code='45XXXX', city='Indore', country='India', bank_name='HSBC', bank_code='HSBC232423', bank_account='9753108642147085', phone='9876543210',email='[email protected]',logo_filename='logo.png')
# Creating an Creator object with the creator details
creator = Creator('TechVidvan', stamp_filename='stamp.png')
# Creating an Invoice object with the invoice details
invoice = Invoice(client, provider, creator)
invoice.currency_locale = 'en_IN.UTF-8'
invoice.currency = 'INR'
invoice.number = invoice_num_entry.get()
invoice.date = datetime.now()
invoice.use_tax = True
# Adding an Item object to the invoice
invoice.add_item(Item(count=1, price=price_entry.get(), description=product_name_entry.get()+" "+description_entry.get("1.0", 'end-1c'), tax=Decimal(tax_entry.get())))
# Asking the user to provide the path to save the invoice
file_name_path = filedialog.asksaveasfilename(defaultextension='.pdf')
# If the user doesn't provide any path, then return
if file_name_path == "":
return
# Generating the invoice if the user provides the path
pdf = SimpleInvoice(invoice)
pdf.gen(file_name_path, generate_qr_code=True)
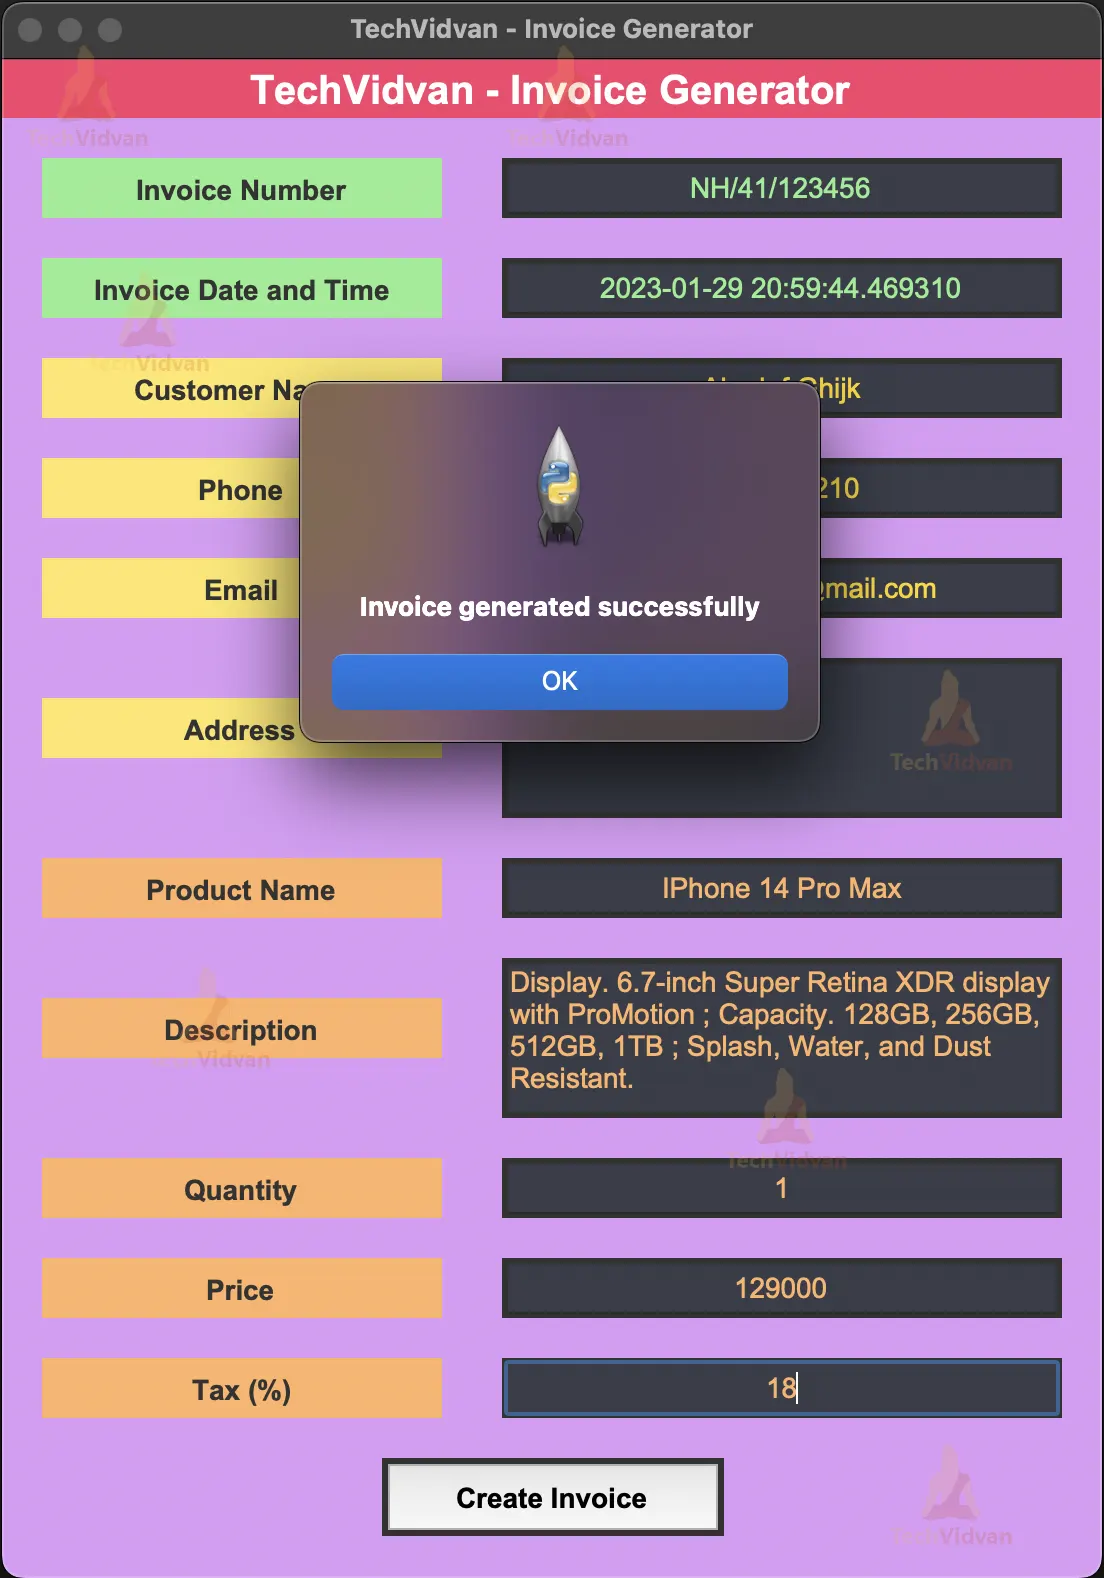
# Showing a success message after the invoice is generated
messagebox.showinfo("Success", "Invoice generated successfully")
Step 4: Creating the GUI
In this step, we will create the GUI using the Tkinter library. We will create a window with a title, a label, and a button. The label will display the text “Invoice Generator” and the button will display the text “Generate Invoice”.
# Creating a label for the title
title_label=tk.Label(root)
title_label.configure(background="#f8406b",font="Arial 20 bold",foreground="#ffffff",justify="center",text="TechVidvan - Invoice Generator")
title_label.place(x=0,y=0,width=550,height=30)


# Creating a label for the invoice number
invoice_num_label=tk.Label(root)
invoice_num_label.configure(background="#90ee90",font="Arial 14 bold",foreground="#333333",justify="center",text="Invoice Number")
invoice_num_label.place(x=20,y=50,width=200,height=30)


# Creating an entry for the invoice number
invoice_num_entry=tk.Entry(root)
invoice_num_entry.configure(background="#393d49",font="Arial 14",foreground="#90ee90",justify="center")
invoice_num_entry.place(x=250,y=50,width=280,height=30)


# Creating a label for the invoice date
invoice_date_label=tk.Label(root)
invoice_date_label.configure(background="#90ee90",font="Arial 14 bold",foreground="#333333",justify="center",text="Invoice Date and Time")
invoice_date_label.place(x=20,y=100,width=200,height=30)


# Creating an entry for the invoice date
invoice_date_entry=tk.Entry(root)
invoice_date_entry.configure(background="#393d49",font="Arial 14",foreground="#90ee90",justify="center")
invoice_date_entry.insert(0, datetime.now())
invoice_date_entry.place(x=250,y=100,width=280,height=30)


# Creating a label for the customer name
customer_name_label=tk.Label(root)
customer_name_label.configure(background="#ffe667",font="Arial 14 bold",foreground="#333333",justify="center",text="Customer Name")
customer_name_label.place(x=20,y=150,width=200,height=30)


# Creating an entry for the customer name
customer_name_entry=tk.Entry(root)
customer_name_entry.configure(background="#393d49",font="Arial 14",foreground="#ffd700",justify="center")
customer_name_entry.place(x=250,y=150,width=280,height=30)


# Creating a label for the customer email
email_label=tk.Label(root)
email_label.configure(background="#ffe667",font="Arial 14 bold",foreground="#333333",justify="center",text="Email")
email_label.place(x=20,y=250,width=200,height=30)


# Creating an entry for the customer email
email_entry=tk.Entry(root)
email_entry.configure(background="#393d49",font="Arial 14",foreground="#ffd700",justify="center")
email_entry.place(x=250,y=250,width=280,height=30)


# Creating a label for the customer phone
phone_label=tk.Label(root)
phone_label.configure(background="#ffe667",font="Arial 14 bold",foreground="#333333",justify="center",text="Phone")
phone_label.place(x=20,y=200,width=200,height=30)


# Creating an entry for the customer phone
phone_entry=tk.Entry(root)
phone_entry.configure(background="#393d49",font="Arial 14",foreground="#ffd700",justify="center")
phone_entry.place(x=250,y=200,width=280,height=30)


# Creating a label for the customer address
address_label=tk.Label(root)
address_label.configure(background="#ffe667",font="Arial 14 bold",foreground="#333333",justify="center",text="Address")
address_label.place(x=20,y=320,width=200,height=30)


# Creating an entry for the customer address
address_entry=tk.Text(root)
address_entry.configure(background="#393d49",font="Arial 14",foreground="#ffd700", wrap="word")
address_entry.place(x=250,y=300,width=280,height=80)


# Creating a label for the product name
product_name_label=tk.Label(root)
product_name_label.configure(background="#ffb367",font="Arial 14 bold",foreground="#333333",justify="center",text="Product Name")
product_name_label.place(x=20,y=400,width=200,height=30)


# Creating an entry for the product name
product_name_entry=tk.Entry(root)
product_name_entry.configure(background="#393d49",font="Arial 14",foreground="#ffb367",justify="center")
product_name_entry.place(x=250,y=400,width=280,height=30)


# Creating a label for the product description
description_label=tk.Label(root)
description_label.configure(background="#ffb367",font="Arial 14 bold",foreground="#333333",justify="center",text="Description")
description_label.place(x=20,y=470,width=200,height=30)


# Creating an entry for the product description
description_entry=tk.Text(root)
description_entry.configure(background="#393d49",font="Arial 14",foreground="#ffb367", wrap="word")
description_entry.place(x=250,y=450,width=280,height=80)


# Creating a label for the product quantity
quantity_label=tk.Label(root)
quantity_label.configure(background="#ffb367",font="Arial 14 bold",foreground="#333333",justify="center",text="Quantity")
quantity_label.place(x=20,y=550,width=200,height=30)


# Creating an entry for the product quantity
quantity_entry=tk.Entry(root)
quantity_entry.configure(background="#393d49",font="Arial 14",foreground="#ffb367",justify="center")
quantity_entry.place(x=250,y=550,width=280,height=30)


# Creating a label for the product price
price_label=tk.Label(root)
price_label.configure(background="#ffb367",font="Arial 14 bold",foreground="#333333",justify="center",text="Price")
price_label.place(x=20,y=600,width=200,height=30)


# Creating an entry for the product price
price_entry=tk.Entry(root)
price_entry.configure(background="#393d49",font="Arial 14",foreground="#ffb367",justify="center")
price_entry.place(x=250,y=600,width=280,height=30)


# Creating a label for the product tax
tax_label=tk.Label(root)
tax_label.configure(background="#ffb367",font="Arial 14 bold",foreground="#333333",justify="center",text="Tax (%)")
tax_label.place(x=20,y=650,width=200,height=30)


# Creating an entry for the product tax
tax_entry=tk.Entry(root)
tax_entry.configure(background="#393d49",font="Arial 14",foreground="#ffb367",justify="center")
tax_entry.place(x=250,y=650,width=280,height=30)


# Creating a button to create the invoice
create_invoice_button=tk.Button(root)
create_invoice_button.configure(font="Arial 14 bold",justify="center",text="Create Invoice", command=generate_invoice)
create_invoice_button.place(x=190,y=700,width=171,height=39)
Step 5: Run the mainloop
In the end, we run the mainloop. This is the loop that keeps the window open and running.
# Run the mainloop
root.mainloop()
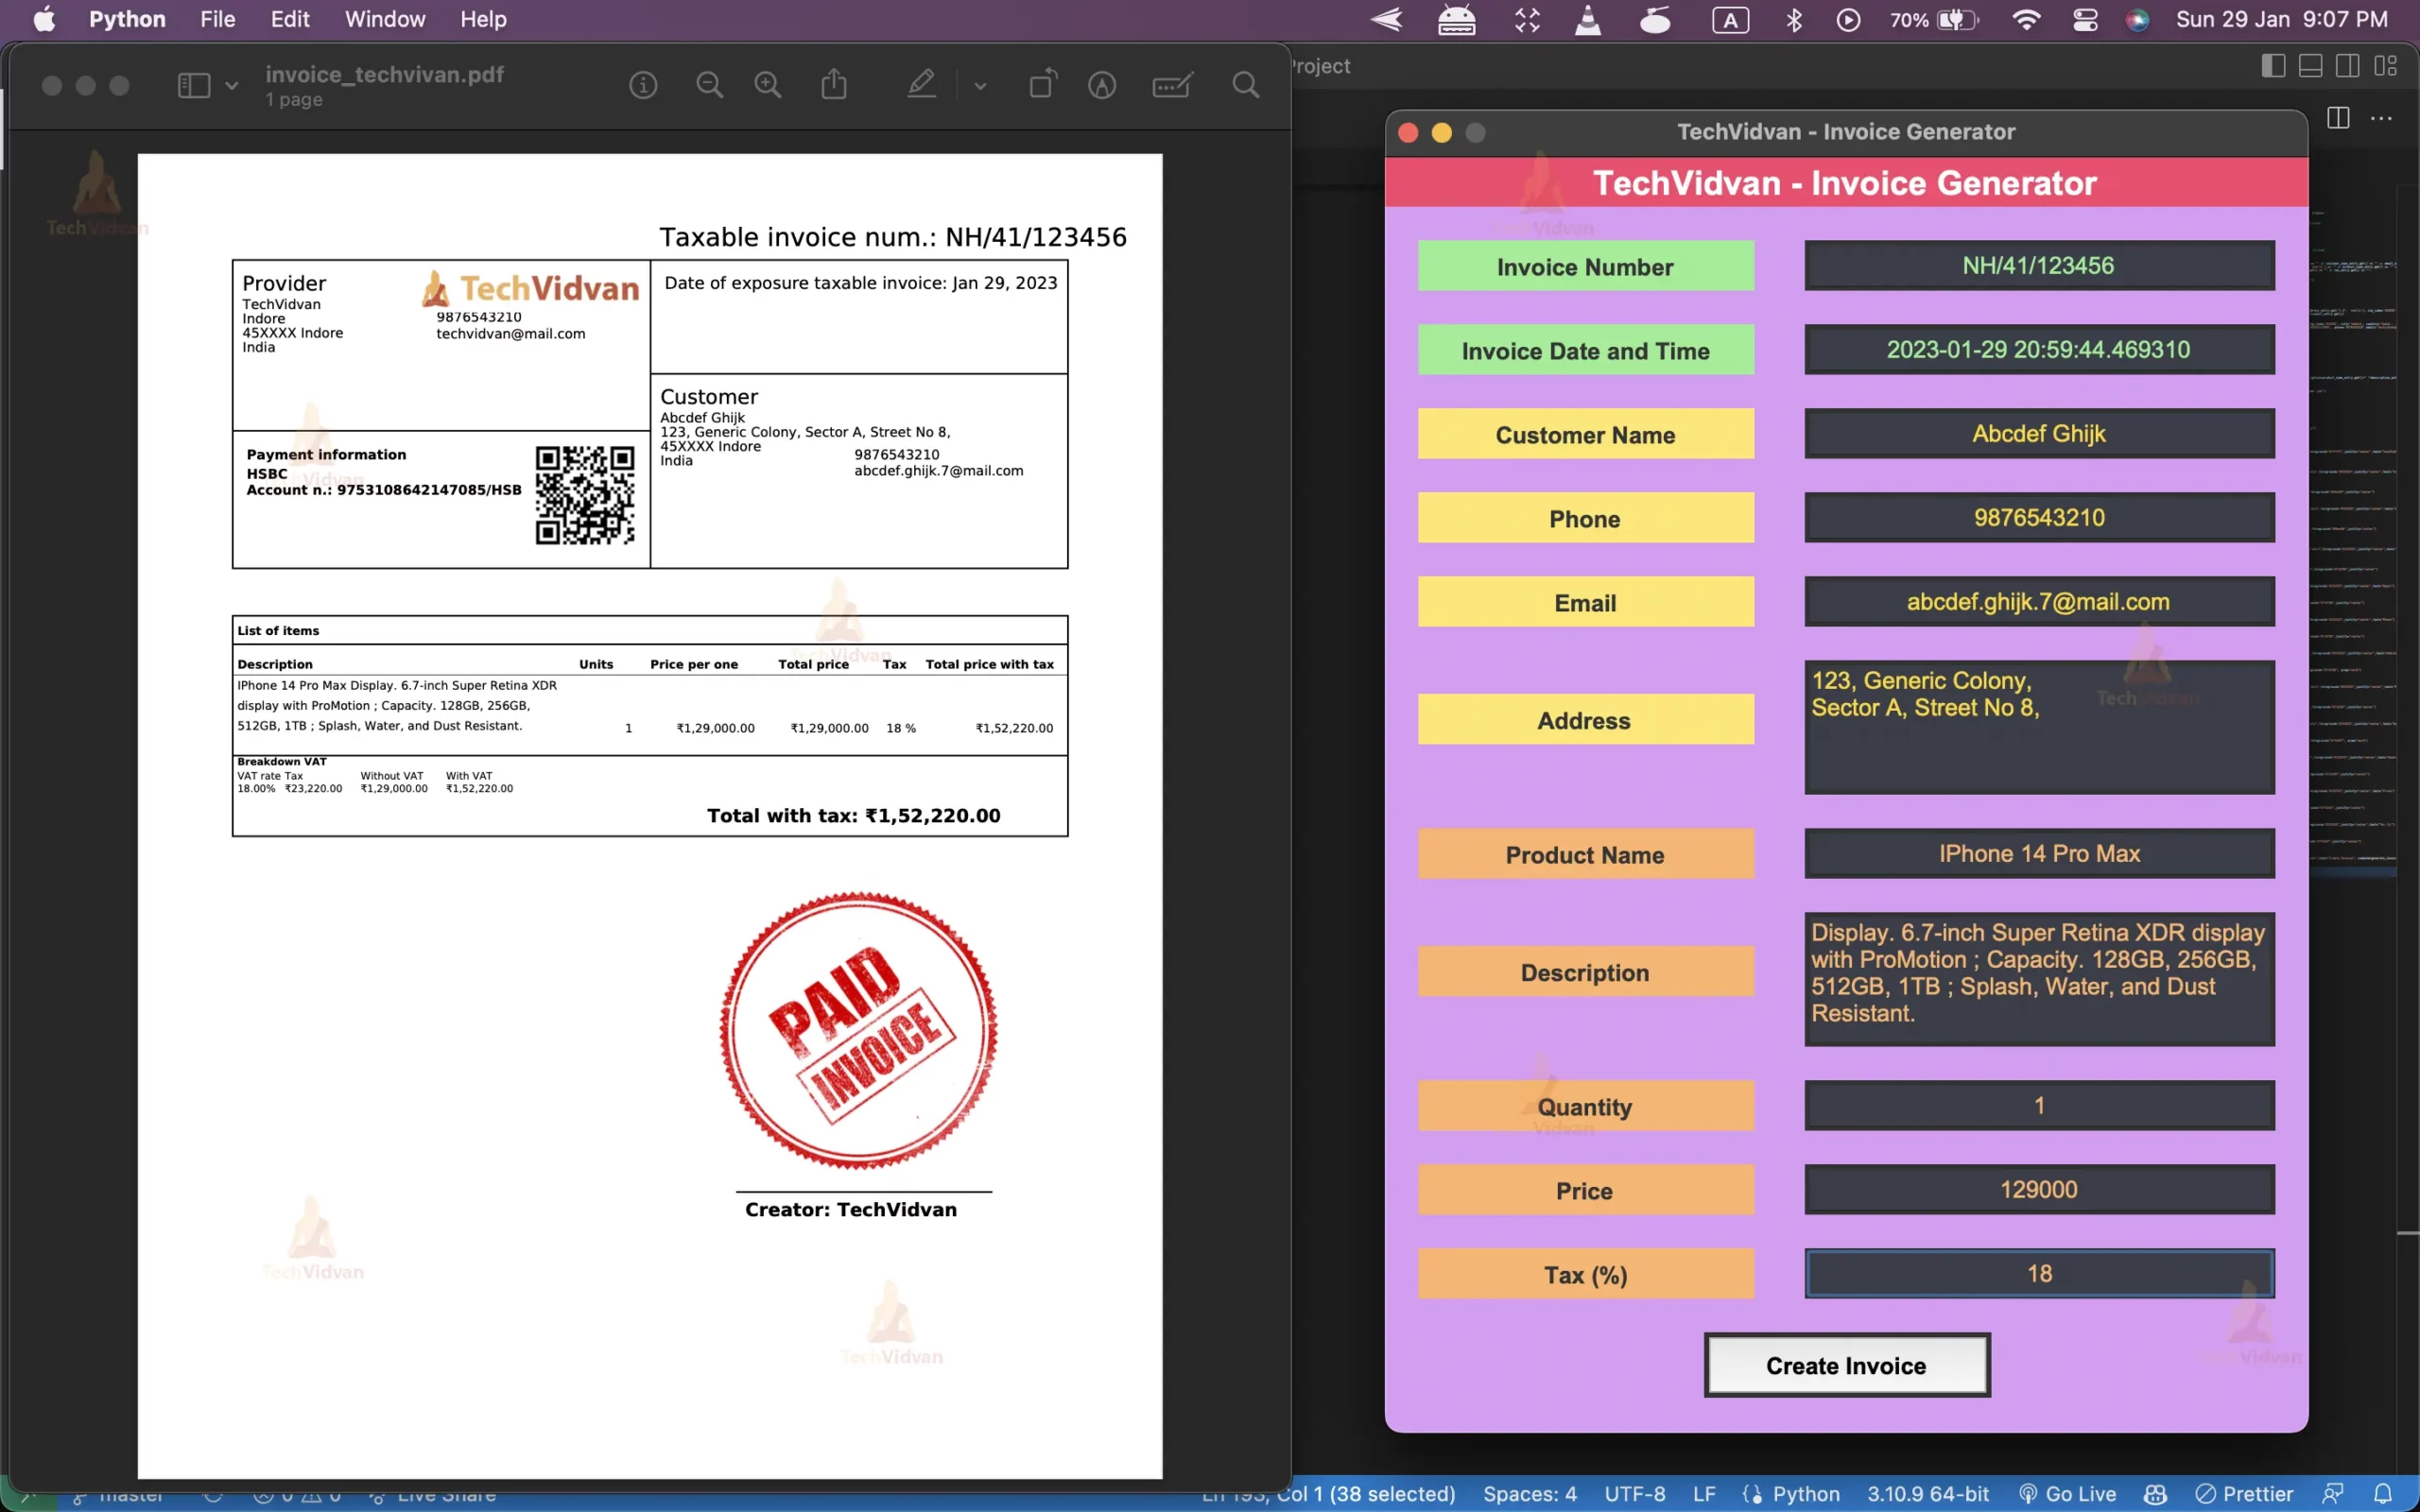
Python Invoice Generator Output
Summary
Congratulations you have successfully created the Invoice generator using python. In this python project, you learned how to use Tkinter and InvoiceGenerator library. Now you can create invoices using this python invoice generator. However, this does not end. You can add more features, like multiple invoice generation and more. Keep learning and keep coding.