Blogging Platform using Django
Last Updated :
23 Jul, 2025
Our task is to build a simple blogging platform using Django. We will learn how to create, display, edit, and delete blog posts with images using Django’s models, views, templates, and admin panel. Step-by-step, we’ll set up the project, connect it to a database, and run it locally.
Project Setup
Prerequisites:
Start by creating your Django project and app:
django-admin startproject blogsite
cd blogsite
python manage.py startapp gallery
Create the Product Model
The Product model represents a blog post with an image and timestamps.
gallery/models.py:
Python
from django.db import models

class Product(models.Model):
    name = models.CharField(max_length=255)
    description = models.TextField()
    image = models.ImageField(upload_to='products/')
    created_at = models.DateTimeField(auto_now_add=True)
    updated_at = models.DateTimeField(auto_now=True)

    def __str__(self):
        return self.name

    def edit(self, name, description, image):
        self.name = name
        self.description = description
        self.image = image
        self.save()


    def short_description(self):
        # Split the description into words
        words = self.description.split()
        if len(words) > 50:
            # Join the first 50 words and add "..." at the end
            return ' '.join(words[:30]) + '...'
        else:
            # If the description is already less than 50 words, return it as is
            return self.description
Register Model in Admin
gallery/admin.py:
Python
from django.contrib import admin
from .models import Product

# Register your models here.
admin.site.register(Product)
gallery/forms.py:
Python
from django import forms
from .models import Product

class ProductForm(forms.ModelForm):
    class Meta:
        model = Product
        fields = ['name', 'description', 'image']
Define Views
gallery/views.py:
Python
from django.shortcuts import render
from .models import Product
from django.http import HttpResponse
from django.shortcuts import render, redirect, get_object_or_404
from .models import Product
from .forms import ProductForm


def product_list(request):
    products = Product.objects.all()
    return render(request, 'myapp/index.html', {'products': products})

def product_detail(request, pk):
    product = Product.objects.get(pk=pk)
    return render(request, 'myapp/index2.html', {'product': product})


def edit_product(request, pk):
    product = get_object_or_404(Product, pk=pk)
    if request.method == 'POST':
        form = ProductForm(request.POST, instance=product)
        if form.is_valid():
            form.save()
            return redirect('product_list')
    else:
        form = ProductForm(instance=product)
    return render(request, 'myapp/edit.html', {'form': form})

def delete_product(request, pk):
    product = get_object_or_404(Product, pk=pk)
    if request.method == 'POST':
        product.delete()
        return redirect('product_list')
    return render(request, 'myapp/delete.html', {'product': product})


def home(request):
    return HttpResponse('Hello, World!')
URL Configuration
gallery/urls.py:
Python
from django.urls import path
from . import views

urlpatterns = [
    path('home/', views.home, name='home'),
    path('', views.product_list, name='product_list'),
    path('<int:pk>/', views.product_detail, name='product_detail'),
    path('<int:pk>/edit/', views.edit_product, name='edit_product'),
    path('<int:pk>/delete/', views.delete_product, name='delete_product'),
]
blogsite/urls.py:
Python
from django.contrib import admin
from django.urls import path, include
from django.conf import settings
from django.conf.urls.static import static

urlpatterns = [
    path('admin/', admin.site.urls),
    path('', include('gallery.urls')),
]

if settings.DEBUG:
    urlpatterns += static(settings.MEDIA_URL, document_root=settings.MEDIA_ROOT)
In blogsite/settings.py, add:
Python
import os

MEDIA_URL = '/media/'
MEDIA_ROOT = os.path.join(BASE_DIR, 'media')
HTML Templates
Create a templates/myapp/ directory inside the gallery app and add the following:
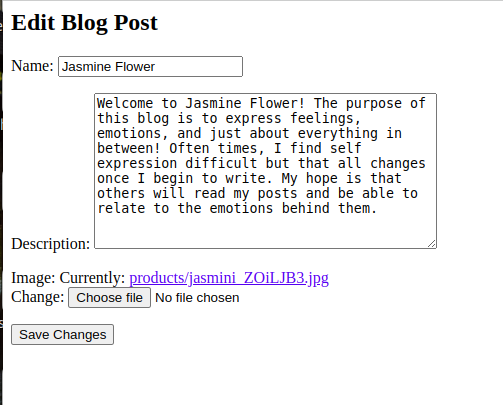
edit.html: HTML file to edit the Blog.
HTML
<h2>Edit Blog Post</h2>
<form method="post">
    {% csrf_token %}
    {{ form.as_p }}
    <button type="submit">Save Changes</button>
</form>
delete.html: HTML file to delete the Blog.
HTML
<h2>Delete Blog Post</h2>
<p>Are you sure you want to delete "{{ product.name }}"?</p>
<form method="post">
    {% csrf_token %}
    <button type="submit">Yes, Delete</button>
</form>
index.html: HTML file to show all the list of the Blog.
Python
<!DOCTYPE html>
<html lang="en">
<head>
    <meta charset="UTF-8">
    <meta name="viewport" content="width=device-width, initial-scale=1.0">
    <title>Blog Website</title>
    <!-- Add Bootstrap CSS link here -->
    <link rel="stylesheet" href="https://maxcdn.bootstrapcdn.com/bootstrap/4.5.2/css/bootstrap.min.css">
</head>
<body>
    <div class="container mt-5">
        <h1>Today's New Blogs</h1>
        <div class="row">
            {% for product in products %}
                <div class="col-md-4 mb-4">
                    <div class="card">
                        <a href="{% url 'product_detail' product.pk %}">
                            <img src="{{ product.image.url }}" alt="{{ product.created_name }}" class="card-img-top">
                        </a>
                        <div class="card-body">
                            <h5 class="card-title">{{ product.name }}</h5>
                            <p class="card-text">{{ product.short_description }}</p>
                            <a href="{% url 'edit_product' product.pk %}">Edit</a>
                            <a href="{% url 'delete_product' product.pk %}">Delete</a> <br>
                            <small class="card-text">Created at: {{ product.created_at }}</small> <br>
                            <small class="card-text">Updated at: {{ product.updated_at }}</small>
                        </div>
                    </div>
                </div>
            {% endfor %}
        </div>
    </div>

    <!-- Add Bootstrap JS and jQuery scripts here (if needed) -->
    <script src="https://ajax.googleapis.com/ajax/libs/jquery/3.5.1/jquery.min.js"></script>
    <script src="https://cdnjs.cloudflare.com/ajax/libs/popper.js/1.16.0/umd/popper.min.js"></script>
    <script src="https://maxcdn.bootstrapcdn.com/bootstrap/4.5.2/js/bootstrap.min.js"></script>
</body>
</html>
index2.html: HTML file to show the full details of the Blog.
Python
<!DOCTYPE html>
<html lang="en">
<head>
    <meta charset="UTF-8">
    <title>{{ product.name }} - Blog Detail</title>
</head>
<body>
    <h1>{{ product.name }} - Blog </h1>

    <div>
        <img src="{{ product.image.url }}" alt="{{ product.name }}" width="200">
    </div>
    <h2>{{ product.name }}</h2>
    <p>{{ product.description }}</p>
    <a href="{% url 'edit_product' product.pk %}">Edit</a>
    <a href="{% url 'delete_product' product.pk %}">Delete</a> <br>

    <a href="{% url 'product_list' %}">Back to Blogs Home Page</a>
</body>
</html>
Install Required Packages
Make sure to install Pillow for image handling:
pip install Pillow
Database Setup and Superuser Creation
Apply Migrations
python manage.py makemigrations
python manage.py migrate
Create a Superuser
python manage.py createsuperuser
You will be prompted to enter a username, email, and password.
Once done, run:
python manage.py runserver
Visit: http://127.0.0.1:8000/admin/
Login using the superuser credentials and add blog entries with images via the admin interface.
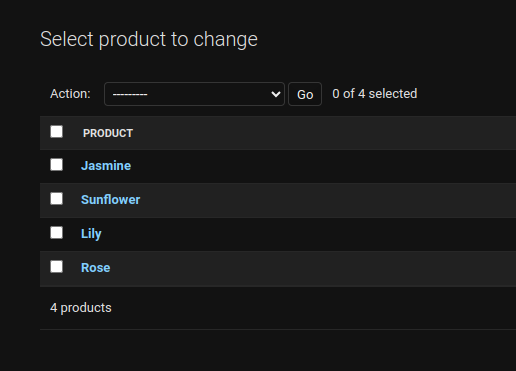
Output:
.png)


Blog Website with Django
Designing Blog Page and Creating Blog Model in Django
Explore
Python Fundamentals
Python Data Structures
Advanced Python
Data Science with Python
Web Development with Python
Python Practice