JWT Authentication with Django REST Framework
Last Updated :
11 Dec, 2025
JSON Web Token (JWT) is a standard used to send information as a JSON object between two parties securely. It is widely used for stateless authentication.
- Stores authentication data on the client instead of the server.
- Makes login and request handling faster and more scalable.
- Works well for APIs and distributed systems.
- Helps build secure, lightweight authentication flows.
Consider a project named 'config' having an app named 'app'.

Installing Required Modules
pip install djangorestframework_simplejwt
This Installs the Simple JWT authentication library for Django REST Framework, enabling token-based (JWT) authentication.
Configuration in settings.py
In settings.py file add the app and configuration:
Python
INSTALLED_APPS = [
    'django.contrib.admin',
    'django.contrib.auth',
    'django.contrib.contenttypes',
    'django.contrib.sessions',
    'django.contrib.messages',
    'django.contrib.staticfiles',

    'rest_framework',
    'app',
]

REST_FRAMEWORK = {
    'DEFAULT_AUTHENTICATION_CLASSES': [
        'rest_framework_simplejwt.authentication.JWTAuthentication',
    ],
}
Configuration in urls.py
In config/urls.py, add the JWT authentication routes:
Python
from django.urls import path, include
from rest_framework_simplejwt import views as jwt_views

urlpatterns = [
    path('api/token/',
         jwt_views.TokenObtainPairView.as_view(),
         name ='token_obtain_pair'),
    path('api/token/refresh/',
         jwt_views.TokenRefreshView.as_view(),
         name ='token_refresh'),
    path('', include('app.urls')),
]
Creating a Protected API View
In app/views.py, create a simple view protected by JWT authentication:
Python
from rest_framework.views import APIView
from rest_framework.response import Response
from rest_framework.permissions import IsAuthenticated


class HelloView(APIView):
    permission_classes = (IsAuthenticated, )

    def get(self, request):
        content = {'message': 'Hello, GeeksforGeeks'}
        return Response(content)
App URLs
Create a urls.py file:
Python
from django.urls import path
from . import views

urlpatterns = [
    path('hello/', views.HelloView.as_view(), name ='hello'),
]
Usage
To make an HTTP request use Postman (It is a graphical API testing tool that lets you send HTTP requests).
Step 1: Run Migrations and Create Superuser
python manage.py migrate
python manage.py createsuperuser
python manage.py runserver
Step 2: Obtain JWT Tokens
Use Postman or any API client to authenticate and obtain the JWT tokens. The response will include both access and refresh tokens. Provide the same username and password created during the superuser setup in the request body.
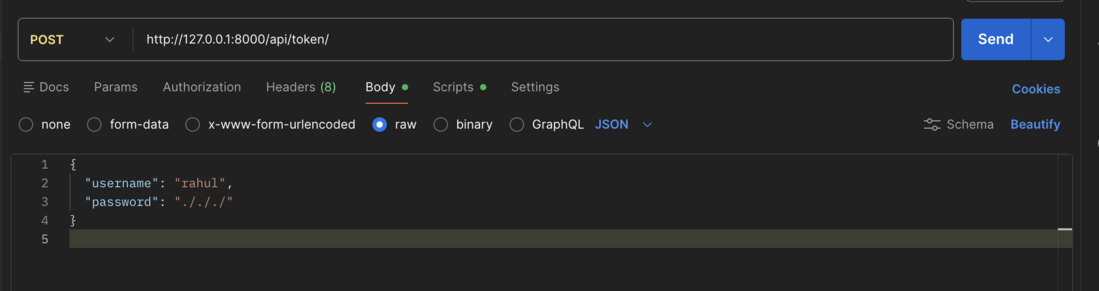 POST request for access token shapshot
Response:
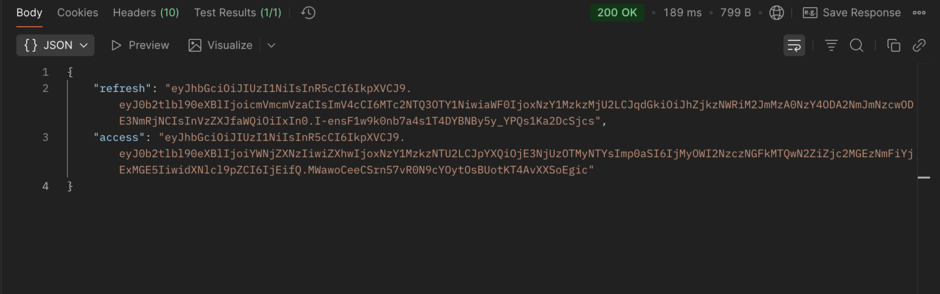 Postman Access token and refresh token snapshot
Step 3: Access Protected Endpoint
Use the access token to make an authenticated request:
GET http://127.0.0.1:8000/hello/ "Authorization: Bearer <your_access_token>"
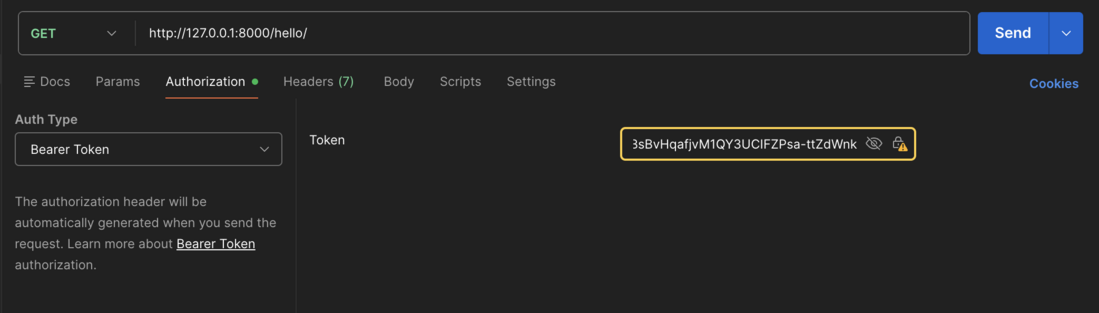 Hello endpoint with access token
Response:
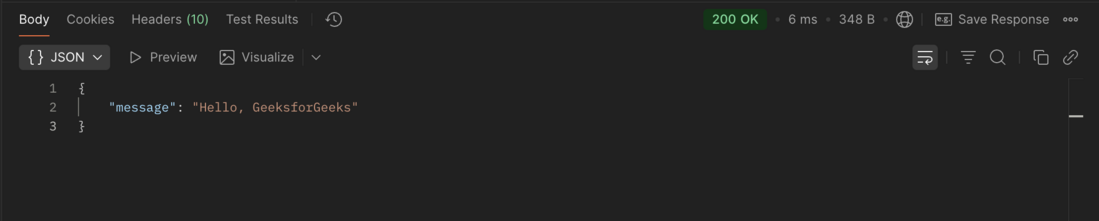 Hello endpoint with access token Response
Accessing the /hello endpoint without a valid access token results in an authentication error:
 Hello endpoint without access token
Explore
Python Fundamentals
Python Data Structures
Advanced Python
Data Science with Python
Web Development with Python
Python Practice