Controlled Components in ReactJS
Last Updated :
12 Aug, 2025
Controlled components are form elements managed by React state, allowing React to control and update their values for better input handling and validation. This makes it easier to debug and keeps data consistent throughout the app.
Usage of Controlled Components:
- Consistency: Ensures reliable data through React-managed inputs.
- Flexibility: Allows custom logic like validation.
- Debugging: Simplifies debugging with explicit state management.
- Forms: Perfect for handling forms and user input.
Flow of Controlled Component
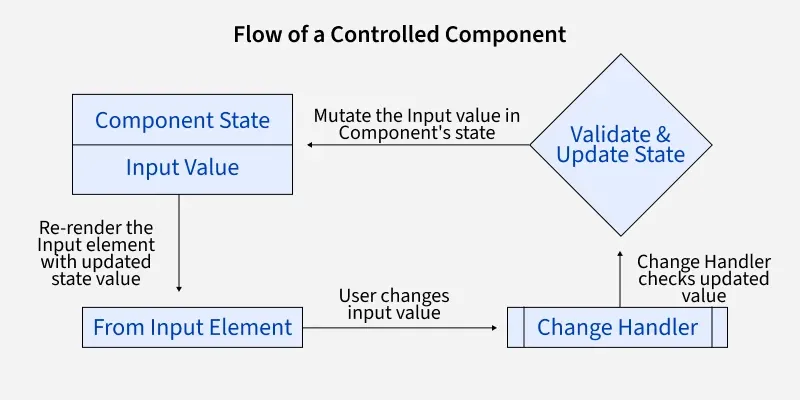
- Input Element: The user changes the input value.
- Change Handler: The onChange event captures the new value and updates the state.
- Component State: The state holds the updated input value.
- Validate & Update: The value is validated and the state is updated.
- Re-render: The input element is re-rendered with the updated value.
Steps to Create the React Application And Installing Module:
Step 1: Create the react app using the following command:
npm create-react-app project
Step 2: After creating your project folder(i.e. project), move to it by using the following command:
cd project
Project Structure:
The updated dependencies in package.json file will look like:
"dependencies": {
    "react": "^18.2.0",
    "react-dom": "^18.2.0",
    "react-scripts": "5.0.1",
    "web-vitals": "^2.1.4",
}
Now let's understand this with the help of example:
JavaScript
import { useState } from "react";

function App() {
    const [name, setName] = useState("");
    const [showName, setShowName] = useState(false);

    function handleSubmit(e) {
        e.preventDefault();
        setShowName(true);
    }

    return (
        <div className="App">
            <form>
                <label>Name:</label>
                <input
                    name="name"
                    value={name}
                    onChange={(e) => setName(e.target.value)}
                />
                <button onClick={handleSubmit} type="submit">
                    Submit
                </button>
            </form>
            {/* Checks the condition if showName is
      true, which will be true only if
      we click on the submit button */}
            {showName === true && <p>You have submitted. Name: {name}</p>}
        </div>
    );
}

export default App;
Step to Run the application: Run the application using the following command from the root directory of the project:
npm start
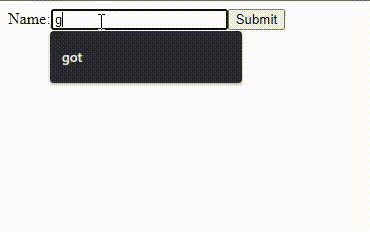
Output:
In this example:
- useState: We use the useState hook to create two state variables: name for storing the user's input and showName to control if the name is displayed after submission.
- handleSubmit: This function prevents the default form submission and sets showName to true, allowing the name to be shown.
- Conditional Rendering: The showName state decides whether the name is displayed in a <p> tag.
What is a Controlled Component in React?
-
A component whose value is managed by the browser
-
A form element whose value is controlled by React state
-
A component that controls other components
-
Any component that uses props
Explanation:
controlled components are form elements managed by React state, allowing React to fully control their values.
What event is used to update the React state in a controlled input?
Explanation:
In controlled components, the onChange handler captures the new input value and updates the state, making the input React-controlled.
In the given example, what is the purpose of the state variable showName?
-
To store the input field reference
-
-
To determine whether the submitted name should be displayed
-
To apply styling to the input field
Explanation:
showName is used for conditional rendering. When true, the <p> element showing the submitted name is displayed.
What does the handleSubmit function do in the example?
-
Submits the form to a server
-
Prevents page reload and updates showName to true
-
-
Explanation:
The function uses e.preventDefault() to stop form submission and sets showName to true so the name can be displayed.
Quiz Completed Successfully
Your Score : 2/4
Accuracy : 0%
Login to View Explanation
1/4
1/4
< Previous
Next >
Explore
React Fundamentals
Components in React
React Hooks
Routing in React
Advanced React Concepts
React Projects