Summary: in this tutorial, you’ll learn how to use the Tkinter Notebook widget to create tabs.
Introduction to the Tkinter Notebook widget #
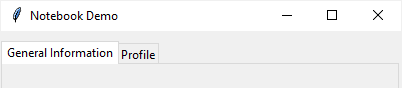
The Notebook widget allows you to select pages of contents by clicking on tabs:
When you click one of these tabs, the Notebook widget will display a child pane associated with the selected tab. Typically, a child pane is a Frame widget.
To create a Notebook widget, you use the ttk.Notebook class as follows:
notebook = ttk.Notebook(master,**kw)Code language: Python (python)In this syntax:
master: This is the parent widget of the notebook. Typically, it’s the main window.**kw: This allows you to specify keyword arguments that control the appearance of the Notebook widget.
The Notebook widget has some useful options. For example, you use height and width options to specify the space allocated to the widget. Also, you can add some space around the outside of the widget by using the padding option.
Notebook methods #
The ttk.Notebook class provides you with many handy methods that allow you to manage tabs effectively.
The following describes the most commonly used ones:
add(child, **kwargs) #
The add() method adds a child widget to a window. The **kwargs argument is one or more options. Here are the important ones:
- The
childis a widget to add to the notebook. - The
textoption specifies the label that appears on the tab - The
imageoption specifies the image to be displayed on the tab. - If you use both
textandimageoptions, you need to use thecompoundoption. The compound option describes the position of the image relative to the text. It can betk.TOP,tk.BOTTOM,tk.LEFT,tk.RIGHT,tk.CENTER. For example,tk.LEFTwould place theimageto the left of thetext. - The
underlineoption that takes zero or a positive integer. It specifies the character at a position of the text on the tab to be underlined.
hide(tabId) #
The hide() method temporarily removes the tab identified by the tabId from the Notebook. Tabs have a zero-based index, meaning that the first tab starts at zero.
To show the tab, you need to call the add() method again. There’s no corresponding show() method.
forget(child) #
The forget() permanently removes the specified child widget from the notebook.
Tkinter Notebook widget example #
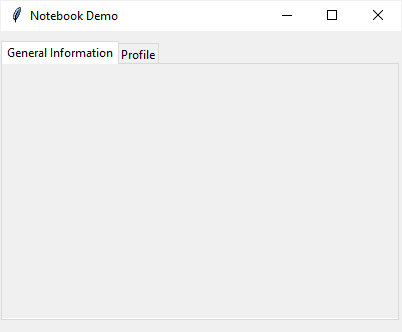
The following program shows how to create a notebook with two tabs:
import tkinter as tk
from tkinter import ttk

# root window
root = tk.Tk()
root.geometry('400x300')
root.title('Notebook Demo')

# create a notebook
notebook = ttk.Notebook(root)
notebook.pack(pady=10, expand=True)

# create frames
frame1 = ttk.Frame(notebook, width=400, height=280)
frame2 = ttk.Frame(notebook, width=400, height=280)

frame1.pack(fill='both', expand=True)
frame2.pack(fill='both', expand=True)

# add frames to notebook

notebook.add(frame1, text='General Information')
notebook.add(frame2, text='Profile')


root.mainloop()Code language: Python (python)
Output:
How it works.
First, create a notebook widget whose parent is the root window:
notebook = ttk.Notebook(root)
notebook.pack(pady=10, expand=True)Code language: Python (python)
Second, create two frames whose parent is the notebook:
frame1 = ttk.Frame(notebook, width=400, height=280)
frame2 = ttk.Frame(notebook, width=400, height=280)

frame1.pack(fill='both', expand=True)
frame2.pack(fill='both', expand=True)Code language: Python (python)
Third, add these frames to the notebook by using the add() method:
notebook.add(frame1, text='General Information')
notebook.add(frame2, text='Profile')Code language: Python (python)
Summary #
- Use the
ttk.Notebookclass to create a notebook widget. - Use the
add()method to add a tab to the notebook. - Use the
hide()method to temporarily remove a tab from the notebook. To remove a tab permanently, use theforget()method.