Summary: in this tutorial, you’ll learn about the Tkinter OptionMenu widget to display a set of options in a drop-down menu.
Introduction to the Tkinter OptionMenu widget #
The OptionMenu widget provides you with a predefined set of options in a drop-down menu.
To create a new OptionMenu widget, you use the OptionMenu constructor:
OptionMenu(container, variable, default=None, *values, **kwargs)Code language: Python (python)The OptionMenu constructor accepts a number of parameters:
containeris the parent widget of theOptionMenuwidget.variableis atk.StringVarobject that holds the currently selected option of theOptionMenu.defaultis the default option that the widget displays initially.valuesis a list of values that appear on the drop-down menu.kwargsis the widget-specific configuration.
The OptionMenu allows you to change the direction of the drop-down menu via the direction option. The valid directions are 'above', 'below', 'left', 'right', or 'flush'.
The OptionMenu widget also supports the command option. This allows you to assign a callback that will be called after an item is selected.
Like other ttk widgets, you can specify the style name for the OptionMenu using the style option.
Tkinter OptionMenu widget example #
The following example illustrates how to use an OptionMenu widget. When you select an item, it’ll show your selection in a label:
import tkinter as tk
from tkinter import ttk
class App(tk.Tk):
def __init__(self):
super().__init__()
self.geometry("320x80")
self.title('Tkinter OptionMenu Widget')
# initialize data
self.languages = ('Python', 'JavaScript', 'Java',
'Swift', 'GoLang', 'C#', 'C++', 'Scala')
# set up variable
self.option_var = tk.StringVar(self)
# create widget
self.create_wigets()
def create_wigets(self):
# padding for widgets using the grid layout
paddings = {'padx': 5, 'pady': 5}
# label
label = ttk.Label(self, text='Select your most favorite language:')
label.grid(column=0, row=0, sticky=tk.W, **paddings)
# option menu
option_menu = ttk.OptionMenu(
self,
self.option_var,
self.languages[0],
*self.languages,
command=self.option_changed)
option_menu.grid(column=1, row=0, sticky=tk.W, **paddings)
# output label
self.output_label = ttk.Label(self, foreground='red')
self.output_label.grid(column=0, row=1, sticky=tk.W, **paddings)
def option_changed(self, *args):
self.output_label['text'] = f'You selected: {self.option_var.get()}'
if __name__ == "__main__":
app = App()
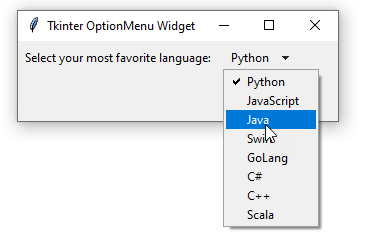
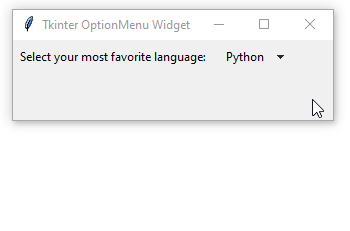
app.mainloop()Code language: Python (python)Output:
How it works.
First, define a list of strings used for displaying on the OptionMenu widget:
self.languages = ('Python', 'JavaScript', 'Java', 'Swift', 'GoLang', 'C#', 'C++', 'Scala')Code language: Python (python)Second, define a ttk.StringVar() object that holds the currently selected item of the OptionMenu in the __init__() method:
self.option_var = tk.StringVar(self)Code language: Python (python)Third, create a new instance of the OptionMenu widget:
option_menu = ttk.OptionMenu(
    self,
    self.option_var,
    self.languages[0],
    *self.languages,
    command=self.option_changed)Code language: Python (python)
Note that if you skip the default value self.languages[0], the first item of the OptionMenu will vanish.
The option_changed() method will be executed after an item is selected. The method sets the text for the output_label to the selected item:
self.output_label['text'] = f'You selected: {self.option_var.get()}'Code language: PHP (php)Summary #
- Use Tkinter
OptionMenuwidget to provide users with a fixed set of choices in a drop-down menu. - Always specify the default value for the
OptionMenuconstructor.